Tag Archives: Composition

Shooting waterfalls and moving water… great for Autumn

Moving water shots

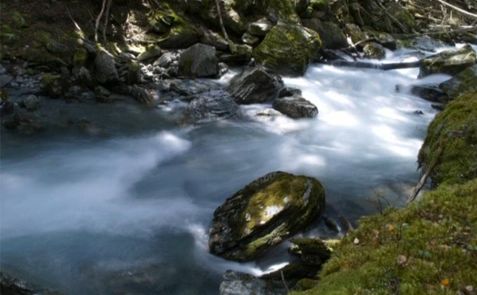
Moving water shots are some of the most romantic landscape shots. They are really easy and fun to do. (Image from the video).

Wow! September already…

With Autumn around the corner I am thinking about great projects for the when the leaves start to turn. Here’s a great idea for you to follow up to make the best of the Autumn colours.

Why Autumn

The summer is great for doing wide open landscapes. Especially around the Golden Hour or at dawn when the light has those wonderful reds, golden or yellow colours.

Autumn is better for doing great shots under the forest canopy and those great shadowy dell shots. The Sun’s lower in the sky and there is reduced contrast with fewer distracting bright spots peeping through the trees from the sky. The light is great and the lower aspect is better for creating contrasts in moving and falling water. On top of that the autumnal colours are exciting. More to the point the range of Autumnal colours create depth and contrast. That is something that uniform green of the summer months tends to reduce.

So think about doing your waterfall and forest shots in the next two months or for your local Autumn. You will really benefit from greater contrasts, colours and light angles.

How to blur water for a dreamy effect

To get you started on great water shots here is an introductory video on the way to slightly blur water in your shots. It helps to make the water take on a more motion-filled ethereal dreaminess.
Uploaded by: Gordon Laing (28 Dec 2007)

A couple of extra tips

Sometimes, especially when working under trees with those hidden waterfalls you will get large contrasts with the surrounding environment. Such contrasts often cause highlights that are distracting. Here are a couple of extra tips to help get past this distraction…

  • If you find you are doing a shadowy moving water shot in the trees but the brightness is still too high try using a polariser filter. This will help to increase the contrasts and overall reduce the incoming light. Polarisers reduce the light by up to about two stops which really helps when working with water. It will also reduce sharp reflections which can be confusing in moving water – especially under trees.
  • If you need to reduce the light even more you can try a Neutral Density filter (ND filter) This type of filter is like sunglasses for your camera. You can find out more here… and here is a range of resources on filters.

Comments, additions, amendments or ideas on this article? Contact Us
or why not leave a comment at the bottom of the page…

Like this article? Don’t miss the next — sign up for tips by email.

By Damon Guy (author and Photokonnexion editor)

Damon Guy - Netkonnexion

Damon Guy (Netkonnexion)

Damon is a writer-photog and editor of this site. He has run some major websites, a computing department and a digital image library. He started out as a trained teacher and now runs training for digital photographers.
See also: Editors ‘Bio’.

Can you write? Of course you can!
Write for Photokonnexion...

We would love to have your articles or tips posted on our site.
Find out more…
Write for Photokonnexion.

Ansel Adams – Master Photographer

Ansel Adams Video

• Ansel Adams BBC Master Photographers (1983 •
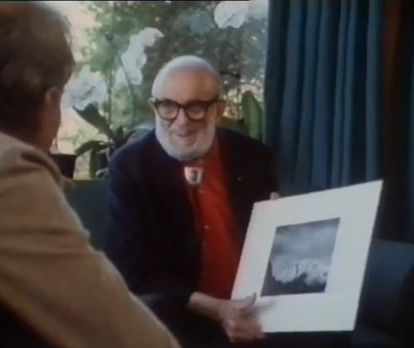
Ansel Adams speaks about his photography and his development.
Picture taken from the video.

Exquisite insights to a legend.

The videos I show are usually for you to quickly watch and learn. This one’s different. It’s longer (34 mins.). And, there is so much in it that you will want to watch it over and over again. The wonderful insights run deep and some show us how much photography has changed.

Ansel Adams’ ideas, photographic insights and depth of feeling is magnetic. He was probably one of the first philosophers of photography. He was one of the undoubted masters too. I hope you enjoy this video as much as I did.

Ansel Adams – “BBC Master Photographers” (1983)

Uploaded by: Rob Hooley External link - opens new tab/page

Can you write? Of course you can!
Write for Photokonnexion...

We would love to have your articles or tips posted on our site.
Find out more…
Write for Photokonnexion.

By Damon Guy (author and Photokonnexion editor)

Damon Guy - Netkonnexion

Damon Guy (Netkonnexion)

Damon is a writer-photog and editor of this site. He has run some major websites, a computing department and a digital image library. He started out as a trained teacher and now runs training for digital photographers.
See also: Editors ‘Bio’.

The power of light and shadow

Facial shadows

• Facial shadows •
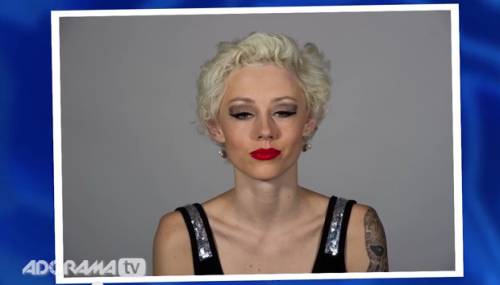
Image taken from the video.

Great portraits rely on shadows

Shadows define a portrait. So it is no surprise that good lighting to get the shadows right is a wonderful idea. But what most people don’t realise is that, almost every time, more lights make things more complicated. One light is almost all you will ever need to get a face right. The rest can be done with a reflector.

Shadow work

In the video Mark Wallace shows us how the face can be properly illuminated, how to do it and more important how to make it look beautiful. He looks at ugly shadows and hard light and explains how to remove them and subdue them using soft light. In all, this is one of the best best portrait lighting tutorials I have seen on video. Enjoy it. There is some really useful stuff presented in a simple and understandable way.

Adorama TV  External link - opens new tab/page

Comments, additions, amendments or ideas on this article? Contact Us
or why not leave a comment at the bottom of the page…

Like this article? Don’t miss the next — sign up for tips by email.

By Damon Guy (author and Photokonnexion editor)

Damon Guy - Netkonnexion

Damon Guy (Netkonnexion)

Damon is a writer-photog and editor of this site. He has run some major websites, a computing department and a digital image library. He started out as a trained teacher and now runs training for digital photographers.
See also: Editors ‘Bio’.

Three minutes of peace and tranquility and endless fun later!

Ink Drops

• Ink Drops •
The feeling of peace and tranquillity can come with many aspects of photography. This is something you can think about and possibly do yourself.
Image from the video.

Seeing and capturing

Every interest has its peaceful side. Photography is no different. For a change here is a video which delivers three minutes of peace and tranquillity. It is possibly something you can have a go at yourself…

Whats going on – can I do it?

What you see in the video is very simply drops of ink into water. The water is sometimes still and sometimes moving very gently. It is simple to do but infinitely complex in the outcomes. Anyone can do it.

There are literally hundreds of different inks on the market. Have a look at this…

Drawing Inks Assortment Set of 12  External link - opens new tab/page
A great set of varied colours. Can be used to create coloured water and for droplet mixes. Great for experimentation.

Here are a few other types of ink you can choose.  External link - opens new tab/page

I have a range of colours I use for water work. You can also use food colourings. Basically the technique is like this…

  • Set up a glass jug, vase or small tank (flat sided is best).
  • Make sure it is very, very clean.
  • Have a dry cloth available to wipe the glass dry if you spill.
  • Use a remote flash or domestic lamp set to the side.
  • Place a black or white card behind your glass vase.
  • Mount your camera on something solid. A tripod is best.
  • Set your camera to auto-white balance.
  • Set the ISO to 100.
  • Use Shutter Value [Sv, Tv etc.] as your shooting mode
  • Use f11 as your setting to shoot right through the water.

You will need to have the light on from the side of the shot. An on-board flash will cause the ink to appear very flat with the light coming from the front. This will ruin the effect.

If you want added brightness from behind you can add a light shining onto the background card. This will lift the internal colours.

Then, as with everything in photography you will need to experiment with the light and conditions you are working with to get the best shots.

The technique

Your water should ideally be about six inches deep. Drop the ink into the water and start clicking your shutter button. You can do it quite a few times as the ink forms up the shots. Once you are satisfied there is no more shots to be had then replace the water and start again.

People spend literally years working with this sort of effect. It is not only great fun for everyone from beginners onward, it is also great art. There are many fine art photographers who work on this sort of image for a living. There is also endless amusement, beauty and some wonderful images. The technique works for both still photography and videography.

INK DROPS

And now for your three minutes of peace and tranquility – enjoy!

Jacob + Katie Schwarz  External link - opens new tab/page

Comments, additions, amendments or ideas on this article? Contact Us
or why not leave a comment at the bottom of the page…

Like this article? Don’t miss the next — sign up for tips by email.

By Damon Guy (author and Photokonnexion editor)

Damon Guy - Netkonnexion

Damon Guy (Netkonnexion)

Damon is a writer-photog and editor of this site. He has run some major websites, a computing department and a digital image library. He started out as a trained teacher and now runs training for digital photographers.
See also: Editors ‘Bio’.

Action portraits… easy to do

Action Portraits

• Action Portraits •
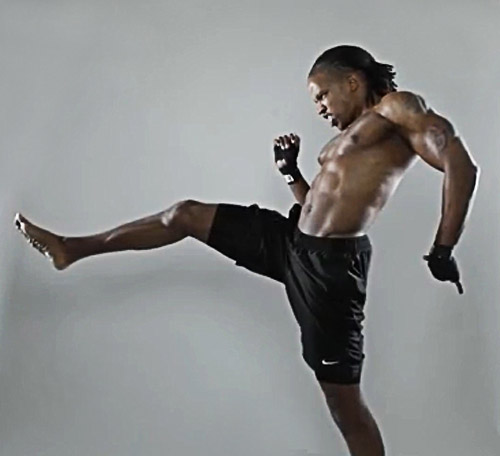
Getting the shot in action situations is not difficult although the lighting can prove a key aspect of success. (Shot taken from the video)

Getting it right…

Most photographers have a go at action shots. Vehicles are common targets – they are easy to find and fun to do. Action portraits can be great fun too and you can do them at home.

Lets talk flash…

 Set up pictures at home to show some action.

Easy action shots at home for anyone.
“Some more bed-jump!!” by Mr Din, on Flickr  External link - opens new tab/page

In its most basic form, it’s a portrait of someone in motion (action?). The wonderfully muscled fighter in the shot above is one way to go. On the other hand pictures of your grand children jumping into the air can be just as effective – and probably more relevant for many of us!

Use off-camera flash for best results

The basic technique is to capture the action with a flash. You can use the on-board flash on your camera. However, it will tend to leave tight shadows on the wall behind the action because the flash is directly in line with the optical axis of the camera. Such shadows look artificial and are difficult to remove in post processing. They look as if there is a slight double image. In the picture of the jumping children the flash is from the left hand side. If you look carefully the shadows are projected away from the kids giving a more realistic feel.

Off-camera flash can be placed to the side of the shot and used to illuminate the scene, give it a little depth and off-set those harsh shadows. For this you can use an off-camera flash. I use this one…

YONGNUO YN460 Flash Speedlite for Canon Nikon Pentax Olympus…  External link - opens new tab/page
This is an excellent buy… it is inexpensive and can be used for any off-camera flash situations. It is reliable, robust, flexible and effective.

I have several of these flash units. At about one fifth of the price of a branded product they are excellent value. If you want to get something a little more sophisticated you can get the YONGNUO YN-560 II Flash unit  External link - opens new tab/page – also a great product. With inexpensive remote flash triggers  External link - opens new tab/page you can set them off when not connected to the camera.

What are you going to capture?

Plan out your scene in advance. You will need someone to be the action taker. You could use more than one person. Then, work out what they are going to do. Jumping on the spot is a favourite. You also try jumping or stepping off something like a chair or low table. You can do skipping, walking, Kung Fu, Juggling, tumbling, hula-hoop, playing ball… well all sorts of things.

How do you do it?

I am assuming that you will be working in a domestic room with a white wall behind the actions.

It is best to use a robust tripod to mount your camera. This is essential. Action shots often cause floor movement and you want a good tripod (Manfrotto 055XPROB)  External link - opens new tab/page and tripod head (Manfrotto 322RC2 Grip Ball Head)  External link - opens new tab/page to give you a chance.

You will need to pre-focus your shot and have it ready to take because you cannot easily compose for action in progress. So set up the camera in advance. Here are some typical settings to get you started…

  • Turn off image stabilisation on your lens.
  • Focus your lens on your subject then turn off the auto-focus.
  • Set white balance to the appropriate ambient light setting.
  • Set ISO to 200 (or 400 experiment).
  • Aperture priority (select F5.6 as a start) [Shutter speed will be set by the camera].
  • Flash synchronisation – 200ths or 250ths of a second (if you need to set it check your manual).
  • Flash setting, try the lowest setting or 1/16th or 1/8th power – again, experiment.

This will give you appropriate starting points. Check you shot and then make any changes to the settings. If you click up or down a setting – say aperture or ISO – then the camera will compensate with a different shutter setting for you. Experimentation is good!

OK, now you are ready for action… this part takes a little practice. The idea is to sit next to your camera ready to push the shutter button as soon as the action is where you want it. As you have already lined up your focus the person can now perform and you can press the button as you see fit to capture your shots. Fire away, enjoy yourself.

Two tricks you have learned here

1. The pre-set-up of your shot is important. There are lots of situations where you can do that. So think about it – that is one of the benefits of having a tripod.
2. Flash! The way to capture a good shot like this is to have a very fast shutter speed. That freezes the action. However, I have suggested you hand the shutter speed to the camera by using the “aperture priority” mode. Well, you can in fact control shutter speed another way. By varying the flash duration. “What?”… I hear your cry. “You did not tell us about that control! But I did. Flash intensity is always the same for any given micro-second. It becomes more intense for the sensor if you leave it on longer. When you set the power of the flash to low power you are actually shortening the length of the flash. Hence you are more able to freeze the action. However, to do this you will need to have your ambient light lower. So using natural light rather than bright room lights works better for this technique.

See how its done in a video

In the video you can see all this action in a full process. The photographer, Joel Grimes, starts off by some discussion about how he came to discover this secret and how he used it in a studio context. Then from about six minutes into the video he shows you how to take the shots.

Remember that the settings are important. He mentions about low power and says that it works to freeze the action IF the flash is more intense than the ambient light. Watch out for that.

One other thing worth looking at is the shot progression. He is constantly assuring his model that he has done a good job. Then he is at the same time developing his shot. He is constantly evolving the positions and situations until he gets the shot he wants. This is critical. Make sure you look out for odd lighting effects, hands over face, bits of body out of the frame etc… He works the shot to reach his ideal as he visualised it – then stops. Even great photographers have to practice and perfect a shot. This is quite a helpful lesson about that. Enjoy!
“Special FX, High Speed Action”

Framed show  External link - opens new tab/page

Comments, additions, amendments or ideas on this article? Contact Us
or why not leave a comment at the bottom of the page…

Like this article? Don’t miss the next — sign up for tips by email.

By Damon Guy (author and Photokonnexion editor)

Damon Guy - Netkonnexion

Damon Guy (Netkonnexion)

Damon is a writer-photog and editor of this site. He has run some major websites, a computing department and a digital image library. He started out as a trained teacher and now runs training for digital photographers.
See also: Editors ‘Bio’.
Review your own photographs

Low flying aircraft

• Low flying aircraft •
Click image to view large
• Low flying aircraft • By Netkonnexion on Flickr External link - opens new tab/page
Every picture has its merits. However is there enough in the picture to interest and invigorate the attention of your viewers? Sometimes, like this picture, if you don’t have a point worth making then you should not really bother with it.

A picture is a wonderful communication.

But like speech if there’s no point there is no impact. To help you see if you have made a great picture here are some guiding points.

We are going to consider…
• What you are communicating:
• Presentation:
• Camera technique:
• Technical Quality:
• Visual Awareness, Visualisation, Seeing and aesthetics:

Looking critically at your own picture

When you make a picture your previsualisation of what you want to achieve is critical to the outcome. If you don’t know what you are trying to make how can you make it convincing? So try to have a mental image of what your picture it going to look like when you make it. If you can see the image before you make it you should have a good point in mind – a reason for making it. All too often snappers see something and just ‘snap’. That being the case, few of the images will have real meaning or impact.

When looking at your own picture you must see if there is really something there. Are you really saying anything? Are you really communicating with the viewer of your picture? Or, is what you have just made only a simple picture? To have real impact is to create in the viewers mind an image. An image that means something to them. So look at your picture and honestly ask yourself what is the viewer going to get from it? What will it mean to them? If you find that you have really said something in the picture then the first criteria for success has been passed.

To this end you should consider how successfully each of these things has contributed to the success of the image…

  • Personal input: have you understood and connected with the subject
  • Appropriate communication the message, mood, ideas, and information you want to pass to your viewer
  • Complementary use of the photographic media (mounting, projection, printing, texture of print etc.)
  • Appropriate imagination and creativity / suitable timing for the shot
What about the other things?

• Presentation: It is important to have a good presentation for your picture. Have you edited out distractions and sensor/lens spots, removed the errant sweet rapper littering the foreground etc. In other words, have you done the little tidying up tasks that make the image stand up as clean representation of your original vision for it? If it is a print, is it well mounted in a non-distracting way. Is the printing immaculate or are there streaks and spots; over-run and smear.

• Camera technique: Is the sharpness the way you want it – deliberate softness is fine as long as that is making an artistic point in a way you intended. Is the depth of field right for the composition? Have you emphasised the point or simply missed the point. Is the digital noise too high, or the contrast too low. What you are looking for here is to see if your prowess with the camera has come through. Did your technique work or were there any errors or mistakes that detract from the delivery of your point? Some of the other things to consider are…

  • Viewpoint to the subject – exciting, interesting, different, right?
  • Choice of lighting – does it complement or complete the subject or is it at odds with your point?
  • Accurate focusing – accurate choice of focus for the subject.
  • Appropriate quality and choice of exposure.
  • Suitable use of depth of field (aperture).
  • Appropriate shutter speed for the subject (and shot timing).
  • Highlights and shadows (ensuring detail is retained)
  • Appropriate quality and choice of exposure – does the balance of light and dark complement or detract from the subject?
  • Is the quality of the light effective or bland; does is make a statement or is it of little consequence?

• Technical Quality:
In this category you should consider exposure, colour and tonal control…

  • Absence of processing faults (dust, spots, hairs, processing artefacts, image damage by sharpening etc.)
  • Appropriate adjustments of colour temperature; hue, saturation, colour balance etc.
  • Appropriate tonal use and control of the range of tones.
  • Good image finishing: removal of distractions, removal of abrupt or discordant features.
  • Appropriate use of levels, curves, colour management, filters, overlays etc (post processing)

In this category you are looking to make sure that the image is digitally developed properly. Is the exposure even or has it been obviously enhanced and changed. Is the light effective to make the point or has the exposure not been fine tuned. It is easy to take a picture, but all these thing go into making an image. Think about what you are trying to achieve and does this picture achieve it with its colour and technical delivery/

• Visual Awareness, Visualisation, Seeing and aesthetics:
Do you think that your shot, the one you have in front of you sees anything different? Are you reporting what you saw or expressing a point, message, communication, feeling… does this picture have IMPACT?

  • Is the composition, design and cropping of the image an effective aesthetic construction?
  • Appropriate simplification (minimising complexity and clutter)
  • Distractions / intrusions should not divert the viewers eye
  • Good use of light, mood, texture and colour
  • Good use of masking/manipulation where appropriate
What you are doing…

Each time you want others to look at your picture you want to impress them, to lift them, to… well, get out your message or point for the picture. The type of questions I have asked above are aimed at getting you looking at your images with a critical eye. If you are honest, you will find that none of your pictures will be satisfactory in all of the above. But if you find you are gradually improving your standard of delivery you will see that the above get closer to ideal with every new picture. Critically reviewing each picture before you publish print or show it to other people helps make sure you are producing something worth showing.

You won’t be right every time. But you will see as you develop, your comments will begin matching those of other people. You will than have a benchmark that tells you if your work is measuring up to peoples view of it. Or, more importantly to see if your picture is measuring up to your original vision of how you wanted the shot.

Comments, additions, amendments or ideas on this article? Contact Us
or why not leave a comment at the bottom of the page…

Like this article? Don’t miss the next — sign up for tips by email.

By Damon Guy (author and Photokonnexion editor)

Damon Guy - Netkonnexion

Damon Guy (Netkonnexion)

Damon is a writer-photog and editor of this site. He has run some major websites, a computing department and a digital image library. He started out as a trained teacher and now runs training for digital photographers.
See also: Editors ‘Bio’.

Fifty tips to set photography starters on their feet

There are some great things to learn.

When you are starting out and need to learn some things fast, it helps to have some guidance. Here are a few things photographers need to know to get started. And some things I wish I had known when starting photography…

Roller coasters ‘R’ us – Photo-learning list…
  1. If you want to learn fast take lots of pictures.
  2. If your pictures aren’t good enough, you’re not close enough.
  3. Spend more time reviewing your pictures than it took to make them.
  4. There are billions of types of light. Learn to see 10 types to start.
  5. Get obsessed with the quality of light and its properties.
  6. Work on image composition at least as hard as your technical skills.
  7. Use natural light as much as possible. Learn its variations.
  8. Don’t use on-board flash. It will ruin your shots.
  9. Make people a central study of your photography.
  10. Count 1000, 2000 slowly then take your camera from your face.
  11. Think carefully about how to do it well. Then follow a process.
  12. Clean your kit before you go out and when you’re back. Cameras hate dust.
  13. “Learners don’t need a tripod”. My biggest learning mistake.
  14. Sharpness is a habit – work hard to get it right from the start.
  15. Think “Why am I taking this picture?” for every shot you take.
  16. Add another lens to your “kit lens” as soon as you can.
  17. Great lenses are more use than an expensive camera. Spend more on them.
  18. Don’t cheap out on a tripod. Cheap ones will not do the job.
  19. Use your tripod.
  20. Own more than one memory card AND more than one battery.
  21. Learn the meaning of RAW and then shoot with it.
  22. “Your first 10,000 photographs are your worst.” ― H. Cartier-Bresson
  23. A keen digital photog can clear 10,000 shots in 14 days – shoot more.
  24. Make some photography gear. You’ll understand your needs.
  25. Gear lust replaces your photographic vision with a hole in your pocket.

More after this…

find out more...Photokonnexion tips by email
Enjoying this article? Please sign up for our
Tips by email service.
                                                Find out more


  1. Carry your camera with you everywhere.
  2. Look at 50 pictures by other people every day.
  3. Take a clichéd shot – satisfy your curiosity. Store it in a secret place!
  4. The “Rule of thirds” works nearly all the time. Learn it early.
  5. Simplicity is the ultimate sophistication.” Leonardo da Vinci
  6. Read your camera manual. Try something. Read that bit again. Repeat.
  7. Have a go at every setting on your camera lots of times.
  8. A proper stance will provide a steady hand-held camera position.
  9. Amateurs often do better pictures than professionals.
  10. And, Professionals do more good pictures, more often.
  11. If your photos look tired and drab – go manual – learn control.
  12. For every shot you do, look at 50 similar ones. How does yours look?
  13. Don’t panic. Usually there is no problem.
  14. No photo, however good, replicates reality. Cameras distort – get over it.
  15. If you see it one way, most people will see it a different way.
  16. Check all gear before you go. Have a list of what you need.
  17. Know why you are going to a location and plan shots in advance.
  18. Back up your files. If your hard drive crashes you will lose the lot.
  19. Wear the right clothes. You cannot do good photography if you are cold.
  20. Help someone else to learn. You will learn too, and make a friend.
  21. Learn the meaning of “exposure” – practice using manual settings.
  22. Learn “Depth of Field” and practice it with each of your lenses.
  23. Post processing is an art and part of photography. Learn it.
  24. Join a club or class – you learn fast with other photogs.
  25. Use Google Images to research every shot you take.
And one for luck!

Photography is fun. Make sure you go with that!

Comments, additions, amendments or ideas on this article? Contact Us
or why not leave a comment at the bottom of the page…

Like this article? Don’t miss the next — sign up for tips by email.

By Damon Guy (author and Photokonnexion editor)

Damon Guy - Netkonnexion

Damon Guy (Netkonnexion)

Damon is a writer-photog and editor of this site. He has run some major websites, a computing department and a digital image library. He started out as a trained teacher and now runs training for digital photographers.
See also: Editors ‘Bio’.