Category Archives: Equipment

equipment, supplies, gear, accessories, accompaniments, accouterments, apparatus, appliances, appurtenances, articles, attachments, baggage, belongings, contraptions, contrivances, devices, equipage, facilities, fittings, fixtures, gadgets, impedimenta, implements, kit, machinery, material, paraphernalia, rig, tools, utensils

Tips for Better Smartphone Photography

This article contributed by Liz Pekler(Bio).

SmartPhone Photography is on an up-trend

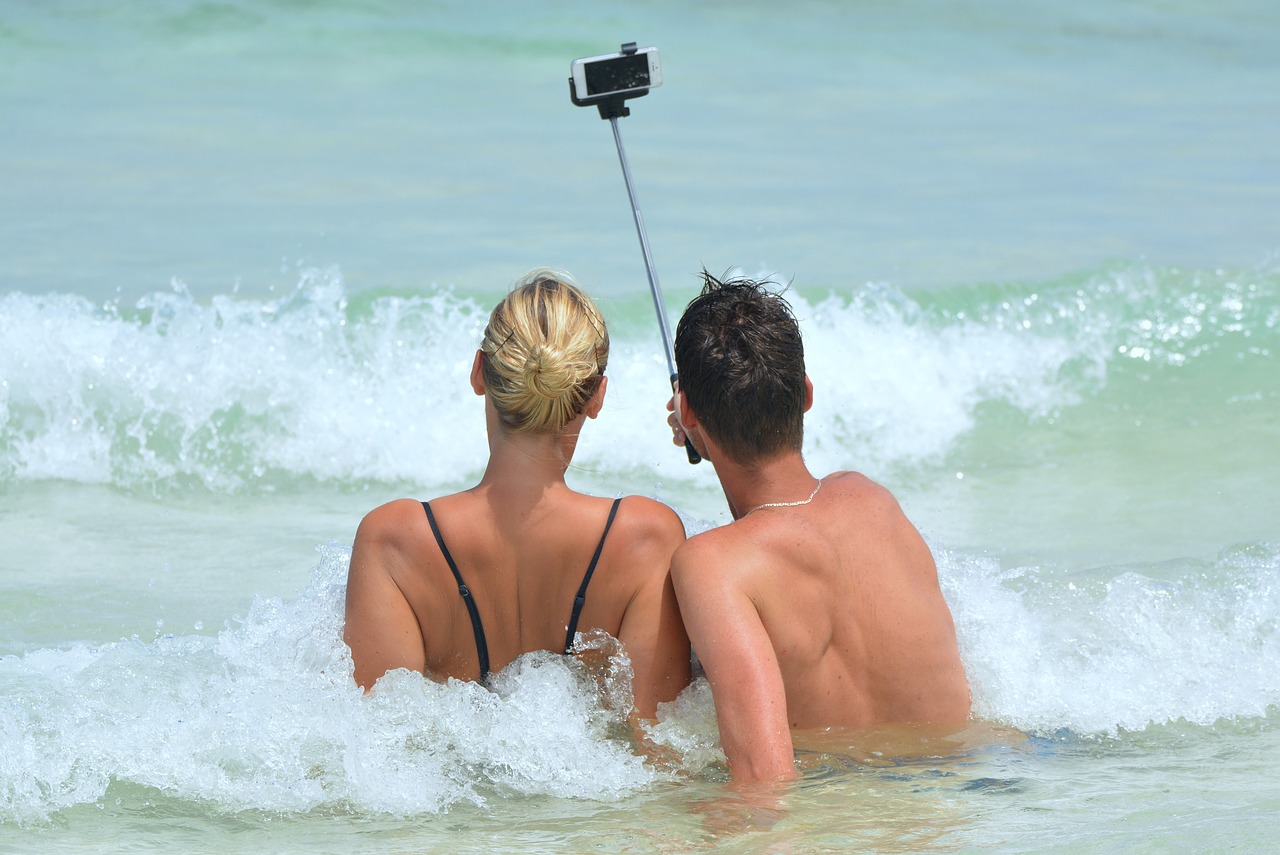
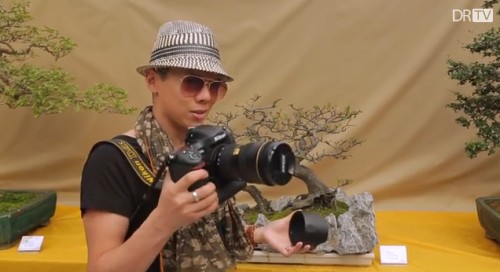
Smartphone photography is the source of millions of images per day worldwide. It is not only an important aspect of social interaction, it is also a way to express yourself. Find out how to improve your shots and make the best of your smartphone photography.


Smartphone Photography is attracting more and more people. The number of images made on mobile devices exceeds the number taken on compact or DSLR cameras. Who could blame these keen users? Smartphones are easier to carry, cheaper to maintain, and are more user-friendly than the DSLR. And, with the constantly evolving smartphone camera apps and accessories, the future of smartphone photography seems assured. Indeed, smartphones and tablets are used in conventional photography too.

Is smartphone photography the new norm?

There’s no denying that DSLRs or mirrorless cameras are still the best types of cameras to have despite their larger size and weight. They have powerful sensors that offer the most megapixels. They allow complete user control over camera settings. However, more than that, they provide flexibility and freedom to use a range of accessories, like interchangeable lenses. The flexibility and control provided by a fully functioned DSLR can help you achieve the highest quality output.

Smartphone photography provides well for general image needs, like social media sharing and family records. Using mobile devices has become standard practice in recent years. Their hardware will need time to catch up on the quality and functions of more advanced cameras. However, there are many smartphone photography accessories available. These add-ons can enable your mobile device to get quite close to the high standard of DSLRs.

As long as smartphone manufacturers continue to develop higher specs and more powerful sensors smartphone photography will be likely to trend upward. However, no matter how good these mobile devices become, using the camera will require some user skill. The best photographs are not the product of the camera. They are a reflection of the vision and skill of the photographer – no matter what the device. Smartphone photography can be artistic, can be beautiful, can return great images.

You can get the best out of the built-in camera in your phones by practicing these helpful tips below:

Tips for Better Smartphone Photography

1. Pay Attention to the light levels

As with DSLRs, think, and make sure everything is good before touching the shutter button. Make sure the image is well-lit. One way to do so is to tap your subject on your phone’s display screen. In the smartphone camera on Auto mode, tapping on your subject will command the camera to focus on the area of the tap. Then the camera will make the exposure adjustment. That will ensure your subject is lit to its best advantage. The camera adjusts the overall image in proportion to the exposure. This shows the subject to its best advantage.

To manually adjust the scene’s brightness, swipe the ‘sun’ or ‘bulb icon’ after tapping on your subject. If you want to revert back to the default value, tapping anywhere on the screen of your smartphone usually does the trick.

Brightness changes are not the best way to lighten your scene. You can over-whiten highlights – leading to distracting white burnouts. Instead, try manually adjusting your ISO levels. Higher ISO means the sensor is more sensitive to light. A high ISO number gives a brighter scene in proportion to the ambient light in the rest of the picture. This helps you adjust your image to avoid burnt out highlights.

Raising the ISO has a penalty. High sensitivity to light levels can make your photos look grainy. It is called digital noise. Dimly lit areas brightened by higher ISO are especially likely to show noise if you boost the ISO too high. Practice with ISO a bit to get a feel for the way to use it.

The best way to avoid digital noise is to add light sources or work with natural light. Camera sensors work well with good light levels. So, think about how you can enhance the light rather than rely on high ISO, if you can.

2. Apply the Principles of Composition

Another thing to significantly improve your smartphone photography is to compose your image. This means taking photos to create a more visually appealing image. Try not to “shoot from the hip”. The quick snap often leads to poor shots.

It helps to keep these basic rules of composition in mind when taking photos:

  • The Rule of Thirds – Mentally divide the screen into a grid with 2 horizontal lines and 2 vertical lines. Then, align your subject with any of the guide lines or intersecting points to achieve a more natural-looking and attractive image.
  • The Golden Ratio Smartphone Photography | External link - opens new tab/page – When you compose your photo, leave 1.6 bits of empty space for every 1 bit of occupied space to achieve a balanced image.
  • Leading Lines – Using lines in your composition will help influence viewing behavior, draw your audience’s eyes across an image or towards a subject, and adds motion and dynamism.
  • Three-Layer Image – Having a foreground, a subject in the middle, and a background adds a sense of depth and interest to your photo. See “River Scene” below.
  • Rule of odds – multiple subjects in an image are more attractive if they are an odd number. The most famous case is to have three of something, but five and seven are often used too.

Smartphone photo showing three compositional layers

:: River Scene ::
This smartphone photograph shows three compositional layers. Introducing clear layers into your image helps to bring out a three dimensional depth and structure. Try to use foreground, mid-ground and distance layers in your images.
(Taken on a Galaxy S6 – Android phone)
(Click here to view large)


There are many ways you can use composition to improve your images. There is a whole page of composition links for you learn more here: Composition resources on Photokonnexion

3. Move as Close to your Subject as Possible

When using a smartphone to take photos, opt to move closer to your subject instead of using its zoom feature. Smartphone camera lenses usually have fixed focal lengths so they can’t zoom optically. Instead, it zooms digitally, which visibly distorts, pixelates, and lowers the quality of your images when overdone. Alternatively, you can use a compatible lens attachment that offers optical zoom capabilities.

4. Use Natural Light

The built-in flash on smartphones can sometimes be unflattering as it can wash out your subjects and produce harsh shadows. Harsh shadows with sharp lines create an angular appearance. This is particularly unflattering on faces.

To produce the best results, go for natural lighting. Natural light has an attractive quality for our eyes. We are naturally tuned to it. If you really need a flash there are some good attachments. You can use an attachable pocket spotlight or ring flash. Better still, use a more diffused light. An attractive diffused light provides just enough light for your subjects and creates flattering soft light with shadows. Shadows from soft light helps to create depth – giving a three dimensional feeling in the image.

5. Use A Third-Party Camera App

Your smartphone’s dedicated camera app can get the job done. However, third party apps allow you to do more with your phone’s built-in camera. Some of them offer better exposure adjustments, manual focus and camera settings (like shutter speed and aperture), or even integrated photo editing features so you can touch up captured photos instantly. If your interest is in better smartphone photography then use better editing too. Work to ensure you can navigate within the app and help you optimize its features for better photos.

Also familiarize yourself with the menu, settings, and features of your chosen camera app. If you’re a beginner, spend time and effort on learning photography basics. Think particularly about the shutter speed, ISO, and aperture. Also, think about how they relate to each other to create the exposure. Do some reading of this blog or other photography sites. Watch a YouTube tutorial on manual camera settings. Help yourself to develop a rounded approach to understanding both exposure and how best to take photos. Smartphone photography is as good for producing images as a DSLR. That is only true, providing, you know your tools and how to use them to produce a great image.

6. Take Advantage of the HDR Mode

The HDR mode on your camera phone allows it to take multiple shots of the same scene at different exposures, and then blend them together to create an image that pleases the eye. HDR mode blends the shots to create deeper contrasts in the image. This is particularly useful when shooting landscapes or high contrast scenes where there are obviously uneven highlights and dark areas. However, it must be used sparingly, as it can leave your images looking odd and overly edited. Don’t overuse it – try to work the editor so that your eye sees reality in the results. Trust your eye.

As a safety measure, also leave HDR on Auto. Then, you can manually pick out a better photo from the bunch of shots that were initially taken, in case the HDR blend goes badly. Apply the final result afterwards.

7. Post-Process Your Images

Post-processing can never replace good photography techniques. The best images stand alone for their beautiful content. However, it is also helpful to have editing skills. You can work to enhance a great image, or to work for the overall improvement of your photos. Take out spots, noise, or other irritations. Clean the image up so you show the beauty without distractions.

Photo editing apps like Instagram, VSCO, and Snapseed can be very helpful in making basic photo adjustments that will give you your desired result. Their photo filters are also great for setting or altering the mood of your images.

However, keep your edits at a minimum – especially processing ‘filters’. Instead, strive to make naturally beautiful images. This way, you don’t have to make too many adjustments later. After all, viewers can tell when you “cheat” your way to a good-looking image. Over-editing lowers the quality of your photos.

8. Keep Your Lens Clean and unscratched

This is something that is often overlooked by smartphone owners. It may not seem to be such a big deal for a small camera. However, a lens having oil, dirt, and moisture on it can slowly damage the glass. Leaving the lens on a tabletop can lead to scratching and marking. These ultimately affect image quality. Make sure you wipe the lens before use and use a protector or case, especially when doing a lot of outdoor shoots.

Can smartphone photography ever replace the DSLR?

Not all smartphones are capable of the more complex camera functions. However, many of the models some models currently on the market already have capabilities that mimic those found in DSLRs. In fact, many of them already allow control over the important camera settings, shutter speed, aperture, and ISO. These controls are native to some of the phones without having to use a third-party camera app.

Some of the latest smartphones, like the brand new iPhone and the latest Google Pixel, have more powerful and versatile cameras with more megapixels and other advanced features. Optical image stabilization for sharper photos and smoother videos is appearing, for example. The LG G6, released earlier this year, has great built in features. It carries a wide-angle lens that covers a larger area and is ideal for capturing group shots, magnificent architecture, and stunning landscapes. Many smartphone cameras from other brands offer other impressive features too. These advances are appearing just a few years after we thought such innovations wouldn’t be possible.

Smartphone photography is progressing fast. In a few years time, smartphone cameras are going to become even more sophisticated. For now, it’s safe to say that smartphones are definitely catching up, but whether they will ever surpass the DSLR remains to be seen. One thing is sure, the smartphone camera and DSLR are converging on each other. Furthermore, emergent technologies could take us anywhere. Camera technology still has a long way to go. Enjoy the ride!

Comments, additions, amendments or ideas on this article? Contact Us
or leave a comment at the bottom of the page…

Like this article? Don’t miss the next — sign up for tips by email.

Post contributed by :: Liz Pekler

I am a travel photographer with several years of experience in the field. Being a freelance blogger enables me to help photography beginners and enthusiasts to tell wonderful stories of their travels as seen through their lenses. It also allows me to share my thoughts about another advocacy of mine: social equality and change.
Connect with Liz Pekler: Linkedin :: Twitter: @liz_pekler

find out more...Photokonnexion tips by email
If you enjoyed this article please sign up for our
daily email service.
                                                 Find out more

Seven Easy Photography Tips With Simple Props

Simple props  Seven DIY Photography Tips Using Household Objects | External link - opens new tab/page

Seven DIY Photography Tips Using Household Objects
(Image from the video)

Use your imagination

You are a photographer right? Then your imagination must be one of your key assets. So don’t just use it with your shots, use it to find simple props too. Think about how you can make your shot better without buying new expensive stuff. Go DIY. Just look around your home for inspiration. Here are some tips to get you started.

Simple Props – just look around you

When we are working on our shots we often think only of the difficult shot, the ‘different’ viewpoint, or the unique perspective. With all aspects of our photography we try to bring something different to the shot. Something to make our viewers think. Something to give them a new insight.

Often ordinary things in our lives inspire a new way of looking at things. In each of our houses are many things we can deploy as simple props in our everyday photography. The video below shows us some of those things and how to shoot with them. But it is not too much of a push for us to look at other household objects as inspiring for our shots. Here is a list of the sorts of things that can help you get started on some new ideas…

  • A pile of books
  • Kitchen tools
  • A candle
  • Chess board and pieces (or other game)
  • A toy
  • Drawing pins (or any stationary)
  • Cut glass ornaments

With a little imagination you use simple props to make some extraordinary shots. I am sure you have many such items you can use for your shots.

The key to using simple props…

There is nothing extraordinary about the simple props I have listed. What will make your shots different is how you use these things. You can start very easily. Get some ideas together first as inspiration. Try these links. The phrase in quotes was entered into the search engine:

Personally I find stationary is great for photography. It definitely provides simple props to work with. Here is an example of my own…

Simple props  Bulldog clip - When you are different, make sure you stand out! | External link - opens new tab/page

Bulldog clip – When you are different, make sure you stand out!
[Click the image to see it full size on http://365project.org/

Spend a little time playing with the phrase you put into the search engine. You will quickly expand the range of images you get as examples. Draw your ideas from the pictures you see. Then set about working on how you are going to use your simple props as you make your image.

7 DIY Photography Tips Using Household Objects – the video


Uploaded by: COOPH

Comments, additions, amendments or ideas on this article? Contact Us
or why not leave a comment at the bottom of the page…

Like this article? Don’t miss the next — sign up for tips by email.

Essential gadgets for the everyday photographer

Essential gadgets for the photographer

A look at some essential gadgets for the photog…

Today’s article comes from: Jane Grates (Bio) from Sleeklens.com.

It is essential, and fun, to keep up-to-date with the latest trends. Gadgets occupy an important niche in our world of photography. In this article I look at the essential gadgets that are must-haves for the serious photographer.

essential gadgets for the photog

Look out for those essential gadgets…

SD Card holder

First, the basics. Lots of hardware to improve your performance as a photographer is wasted if you do not have enough space to store pictures. The storage issue can become a nuisance. Beat the problem and have many SD cards in order to prevent lack of drive space. This is particularly important for photographers who travel a lot.

Essential gadgets - The SD card holder.

Essential gadgets – The SD card holder.

Buying an SD card holder is a smart solution to the space problem. You can split your work over different SD cards to create a well organized library. Not only are you placing your work in a safe place, you are creating smart categories too.

A Tripod

A classic, the tripod is vital when dealing with heavy lenses or long exposure times. Night time photography is almost impossible without a tripod. The longer exposures are needed to capture low light levels.

A quality tripod is one of those essential gadgets we should all have. Look for one that suits the needs of your photo interests and for height and transportability. Higher quality tripods tend to be heavier, but this means they are less likely to blow over or vibrate in windy conditions.

xxx

A quality tripod is one of those essential gadgets we should all have.

Think how you will use your tripod. This will determine the price range. If you do your work mainly in a studio, or you are just starting your business, you can buy a simple model. If, on the other hand, you are a skilled photographer, you will want to buy a pricier, more adaptable one to last longer and endure the diverse conditions you may come across.

Lens Filters

You can create “filter effects” with post-production ‘presets’ in editing software. But you can skip a step by using on-camera filters. This will save incredible amounts of time in processing. Filters can help you avoid burned out images from strong sun if you use Polarized filters. The camera lens will react the way your eyes do when you use polarized sunglasses.

Polorising filter - one of the more essential gadgets.

Polarising filters help you deal with strong sunlight – one of the more essential gadgets.

Remember to buy a lens filter that fits your lens size. There are companion gadgets for filters. Step-up/down rings serve to create a perfect fit on lenses with non-standard formats or sizes. The latter are commonly seen on bridge cameras.

Remote shutter release

For long exposure times, or for portrait pictures including the photographer in the scene, remote shutter devices are handy tools. Simply grab your remote shutter release, place your camera on the tripod and let the action flow.

Remote shutter release - one of the essential gadgets.

Remote shutter release – one of the essential gadgets.

You can choose a remote shutter release from wired or wireless devices. I recommend buying a wired model, at times interference can be frustrating. Although, there are some very good models on the market recently. It is worth

Another remote shutter choice is a phone app. Not all camera models are supported. Some Canon and Nikon models are compatible with this feature. The apps are cheap, or free, saving some of your money. In fairness the latest remote shutters are not really expensive. Still, having a phone app will certainly guarantee that you won’t forget your remote shutter release wherever you go!

Weather cases

A common problem, as a photographer, is the sudden appearance of bad weather. It’s not good for using your camera! Don’t risk the investment you made in quality kit. Consider carrying a weather-safe case that fits your camera model, lenses and other accessories. Not only are you going to protect your beloved camera, but you can continue your shoot regardless of the conditions.

Protect your beloved camera from bad weather - use a camera case.

Protect your beloved camera from bad weather – use a camera case.

Weather sealed cameras can benefit from this protection too. Water seals deteriorate over time. Other attached accessories are not all water proof as well. Don’t risk your device without even thinking about it.

Smart phone lenses

If you are a photographer on the go, you probably own a smartphone. Up to date models have a good camera. It can be a limitless source of creativity. However, smartphones are limited compared to modern DSLR cameras. They rarely have full and true manual controls. They lack the proper control of ISO, Aperture and Shutter speed settings.

Smartphone add-on lenses open a new dimension for the photographer on the go.

Smartphone add-on lenses open a new dimension for the photographer on the go.

A cool way to fix this issue is smartphone lenses. They come in a wide range of prices and with various features. Common base models of add-on smartphone lenses can do things that smartphone camera lenses can’t do. For example, fish-eye effect, macro or telephoto and other effects. More complex models, like the latest Sony QX-10, completely reinvents the smartphone lens concept. It boosts the smartphone with a professional quality sensor packed with manual controls. Even if it seems to be pricey, the result won’t disappoint.

Remember, the smartphone is a useful addition to the camera bag in its own right. Check out this post: Using tablets in photography.

Essential gadgets – more than just the camera… Photographer’s backpack

Like the tripod, photographers backpacks are a common classic. They provide storage for the camera, different lenses, as well as leaving room for other important items. Some are also designed to carry laptops, batteries, and much more. Avoid back packs that are not designed for photography. They can cause equipment damage. Specially designed packs let you carry equipment safely and help you pack efficiently.

Buy a good quality photographers bag to protect your equipment.

Buy a good quality photographers bag to protect your equipment.

Consider buying a weatherproof backpack regardless of price. Protecting your working equipment is a top priority. Photographic equipment is highly sensitive to poor climate conditions. Most good quality packs come with slip-over water protection.

Also, be aware of the maximum weight supported by the backpack. Don’t over load it (or you). Avoid misuse, which will shorten the life expectancy of the product. Protect it from wear, chemicals and dust.

Essential gadgets are those that suit your needs

You can find countless options for complimenting your photography and workflow. Most will depend on the kinds of photography you decide to focus on. In the end, it is up to you to find the best equipment that will enhance your day-to-day photography. Everyone has their own special “essential gadgets”… What are yours?

Feed your imagination…

Here are some more essential gadgets for photographers on Amazon.
Check out this Google search on essential gadgets for photographers!

Comments, additions, amendments or ideas on this article? Contact Us
or why not leave a comment at the bottom of the page…

Like this article? Don’t miss the next — sign up for tips by email.

find out more...Photokonnexion tips by email
If you enjoyed this article please sign up for our
daily email service.
                                                 Find out more

Using tablets in photography

[Todays article comes from contributing author, Honest Blossom]

Photo of a camera taken with a tablet as a light source.

Taking shots in soft light is so easy with a soft light source. A tablet can provide just that.
{Image by Damon Guy}

Mobile devices give us new tools

Mobile photography is on the rise. Yet despite high usage of smart phones and tablets many believe nothing beats photos produced on a DSLR.

Mobile devices do have a place in the photogs bag. Many pros use mobiles Tablets in photography | External link - opens new tab/page effectively. Photographer-author Anne Hamersky used her iPhone 5 to take photos for her book, “Farm Together Now Tablets in photography: Link to Amazon | External link - opens new tab/page (jointly authored with Amy Franceschini and Daniel Tucker)”.

Apart from being used as cameras, smart phones and tablets in photography have huge potential. They can assist with simple lighting, easy viewing of images, and controlling cameras.

1. Simple Lighting

You don’t need professional lighting equipment to create a soft light. Your tablet can create shadow graduations on your subject. How? Use a bright-white image on your screen (Download white-screen image here). Point the display toward your subject. It will create soft light and shadows. You can also use your smart phone to light smaller objects. The screen illumination produces white light. It’s a source of localized soft light in your image.

Table-top studio photo showing how to use a tablet as a soft light source.

The camera image at the top of this article was taken using the table-top studio set up in this image. Simple to do and simple to set up.

Use tablets in photography to create direct light too. Devices with built-in flash can be used as a photographic light. Use a flashlight (torch) app. There are also some LED light apps. that you can use on your tablet to create coloured light sources.

2. Camera Controller

Want to control your camera functions via your tablet? Try the Chainfire app for Android devices. You can use your tablet as a Canon EOS camera controller. Here is how to do it:

  1. Install the Chainfire app Tablets in photography: Chainfire app. | External link - opens new tab/page.
  2. Connect your DSLR to the tablet via a USB OTG connector line and a mini USB cable for the camera. {Tip: It’s best to get a longer USB cable}.
  3. Turn on the camera and the app to view the subject.

Navigating through the app is easy, as it uses the controls of your camera. Photos taken using the camera can also be saved to the memory card of the tablet. I suggest downloading photos to your computer later. Photos take a lot of space and are safer on a PC.

View a guide on how to use the Chainfire app Tablets in photography: Chainfire app guide. | External link - opens new tab/page. Also read more details on the Chainfire website Tablets in photography: Chainfire website | External link - opens new tab/page.

3. Field or Preview monitor

It’s advisable to opt for a tablet with at least a 9-inch display. The main purpose of using a tablet is as an extended monitor. You will get a better preview of the subject than the small display on your DSLR. According to O2, tablets such as the Apple’s iPad Air (9.7-inch screen) and ‘Samsung Galaxy Tab S’ (10.5-inch screen) are the best preview monitors you can use on a photo shoot Tablets in photography | External link - opens new tab/page. They allow more space to view and work with the images. You are less likely to strain your eyes with decent sized screens.

Using tablets in photography to control the camera uses the same procedure as any shoot. Taking the shot is set up and released from the mobile. You will need a USB OTG connector to use the tablet as a preview monitor. Applications such as the DSLR Controller, GoPro, CamCap, Helicon Remote, and DslrDashboard are the advisable software to use.

Tablets in photography – top devices

What are the top tablets for photographers? There are various devices to choose from. They offer many features and functions. Choosing one can be quite confusing when picking the best to help your shoots.

To make it easier, consider the other reasons you’re buying the tablet. Email and editing photos or other uses are also important. This will help narrow down your list of choices, as most devices have their own strengths. It will also help to opt for a tablet that has been recommended by other photographers. Here are some examples:

  1. Apple iPad with Retina Display
  2. Samsung Galaxy Note Pro 12.2
  3. Sony Xperia Z2 Tablet
  4. Microsoft Surface 2
  5. Lenovo Yoga Tab

Mobile devices have found their way into DSLR photography because of powerful camera lenses and relevant apps. These assist professional and amateur alike. The changes have come about because using tablets in photography helps and simplifies our work.

Comments, additions, amendments or ideas on this article? Contact Us
or why not leave a comment at the bottom of the page…

Like this article? Don’t miss the next — sign up for tips by email.


Contributing author: Honest Blossom

Honest Blossom is a seasoned blogger and practising photographer from the UK. She has written various articles ranging from the latest technology and innovation, travelling spots, mobile and digital photography and more.

Photography hacks – adapting your equipment

Seven photography hacks :: adapting your equipment

Seven photography hacks

Photography hacks- making something work differently

In most shots our standard equipment does what is required. Yet, the standard shot is not always what we want. Sometimes we want to make some special effort to provide a different effect, a new view. There are many thousands of photography hacks. Each one can give us something different. Some are more radical than others. But what it really comes down to is making our equipment fit our need to get a specific type of outcome.

Regular readers will know that creative work often involves visualisation. Seeing a hoped-for image outcome in your head helps you to have ideas. Such pre-thinking can help you plan how to use or adapt your equipment. To get the desired result you may have to do all sorts of small adaptions. Walk into any working studio and you will see, card, boards, gaffer tape, clamps, flags. They are all there to help jury-rig things into a new way of creating an effect for the shoot.

These photography hacks are the mainstay of studio work and important on location too. You can do lots of simple things to change the light, the colours, the shadows, the effects of light on your lens, and so on. All that is required is to try and think ahead about what you want to achieve. Then, find ways to change your equipment to get the effect. Familiarity with your equipment helps. As you get creative, then other ideas will come to mind. Look around for ways to change things, or to get new effects.

Photography hacks video

In the video, “7 Simple Photography Hacks” you can get an insight into some of the basic ideas. These are a good start for some examples you can develop yourself. Spend a little time thinking about things you have around you. See if some of them could be used in your own photography hacks.
Provided by COOPH Photography hacks video | External link - opens new tab/page

Messy

The “Vaseline” photography hack in the video can be a bit messy. Only do it on a filter, not the lens. And, try to keep any of the “Vaseline” off the rest of the camera. It is difficult to clean up too. So use an old filter.

Another photography hack for you to try

Here is another idea you can use. It is less messy and gives some satisfying results too…

  • Cut a section out of a fine quality pair of ladies tights (psst… make sure they are surplus first!).
  • Pull the piece tight across the end of your lens.
  • Fix it in place by securing it with elastic bands tight enough over the end of the lens to hold it taught.
  • Take your photo through the material of the tights.
  • To vary the effect, you can make a central hole in the material.
  • Try different colours, try different types of tights knit.

This one is a very old photography hack. It used to be used a lot in wedding shoots years ago. It is just as effective today. Have a go. It is fun.

Let us have some of your shots. We would love to put up a few for others to see.

Comments, additions, amendments or ideas on this article? Contact Us
or why not leave a comment at the bottom of the page…

Like this article? Don’t miss the next — sign up for tips by email.

Damon Guy - Netkonnexion

Damon Guy (Netkonnexion)

Damon is a writer-photographer and editor of this site. He has run some major websites, a computing department and a digital image library. He started out as a trained teacher and now runs training for digital photogs.
See also: Editors ‘Bio’.
By Damon Guy see his profile on Google+.

Looking good – the essence of the professional photographer

Looking good :: To be a pro-photog just look the part...

Looking good is obviously the main aim here!
(Image from the Video).

The important part of being a pro-photographer…

Looking good and owning the top kit is essential. Otherwise we won’t know you are a successful photographer (not!). In this hilarious spoof on professionalism the video provides a humorous insight into looking good as photographers. Maybe some see themselves that way. Maybe it’s how others see us too!

How to look like a Pro Tog


DigitalRev TV Looking good :: DigitalRev TV | External link - opens new tab/page

Creative comedy

The video takes a poke at photogs who are a bit “up themselves”. And, perhaps some are a little over the top. Creative comedy like this is needed to make us laugh at ourselves sometimes. Looking good is important as in any business. It is also something we should not do to excess.

What we should not be doing…

We are all proud to be photographers. It is a passion and a lifestyle. It is also a competitive business and an actively developing one. The video shows us something we should be careful about. Gear lust is an affliction that many beginner photographers have. They spend all their time scouring the magazines and websites for the latest and greatest equipment. Looking good and having the latest technology seems to be the aim. The truth of that is that it is not what photography is about.

What we should be doing – it’s not about “looking good”

Photography is about getting pictures. It is about making those pictures good enough so they create an unforgettable image in the mind of the viewer. It is worth remembering that…
Despite excellent technology you can

  • Still make mistakes.
  • Produce a picture that says nothing.
  • Make a picture that’s ugly and of no value.

In other words, bad pictures can come from great technology. Also, excellent images and art can be produced using non-cutting edge equipment. Just look at any number of photography websites – Instagram is one example where all sorts of art is produced without top quality DSLR equipment.

Photography is about how you take your picture and what you show in it. Our passion is a unique synthesis of art and technology. But the technology can range from a simple pin-hole box “camera” to the worlds leading-edge DSLR. Both can surpass each other if used in the right way.

The lesson in this…

Looking good with up to date equipment can be important. But don’t aspire to the most expensive and up-to-date equipment just because looking good makes you fit the part. Concentrate on getting your technique and your skills right. Learn to produce great images. Understand your art – your pictures will be much better for that focus. Give up any obsession with the new and shiny.

Comments, additions, amendments or ideas on this article? Contact Us
or why not leave a comment at the bottom of the page…

Like this article? Don’t miss the next — sign up for tips by email.

Damon Guy - Netkonnexion

Damon Guy (Netkonnexion)

Damon is a writer-photographer and editor of this site. He has run some major websites, a computing department and a digital image library. He started out as a trained teacher and now runs training for digital photogs.
See also: Editors ‘Bio’.
By Damon Guy see his profile on Google+.

Using polarising filters

The polarising filter helps reduce glare in the photograph| Photokonnexion.com

• Beach Huts •
Using polarising filters reduce glare, reflection and colour fade in your photograph. These filters are easy to use and produce great results.
[Image from the video]

Filter with a hidden impact

Photographic filters are light modifiers. They have a variety of different effects. Polarising filters are just one type of photographic filter. When you look at one it appears dark. It looks as if it would have no effect except to reduce the light in your image.

What does using polarising filters do for your photo? Light from the sun tends to be scattered by the atmosphere. The waves of light are out of alignment. When the light is very bright the glare causes a bright haze of light. This over-brightness can act to overwhelm a photograph. It especially tends to wash the colour out of the sky, whitening it. Using polarising filters helps reduce the glare. It filters out some of the light that is not aligned. Only the polarised light passes through the filter. This aligned light has reduced glare allowing the colours to come out. Skies are darkened. Reflections are reduced.

The results of using polarising filters

The result of darkened skies, reduced reflections and better colours can be dramatic. Here are a whole range of images on Google using polarising filters Images on Google using polarising filters | External link - opens new tab/page.

Worst and best case scenario for using polarising filters | Photokonnexion.com

• Worst and best case scenario for using polarised filters •
Careful positioning and using polarising filters dramatically affects the outcome.

Using polarising filters can have a dramatic effects on your image. The top picture shows the worst case scenario. Light is almost directly into the lens. It is bouncing off glass and polished surfaces into the lens too. The sky is very bright with scattered light from direct, harsh sunlight. There is a hazy glare from brightness. There is also flare and very bright spots from reflections. This photo was taken without using a polarising filter.

In the second (lower) photo the position is different. The direct sunlight is not directly entering the lens. Even so, without using a polarising filter there would be problems. Notice the bright blue sky. This would have been a very washed-out blue on this very sunny day. Notice the windscreen is almost transparent? The polarising filter has reduced the bright reflections and specular highlights. The reflections on the bonnet are also pleasant and not over-white. The car paintwork has a quality colour-depth. The whole quality of the lower photo seems better. All this despite the harsh direct light.

Actually using polarising filters

In the video Mike Browne shows how to use these useful filters. In particular you need to remember three things of particular interest…

  1. Using polarising filters is most effective when the light is coming at the lens from about 45° off the optical axis.
  2. While using polarising filters you will need to rotate the filter to find the most effective polarising position. You need to re-adjust it every shot. Each shot will have a different angle of light to the lens.
  3. Using polarising filters reduces the light able to enter the lens. Your light may be reduced by over two stops with a poor quality version.


Mike Browne

Quality

High quality Polarisers are more expensive. They are time consuming and expensive to make. They also use expensive materials. However, the better ones maintain photographic quality. So it is worth spending the extra money. Poor quality polorisers may increase the digital noise from light scatter in the filter. They may also create aberrations and distort the image.

All photographic filters reduce the light entering the lens. A quality polariser will also reduce the light. But, they will affect the light much less than a poor quality polariser. Using polarising filters of a low quality may reduce the incoming light by as much as three stops. A quality polariser will tend to reduce light by only two stops (or less). So think carefully about what you purchase.

Buy now…

When buying a circular polarising filter make sure you get one that is the right size. The filter size of your lens is normally written on the inside of the front of the lens.

Recommended!

Circular polarising filters  A range of circular polarisers on Amazon | External link - opens new tab/page

When using polarising filters buy the size that fits your lens. Also remember that the quality of the filter can affect the photo. High quality polarisers reduce aberrations. A higher quality filter will not reduce the light as much as a poor quality one.

Review a range of different filters here…
Circular polarising filters  A range of circular polarisers on Amazon | External link - opens new tab/page


Comments, additions, amendments or ideas on this article? Contact Us
or why not leave a comment at the bottom of the page…

Like this article? Don’t miss the next — sign up for tips by email.

Damon Guy - Netkonnexion

Damon Guy (Netkonnexion)

Damon is a writer-photographer and editor of this site. He has run some major websites, a computing department and a digital image library. He started out as a trained teacher and now runs training for digital photogs.
See also: Editors ‘Bio’.
By Damon Guy see his profile on Google+.