Category Archives: Starters School

Articles essential for starters

Five Types of Photography Niche: Which is Right for You?

Enjoy your photography niche – never work another day…

Getting into photography is one of the most fulfilling steps you can take in life. If you love capturing and immortalizing candid moments, becoming a professional photographer may be a dream come true. You know what they say: If you love what you do, you’ll never work a day in your life. Nothing is truer than that.

Five types of photography niche

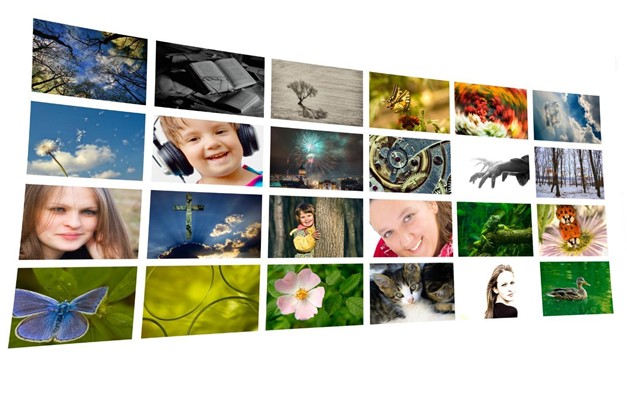
However, with so many different types of photography, how can you ever choose only one? The key lies in what inspires you most, making you feel alive every time you’re behind the camera.

Here are some of the most exciting types of photography you can try when picking your favorite niche.

Portrait Photography

Also known as portraiture, portrait photography is quite self-explanatory, just like any other photography niche. So, what makes it stand out?

When taking portrait photos, you need to tell the story of your subjects. What is it that makes them unique? What are their most notable personality traits?

You need to highlight their best features and perfectly capture that personality. Interesting poses play a big part here, so do the eyes. The most critical factors for high-quality portrait photography include good lighting, proper focal length, and a clean background. You can also use a shallow depth of field to put your subjects in full focus.

The background can also include objects that give more context. For instance, you can add a guitar, a basketball hoop, an easel, or anything else relevant to the story.

Portrait photography has many sub-types so that you can delve deeper into the genre. There are family portraits, couple portraits, fashion photography, glamour photography, surreal portraits, and more niche sectors for you to try.

Portraiture - Image showing a group portrait (5 types of photography niche)

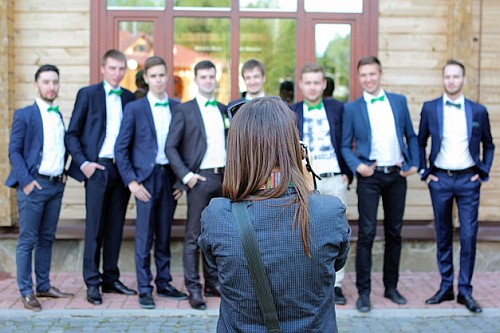
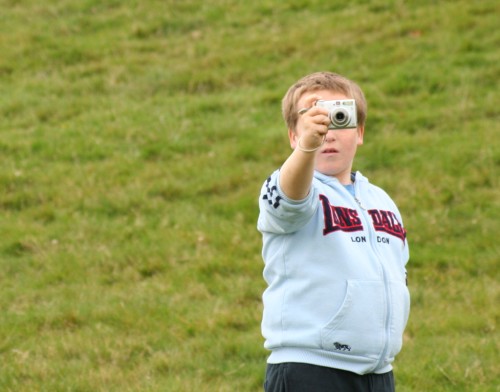
The Event Photography Genre

This photography niche can be unbelievably fun. You can shoot at a wealth of events, including concerts, birthday parties, weddings, anniversaries, corporate events, and so much more.

The interest is there to work at a range of events. However, you can specialise if you want. Just choose to work only one type of event, such as weddings, for instance.

The point is, events all have two things in common – they are fast-paced and include an array of subjects. They can even be a bit challenging. Apart from taking portraits and group shots, you may need to snap photos of food, the venue, and much more. Your other niche photographic interests can easily be included.

What it all comes down to is capturing once-in-a-lifetime moments. These are the special moments that the attendees will cherish forever. Your photos will enable them to relive the events and remember how fun everything was.

No pressure, right? The truth is that only your first gig will be a bit stressful until you get the hang of it. You’ll forget all about the stress halfway through the event. And, soon enough, it will become second nature to you. The really exciting thing is that in this type of niche photography you work with people who really want you to take their photo. That is great fun and rewarding.

The Stock Photography Niche

Using stock photos is very popular. So, you can quickly sell stock photos and earn a regular income.

This photography niche is ideal if you enjoy a wide range of interests. You can shoot whatever interests you. Stock pictures can be of food, nature, street photography, people, buildings, landmarks, offices, still life – you name it. Then, post the photos on stock photography websites.

Photographers sell stock photos under license. This allows your pictures to be used by multiple purchasers, increasing your income per picture.

‘Royalty Free’ (RF) licenses

These licenses grant non-exclusive, multiple, unlimited use of an image. There are few restrictions. The client pays a one-time fee to have perpetual use of the image in the permitted ways. However, in practice RF licenses tend allow a wide range of use. That means you may not always be happy with the type of use. So, be careful.

‘Rights-managed’ (RM) images

The ‘RM’ license require a one-time fee for limited usage. However, you can buy additional licenses that allow more uses. There may be other limitations on use too. For instance, the purchased RM license may have certain geographical restrictions or time limits. Alternatively, it may specify the type of media in which the image can be used (print, book, website etc.). Rights managed is the more traditional type of image license and is far more restrictive than royalty free.

Other ‘stock models’

License types are varied in this niche. So, you need to think about how you want to sell your images. ‘Microstock’ describes the low cost end of the stock photography business. Images usually sell under a ‘Royalty free’ license. The photographer is paid a small amount (a micro payment). Microstock libraries carry images from both pro and amateur photographers. The return you get per image may be tiny. However, it may be a good way to get started.

Once you become practiced in the stock photography business you might pick and choose. Certain images you make can be sold under RM license, others as different license types. As you get experienced you can learn which are the best sites for you to sell your images of different types.

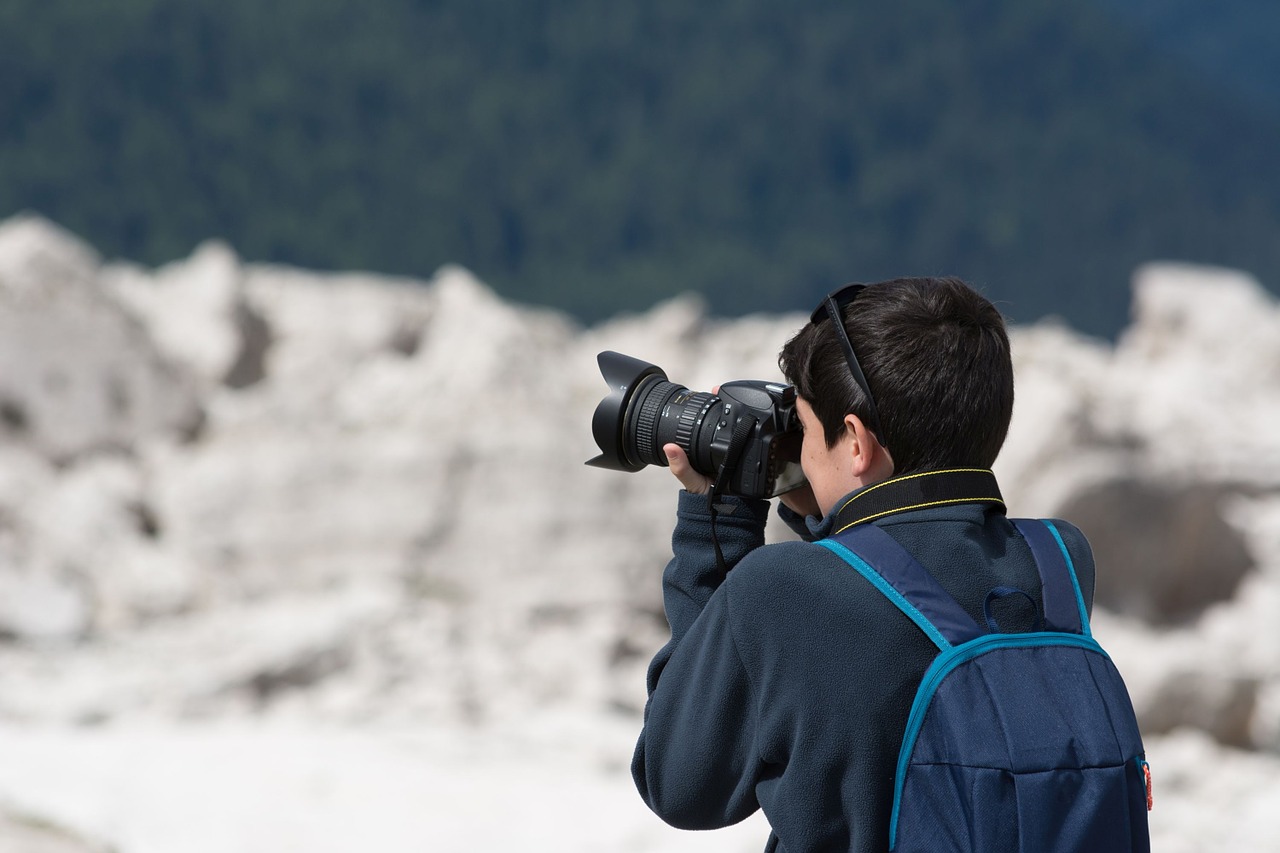
Wildlife Photography

The wildlife photography niche covers many types of wild and natural shots. It is, without a doubt, one of the most challenging types of photography. It is also one of the most thrilling niches, as it can result in genuinely breathtaking photographs.

Why is it difficult? Because you can’t exactly instruct an animal to pose for a photo. You need to wait for a perfect moment to capture it and tell its story. This can mean sitting in one spot for hours on end – or much longer!

There will be times when you quickly get an opportunity for some magical shots. An animal might pass by and stop long enough for you to create a remarkable photo. But, you have to be ready for those blink-and-miss-it moments too.

“Patience is a virtue” gets a whole new meaning in wildlife photography. If you love animals and have a world of patience, this photography genre might be ideal for you. You can also get to see some wonderful parts of the world.

Image of a travel photographer

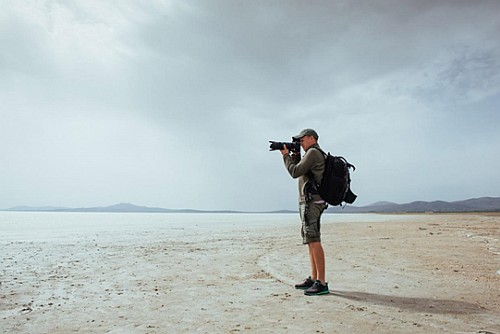
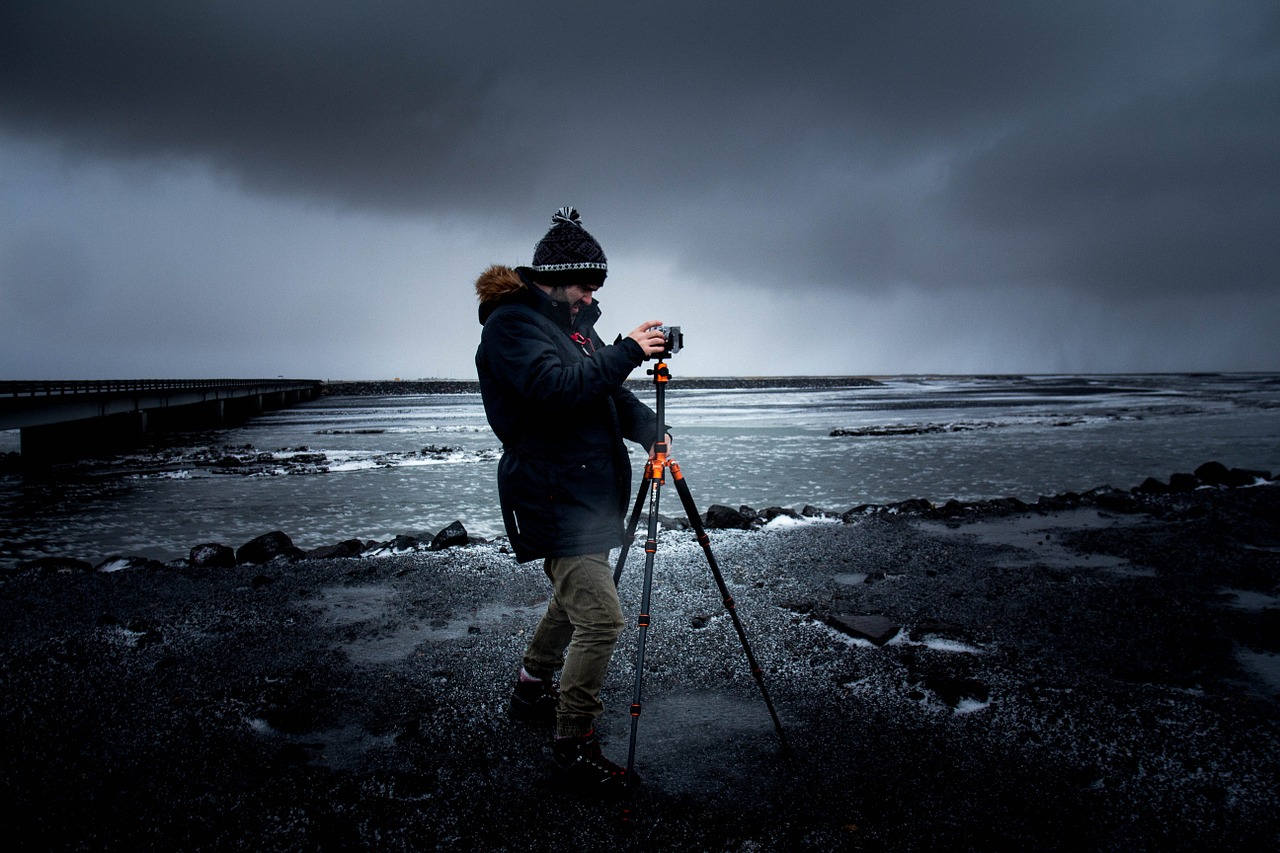
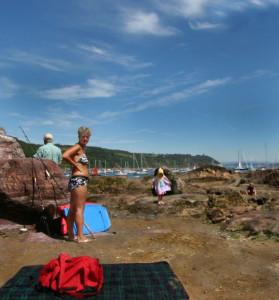
The Travel photography Niche

Undoubtedly, travel photography is one of the most popular types of photography. Just do a quick search on Instagram, and you’ll find an abundance of profiles with awesome travel photos.

Capture uniqueness

The goal of travel photography is to capture different landscapes, landmarks, cultures, peoples, history – everything that makes a place unique. When you travel to a location, you need to find what distinguishes it from everywhere else. Then focus on those shots that give the viewer something new to appreciate. Make them want to go there and your travel photography has succeeded.

As a travel photographer, you can mix various photography genres. You can snap portraits, food, landscapes, wildlife, streets, architecture and anything else. Look for things that tells a unique story about the places you visit.

Showcase special places

You have complete license to show off our lovely planet. Consequently, you can help people feel more connected to it. You can also help them choose their next vacation destinations. You might even help many of them find a place for their dream home.

What makes the travel photography niche especially exciting is that you get to travel the world. How else are you going to take photos of faraway places?
Traveling the world and shooting photos? Who would not want to live like that? It’s one of the most adventurous careers ever.

Inspired yet?

Each photography niche offers you something to think about and learn about. If you have a hard time making up your mind where to focus, those that include a range of types can be ideal. Again, it’s all about what inspires you, but be sure to give all these genres a try. That’s the only way to see if they match your interests and skills.

Comments, additions, amendments or ideas on this article?
Contact Us or leave a comment at the bottom of the page…

Like this article? Don’t miss the next — sign up for tips by email.

Post contributed by :: Isabella Foreman

Isabella Foreman ImageIsabella Foreman has been an avid blogger for 5 years, with particular interests in Photography – lifestyle activities like Travel, Weddings, etc. Today she is an expert on the subject and over the years she has consistently contributed articles to top photography and lifestyle publications. Presently, she is associated with Smart Photo Editors – a photo editing service company.
Website: Smart Photo Editors Smart Photo Editors | External link - opens new tab/page

find out more...Photokonnexion tips by email
If you enjoyed this article please sign up for our
Email service.
Find out more


Making an abstract image – opening your eyes

A personal path to making an abstract by Alison Bailey
Interplay By Alison Bailey.

Abstract image :: Interplay.
By Alison Bailey.
Seen on: 365project.org Interplay By Alison Bailey | External link - opens new tab/page
Dated: 15/01/2017
Click picture to see full size image.

I became serious about photography through doing a 365 project My 365Project | External link - opens new tab/page in 2011. I got my first DSLR camera for Christmas that year and have been happily obsessed ever since.

At the end of 2014 I had a eureka moment: abstract photography was for me. It’s ideal for depicting what moves me most in my world – the aesthetics of the characteristics of things. Abstract photography’s exciting, exasperating, exhausting and exhilarating. I love it. I hope you will too.

Making an abstract image

Abstraction is intensely personal and one of the most imprecise art forms. There are no recommended settings or specific lenses that will produce an ‘ideal result’. The accepted ‘rules’ of composition are often deliberately broken or disregarded. There’s no magic formula that will guarantee success. This article aims to provide you with thoughts, ideas and suggestions, along with information about how I work. These may help you to make an abstract image or gain experience to make many of them.

Groundwork

I began my journey by researching exactly what is meant by ‘abstract’. I didn’t find a universally accepted definition. The definition of abstract photography in the Photokonnexion glossary hits the spot for me. It is easy to understand and includes a list of the different aspects of abstraction. It makes a great reference guide for use in the field. I re-read it occasionally for revision.

When I think about an abstraction, what I see in front of me is not manifested in my mind’s eye. Well, not as a picture. I don’t ‘see’ – I experience. Things come to me as impressions with verbal descriptions. I have recently learned that when people say they ‘see’, it’s not shorthand for a thought process that’s like mine. They really do make pictures in their heads. I first thought we all imagine in the same way. It seems that is not true. ‘Seeing’ an abstract is an intensely personal thing. You have to do it your own way.

Studying, analysing and commenting other people’s work teaches you a lot. So, I researched the idea of the ‘abstract image’ on the internet. I viewed many abstracts, examining their composition. I had fun, gained insight into what abstracts can look like and developed ideas and personal preferences too.

The next step toward making an abstract image

I began habitually looking everywhere for shapes, structures, patterns, lines and textures. I looked for them whether I was taking photos or going about daily life.

Then it was time to put what I’d learned into practice.

If you’re unsure where to begin, here are some ideas to get you started. Three dimensional artworks can be inspirational. They are a good choice for the abstract image novice. Less representational work is particularly suitable. Find a piece you like and can legitimately photograph. The artist’s concept and execution of it will give you some useful pointers. However, your appreciation of the work is key to how you interpret it. Beyond works of art, here are some other sources…

  • Look at items in your house. The kitchen is a great source of inspiration.
  • Is there a type of photography you are especially enthusiastic about?
  • Architecture: plenty of lines, shapes and patterns, often textures too.
  • Street scenes (people and/or transport) have many abstract sides.
  • Wildlife and fast-action sports photography lend themselves to expressing movement through abstraction.
  • Macro photography shares an emphasis on detail so it too lends itself to abstract image work.

Keeping an open mind and expecting to find a promising subject is a good recipe for success. The more you look for subjects, the more you will see, sometimes in unlikely places. Whatever you choose, it is important it moves you in some way. A way that makes you care about it.

Rhythmic - I spotted this chair stack in an out-of-the-way corner of an historic cathedral.

Abstract Image :: “Rhythmic”
I spotted this chair stack in an out-of-the-way corner of an historic cathedral. Their lines caught my eye. I felt they had a rhythmic quality.
Breaking the pattern, a compositional device often used to focus the eye, wasn’t appropriate here. The rhythm – the whole point of the image – would have been lost.
By Alison Bailey.
Seen on: 365Project.org Abstract Image :: Rhythmic | External link - opens new tab/page
Dated: 10/07/2015.
Click picture to see full size image.

Studying the details

Once you find something meaningful to you, examine it closely from all angles. You are looking for a way to portray it.

This is a process that cannot be rushed or forced. It is important to be relaxed and receptive. Take a long, leisurely look, soaking up the details. Ask yourself:

  • What do I feel about this?
  • What visual aspects – lines, shape, texture, etc – make me feel that way?
  • How can I present, compose, those aspects to engage viewers and tell them what I saw?

Look carefully. Allow the answers to those questions, and any other ideas that might occur, time to form in your mind. For the best results, keep these answers and ideas in mind at all stages of making an image.

I study a subject via the camera’s viewfinder to remove distractions from the periphery of my vision. I often take photos at this stage too; the act of pressing the shutter button helps me think.

Layers upon layers :: Detail of a sculpture comprising seven pillars of piles of slates.

Abstract Image :: “Layers upon layers”
Detail of a sculpture comprising seven pillars of piles of slates. The profusion of layers and the arrangement of the slates are wonderful. I spent nearly an hour looking and studying them. The light – bright, midday sunshine – cast hard shadows that define and separate the slates and augment the idea of profusion. I composed to create opposing diagonals that prevent a jumbled confusion of lines by drawing the elements together.
By Alison Bailey.
Seen on: 365Project Abstract Image :: Layers upon layers | External link - opens new tab/page
Date: 20/11/2016.
Click picture to see full size image.

Making the abstract image

Choice of lenses, use of light, camera settings and how close you can get to your subject are all factors to take into account when composing your abstract image.

It’s usually not possible for me to use a tripod or flash. I prefer natural or constant, artificial light, anyway. So I have to work round resulting restrictions. You should consider how best to make use of light, depth of field, angle, and point of focus. A good angle and an appropriate focal point can make or break the flow of a composition. That is especially true with a shallow depth of field.

I have discarded many shots owing to poor choice of focal point. I still struggle with it. However, an effective composition is important. So it is worth the effort to get the focal point right.

Once you are satisfied with your composition, take a photo, maybe several. It is good to experiment with other settings and angles, you might discover another approach to your subject that is more meaningful to you than your original idea.

Abstract image :: “Thorny subject”.

I had intended to compose for the spiral created by the arrangement of the leaves of this plant but realised I was more taken with its thorns. I angled to emphasise them whilst, again, looking for a cohesive composition. To emphasise the spikiness of the thorns stronger tonal contrasts were created in processing.
By Alison Bailey.
Seen on: 365Project Abstract Image :: Thorny Subject | External link - opens new tab/page
Date: 30/09/2016.
Click picture to see full size image.

Assessing your work

After you download your photographs, consider and critique them. Take time to do this.

Don’t delete a shot straight away; experience might alter your opinion of it. If I am uncertain, I reassess a photo periodically, sometimes processing it, until I feel sure about it. I’m still mulling over a few taken a year or more ago.

Got a keeper? Then it’s time to add the finishing touches.

From photograph to abstract image

Thoughtful processing will take your photograph to another level. How this is achieved is very much a matter of personal taste.

I almost always process in black and white. Colour isn’t usually what my images are about. For me it will distract the viewer’s eye from the aesthetic aspects that I want to express, weakening the image’s impact. Other authors may take a different avenue. Final processing is very much a personal style.

I often choose to use high tonal contrasts to accentuate, even exaggerate, detail (see Thorny Subject above). My preferred method is to enhance clarity in the image processor’s ‘raw’ filter when developing the image for *.jpg. Then I adjust contrast, brightness and light levels in the main editor.

Whatever you do, the aim is to enhance your composition for maximum impact. You should work to help engage viewers with the aesthetics of your subject and give them the best chance of understanding the artistic intent of your image.

More after this…

The Edge of Vision: The Rise of Abstraction in Photography The Edge of Vision. A book about abstract photography. External link - opens new tab/page
There are few good books on abstract photography. So this historical view is welcome. It brings together the concepts and the art in abstract photography. Spanning the earliest images to modern processes with quality colour pictures too, the book includes up-to-date work from well known abstract photographers. The book gives readers an all-round view.
What readers said:
» Great buy! :: 5*
» A lovely book :: 5*
» Be educated and stimulated :: 5*
» …filled with deep and insightful articles and ideas to inspire. :: 5*
The Edge of Vision: The Rise of Abstraction in Photography The Edge of Vision. A book about abstract photography. External link - opens new tab/page


Completing the abstract image

Abstract image :: “Internal structure”
A macro image and a personal favourite. High contrast wasn’t appropriate here. I love the the way this whelk shell is constructed. The fragility of its exterior (suggested by the light tones) belies the strength of the internal structure, brought out by contrast created with natural, diffused light.
On reassessing, I felt the right-hand curve was drawing my eye down out of the frame, so I cropped the bottom of the image to draw the eye back to the pillar.
By Alison Bailey.
Seen on: 365Project Abstract Image :: Internal structure | External link - opens new tab/page
Date: 02/11/2016.
Click picture to see full size image.

After a day or two, I reassess my image. I take time to let the initial pride of authorship fade. Then, if needed, I do whatever is necessary to improve it. Any processing you want is allowable. It could even mean scrapping the image and starting again. It’s frustrating but not daunting; mistakes are excellent teachers and I want to learn and improve.

If that sounds serious, it is. But, it’s seriously tremendous fun. Happy abstraction!

Comments, additions, amendments or ideas on this article? Contact Us
or leave a comment at the bottom of the page…

Like this article? Don’t miss the next — sign up for tips by email.

Post contributed by :: Alison Bailey

Alison is a veteran participant in 365Project.org 365project.org | External link - opens new tab/page. She worked as an assistant librarian and a Civil Servant before becoming a traditional housewife and mother. She enjoys life with her retired husband – and her camera. Alison has at last realised that photography is the medium best suited to her artistic abilities. She is having serious fun striving to express, through her images, her love of, and fascination with, the world around her.

Essential gadgets for the everyday photographer

Essential gadgets for the photographer

A look at some essential gadgets for the photog…

Today’s article comes from: Jane Grates (Bio) from Sleeklens.com.

It is essential, and fun, to keep up-to-date with the latest trends. Gadgets occupy an important niche in our world of photography. In this article I look at the essential gadgets that are must-haves for the serious photographer.

essential gadgets for the photog

Look out for those essential gadgets…

SD Card holder

First, the basics. Lots of hardware to improve your performance as a photographer is wasted if you do not have enough space to store pictures. The storage issue can become a nuisance. Beat the problem and have many SD cards in order to prevent lack of drive space. This is particularly important for photographers who travel a lot.

Essential gadgets - The SD card holder.

Essential gadgets – The SD card holder.

Buying an SD card holder is a smart solution to the space problem. You can split your work over different SD cards to create a well organized library. Not only are you placing your work in a safe place, you are creating smart categories too.

A Tripod

A classic, the tripod is vital when dealing with heavy lenses or long exposure times. Night time photography is almost impossible without a tripod. The longer exposures are needed to capture low light levels.

A quality tripod is one of those essential gadgets we should all have. Look for one that suits the needs of your photo interests and for height and transportability. Higher quality tripods tend to be heavier, but this means they are less likely to blow over or vibrate in windy conditions.

xxx

A quality tripod is one of those essential gadgets we should all have.

Think how you will use your tripod. This will determine the price range. If you do your work mainly in a studio, or you are just starting your business, you can buy a simple model. If, on the other hand, you are a skilled photographer, you will want to buy a pricier, more adaptable one to last longer and endure the diverse conditions you may come across.

Lens Filters

You can create “filter effects” with post-production ‘presets’ in editing software. But you can skip a step by using on-camera filters. This will save incredible amounts of time in processing. Filters can help you avoid burned out images from strong sun if you use Polarized filters. The camera lens will react the way your eyes do when you use polarized sunglasses.

Polorising filter - one of the more essential gadgets.

Polarising filters help you deal with strong sunlight – one of the more essential gadgets.

Remember to buy a lens filter that fits your lens size. There are companion gadgets for filters. Step-up/down rings serve to create a perfect fit on lenses with non-standard formats or sizes. The latter are commonly seen on bridge cameras.

Remote shutter release

For long exposure times, or for portrait pictures including the photographer in the scene, remote shutter devices are handy tools. Simply grab your remote shutter release, place your camera on the tripod and let the action flow.

Remote shutter release - one of the essential gadgets.

Remote shutter release – one of the essential gadgets.

You can choose a remote shutter release from wired or wireless devices. I recommend buying a wired model, at times interference can be frustrating. Although, there are some very good models on the market recently. It is worth

Another remote shutter choice is a phone app. Not all camera models are supported. Some Canon and Nikon models are compatible with this feature. The apps are cheap, or free, saving some of your money. In fairness the latest remote shutters are not really expensive. Still, having a phone app will certainly guarantee that you won’t forget your remote shutter release wherever you go!

Weather cases

A common problem, as a photographer, is the sudden appearance of bad weather. It’s not good for using your camera! Don’t risk the investment you made in quality kit. Consider carrying a weather-safe case that fits your camera model, lenses and other accessories. Not only are you going to protect your beloved camera, but you can continue your shoot regardless of the conditions.

Protect your beloved camera from bad weather - use a camera case.

Protect your beloved camera from bad weather – use a camera case.

Weather sealed cameras can benefit from this protection too. Water seals deteriorate over time. Other attached accessories are not all water proof as well. Don’t risk your device without even thinking about it.

Smart phone lenses

If you are a photographer on the go, you probably own a smartphone. Up to date models have a good camera. It can be a limitless source of creativity. However, smartphones are limited compared to modern DSLR cameras. They rarely have full and true manual controls. They lack the proper control of ISO, Aperture and Shutter speed settings.

Smartphone add-on lenses open a new dimension for the photographer on the go.

Smartphone add-on lenses open a new dimension for the photographer on the go.

A cool way to fix this issue is smartphone lenses. They come in a wide range of prices and with various features. Common base models of add-on smartphone lenses can do things that smartphone camera lenses can’t do. For example, fish-eye effect, macro or telephoto and other effects. More complex models, like the latest Sony QX-10, completely reinvents the smartphone lens concept. It boosts the smartphone with a professional quality sensor packed with manual controls. Even if it seems to be pricey, the result won’t disappoint.

Remember, the smartphone is a useful addition to the camera bag in its own right. Check out this post: Using tablets in photography.

Essential gadgets – more than just the camera… Photographer’s backpack

Like the tripod, photographers backpacks are a common classic. They provide storage for the camera, different lenses, as well as leaving room for other important items. Some are also designed to carry laptops, batteries, and much more. Avoid back packs that are not designed for photography. They can cause equipment damage. Specially designed packs let you carry equipment safely and help you pack efficiently.

Buy a good quality photographers bag to protect your equipment.

Buy a good quality photographers bag to protect your equipment.

Consider buying a weatherproof backpack regardless of price. Protecting your working equipment is a top priority. Photographic equipment is highly sensitive to poor climate conditions. Most good quality packs come with slip-over water protection.

Also, be aware of the maximum weight supported by the backpack. Don’t over load it (or you). Avoid misuse, which will shorten the life expectancy of the product. Protect it from wear, chemicals and dust.

Essential gadgets are those that suit your needs

You can find countless options for complimenting your photography and workflow. Most will depend on the kinds of photography you decide to focus on. In the end, it is up to you to find the best equipment that will enhance your day-to-day photography. Everyone has their own special “essential gadgets”… What are yours?

Feed your imagination…

Here are some more essential gadgets for photographers on Amazon.
Check out this Google search on essential gadgets for photographers!

Comments, additions, amendments or ideas on this article? Contact Us
or why not leave a comment at the bottom of the page…

Like this article? Don’t miss the next — sign up for tips by email.

find out more...Photokonnexion tips by email
If you enjoyed this article please sign up for our
daily email service.
                                                 Find out more

Headshot poses – make your portrait right

Headshot poses :: Keep it simple.

• Headshot poses •
Keep the shots simple and try to reduce any distracting elements in the shot.
(Image from the video)

Your portraits need to be suitable for your subject…

When you want to do a portrait your subject will often not know what to do. Headshot poses are usually pretty simple. But the subject will look to you for direction. You will need to help them pick the right pose.

What inexperienced photogs forget is that male and female poses are different. So they tell their subject to pose how they do when feeling good. That may not be right for someone of the opposite sex to you.

Think about the gender of the subject in headshot poses

If you are a female, think carefully about your headshot poses for a male. Maleness tends to be angular, more aggressive in stance. Males are often better seen head on where their size seems a little more imposing. A hard, upright position indicates maleness. So does harder shadow lines on the face and angular light direction.

If you are a male photographer, you may think in male terms. Female headshot poses are better as more rounded poses than male shots. Inclined heads and slightly turned bodies are best – not looking directly at the camera. Find ways to pose your women subjects in a smaller more understated pose. Remember, shadows on a female face are more flattering when they are soft and give a more rounded appearance.

Circumstances may effect the headshot poses too

There are a lot of different reasons to take a headshot portrait. They may have particular poses attached to those circumstances. For example business poses still have a masculine and feminine aspect. However, they would tend to be more understated than a free posing session. The same might be said of guests at a wedding – and so on. So you need to consider why the headshot poses are being taken.

Clothing is important too. Headshot poses tend to include only the upper body. So if the clothing is distracting it can draw the eye away from your subjects face. Don’t try to get your subject to do a heavy make-up or high-quality hair do if you are trying for a natural shot. Let the inner person come out. Headshot poses are best done in as simple way as possible. There is going to be a high proportion of face in the shot. Overdoing other things will detract from that.

Setting the mood for your headshot poses

Here are a few extras for you…

  • Relax. Sometimes you can get very uptight when shooting portraits. This will get your subject uptight too. So before you start shooting, take a deep breath, breath out slowly. Then spend a few moments talking to your subject to put them at ease.
  • Jokes help to relax an uptight subject. If you tell a light-weight joke it will help set a light mood.
  • Subjects often have a very uptight face to start with. Sometimes all the expression goes of their face. It is fun and will lighten things up if you tell them to pull a few faces – do it with them. That will help get a few giggles and they will have more expression after doing it.
  • When doing the poses make sure you complement your subject. Headshot poses are best done with natural facial expressions. Reward those with a complement. “Lovely smile”, “Nice eyes”, “love that expression”, and so on. This builds a rapport with your subject. It helps them feel comfortable as they pose too.
How to Pose someone for Headshots

In this five minute “headshot poses” tutorial you are lead through a range of things to consider…
Tony Northrup

Comments, additions, amendments or ideas on this article? Contact Us
or why not leave a comment at the bottom of the page…

Like this article? Don’t miss the next — sign up for tips by email.

Damon Guy - Netkonnexion

Damon Guy (Netkonnexion)

Damon is a writer-photographer and editor of this site. He has run some major websites, a computing department and a digital image library. He started out as a trained teacher and now runs training for digital photogs.
See also: Editors ‘Bio’.
By Damon Guy see his profile on Google+.

Family day out – three tips to help you remember

Family day out :: Try not to take formal shots on the beach

• Family day out •
The memories are preserved better if you have relaxed shots. Don’t ruin the day obsessing about your photography – make a story. Forget the world class aesthetics and concentrate on the stuff of memories.

Capture the spirit of the day out.

The “Family day out” is one of the important bonding moments for a family. When you get to your destination the family relax and spend time doing what they enjoy. Memories are made of great days out. And, your pictures of the day make for wonderful memory-moments when you look back.

Often photogs out for the day tend to line people up in stiffly-posed formal positions. The informal clothing and location put these poses at odds with the scene. And it is not all about great aesthetics either. The family day out is more about people enjoying themselves than it is about achieving a world class image.

Here are three tips to help you get the most out of your family day out memory-shots.

Family day out – the candid moment

It’ll be fun, especially if you have the children there. So the most important thing is to get them doing what they enjoy. There is a problem though. You’ll never get a memorable family day out image if you spend the day fretting about getting it all just right.

Sometimes as photographers we get rather precious about poses, backgrounds, set up, simplifying scenes… It all has to be right. But does it really? Capturing a family scene is about your memory. Great aesthetics are one thing. Seeing your loved ones in a memory popping moment is another. So, relax your high principles – for the sake of a family memory moment.

Family day out :: candid moment

• A quiet moment at lunch •
Catch your loved ones in a candid moment. Tell a compelling story of your family day out.


There are lots of different aspects to photography. Instead of being an over-bearing photographer consider a different way. Just do something for you. You could make a great family day out miserable by regimenting them just so you can record it.

Alternatively, you could make the whole experience a vital and unique series of captures. Spend your time documenting what your family are doing. Catch them really enjoying themselves. Leave them be, spend your time getting the candid moments when they are most absorbed. That way you will see the deeper aspects of their character as well as making your shots tell a compelling story.

Capturing people doing what they enjoy

Doing what you enjoy on a day out is very character revealing. If you capture your subject in a moment that reveals their inner self then the shot is more memorable for you. It’s still in the spirit of the candid moment. Don’t interrupt them – capture them in action. It helps tell the story of the day. It also will help you remember the context of the shot and what you were doing at the time.

Family day out :: Capture your loved ones doing what they enjoy.

• Making pictures •
Capture your loved ones doing what they enjoy. It helps make the story of your family day out more compelling.

Family day out – vista shots – story continuity

As the family photog you can be happily engaged in your interest while the rest of the family pursue theirs. So don’t forget to have a good look around. There are plenty of things you can be photographing as well as your family. This is your chance to make your photographic skills come out. You can obsess all you like over the detail of things you photograph while you leave the rest of the family to have their fun.

Take in the vista too. Make sure you look at the surrounding area. Capture the things that interest you and others in your family. Think about how to put your “family day out” story in context. So make sure you take some shots of the scene and the surrounding areas or activities taking place. If you take the time to do this through the day you can build a story line with your pictures. It will make a great album for you all to remember your family day out for years to come.

Comments, additions, amendments or ideas on this article? Contact Us
or why not leave a comment at the bottom of the page…

Like this article? Don’t miss the next — sign up for tips by email.

Damon Guy - Netkonnexion

Damon Guy (Netkonnexion)

Damon is a writer-photographer and editor of this site. He has run some major websites, a computing department and a digital image library. He started out as a trained teacher and now runs training for digital photogs.
See also: Editors ‘Bio’.
By Damon Guy see his profile on Google+.

Using polarising filters

The polarising filter helps reduce glare in the photograph| Photokonnexion.com

• Beach Huts •
Using polarising filters reduce glare, reflection and colour fade in your photograph. These filters are easy to use and produce great results.
[Image from the video]

Filter with a hidden impact

Photographic filters are light modifiers. They have a variety of different effects. Polarising filters are just one type of photographic filter. When you look at one it appears dark. It looks as if it would have no effect except to reduce the light in your image.

What does using polarising filters do for your photo? Light from the sun tends to be scattered by the atmosphere. The waves of light are out of alignment. When the light is very bright the glare causes a bright haze of light. This over-brightness can act to overwhelm a photograph. It especially tends to wash the colour out of the sky, whitening it. Using polarising filters helps reduce the glare. It filters out some of the light that is not aligned. Only the polarised light passes through the filter. This aligned light has reduced glare allowing the colours to come out. Skies are darkened. Reflections are reduced.

The results of using polarising filters

The result of darkened skies, reduced reflections and better colours can be dramatic. Here are a whole range of images on Google using polarising filters Images on Google using polarising filters | External link - opens new tab/page.

Worst and best case scenario for using polarising filters | Photokonnexion.com

• Worst and best case scenario for using polarised filters •
Careful positioning and using polarising filters dramatically affects the outcome.

Using polarising filters can have a dramatic effects on your image. The top picture shows the worst case scenario. Light is almost directly into the lens. It is bouncing off glass and polished surfaces into the lens too. The sky is very bright with scattered light from direct, harsh sunlight. There is a hazy glare from brightness. There is also flare and very bright spots from reflections. This photo was taken without using a polarising filter.

In the second (lower) photo the position is different. The direct sunlight is not directly entering the lens. Even so, without using a polarising filter there would be problems. Notice the bright blue sky. This would have been a very washed-out blue on this very sunny day. Notice the windscreen is almost transparent? The polarising filter has reduced the bright reflections and specular highlights. The reflections on the bonnet are also pleasant and not over-white. The car paintwork has a quality colour-depth. The whole quality of the lower photo seems better. All this despite the harsh direct light.

Actually using polarising filters

In the video Mike Browne shows how to use these useful filters. In particular you need to remember three things of particular interest…

  1. Using polarising filters is most effective when the light is coming at the lens from about 45° off the optical axis.
  2. While using polarising filters you will need to rotate the filter to find the most effective polarising position. You need to re-adjust it every shot. Each shot will have a different angle of light to the lens.
  3. Using polarising filters reduces the light able to enter the lens. Your light may be reduced by over two stops with a poor quality version.


Mike Browne

Quality

High quality Polarisers are more expensive. They are time consuming and expensive to make. They also use expensive materials. However, the better ones maintain photographic quality. So it is worth spending the extra money. Poor quality polorisers may increase the digital noise from light scatter in the filter. They may also create aberrations and distort the image.

All photographic filters reduce the light entering the lens. A quality polariser will also reduce the light. But, they will affect the light much less than a poor quality polariser. Using polarising filters of a low quality may reduce the incoming light by as much as three stops. A quality polariser will tend to reduce light by only two stops (or less). So think carefully about what you purchase.

Buy now…

When buying a circular polarising filter make sure you get one that is the right size. The filter size of your lens is normally written on the inside of the front of the lens.

Recommended!

Circular polarising filters  A range of circular polarisers on Amazon | External link - opens new tab/page

When using polarising filters buy the size that fits your lens. Also remember that the quality of the filter can affect the photo. High quality polarisers reduce aberrations. A higher quality filter will not reduce the light as much as a poor quality one.

Review a range of different filters here…
Circular polarising filters  A range of circular polarisers on Amazon | External link - opens new tab/page


Comments, additions, amendments or ideas on this article? Contact Us
or why not leave a comment at the bottom of the page…

Like this article? Don’t miss the next — sign up for tips by email.

Damon Guy - Netkonnexion

Damon Guy (Netkonnexion)

Damon is a writer-photographer and editor of this site. He has run some major websites, a computing department and a digital image library. He started out as a trained teacher and now runs training for digital photogs.
See also: Editors ‘Bio’.
By Damon Guy see his profile on Google+.

Twitter Users – Welcome to Photokonnexion

@photokonnexion :: Twitter is a medium of choice for Photokonnexion.com

Twitter is a medium of communication. It perfectly complements the power of photography.

Twitter :: A series of “now” moments

Photokonnexion is all about learning photography. Our tips, tricks and tutorials cater for all levels of skill. We try to write in easily understandable language and to explain new terms and ideas fully. If you enjoy making photographs this is the place to find out more. If you love your camera this is the place to learn more about that too.

Photokonnexion and Twitter

Because Twitter is all about small amounts of information it is easy to learn in bite sized chunks. The @Photokonnexion Twitter stream aims to be on the fun side. We tweet bite-sized chunks of learning. You will find photographic facts, quotes, philosophy and fun comments. It is all about cryptic and comic, tips and tricks, moments and motivation.

A thousand pages helping you learn

Twitter and Photokonnexion.com :: Learn photography, connect with your cameraPhotokonnexion.com has more pages than your average photography book. All of them are packed with photography facts, resources and links to more. It is a rich resource for learning. It is a fun resource to browse. These pages aim to fill the details in. Photokonnexion.com is a perfect complement to our twitter stream.

Twitter users, let us know what you think

We hope you enjoy the site and encourage you to Contact Us with ideas and questions. Help us to develop this site. The more participation and comment the better.

Not landing here from Twitter?

Well, you will find that following our Twitter stream is easy. Just press the button below…


… and sign in to your Twitter account – or sign up for a new account. It’s quick and free.

For a quick idea of what you might find in our Twitter stream check out some of our motivational quotes.

Comments, additions, amendments or ideas on this article? Contact Us
or why not leave a comment at the bottom of the page…

Like this article? Don’t miss the next — sign up for tips by email.

Damon Guy - Netkonnexion

Damon Guy (Netkonnexion)

Damon is a writer-photographer and editor of this site. He has run some major websites, a computing department and a digital image library. He started out as a trained teacher and now runs training for digital photogs.
See also: Editors ‘Bio’.
By Damon Guy see his profile on Google+.