Tag Archives: Shadow

A post to make you think… photographic creativity

Your Body My Canvas

• Your Body My Canvas •
Simply turn things upside down to get a new perspective.
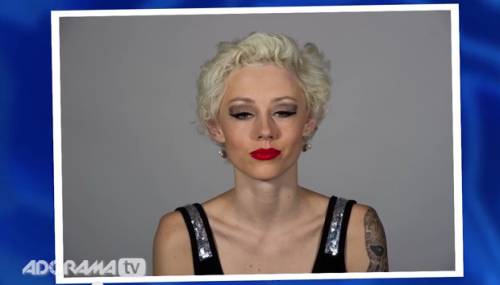
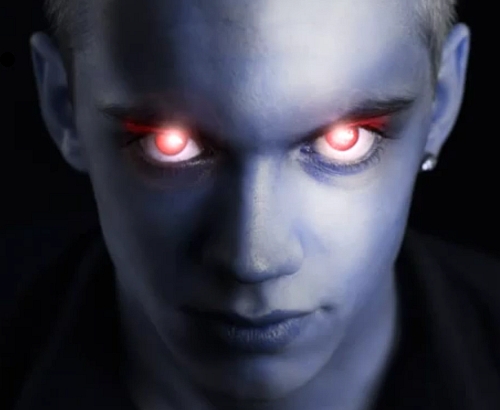
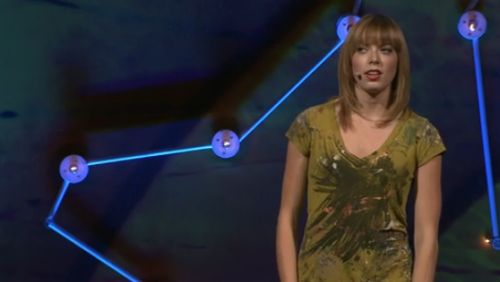
(Image from the video).

Take a new perspective.

The greatest inventions are often originated by people who play with ideas. They are not afraid to experiment, to try a different way. Creativity is more than just the sum of your experience. It is also the capacity to make mistakes, to explore ideas beyond the norm and to simply have a go.

And so she tried painting…

This video captures so much about what makes photography exciting – the unique experience and personal extension that goes into making every picture. I gained a lot from this short video. Here are seven reasons I think you will gain from watching too…

  • Photographers try very hard to make a two dimensional image look 3D. Alexa Meade is trying hard to make a 3D image two-dimensional. A bizarre concept, but enlightening. It teaches us so much about the nature of ‘form’ – the 3D manifestation of objects.
  • She shows that the nature of shadow is both transient and yet fundamental to the creation of both 2D and 3D images. This is something that photographers really need to understand and be able to observe.
  • Alexa Meade gave up her aspirations and suddenly became a painter/photographer with no previous training. She took a chance, tried something different, and got caught up in the idea. This launched a unique career and artistic experiment that provides us with some excellent photographic insights. This video shows that experimentation is the manifestation of creativity. This is a principle that learner photographers will gain a lot from exploring.
  • In her work she is marrying painting and photography. Some of the worlds most creative people are successful because they take things that are completely disassociated and create a new synthesis. You can do this too. Take your previous knowledge, your wider experiences and try to put them together in novel or unique ways. You are certain to hit some new perspectives for your own photography.
  • Photography is about art meeting technology. What’s created is an interpretation which is a unique communication by the photographer. This project is an outstanding example of that idea.
  • Alexa Meade follows a wonderful creative process in her work. She works through her visualisation. Her concept defined, she then applies the technology… visualisation, concept, action. This is a great model for producing creative images.
  • The artist in Alexa Meade has found a unique way to express herself buy turning well formed concepts upside-down. Not only is that brave, but it’s likely to lead to more wonderful insights. Creative work is often about dumping convention and trying another way. Think how you could use this idea in your photography.
Alexa Meade: Your body is my canvas


Uploaded by Ted.com  External link - opens new tab/page

Comments, additions, amendments or ideas on this article? Contact Us
or why not leave a comment at the bottom of the page…

Like this article? Don’t miss the next — sign up for tips by email.

By Damon Guy (author and Photokonnexion editor)

Damon Guy - Netkonnexion

Damon Guy (Netkonnexion)

Damon is a writer-photog and editor of this site. He has run some major websites, a computing department and a digital image library. He started out as a trained teacher and now runs training for digital photographers.
See also: Editors ‘Bio’.

The power of light and shadow

Facial shadows

• Facial shadows •
Image taken from the video.

Great portraits rely on shadows

Shadows define a portrait. So it is no surprise that good lighting to get the shadows right is a wonderful idea. But what most people don’t realise is that, almost every time, more lights make things more complicated. One light is almost all you will ever need to get a face right. The rest can be done with a reflector.

Shadow work

In the video Mark Wallace shows us how the face can be properly illuminated, how to do it and more important how to make it look beautiful. He looks at ugly shadows and hard light and explains how to remove them and subdue them using soft light. In all, this is one of the best best portrait lighting tutorials I have seen on video. Enjoy it. There is some really useful stuff presented in a simple and understandable way.

Adorama TV  External link - opens new tab/page

Comments, additions, amendments or ideas on this article? Contact Us
or why not leave a comment at the bottom of the page…

Like this article? Don’t miss the next — sign up for tips by email.

By Damon Guy (author and Photokonnexion editor)

Damon Guy - Netkonnexion

Damon Guy (Netkonnexion)

Damon is a writer-photog and editor of this site. He has run some major websites, a computing department and a digital image library. He started out as a trained teacher and now runs training for digital photographers.
See also: Editors ‘Bio’.

Know how to use a gobo? You have probably used them…

A gobo can be used to fit on off-camera flash units

• A gobo can be used to fit on off-camera flash units •

A simple idea – but so useful!

A gobo is used to block or shape light – normally using black screens of some sort. They’re commonly used in the movie industry, and more recently photography. Find out all about them here…

Of light and shadow

It sounds like a grand and mysterious name. In fact the term gobo is a rather straight forward. Here is what the Oxford English Dictionary (OED) Gobo - Oxford English Dictionary | External link - opens new tab/page says…

gobo, (noun); gobos (plural)
Etymology: Unknown. Originally from the U.S.
1930 – Gobo, portable wall covered with sound-absorbing material.
1936 – A ‘gobo’ is a small black screen used to deflect light.
1970 – A gobo is anything that goes between, e.g., the light and the set.
OED (online) Seen 08/08/2013  External link - opens new tab/page

So, this wonderful little word seems to have been a compound word from “go between”. Hmmm! I would like to see some proof of that. The side entry in the OED says in red “This entry has not yet been fully updated (first published 1972)”. Seems a long time without full qualification.

What is the Gobo really about? Manipulation of light and shadow. Our more technical definition in the Photographic Glossary (gobo) goes into more depth about how it is used in five broad ways in modern photography…

  • To block light or create shapes or patterns of light and shadow together.
  • A mask with a shape cut out of it fixed to the light and used to project a light shape (eg. a logo).
  • Cards/screens to create shaped shadow or deeper shadow in a scene.
  • A jury rigged light modifier on a light to shape or direct the light.
  • A mask placed in the light beam which shapes the light/shadow in the scene.
  • A light modifier allowing some light through and casts a specific shadow or diffusion shape

It is interesting that both the Hollywood studios and the OED use the term to manipulate and absorb sound. Of course in photography sound is less important. You can see however, that gobos are used to shape light and shadow in various ways.

How do gobos affect you?

If you have ever held your hand, a hat or a piece of card up to shade your lens to prevent flare or lens reflection you have used a ‘flag‘. Originally a gobo was the term used for protective devices to keep a lens out of incidental light. Now days the more specialist term, flag, is used for shield or blocking of light especially when it relates to the protection against lens flare. Understandable the two terms are easily mixed up. A flag seems to be used mainly for blocking light out. A gobo more for manipulating light, especially where that involves creating shadows.

Today I was photographing a white van in very bright overhead light. I keep a black blanket in my equipment for this type of situation. My assistant held up the blanket behind me to create a broad shadow across the corner of the van I was photographing to cut out the strong sun light. This is one form of gobo. It was not cutting out the light completely. I was reducing the very bright sunshine to an area of pure white so I could more easily pick out the details.

In a studio you might use a a black screen to intensify the darks in one area of a scene. It is a mood enhancer in this situation.

On another day I was working on business portraits. The office was a bright, but grey colour. We used plants on a trellis with a light behind it to create a shadow-pattern of leaves and diamond shapes onto the wall giving added interest to the background, breaking up the grey. This is a gobo too – being used to enhance the light/shadow ambiance.

More after this…

A solid light of the same colour and intensity across a still life is boring. Use cards or diffusion surfaces to vary the light and create slight shadows or graduate the light. One side of the still life use a black card to darken and block light. On the other side use white card to intensify and diffuse it.

A gobo is often used to shield the camera from light too, but it is not a flag. In A quick shoot using water? Tips to get you started… from yesterdays post a gobo could have been placed in front of a flash unit on the table. This would prevent the light getting directly back to the camera lens, but still project the light onto the back wall. A two in one gobo.

There is one further really fun use of gobos that is growing in photography. The recent growth of interest in light painting has renewed the interest in projecting shapes onto surfaces to be photographed. A black card with a logo or shape cut out of it can be placed directly in front of a light source. The light shining through the shape projects it onto a far surface. Then, in the dark, light painters can photograph the projection. Light painting is the intrepid art of photographing deliberately manipulated bright lights in the dark. It’s great fun!

What have we learned

A gobo is a term that describes the manipulation of the light shadow relationship. We use a range of blocking and masking techniques to manipulate the light and the gobos are the instruments of that manipulation. A flag on the other hand is a pure blocker of light.

Have fun thinking this one over. It is a useful concept and one that has infinite uses for mood, variation of shadow and creating settings.

Comments, additions, amendments or ideas on this article? Contact Us
or why not leave a comment at the bottom of the page…

Like this article? Don’t miss the next — sign up for tips by email.

Do you understand the play of light on faces?

Video

Video

Understanding light involves seeing it on your subject…

That understanding comes from seeing light in different environments. Next time you are outside look at the light and shadow on the faces of people around you. Look for light/shadow relationships and look out for light playing on the face – how it moves around as the face moves in the light.

The play of light on faces is interesting, but often ugly

When you study faces and light together you will see that there are some pretty ugly shapes and shadows created by light on the face. We are programmed to follow edges, lines and contrasts with our eyes. Oddly, we see these on faces all the time but tend to ignore them.

Normally we ignore the ugliness of bad light because we have no control over light on other peoples faces. And, our familiarity with the face turns off our attention to light. It allows us to forget that faces can be pretty ugly in bad light or a bad position relative to the light.

Somehow, when we translate a scene to a 2 dimensional picture, these shapes, contrasts and lines created by light on the face become more obvious than in real life. They seem to take on an ugliness that we normally do not see.

‘Picture-awareness’, what we see on pictures but not in real life, happens in a lot of things. With faces it is pretty important. For photographers doing portraits it can make or break a picture. Becoming familiar with the concept is important if you want your portraits to succeed.

How to use natural light and fill flash Portrait tutorial

In the video Tony Northrup shows how light and shadow can be changed to your advantage easily and simply.

Tony Northrup  External link - opens new tab/page

Comments, additions, amendments or ideas on this article? Contact Us

find out more...Photokonnexion tips by email
If you enjoyed this article please sign up for our
Tips by email service.
                                                 Find out more

A simple lighting technique with lovely light

The mobile phone light... soft and effective.

The mobile phone light… soft and effective.

Table-top photography works with soft light.

When you are doing still life shots you want soft, gentle light. Exposures can be longer so you can create lovely gentle shadow graduations. Your mobile phone provides an excellent light source for this. Here is how it is done.

White source image

The basic technique is to put a bright white image onto your mobile screen. When you display it on the mobile screen the illumination produces a white light. This is a wonderful, quite localised soft light for your shot. The steps in detail are…

  • Open your favourite image editor
  • Create a new image (approx size 800 pixels by 600 pixels)
  • Paint it brilliant (pure) white
  • If you are on your computer save the image then upload it to your phone
  • If you are on your mobile phone save the image to a known folder
  • When you want to use the light, display the image on screen

The white image on screen produces enough illumination to create the light you want for your table top image.

Other ways to use your mobile as a light source

Of course many mobiles are also capable cameras in their own right. So here are two other ways to use them:

Photographic light: Lots of mobiles have a “flashlight” app. This will allow you to use the camera flash as a photographic light onto your still life scene. Many on-camera (pop-up flash) flash units are very strong and have a harsh light. The flash on a mobile is often much softer and sometimes is coloured to be a similar colour to daylight (approx 5500 Kelvin). This ‘daylight balance’ is a great light and worth using if you have it. Prop your phone up with the flashlight app activated and start shooting.

Coloured light source: Traditionally coloured light is produced using colour gels. However, some apps on mobile phones can create both a white light or a range of other coloured lights. One such app for example is: Tiny flashlight + LED. This is an app. for Android phones, but there are other apps. for different operating systems. If you cannot find a suitable app. you can produce a colour image like the white one above. Store that on your phone and open the image when you want that colour light.

Versatile

While the light from the screen of your phone might not be very strong, for a long exposure that is not too important. The light is wonderful and soft. As it comes from a wide source it creates lovely wrap-around shadows. These are just great for still life. Other features of phones can help with the lighting for your photography too. So, have a look at your mobile in a new light – see what you think.

By Damon Guy (author and Photokonnexion editor)

Damon Guy - Netkonnexion

Damon Guy (Netkonnexion)

Damon is a writer-photog and editor of this site. He has run some major websites, a computing department and a digital image library. He started out as a trained teacher and now runs training for digital photographers.
See also: Editors ‘Bio’.

The secret to a wonderful black background with moody lighting

Mastering the black background

• Mastering the black background •
With very little practice you can get a perfect black background and moody lighting.

The eye is captured by solid black.

It provides a really focussed experience for the viewer. Low key and solid black backgrounds provide a wonderful insight on detail and features. If you get this right it provides an excellent insight for portraits and helps many other aspects of your photography. This is a technique I use for product photos, still life, landscapes and flower photography.

Simplicity itself

The technique involves using a bright light (off camera flash) to overpower the ambient light. The steps are simple…

  • Set your camera to its lowest ISO setting (around ISO 100) – the sensor is least sensitive to light.
  • Set your aperture to a high f number (small aperture = low light), say f11, or higher so that the amount of light your camera lets in is very small.
  • Take a test shot to ensure your screen is black – you want nothing to show.
  • Shoot with a diffused off-camera flash at full power using a narrow beam.

This simple technique is relying on extreme underexposure. Basically you are underexposing the whole scene to blackness. But then you are introducing a very narrow beam of brightness that overcomes a limited area of the underexposed shot. This leaves your highlighted spot on the subject in a moody light with the rest in black.

Photography Technique: The Invisible Black Background

Glyn Dewis  External link - opens new tab/page introduces the technique on video. Notice the way the umbrella is creating a focussed narrow beam of light. You can do the same thing with “barn door” lights or cards either side of a reflected flash. Enjoy the video…

By Damon Guy (author and Photokonnexion editor)

Damon Guy - Netkonnexion

Damon Guy (Netkonnexion)

Damon is a writer-photog and editor of this site. He has run some major websites, a computing department and a digital image library. He started out as a trained teacher and now runs training for digital photographers.
See also: Editors ‘Bio’.

The simple secrets of dodge and burn – post processing

• Dodge And Burn •

• Dodge And Burn
Important techniques for affecting the light and dark in an image. (Video below).
lynda.com on YouTube  External link - opens new tab/page

Dodge and burn – powerful light/shadow effects

Two of the oldest techniques in the photographic skill set are dodging and burning. In the old days of chemical baths and film developing they were the most effective way of changing the image out of camera. Simple stuff really. During the development of your film you allowed parts of the developing film to become overexposed. Other parts of the film you allowed to become underexposed. The effect on the final print was to increase the brightness in some areas of the film and darken others.

In modern post-processing we still use these techniques. Most post processing software packages have ways to create dodges (whitening or brighten) or burns (darkening or blacking). The aim of this? Well its simple really. If you have a picture and you want to do any of these things you need these techniques…

  • Increase/decrease the intensity of shadowy parts of the image
  • Increase/decrease the intensity of brighter parts of the image
  • Brighten the bright spots and darken the dark spots to increase contrast
  • Darken down intensely bright spots in the image to prevent distractions
  • Brighten the darker areas in the image to bring out detail
  • Pick out highlights

More after this…

find out more...Photokonnexion tips by email
Enjoying this article? Please sign up for our
daily email service.
                                                Find out more
#11030#

Dodge and burn

Although this tutorial is based in PhotoShop, most of the techniques shown in this video can be used in most editing software. If your software does not have the same tools as those found in PhotoShop check your help files for more information.

You may have to do some trial and error experiments to get these techniques working – after all, the practice will give you control of your software. Trying out these skills will give you the basic command of light and dark in the post processing context. Dodging and burning are really important techniques. Watch the video for how the techniques are used.

Photoshop dodge and burn

lynda.com on YouTube  External link - opens new tab/page

By Damon Guy (author and Photokonnexion editor)

Damon Guy - Netkonnexion

Damon Guy (Netkonnexion)

Damon is a writer-photog and editor of this site. He has run some major websites, a computing department and a digital image library. He started out as a trained teacher and now runs training for digital photographers.
See also: Editors ‘Bio’.

Can you write? Of course you can!
Write for Photokonnexion...

We would love to have your articles or tips posted on our site.
Find out more…
Write for Photokonnexion.