Tag Archives: Approach

Review your own photographs

Low flying aircraft

• Low flying aircraft •
Click image to view large
• Low flying aircraft • By Netkonnexion on Flickr External link - opens new tab/page
Every picture has its merits. However is there enough in the picture to interest and invigorate the attention of your viewers? Sometimes, like this picture, if you don’t have a point worth making then you should not really bother with it.

A picture is a wonderful communication.

But like speech if there’s no point there is no impact. To help you see if you have made a great picture here are some guiding points.

We are going to consider…
• What you are communicating:
• Presentation:
• Camera technique:
• Technical Quality:
• Visual Awareness, Visualisation, Seeing and aesthetics:

Looking critically at your own picture

When you make a picture your previsualisation of what you want to achieve is critical to the outcome. If you don’t know what you are trying to make how can you make it convincing? So try to have a mental image of what your picture it going to look like when you make it. If you can see the image before you make it you should have a good point in mind – a reason for making it. All too often snappers see something and just ‘snap’. That being the case, few of the images will have real meaning or impact.

When looking at your own picture you must see if there is really something there. Are you really saying anything? Are you really communicating with the viewer of your picture? Or, is what you have just made only a simple picture? To have real impact is to create in the viewers mind an image. An image that means something to them. So look at your picture and honestly ask yourself what is the viewer going to get from it? What will it mean to them? If you find that you have really said something in the picture then the first criteria for success has been passed.

To this end you should consider how successfully each of these things has contributed to the success of the image…

  • Personal input: have you understood and connected with the subject
  • Appropriate communication the message, mood, ideas, and information you want to pass to your viewer
  • Complementary use of the photographic media (mounting, projection, printing, texture of print etc.)
  • Appropriate imagination and creativity / suitable timing for the shot
What about the other things?

• Presentation: It is important to have a good presentation for your picture. Have you edited out distractions and sensor/lens spots, removed the errant sweet rapper littering the foreground etc. In other words, have you done the little tidying up tasks that make the image stand up as clean representation of your original vision for it? If it is a print, is it well mounted in a non-distracting way. Is the printing immaculate or are there streaks and spots; over-run and smear.

• Camera technique: Is the sharpness the way you want it – deliberate softness is fine as long as that is making an artistic point in a way you intended. Is the depth of field right for the composition? Have you emphasised the point or simply missed the point. Is the digital noise too high, or the contrast too low. What you are looking for here is to see if your prowess with the camera has come through. Did your technique work or were there any errors or mistakes that detract from the delivery of your point? Some of the other things to consider are…

  • Viewpoint to the subject – exciting, interesting, different, right?
  • Choice of lighting – does it complement or complete the subject or is it at odds with your point?
  • Accurate focusing – accurate choice of focus for the subject.
  • Appropriate quality and choice of exposure.
  • Suitable use of depth of field (aperture).
  • Appropriate shutter speed for the subject (and shot timing).
  • Highlights and shadows (ensuring detail is retained)
  • Appropriate quality and choice of exposure – does the balance of light and dark complement or detract from the subject?
  • Is the quality of the light effective or bland; does is make a statement or is it of little consequence?

• Technical Quality:
In this category you should consider exposure, colour and tonal control…

  • Absence of processing faults (dust, spots, hairs, processing artefacts, image damage by sharpening etc.)
  • Appropriate adjustments of colour temperature; hue, saturation, colour balance etc.
  • Appropriate tonal use and control of the range of tones.
  • Good image finishing: removal of distractions, removal of abrupt or discordant features.
  • Appropriate use of levels, curves, colour management, filters, overlays etc (post processing)

In this category you are looking to make sure that the image is digitally developed properly. Is the exposure even or has it been obviously enhanced and changed. Is the light effective to make the point or has the exposure not been fine tuned. It is easy to take a picture, but all these thing go into making an image. Think about what you are trying to achieve and does this picture achieve it with its colour and technical delivery/

• Visual Awareness, Visualisation, Seeing and aesthetics:
Do you think that your shot, the one you have in front of you sees anything different? Are you reporting what you saw or expressing a point, message, communication, feeling… does this picture have IMPACT?

  • Is the composition, design and cropping of the image an effective aesthetic construction?
  • Appropriate simplification (minimising complexity and clutter)
  • Distractions / intrusions should not divert the viewers eye
  • Good use of light, mood, texture and colour
  • Good use of masking/manipulation where appropriate
What you are doing…

Each time you want others to look at your picture you want to impress them, to lift them, to… well, get out your message or point for the picture. The type of questions I have asked above are aimed at getting you looking at your images with a critical eye. If you are honest, you will find that none of your pictures will be satisfactory in all of the above. But if you find you are gradually improving your standard of delivery you will see that the above get closer to ideal with every new picture. Critically reviewing each picture before you publish print or show it to other people helps make sure you are producing something worth showing.

You won’t be right every time. But you will see as you develop, your comments will begin matching those of other people. You will than have a benchmark that tells you if your work is measuring up to peoples view of it. Or, more importantly to see if your picture is measuring up to your original vision of how you wanted the shot.

Comments, additions, amendments or ideas on this article? Contact Us
or why not leave a comment at the bottom of the page…

Like this article? Don’t miss the next — sign up for tips by email.

By Damon Guy (author and Photokonnexion editor)

Damon Guy - Netkonnexion

Damon Guy (Netkonnexion)

Damon is a writer-photog and editor of this site. He has run some major websites, a computing department and a digital image library. He started out as a trained teacher and now runs training for digital photographers.
See also: Editors ‘Bio’.

Buying a tripod – the essentials

Buying Tripods

• Buying Tripods •
Buying a tripod? There are a lot to choose from. So what should you look for?
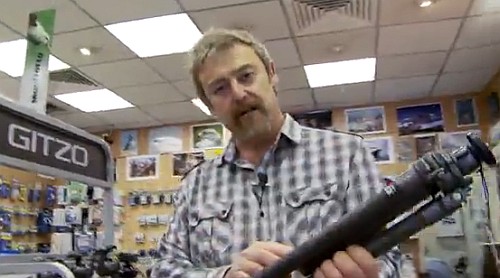
Image from the video.

Why would you buy a tripod?

Because a tripod is of the central pillar of your sharpness strategy. Without a tripod you are denying yourself the opportunity to use a large proportion of the settings on you camera. Let’s look more closely at what this means…

Settings

Your camera has three primary controls…

  1. ISO – Controls how sensitive your camera image sensor is to light.
  2. Shutter speed – Controls how long your sensor is exposed to light.
  3. Aperture – controls how much light is allowed to reach the sensor.

These are inter-related. As we want a high quality result (with low digital noise) we set the ISO to around 100. Therefore, for our purposes here we are particularly interested in two of those settings.

  1. Shutter speed – movement blur created with long exposure; movement frozen at short shutter speeds.
  2. Aperture – Wide aperture, shallow depth of field; small aperture gives a deep depth of field.

Looking at these you need to consider how you do photography where only low levels of light enter your camera. Here are some examples:

  • Landscape – Use aperture f11 or higher. Small aperture gives Depth of Field, but lowers the light influx. Therefore you need to have a longer shutter speed especially during the Golden Hour. Hand-holding is not an option.
  • Portraiture – In bright sunlight a shallow depth of field (wide open aperture – blurred background) would overexpose the shot the shot.Use a Neutral Density Filter. This reduces light influx but means a ling exposure. A tripod stops handshake.
  • Still life: You are doing a still life requiring low light for the mood shadows. To get the exposure you need a longish exposure. You do some test shots. Your best exposure is with a shutter speed of one second. Tripod needed!
  • Fireworks: You need to hold the camera steady for about 1/20th of a second to get the full spread of the explosion. Tripod – essential.
  • A disco dance floor – If you want to capture movement you will need to work at around 1/60ths of a second. But you also need sharpness right through. You will need an aperture of f8 or f10. A Tripod is essential if you want the movement blurred and the rest of the room sharp.
  • Photographing a baby. Flash changes the mood and invites crying. It’s also harsh light. Baby skin loves natural light. Use a fast shutter and tripod. Make the composition right then watch the baby. Pick your moments and take several shots. A tripod helps you can concentrate on the right moment while baby is still and happy. You don’t have to recompose for every button push.
  • Family photo – Set the timer, join the group! A tripod is essential.

I could go on… there are dozens of everyday scenarios requiring a tripod. These are just the obvious ones. For sharp, quality shots I need to use a tripod around 75% of the time. My tripod is essential to my business.

If you are an amateur you probably cover more varied situations than me. You need a tripod for a high quality result. It is not uncommon for me to hear students say, “I never use a tripod, I don’t need one”. Then in almost the same breath, “Why are my pictures always blurred or dull?” The answer to the question is – to get a proper exposure you need a tripod.

Lots of people say, “A tripod just slows me up!” My response is simple. Most amateurs take ten shots to get one – and are not necessarily successful. A tripod actually saves you time. You can rely on one shot being sharp. In post production you review one shot for each composition, not dozens.

What to look for…

In general the main considerations are:

  • Well designed: smooth operation, strong leg clips so you can set the tripod at various leg heights.
  • Centre column: Solid, little movement, clamps solid.
  • Legs – variable wideness: You can spread the legs out wider and at different angles to each other.
  • Tripod provides a platform for different heads: Do not buy a tripod with one type of head pre-fitted. It may not be suitable for your camera and there are different heads for different types of photography.
  • Weight or lightness: Solid and heavy tripods mean a good platform. Lighter carbon fibre tripods are more expensive, but the carbon fibre has the ability to reduce vibration (especially when stressed by a weight bag hanging on it to steady it).

For general work I use this tripod…

Of course you need a good head on a good tripod. This head is my mainstay for most work…

A good tripod will last you years. It will be stable and steady even in wind. It will not wear out easily. A worthwhile investment. Don’t be tempted to go cheap. Look for quality brands with after sales parts and good design. Spend more and you will have a flexible friend that helps you in all aspects of your photography.

Have a look at these ranges of tripods. I use a Manfrotto for most situations, but there are other quality ranges. My Benro tripod is very rugged and nothing beats it on a beach or mountainside. Check out these links for a range of ideas…

Manfrotto tripods  External link - opens new tab/page

Gitzo Tripods  External link - opens new tab/page

Giottos Tripods  External link - opens new tab/page

Benro Tripods  External link - opens new tab/page

Which Tripod Should I Buy?

Mike Browne introduces this video with the basics of how to think about what you want in a tripod. What he says is good thinking. At the end two other photographers add their advice. I was impressed with the comments of both. There is a lot of great advice in this video.

Mike Browne  External link - opens new tab/page

Comments, additions, amendments or ideas on this article? Contact Us
or why not leave a comment at the bottom of the page…

Like this article? Don’t miss the next — sign up for tips by email.

By Damon Guy (author and Photokonnexion editor)

Damon Guy - Netkonnexion

Damon Guy (Netkonnexion)

Damon is a writer-photog and editor of this site. He has run some major websites, a computing department and a digital image library. He started out as a trained teacher and now runs training for digital photographers.
See also: Editors ‘Bio’.

Fifty tips to set photography starters on their feet

There are some great things to learn.

When you are starting out and need to learn some things fast, it helps to have some guidance. Here are a few things photographers need to know to get started. And some things I wish I had known when starting photography…

Roller coasters ‘R’ us – Photo-learning list…
  1. If you want to learn fast take lots of pictures.
  2. If your pictures aren’t good enough, you’re not close enough.
  3. Spend more time reviewing your pictures than it took to make them.
  4. There are billions of types of light. Learn to see 10 types to start.
  5. Get obsessed with the quality of light and its properties.
  6. Work on image composition at least as hard as your technical skills.
  7. Use natural light as much as possible. Learn its variations.
  8. Don’t use on-board flash. It will ruin your shots.
  9. Make people a central study of your photography.
  10. Count 1000, 2000 slowly then take your camera from your face.
  11. Think carefully about how to do it well. Then follow a process.
  12. Clean your kit before you go out and when you’re back. Cameras hate dust.
  13. “Learners don’t need a tripod”. My biggest learning mistake.
  14. Sharpness is a habit – work hard to get it right from the start.
  15. Think “Why am I taking this picture?” for every shot you take.
  16. Add another lens to your “kit lens” as soon as you can.
  17. Great lenses are more use than an expensive camera. Spend more on them.
  18. Don’t cheap out on a tripod. Cheap ones will not do the job.
  19. Use your tripod.
  20. Own more than one memory card AND more than one battery.
  21. Learn the meaning of RAW and then shoot with it.
  22. “Your first 10,000 photographs are your worst.” ― H. Cartier-Bresson
  23. A keen digital photog can clear 10,000 shots in 14 days – shoot more.
  24. Make some photography gear. You’ll understand your needs.
  25. Gear lust replaces your photographic vision with a hole in your pocket.

More after this…

find out more...Photokonnexion tips by email
Enjoying this article? Please sign up for our
Tips by email service.
                                                Find out more


  1. Carry your camera with you everywhere.
  2. Look at 50 pictures by other people every day.
  3. Take a clichéd shot – satisfy your curiosity. Store it in a secret place!
  4. The “Rule of thirds” works nearly all the time. Learn it early.
  5. Simplicity is the ultimate sophistication.” Leonardo da Vinci
  6. Read your camera manual. Try something. Read that bit again. Repeat.
  7. Have a go at every setting on your camera lots of times.
  8. A proper stance will provide a steady hand-held camera position.
  9. Amateurs often do better pictures than professionals.
  10. And, Professionals do more good pictures, more often.
  11. If your photos look tired and drab – go manual – learn control.
  12. For every shot you do, look at 50 similar ones. How does yours look?
  13. Don’t panic. Usually there is no problem.
  14. No photo, however good, replicates reality. Cameras distort – get over it.
  15. If you see it one way, most people will see it a different way.
  16. Check all gear before you go. Have a list of what you need.
  17. Know why you are going to a location and plan shots in advance.
  18. Back up your files. If your hard drive crashes you will lose the lot.
  19. Wear the right clothes. You cannot do good photography if you are cold.
  20. Help someone else to learn. You will learn too, and make a friend.
  21. Learn the meaning of “exposure” – practice using manual settings.
  22. Learn “Depth of Field” and practice it with each of your lenses.
  23. Post processing is an art and part of photography. Learn it.
  24. Join a club or class – you learn fast with other photogs.
  25. Use Google Images to research every shot you take.
And one for luck!

Photography is fun. Make sure you go with that!

Comments, additions, amendments or ideas on this article? Contact Us
or why not leave a comment at the bottom of the page…

Like this article? Don’t miss the next — sign up for tips by email.

By Damon Guy (author and Photokonnexion editor)

Damon Guy - Netkonnexion

Damon Guy (Netkonnexion)

Damon is a writer-photog and editor of this site. He has run some major websites, a computing department and a digital image library. He started out as a trained teacher and now runs training for digital photographers.
See also: Editors ‘Bio’.

How to do DIY diffusion – great light from simple tips

 • DIY Ways to diffuse light •

• DIY Ways to diffuse light •
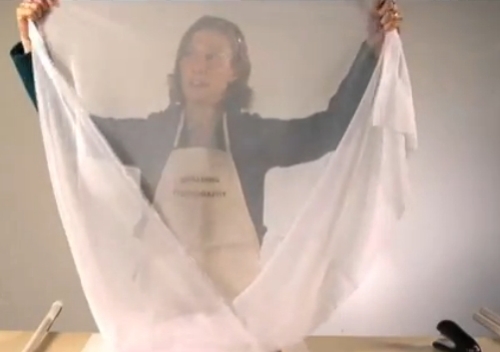
Image taken from the video.

Inexpensive photography equipment!

Following on from the Save money and improve your scene lighting yesterday, we have another video showing how you can provide yourself with an inexpensive light diffuser. It will be quite as good as any professional diffuser and in fact you make it have variable diffusion effects.

Professional and amateur alike use quickly and easily made DIY solutions for their photography. They know they can make things to the specification they require without the equipment costing the earth. In most photographers studios you will find materials and adaptations to be able to do all sorts of ‘quick makes’ with materials, frames and stands. It just makes sense to save money and do it how you need it, rather than spend a mint on something you only use once.

DIY Ways to Diffuse Light


Playgallery  External link - opens new tab/page

Comments, additions, amendments or ideas on this article? Contact Us
or why not leave a comment at the bottom of the page…

By Damon Guy (author and Photokonnexion editor)

Damon Guy - Netkonnexion

Damon Guy (Netkonnexion)

Damon is a writer-photog and editor of this site. He has run some major websites, a computing department and a digital image library. He started out as a trained teacher and now runs training for digital photographers.
See also: Editors ‘Bio’.

Can you write? Of course you can!
Write for Photokonnexion...

We would love to have your articles or tips posted on our site.
Find out more…
Write for Photokonnexion.

Save money and improve your scene lighting!

DIY Reflectors, Bouncer, and Absorbers

• DIY Reflectors, Bouncer, and Absorbers •

Professional equipment costs so much!

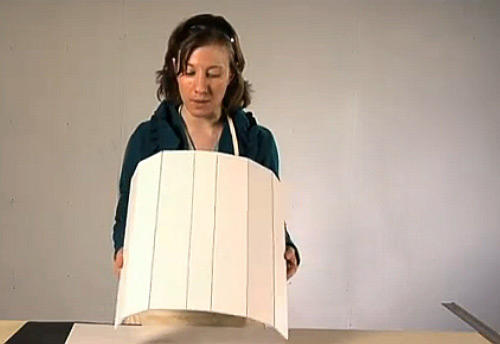
But easily made DIY lighting equipment can do the same as professional light diffusers and absorbers. There is so much you can do to create your own effects. It is pretty easy too. With some simple tools and materials you can have the same outcomes as from a professional studio. The video shows you not only how to make the simple reflectors, bouncers and absorbers, but also shows how they can be used. If you want to get really good with them you will need to practice your photography with them – that is the fun part!

Light reflectors, bouncers and absorbers

The use of flash or studio lights is a great way to light your subjects. However, flash is very harsh and studio lights are often expensive. You can make the reflectors, bouncers and absorbers very cheaply and they can also help adjust the light colour. Bright white board and silver reflectors help to modify the light colour from domestic lights. You may still need to adjust the light balance on your camera, but the reflections will give much more controllable light against the skin tones and clothes of your subject.

Why do we use reflectors and bouncers? These are part of a general class of photography equipment called light modifiers. Anything which changes the light from a light source is a light modifier.

With most lighting situations we have only one main light called the key light. Other lights should not be as strong as the key light. They should also have strength in proportion to the key light. We get that proportion by using reflectors and bouncers to distribute the light around our subject. This ‘fill’ light helps the light on the subject be less harsh. Bounced or reflected light creates soft shadows that wrap around curves and lessen the intensity of darkness in the shadows.

On the other hand absorbers actually cut down the reflections and help the darkness get more intense. This too has its uses. We can make shadows darken and help cut down the effect of light bounced off other things near the subject. The use of absorbers helps define shadows and create darker areas of the scene.

And now to the video…

DIY Ways to Reflect, Bounce, and Absorb Light


Playgallery

Comments, additions, amendments or ideas on this article? Contact Us
or why not leave a comment at the bottom of the page…

Is your composition in photography up to scratch?

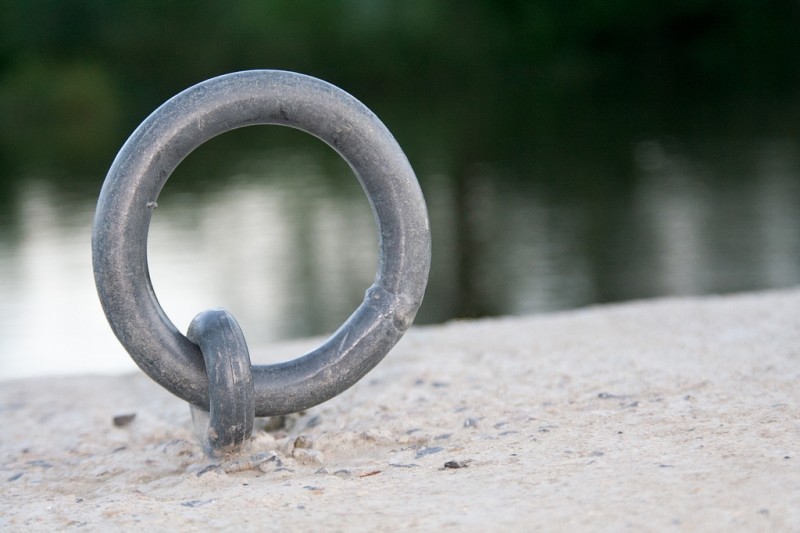
Composition in photography :: Image: River Bokeh

• River Bokeh •
There is more to composition in photography than simply placing the subject on a third. The concept of “composing” pulls in many aspects of Photographic work.

Composition in photography – science or art.

Many photographers struggle with composing a picture. Composition in photography seems seems difficult to define. Starting with a few simple ‘rules’ helps. If you want to develop your work you must go beyond the rules and understand some of the other principles in photographic art.

A lifelong adventure

The Definition: Composition (photographic aesthetics) in our Photographic Glossary is up to date and helps to explain the idea of the Elements of photographic art. It would help to read that definition before the rest of this article.

Construction or deconstruction

I have thought about the traditional elements and principles of art for a long time. I find myself dissatisfied with the traditional view with respect to photography.

Composition from a photographers viewpoint is, I think, a different situation to say a painters viewpoint. We could be side-by-side with a painter and both create an image of the scene which is broadly alike. Alternatively we could produce something totally different. They could be worlds apart.

I think there is something different in the approach to a scene for a photographer compared to an artist. A painter constructs a picture from scratch. They can create something that is like the scene they see. They my paint something that differs from that scene so completely it is unrecognisable. Whichever it is, they are able to construct the scene, element by element.

In this “construction” mode an artist has used their knowledge of the “elements of composition” and done an analysis of the scene. Then, using their imagination they put the elements together using the principles of art to create a rounded composition which is aesthetically pleasing, well proportioned, organised and representative of the scene.

A photographer has to approach the scene from a different perspective. The scene has attributes which are elements of art. While the photographer sees the textures, proportions, colours and other elements the way these are used differs to the ‘construction’ work of the artist. A photographer has to take a ‘viewpoint’ in using composition in photography. We look at a scene and are faced with less artistic license in the placement of the elements or how to colour, texture or use them. Instead the photographer has to consider what not to include in the picture – to make it simple. Photographers consider using the natural attributes of the scene to pick out the compositional elements. We use the principles of art. But we consider them in an existing context to create an aesthetic outcome. This is done through our viewpoint of the scene.

In other words, photographers tend to work in a “deconstructive” mode. Simplification and point-of-view are compositional tools. They derive from the principles of photographic art. This helps make it easier to express the desired outcome. But essentially our efforts at composition in photography are about ignoring elements of the scene (leaving them out of the image). And also to emphasise others (or keep them in the frame) in order to develop the message or ‘point’ of the picture.

Complexity

All art is complex. So there is plenty of ways that this analysis can be knocked down by a whole range of “what if” arguments. Nevertheless I feel that photographic art does have this deconstructive approach to a scene compared to other creative arts. To a lesser or greater extent it applies to all scenes. There will be more construction in a still life; less in a landscape. So this is not a simple concept to be applied in all situations.

However complex a scene, however it is approached, the outcome will be unique to the photographer or the artist. It is in this variation and infinite use of interpretation that photography is an art. The use of our knowledge of composition in photography allows an analysis of the scene which may seem like the same analysis made by an artist. I question that the principles of art are the same as the principles of photographic art. I think they are deployed differently.

Think about the contrasting models of the artist and photog. Construction (artist) verses deconstruction (photographer) is one way to bring out how a scene can be approached. This analysis is one more way to think about composition in photography.

Background

You may feel that you need more background on the subject of composition in photography. If you do, here is a slide show to provide some insight into the basics of composition in photography. Please also read the Definition: Composition (photographic aesthetics) and look up the Composition resources on Photokonnexion

Comments, additions, amendments or ideas on this article? Contact Us
or why not leave a comment at the bottom of the page…

By Damon Guy (author and Photokonnexion editor)

Damon Guy - Netkonnexion

Damon Guy (Netkonnexion)

Damon is a writer-photog and editor of this site. He has run some major websites, a computing department and a digital image library. He started out as a trained teacher and now runs training for digital photographers.
See also: Editors ‘Bio’.

Everybody Street… a new documentary about street photography

Video

Video

Documentary released for Film Festival.

Released at the “Hot Docs International Film Festival”, Everybody Street is about the street photography art of New York. Focusing on a range of street photogs it opens up the everyday reality of street photography.

The trailer for the documentary has been released and provides an insight to what may be in the documentary. It shows some stunning shots and some powerful insights. However, it also takes a rather voyeuristic and antagonistic view of street photography. While I personally don’t aspire to that approach there are others that do.

I believe that to act as an antagonist on the street is both dangerous and unnecessary. Personally I believe in respect, contact and participation in the street scene. But I do acknowledge that there are some people that take a different view.

I think it is worth seeing this documentary and I hope that one day it will be widely available. For now I leave you with the trailer. See what you think. The video is just over two minutes.

EVERYBODY STREET – New York City

Everybody Street Trailer from ALLDAYEVERYDAY on Vimeo.

Visit the website for the documentary at: http://everybodystreet.com/  External link - opens new tab/page

Comments, additions, amendments or ideas on this article? Contact Us
or why not leave a comment at the bottom of the page…

find out more...Photokonnexion tips by email
If you enjoyed this article please sign up for our
Tips by email service.
                                                 Find out more

By Damon Guy (author and Photokonnexion editor)

Damon Guy - Netkonnexion

Damon Guy (Netkonnexion)

Damon is a writer-photog and editor of this site. He has run some major websites, a computing department and a digital image library. He started out as a trained teacher and now runs training for digital photographers.
See also: Editors ‘Bio’.