Tag Archives: Bounce

On-camera flash… advice for taming the beast

Taming on-camera flash

• Taming on-camera flash •
Left: harsh light and highlights are so unflattering!
Right: properly controlled you get proper skin tones and no highlights.
•••••||•••••
On camera flash can be a pretty tough nut to crack – learn how.
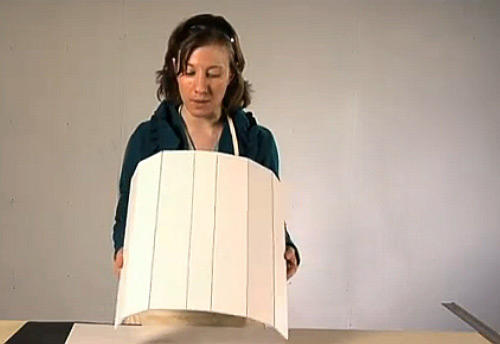
(Images taken from the video)

On-camera flash is pretty harsh…

In fact it’s often the source of ruined pictures from otherwise great dinner parties and family events. Dealing with with these little beasts takes a little work. You can make them do you bidding, you just need to know how.

A small powerful light source

The power of the little flash on your camera is misleading. For such a small light it puts out a lot of power. The learner is often caught off-guard. A great scene can be ruined by very unpleasant light, colour leached from faces, shiny reflections on faces and really hard-edged shadows. The whole thing is pretty ugly.

Here is some news. There are ways to control these little beasts and make them do your bidding.

Two of the most useful techniques for dealing with the problems are explained more fully in: Find out more about diffusing your on-camera flash. The other way is to help your flash work better in the room. Use the room itself as a way to bounce light around. Point your flash at a wall or ceiling so the light is reflected everywhere. It will make harsh flash into soft light – make it a more wrap-around light. This is always more flattering and shows the gentle curves of the face much better. It also means the light works its way around the back of the subject reducing harsh shadows cast onto the wall.

Practical use of the on-camera flash

For those quiet evenings where you are chatting with your friends and family here are some easy techniques. You can use your on-camera flash to good effect without the harsh shadows. You can escape the electric shock faces and startled expressions too. Have a look at the video and follow the sage advice of Mike Browne at a dinner party…

Using on-camera Flash Indoors – With Mike Browne


Mike Browne  External link - opens new tab/page

Using the proper tools is best

Let’s face it. On-camera flash is always going to be a bit difficult. As good as it looks in the video controlled results are always going to be difficult from such a little light source. Here is what Mike himself has to say about on-camera flash…

I’d suggest a speedlight is better because you can fit a diffuser and better still, turn the flash head in any direction and bounce the flash off a wall or ceiling.
Mike Browne  External link - opens new tab/page.

Have a look at some off-camera ideas. These are probably the most flexible options for moving your photography forward, especially for small intimate surroundings. Check out these options…

Off camera flash units

Canon Speedlite 430EX II Flash Unit – a great branded flash for general use  External link - opens new tab/page

Nikon SB-600 Speedlight – a great quality mid-range Nikon flash unit  External link - opens new tab/page

Special pick…

This high quality own-brand flash unit performs like branded units but is much more affordable. The unit provides a range of functions as well as being compact, light and robust. Great value for your money. YN560 III 2.4Ghz Wireless Flash Speedlite Support RF-602/603 YN560-III For Canon Nikon Pentax Olympus  External link - opens new tab/page

 
All these units will fire as normal when mounted on the camera. They will require an off-camera flash cord or wireless radio triggers for off-camera flash units  External link - opens new tab/page to connect to the camera when shooting off-camera.

Comments, additions, amendments or ideas on this article? Contact Us
or why not leave a comment at the bottom of the page…

Like this article? Don’t miss the next — sign up for tips by email.

Netkonnexion

Damon Guy (Netkonnexion)

Damon is managing editor of Photokonnexion.com with professional experience in photography, writing, image libraries, and computing. He is also an experienced, webmaster and a trained teacher. Damon runs regular training for digital photographers who are just starting out.
See also: Editors ‘Bio’
By Damon Guy :: Profile on Google+

Save money and improve your scene lighting!

DIY Reflectors, Bouncer, and Absorbers

• DIY Reflectors, Bouncer, and Absorbers •

Professional equipment costs so much!

But easily made DIY lighting equipment can do the same as professional light diffusers and absorbers. There is so much you can do to create your own effects. It is pretty easy too. With some simple tools and materials you can have the same outcomes as from a professional studio. The video shows you not only how to make the simple reflectors, bouncers and absorbers, but also shows how they can be used. If you want to get really good with them you will need to practice your photography with them – that is the fun part!

Light reflectors, bouncers and absorbers

The use of flash or studio lights is a great way to light your subjects. However, flash is very harsh and studio lights are often expensive. You can make the reflectors, bouncers and absorbers very cheaply and they can also help adjust the light colour. Bright white board and silver reflectors help to modify the light colour from domestic lights. You may still need to adjust the light balance on your camera, but the reflections will give much more controllable light against the skin tones and clothes of your subject.

Why do we use reflectors and bouncers? These are part of a general class of photography equipment called light modifiers. Anything which changes the light from a light source is a light modifier.

With most lighting situations we have only one main light called the key light. Other lights should not be as strong as the key light. They should also have strength in proportion to the key light. We get that proportion by using reflectors and bouncers to distribute the light around our subject. This ‘fill’ light helps the light on the subject be less harsh. Bounced or reflected light creates soft shadows that wrap around curves and lessen the intensity of darkness in the shadows.

On the other hand absorbers actually cut down the reflections and help the darkness get more intense. This too has its uses. We can make shadows darken and help cut down the effect of light bounced off other things near the subject. The use of absorbers helps define shadows and create darker areas of the scene.

And now to the video…

DIY Ways to Reflect, Bounce, and Absorb Light


Playgallery

Comments, additions, amendments or ideas on this article? Contact Us
or why not leave a comment at the bottom of the page…

Three little known facts about shadows

What is shadow? Why is it so important in photography?

What is shadow? Why is it so important in photography?

Shadow is difficult to understand… it’s, well, shadowy.

To a photographer the nature of shadow is the second most important concept we work with, but most don’t understand what it is. Here is a look at three ideas to help you know shadow.

First, you may ask, what is the most important concept to a photographer before shadow? Light… it’s the very centre of photography. It is also the reason we have shadow.

Fact no. 1 – It’s all in the difference

Light and shadow are in fact the same thing. They are not opposites. Dark is the absence of light – a pretty rare thing in modern times. But, shadow is the difference between a particular light intensity and a lower light intensity next to it. Shadow is created by an object intercepting the light from a light source. Light passing the object will be brighter than the light where the beam has been blocked.

Fact no. 2 – It’s not dark in the shadow because…

Light is pretty fickle stuff. It travels in straight lines (direct light) unless it bounces off something. In fact light will bounce off almost anything – even the atmosphere. We see everything around us because light has bounced off things and then entered our eyes. Places with a lot of light bouncing around from different objects and in many directions is said to have diffused light. Some of that light will be bounced into shadow areas. It lightens the shadows. Some light is produced by big light sources like a photographer’s umbrella. This causes a less direct or soft light. The soft light source creates shadows with poorly defined edges. The shadows have a gradual transition from light to the darker shadow areas. Where soft light and diffusion occurs you get less shadow and it is poorly defined.

Fact no. 3 – Direct light and little diffusion equals hard light

Direct light, where there is little diffusion, creates sharp edges on the shadows. The shadow abruptly stops and the brighter light starts. This is called hard light and is normally created by a small light source. Because there is little diffusion the shadow is more intense. This is because there is no diffused light bouncing into the shadow area to lighten it. Hard light and little diffusion creates well defined shadows.

Where does this lead us

The photographer works mainly with light intensity, direction, colour and hardness. Together these components create the quality of light that is so important for successful photography. We intuitively understand intensity and direction. Colour in light is something that we gradually learn to see (harsh blue of mid-day to the golden glow of dusk).

Most photographers don’t immediately see the difference between hard and soft light, and what the effects are on shadow formation. However, shadows are of great importance because they define what we see many ways. More intense shadows stand out more. As they catch our eye we are better able to see what is causing them. As we do so we become aware of the shapes and forms that are sculpting the shadows. In other words, shadows help to give definition to the objects and world around us.

Photography is a two dimensional media. We are very experienced at seeing the world in three dimensions. When we see a flat representation of the world we are able to interpret it in three dimensions because we understand how shape and form are portrayed by the light/shadow relationship. So get to know shadows, hard and soft. Become skilled at capturing them in your images. You will be better able to create a three dimensional world for your viewer – even within a two dimensional medium.