Tag Archives: DSLR

Fifty tips to set photography starters on their feet

There are some great things to learn.

When you are starting out and need to learn some things fast, it helps to have some guidance. Here are a few things photographers need to know to get started. And some things I wish I had known when starting photography…

Roller coasters ‘R’ us – Photo-learning list…
  1. If you want to learn fast take lots of pictures.
  2. If your pictures aren’t good enough, you’re not close enough.
  3. Spend more time reviewing your pictures than it took to make them.
  4. There are billions of types of light. Learn to see 10 types to start.
  5. Get obsessed with the quality of light and its properties.
  6. Work on image composition at least as hard as your technical skills.
  7. Use natural light as much as possible. Learn its variations.
  8. Don’t use on-board flash. It will ruin your shots.
  9. Make people a central study of your photography.
  10. Count 1000, 2000 slowly then take your camera from your face.
  11. Think carefully about how to do it well. Then follow a process.
  12. Clean your kit before you go out and when you’re back. Cameras hate dust.
  13. “Learners don’t need a tripod”. My biggest learning mistake.
  14. Sharpness is a habit – work hard to get it right from the start.
  15. Think “Why am I taking this picture?” for every shot you take.
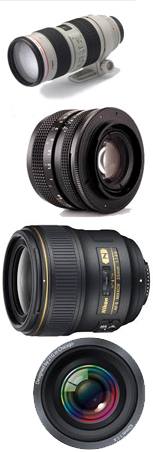
  16. Add another lens to your “kit lens” as soon as you can.
  17. Great lenses are more use than an expensive camera. Spend more on them.
  18. Don’t cheap out on a tripod. Cheap ones will not do the job.
  19. Use your tripod.
  20. Own more than one memory card AND more than one battery.
  21. Learn the meaning of RAW and then shoot with it.
  22. “Your first 10,000 photographs are your worst.” ― H. Cartier-Bresson
  23. A keen digital photog can clear 10,000 shots in 14 days – shoot more.
  24. Make some photography gear. You’ll understand your needs.
  25. Gear lust replaces your photographic vision with a hole in your pocket.

More after this…

find out more...Photokonnexion tips by email
Enjoying this article? Please sign up for our
Tips by email service.
                                                Find out more


  1. Carry your camera with you everywhere.
  2. Look at 50 pictures by other people every day.
  3. Take a clichéd shot – satisfy your curiosity. Store it in a secret place!
  4. The “Rule of thirds” works nearly all the time. Learn it early.
  5. Simplicity is the ultimate sophistication.” Leonardo da Vinci
  6. Read your camera manual. Try something. Read that bit again. Repeat.
  7. Have a go at every setting on your camera lots of times.
  8. A proper stance will provide a steady hand-held camera position.
  9. Amateurs often do better pictures than professionals.
  10. And, Professionals do more good pictures, more often.
  11. If your photos look tired and drab – go manual – learn control.
  12. For every shot you do, look at 50 similar ones. How does yours look?
  13. Don’t panic. Usually there is no problem.
  14. No photo, however good, replicates reality. Cameras distort – get over it.
  15. If you see it one way, most people will see it a different way.
  16. Check all gear before you go. Have a list of what you need.
  17. Know why you are going to a location and plan shots in advance.
  18. Back up your files. If your hard drive crashes you will lose the lot.
  19. Wear the right clothes. You cannot do good photography if you are cold.
  20. Help someone else to learn. You will learn too, and make a friend.
  21. Learn the meaning of “exposure” – practice using manual settings.
  22. Learn “Depth of Field” and practice it with each of your lenses.
  23. Post processing is an art and part of photography. Learn it.
  24. Join a club or class – you learn fast with other photogs.
  25. Use Google Images to research every shot you take.
And one for luck!

Photography is fun. Make sure you go with that!

Comments, additions, amendments or ideas on this article? Contact Us
or why not leave a comment at the bottom of the page…

Like this article? Don’t miss the next — sign up for tips by email.

By Damon Guy (author and Photokonnexion editor)

Damon Guy - Netkonnexion

Damon Guy (Netkonnexion)

Damon is a writer-photog and editor of this site. He has run some major websites, a computing department and a digital image library. He started out as a trained teacher and now runs training for digital photographers.
See also: Editors ‘Bio’.

Facts about focus… how much do you know?

Orb Out Of Focus

• Orb – Out Of Focus •

Focus is more complex than at first sight.

Focus, and the associated functions on a camera, take a little time to sort out in your mind. Here are some fundamentals and some obscure facts for you to think about.

Focus facts…
  1. When you point your camera at a single colour, blank space, solid blue sky or night sky the auto-focus will ‘hunt’ for some contrast. The lens will be unable to focus but keep trying. If it detects a difference of contrast in the frame it’ll be able to balance it out and use it to create a focus. If your lens is ‘hunting’, find something with a bit of colour or light contrast. Then it will stop hunting and focus. More…
  2. The light from your lens focuses on the “image plane”, the flat surface that is also the surface of the Digital Image Sensor. The circle of light it creates is bigger than the sensor. The light that falls outside the sensor area is normally inferior to the light which falls on the sensor surface. This is because the edges of the lens creates an inferior quality of light compared to the middle part of the lens. More…
  3. There is such a thing as a “fixed focus lenses”… they have no focus capability. They are put in the camera at time of manufacture and set to give a deep focus from a few meters through to infinity. Can you imagine why such a lens would be used in a camera? More…
  4. Bokeh appears in out-of-focus areas. Some people think that the prominent little circular highlights are the bokeh. This is incorrect. In fact bokeh is a statement relating to the quality of the out-of-focus blur. The blur itself is called… blur! More…
  5. Macro lenses are highly effective at focusing at short distances from the lens and to enlarging the image. Actually they will also focus at other distances too. Macro lenses produce a great portrait. More about macro lenses…
  6. When a lens lets light through the light follows something called the optical path. The focus is achieved on the optical path. However, in a DSLR when the mirror is down, the optical path ends up at the eye. The optical path is not the same all the time. More…
  7. Where you focus affects your exposure. Most people assume focus and exposure are two separate things. And, in fact, they are. But, your camera senses the light conditions where you are focusing and sets that focus at the same time as taking readings for the light meter. Change your point of focus and you may change the light reading. Even a tiny movement may change your exposure readings if your focus changes from a lighter to darker surface. Useful to know if you are in a darker environment with bright light sources around. Especially useful if you are trying to learn manual control.
  8. The ‘sensor plane’ is the surface on which the image is projected by the lens. It is the surface of the sensor itself. In former times it was the same surface that the film was laid upon. Any idea what other names might be applied to the same surface in a camera? More…
  9. Sometimes it is important to measure your focus distance precisely. For example if you want to repeat shots or vary the distance form camera to focus-point by a measured amount in a series of shots. Such measurements are often used in forensic photography, macro work and for working out scene sizes and distances. There is only one place where you can take a true measurement from on a DSLR. It is clearly marked. Know what it’s called and where it is? More…
  10. Consider turning off your auto-focus when using a tripod. The motor that works the auto-focus creates vibration that may affect your shot. It is less likely to have an effect on long exposures, but if you get into the habit of doing it you may help to sharpen your shots. Reducing any vibration is good when you are trying to sharpen your shots.
  11. The Plane of focus is a very important concept – it is about where you are focussing. It gives you an idea of what your focus is doing at any angle of the camera. You should really have a good idea about it if you want to make sure you are getting a proper focus on the subject of your shot. More…
Lots more to learn…

Focus is big subject and can become extremely technical. There is a lot more you can learn. These points are just some fun ideas to help you learn about different aspects of focus in general. If you have any comments, other ideas or want me to write about another aspect of focus – leave a comment at the bottom of the page.

Comments, additions, amendments or ideas on this article? Contact Us
or why not leave a comment at the bottom of the page…

Can you write? Of course you can!
Write for Photokonnexion...

We would love to have your articles or tips posted on our site.
Find out more…
Write for Photokonnexion.

By Damon Guy (author and Photokonnexion editor)

Damon Guy - Netkonnexion

Damon Guy (Netkonnexion)

Damon is a writer-photog and editor of this site. He has run some major websites, a computing department and a digital image library. He started out as a trained teacher and now runs training for digital photographers.
See also: Editors ‘Bio’.

Lenses and designations? Confused? An easy guide

• Lenses •

• Lenses •
Buying lenses optimised for your sensor is confusing.

Lenses are a big investment…

It is difficult to know which lens is optimised for your digital image sensor. There seems to be so many different designations. Here is a guide to which lens designation you want.

Explaining the differences

Brands like Canon and Nikon have their own lenses range. Third party manufacturers, like Sigma, Tokina and Tamron etc. manufacture lenses for brands like Nikon, Canon and others. if buying lenses the third party manufacturers have lenses which are equivalent to the Camera brand manufacturer or possibly better. Look around at online reviews to see what standard of lenses and prices are available.

Make sure you buy lenses fitted with the correct lens mount for your camera. Older models of cameras may have the correct mount but some of the more recent lenses might not be suitable to work with the camera. So check the mount and camera are compatible before buying.

Why are lens mounts specific to brands? It’s mainly historical – the development paths of the manufacturers differ. However, they also want their customers to stay loyal to the brand. This unfortunate situation means you have to reinvest in a new range of lenses if you change your camera body. Hmmm! Expensive.

There are two types of camera sensor. There are cropped sensors – which is a small size. These are more often referred to as APS-C format.

The other sensor format is full frame sensor. These are the size equivalent of the old film SLR frames on a roll of film.

Full frame digital sensors are less common than cropped sensors. The cropped sensors are easier and cheaper to manufacture. However, in recent years we are seeing an increase in full frame releases of new cameras. The higher resolution (more pixels) and potentially bigger print sizes are attractive to consumers. As full frame format gets cheaper they are likely to become more common.

The full frame sensor size is the same size as a 35 mm (36mm ×24mm) film frame in old SLR cameras. Because of the historical significance of the 35mm format modern DSLRs are based on the same standard. Lenses are normally designed to fit either the full frame format or the cropped format.

Lenses designed for the full frame sensor have an image circle that covers the whole 35mm sensor. These lenses tend to be more expensive because they need a wide circle of light thorough them to cover the sensor. They have bigger glass elements as a result.

Full-frame sized lenses are able to fit a camera with the same mount and a cropped sensor. The image circle from the lens remains constant. The smaller sensor size (APS-C) is therefore only able to process the light from the centre of the circle – the rest of the light spills over the side of the sensor. The resultant photograph is like a zoomed-in crop of the image that would have otherwise been taken with a full frame sensor.

This image-cropping effect of smaller sensors is known as the “crop factor”. It represents the ratio of the size of the full-frame 35 mm sensor to the size of the smaller format. The apparent zooming effect also gives rise to an alternative name – the “focal-length multiplier”.

The ratio of full-frame to crop tends to lie in the range 1.3–2.0 for most cropped sensor DSLRs. You might say that a 100 mm lens on a camera with a 1.5 crop factor creates an apparent zoom multiplying the focal length by 1.5. A 100mm lens would then appear to produce the same picture as a 150mm lens. This is not a true magnification since the focal length of the lens is the same on both cameras. Instead the cropped sensor is likely to produce a lower quality result than than the full frame sensor while revealing a closer result.

You can use lenses designed for full frame sensors on cropped sensors. It does not work the other way. A lens designed for a cropped sensor creates an image circle smaller than the full-frame sensor. It would create a circular image with very strong vignetting around the sides. Manufacturers recommend not using lenses designed for cropped sensors on full frame cameras.

Designations

To ensure that buyers purchase the correct lenses for full frame or cropped sensor manufacturers designate them with specific marques. Here is the breakdown of the most common designations…

 Manufacturer  Full frame
(and APS-C)
 APS-C
(cropped)
    Canon           EF pEF-S
    Nikon          FX DX
    Sigma          DG DC
    Tokina          FX DX
    Sony     Various‑incl.
3rd party mounts
DT
    Tamron          Di Di-II
    Samsung   Not available‑2013 NX
    Pentax Check manufacturer
specification
DA
  Konica‑Minolta Check manufacturer
specification
DT
Other related sources…

Lens manufacturers (Wikipedia) External link - opens new tab/page
Photography equipment manufacturers (cameras, lenses etc) (Wikipedia)  External link - opens new tab/page

Comments, additions, amendments or ideas on this article? Contact Us

find out more...Photokonnexion tips by email
If you enjoyed this article please sign up for our
Tips by email service.
                                                 Find out more

By Damon Guy (author and Photokonnexion editor)

Damon Guy - Netkonnexion

Damon Guy (Netkonnexion)

Damon is a writer-photog and editor of this site. He has run some major websites, a computing department and a digital image library. He started out as a trained teacher and now runs training for digital photographers.
See also: Editors ‘Bio’.

Can you write? Of course you can!
Write for Photokonnexion...

We would love to have your articles or tips posted on our site.
Find out more…
Write for Photokonnexion.

Ten simple ideas to improve your photography (and a fun quiz)

Ten Tips

Ten Tips and 12 fun quiz questions.

Simple things help you…

We should all take a step back and think about the basics sometimes. It helps us remember essential techniques and keeps us on our toes. Here are the basics with some fun quiz questions too.

The simplest techniques in photography are often the most important ones. In this post we make sure we don’t forget them…

10 essential things to know; 12 fun quiz questions
  1. Not knowing your camera: This is really bad news. If you are hoping to improve your photography make sure you learn what every lump, bump, dial, screen, lens and twiddly bit does. Read your manual regularly. Practice with each function until you have got it right. Then practice it in the dark so you can do a night shoot.
    Quiz Question 1: How many lenses are there on a camera? Answers at the end!
  2. Poor stance: Most people when starting photography don’t realise that the way they stand and hold the camera creates all sorts of problems and poor performance. If you are a keen photographer a good stance can contribute to improved sharpness (hand-held shots), better focus, more steady hand and better shot timing. Learn to stand properly right at the start and you will save yourself lots of re-training time later.
    Quiz Question 2: At what point in the breath cycle is it best to take your shot?
  3. Not using a tripod: classic mistake. Tripods save you lots of time and give you pin sharp photographs. They give you an opportunity to set your camera up properly and ensures that your are ready for your shot.
    Quiz Question 3: A monopod has one leg, a tripod has three legs. What is, and how might you use, a bipod?
  4. Not giving the camera time to focus: When you press the shutter button halfway down it causes the auto-focus to cut in which focuses the camera. But if you punch straight through that to the shot the focus has not had time to do the full focus. This normally happens on the first focus attempt when the focus is right off. After that the lens in nearly focused and will adjust more quickly. So don’t make your first focus attempt too close to the shot or it will be blurred.
    Quiz Question 4: Why do you have two rings on a modern auto-focus/zooming photographic lens? What do you call each of them?
  5. Taking pictures against a bright light? Cameras don’t like very bright lights. Especially if there are also very dark spots nearby. Shooting indoors while looking at a window out to a bright sky will cause a strong white spot. This is very distracting and draws the eye away from the subject. Not good. There are Light and Lighting resource pages on Photokonnexion for you to learn more.
    Quiz Question 5: How many stops of light can healthy human eyes see (20:20 vision)? How many can the camera (rough generalisation) cope with?
  6. Relying on flash (especially pop-up flash): Pop up light has a very small concentrated source. It discolours faces, washes out colours, creates harsh, sharp-lined shadows and is badly placed (too close to the optical axis) creating nasty highlights on faces. Try to use natural light more. It is much more forgiving and does not produce such harsh shadows most of the time.
    Quiz Question 6: What is often the result of using pop-up flash with respect to two parts of the face?
  7. Dead centre subject: If you put the subject of your picture in the centre it will usually be boring. If you off-set your subject the eye will be looking to see why the symmetry is broken. That keeps the eye hunting around the screen. Learn about the “Rule of thirds” and other Composition principles. That will help you make the shot more compelling to the eye.
    Quiz Question 7: What type of compositional perspective would you be working with if you want to promote a three dimensional feel to your picture composition?
  8. Horizon control: Make sure your horizon is level, especially if it is a seascape. If you leave it on an angle the picture will be ruined because it will look like the sea is sliding off the page! Horizons also induce mid-picture viewer-stupor. Make a decision. Either shoot for the sky in which case place the horizon in the bottom third of the picture. Or, shoot for the ground in which case the horizon goes in the top third of the picture. An off-set horizon is more dynamic and keeps the viewers eye moving.
    Quiz Question 8: If your main choice is to shoot for the sky, where would you take your exposure from? (Where would you point your viewfinder focus point?) a. The sky? b. The ground?
    Quiz Question 9: Describe autofocus hunting and why it happens?
  9. Simplify, simplify, simplify: The most effective way to show a subject to your viewer is to de-clutter the picture. Take out of your composition everything that is nothing to do with the subject. The more you make the viewers eye go to the subject the more effective your shot will be.
    Did I mention that you should simplify your shot?
    Quiz Question 10: What is it called when you paint out something from your picture in post processing to simplify a shot?
    By the way, did I mention that you should work really hard to simplify your shots?
  10. Go manual: Auto-modes on your camera are really best guesses about what the manufacturer thinks will be suitable for the average shots most snappers will take. Buy you are a keen photographer. To get the camera to do exactly what you want, and to make discerning choices about your images you should work on improving your manual control. Your understanding of photographic principles will improve, your skill at exposure will improve and you will find yourself making informed choices about how you want your picture to come out. You will turn from a snapper into a photographer.
    Quiz Question 11: What does the ISO control do? a. Adjust the sensitivity of the digital image sensor or b. Change the aperture size?
    Quiz Question 12: Does ‘shutter speed’ or ‘aperture’ control movement blur?
Answers to quiz questions
  • Quiz Question Answer 1: I am talking about any camera that has a lens, not just DSLRs. the number of lenses is a matter of variation. If you are discussing photographic lenses then only that one will count (but read on). Some people think of each glass element in the photographic lens as an independent lens. Technically that is not true. They are optical lenses or glass elements, not photographic lenses. However, if the photographic lens (and elements if you included those) were all you counted you would be wrong. Here is a short list of Possible lenses on a camera of any sort…

    There may be others.

  • Quiz Question Answer 2: You should take a shot at the full inhale point or full exhale point before inhaling or exhaling in the next part of the cycle. You can choose which is best for you. All you do is delay the next part of the cycle while you take a shot. This is the point in the breath cycle when there is least movement of the shoulders/chest. Read more about it in Simple tips for a good stance
  • Quiz Question Answer 3: A bipod is photographically uncommon. Understandably, it has two legs. Find out more here… Definition: Bipod
  • Quiz Question Answer 4: The two rings on an auto-focussing photographic lens allow one ring to focus the image – the focus ring. The other ring is for zooming the lens. The latter changes the focal length and is called the focal length ring.
  • Quiz Question Answer 5: Human eyes can see about 18 to 20 stops of light when healthy. However, by contrast the best commercially available cameras have to operate with a dynamic range of 8 to 12 stops of light. Research is pushing the boundaries but there is still a big gap to meet the dynamic range of the human eye (in 2013).
  • Quiz Question Answer 6: Pop-up flash is very likely to cause red-eye.
  • Quiz Question Answer 7: To make things look three dimensional in your image you should be working with three point perspective. Look for lines in your image that promote cube-like structures. For example buildings, walls and other objects with lines and shapes that have a solid feel in real life. This will trick the eye into believing that there is a solid object in the picture. Read: Simple ideas about perspective in photography and: Definition: Perspective
  • Quiz Question Answer 8: If you shoot for the sky you will need to be taking your exposure from the sky as that is the brightest point. This will leave the ground darker in your exposure than you would see it with your eye. You can use one of a number of techniques to correct that later.
  • Quiz Question 9: Auto-focus hunting is when the auto-focus in the lens cannot focus and will keep going up and down the focus range trying to get a focus. This is a common problem at night, in darker conditions, low contrast conditions and clear or totally grey skies. You can read more about it in: Auto-focus ‘Hunting’ Definition: Hunting, Auto-focus

  • Quiz Question 10: when you paint out something from your picture in post processing to simplify a shot? You normally use a cloning tool. You can find out more in: Definition: Cloning; To Clone; Cloned; Clone Tool.
  • Quiz Question 11: What does the ISO control do? It adjusts the sensitivity of the digital image sensor allowing you to work in bright light (low ISO setting) or low light (high ISO setting). There is an article on ISO here: ISO.

  • Quiz Question 12: Shutter speed controls movement blur. Aperture controls blur (bokeh) created by the loss of sharpness outside the zone of acceptable sharpness. This is traditionally known as the depth of field. More reading on: Definition: Exposure and related to aperture: Definition: f number.

find out more...Photokonnexion tips by email
If you enjoyed this article please sign up for our
Tips by email service.
                                                 Find out more
#11030#

By Damon Guy (author and Photokonnexion editor)

Damon Guy - Netkonnexion

Damon Guy (Netkonnexion)

Damon is a writer-photog and editor of this site. He has run some major websites, a computing department and a digital image library. He started out as a trained teacher and now runs training for digital photographers.
See also: Editors ‘Bio’.

How to buy a new camera…

Buying a new digital camera

Buying a new digital camera

Buying is a big decision.

Photographers should be wary of the simple answer. Buying a camera is a deeply personal matter and a big investment. You live with the consequences for a long time. Look carefully at considerations that really matter to you and your performance as a photographer. Impulsive buys may spoil your photography. If you’re comfortable with your buy you will be more likely to get to know it, use it and have fun with it.

1. Work out what you need

Impulsive buying means something will not match your need, then you won’t get the use you want. The points below will help refine your thoughts. Write down your ideas to ease your research later.

Budget: Fix a budget – it may define the type of camera you can buy. So write down what you want to spend before starting. Change your mind later, but start with an idea to guide initial research.

Usage: What type of photography will you do? There are broadly two types of photographer…
The ‘point-and-shooter’:

  • Interested in recording fun, family, events and memories.
  • Love things they do when they have a camera around.
  • Take pictures as reminders. (Holidays, family, fun, action, friendship).
  • The camera is an accessory to the activity.
  • The camera is easy to use, probably in auto mode.
  • Simple controls – lighter, lifestyle-type design.
  • Less interested in the art of photography, more the style of life.

The ‘photographer’:

  • Take pride in every shot.
  • Indulges other passions through photography.
  • Wants more equipment.
  • Interested in “functions” and “controls” – technical cameras/DSLRs.
  • Camera is an essential part of the activity. (Landscapes, macro, action, nature, still-life, fine art…).
  • Loves photography for its art, technology, skills and techniques.
  • Documents passions and communicates interests through photography.
  • Take pride in camera control.
  • Enjoys the technical aspects of the capture as much as the images.

Each has an associated type of camera. A heavy DSLR is not well suited to the carefree life of the point-and-shooter. A compact, colourful, wrist-strap camera is not suited to landscape shots and large prints. Preferences and lifestyle should be shorted out early on. Are you are a point-and-shooter or a committed photographer (DSLR style)?

Conditions: Indoors/outdoors, weather, underwater, holiday, abroad, air travel? The situations in which you use the camera affects what you buy. Consider protection, travel, camera size and special equipment needs.

Experience: Skill level affects purchase – your aspirations for your future photography will too. If you’re just starting out, buying a camera with a bewildering range of functions is daunting. Take simple steps. Entry level DSLRs provide for years of growth into your hobby and produce great images. This allows you to develop skills without confusion.

Features/flexibility: Spending more on a camera means more features and flexibility. However, while this gives more control it increases cost for relatively little increase in picture quality for starters. Don’t waste your money. Focus on what you need, not “feature bloat”.

Physique/fitness: When buying you don’t get a feel for using a camera. Little, disabled, or not very fit people may find big cameras unusable. Fit, but not shooting daily? You might struggle to hold up a big camera for long periods. Buy a camera you can hold steady and use all day (if necessary). I know people who bought great cameras and had to sell them again to buy another great, but lighter, camera. Also ensure you can grip it properly and comfortably. Can you reach all the buttons easily?

Size of prints: More megapixels is NOT a better camera today. Good quality cameras have sensors to produce great images. High megapixels are only necessary for high resolution pictures – mostly for large prints. You pay a lot of money for top-megapixel cameras. Only buy them if you frequently do big prints in high definition. Don’t worry about megapixels in the market mid-range.

Lenses: To a committed photographer lenses are key. Buying the right lenses is more important than a camera body. Lens investment pays you back for a lifetime, or many camera bodies. Spend less on the body than you intended and save money for better quality lenses (not more lenses). Consider retaining at least half your budget for lenses.

Other equipment and accessories: New cameras require other items affecting your budget. Consider…

  • Lenses (Wide angle, Zoom, macro etc)
  • Camera/equipment bag
  • Tripod
  • Spare batteries (two)
  • Light modifiers (diffusers), filters, reflectors
  • Specialist equipment for specific interests
  • Memory cards (at least two – eg. 2×16 Gb not 1×32 Gb – cheaper and more secure)
  • Off-camera flash (pop-up flash is rarely useful)
  • Remote trigger to fire the flash/camera

There may be other things too.

Compatibility: Is your existing equipment compatible? Buying a camera could mean buying those extras again, straining your budget. Consider the camera brand you want to buy. That may affect the other equipment you buy later. Lenses are a particular consideration. Top brands make good lenses, but other brands may not. That could be important for your buying strategy.

Picture quality: Quality digital cameras produce great picture quality. However, large, high resolution images (especially for printing) may need larger digital-sensor size (cropped or full frame?) and type of lens and lens quality. Buy up-market lenses as far as you can. For a point-and-shoot camera consider the quality of zoom. ‘Optical zoom’ is best, the lens does the enlarging. The quality will be better with a good optical zoom. With a large digital zoom component expect lower quality prints. Digital zooms crop the picture in-camera to make the picture appear bigger. You will see more detail, but the picture may be a lower definition/resolution.

More after this…

find out more...Photokonnexion tips by email
Enjoying this article? Please sign up for our
daily email service.
                                                Find out more
#11030#

2. Research

Now look at what is available. examine a range of reviews on different websites. Check out what’s popular around the web and get a “best fit” camera to your specification from above. Talk to experienced photographers. Join a club. Leave questions on Internet forums. Ask in shops.

Be prepared for this stage to take quite a long time. You may be committing to a brand for a quite a few years, or your career. Take it slowly so you can understand all implications. Keep notes and be prepared to check definitions and learn about features.

3. Try it out

Once you have identified your dream machine, see if you can try one out. Beg, borrow or hire. You will be unlikely to try everything but spend a weekend or week with it to really get a feel for it. That will help you to feel confident about your ideas or start new research. Ensure you are on the right track.

4. The purchase

From a shop: Local camera shops often have deals and committed staff. They will have knowledge and experience too. Remember they are on commission and a different focus to you. So go to a shop with a really good knowledge from the above before you buy.

Online: There are some great deals but also a lot of scam artists. Consider…

  • Who you are buying from.
  • Does the site cover losses?
  • Is delivery and packaging good?
  • Delivery times?
  • Are there proper cancellation and returns procedures?
  • Transit/purchase insurance (the company or your credit card)
  • Is the online store reputable and well known?
  • Do not click from email ads to the site – insecure.
  • Check with friends to see which online stores they used.

If it sounds too good to be true, it probably is. A reputable company will have protections built into the purchase and made clear on the site.

When you are ready consider negotiations. Lots of websites will do deals. Shops will too. Make sure you get the right deal, but don’t compromise security or safety.

5. After purchasing

Check your purchase properly – has everything arrived? Retain all paperwork and orders for future reference, returns and insurance. Test to see that it works properly. Get signed receipts and correct paper work for returns, delivery shortages or damage.

Satisfied you have the correct equipment and it works? Put it through its paces in a logical way. In Getting started with a new lens I show how to work through testing and getting to know new lenses. Many of the principles apply to the purchase of a camera and help you get to know your camera properly.

Other ideas?

Please share your other ideas, tips or experiences on buying a camera with us below in the comments…

By Damon Guy (author and Photokonnexion editor)

Damon Guy - Netkonnexion

Damon Guy (Netkonnexion)

Damon is a writer-photog and editor of this site. He has run some major websites, a computing department and a digital image library. He started out as a trained teacher and now runs training for digital photographers.
See also: Editors ‘Bio’.

The advantages and disadvantages of live view

• DSLR Camera •

• DSLR camera diagram (side veiw) showing mirror down position •
Click image to view large
• DSLR Camera • By Netkonnexion on Flickr External link - opens new tab/page

Live view is here to stay.

What are the good and bad aspects of this technology? Should we be using it? What does it offer the DSLR user over the time honoured viewfinder system? In this post we look at the pros and cons.

The DSLR mirror system

If you are not familiar with the inner workings of the DSLR you can read more about it in this post: DSLR; Digital Single Lens Reflex Camera.

The essence of the mirror system is simple. The photographer peers through the viewfinder (see the diagram above) and the eye receives light directly from the main lens. Light reaching the eye has been redirected by the mirror up through the camera to the viewfinder eyepiece. When the photograph is taken the mirror flips up. Then the shutter opens allowing the digital image sensor to be exposed to light entering through the lens. While the mirror is up the photographer is unable to see through.

Live view…

When using live view the mirror is flipped up. You cannot see through the viewfinder. The view detected by the image sensor is instead created electronically on the camera screen on the back of the camera. In the most up to date mirrorless cameras the view is projected electronically into the viewfinder so you can use that instead of the screen-view on the camera.

The screens on the back of the DSLR, bridge cameras and point-and-shoot cameras provide a good, clear image on the screen. The displays offer a pretty good representation of the image seen through the lens. Reviews of the new mirrorless cameras suggest that electronic viewfinders are apparently not as good as those using mirrors. However, the technology is young and significant advances have been made recently. I think eventually electronic viewfinders will provide as good a view as the back screen.

Why do we need a viewfinder?

One of the problems of a back-screen is holding the camera steady. When you have a big lens on a camera the sheer unbalanced weight-in-hand makes it difficult to steady the camera with two hands held out in front of you. For a professional, or the keen amateur, the extra softness this induces is intolerable.

This is less important with light point-and-shoot cameras which can be held steady with one hand. Mirrorless cameras are smaller and lighter than DSLR counterparts. Bigger lenses still make them relatively heavy. Pressing a camera-lens combo to your eye while also held in both hands gives a third point of stabilisation to your camera – a steady position. So, a practical consideration for more substantial combinations of large camera and lens.

Retaining a viewfinder also ensures the “eye-view” is actually available to the photographer. By this I mean that the camera can be placed where the eye actually is on the body. Then the photographer sees through the camera in the same plane and level as the eye. I find this leads to better composition. We are more used to using eye-level views in our everyday vision. I acknowledge that the free-roaming screen composition may provide a more unusual point of view. However, artistic considerations aside, when composing an image I find close scrutiny of the scene leads to cleaner images and a rigorous composition. OK, this is not for everyone. It is a point to bear in mind for the more discerning photographer.

In my experience doing a back-screen composition is difficult because the eye is distracted from the screen. This leads to limited, incomplete composition, or missed details. I have been guilty of this sort of sloppy composition and have seen it in the images of others. Personally, I think the viewfinder helps me to compose accurately and cleanly allowing proper examination of detail.

What live view can offer…

Despite the shortcomings of back-screen composition and lack of steadiness there are good reasons to use live view.

On a tripod… While using a tripod to compose for landscapes, macros, wide angle and fish-eye shots do a quick check in live view before the shot. I suggest you do your initial composition using a viewfinder on the tripod. Once composed quickly check the live view simultaneously scanning your scene by eye. This enables comparison of the lens-distorted view against the scene as the eye sees it. This cross-checks your composition against your vision for the final outcome of the shot.

Mirror lock-up… When using a tripod use mirror lock-up to help sharpness. This mode sets the camera to flip-up the mirror ahead of the shot. The vibration from the ‘mirror-flip-up’ then passes before the exposure takes place. This reduces vibration enabling a sharper shot. Most DSLRs offer the mode which is found in the menu screens. Live view also performs a mirror lock-up action on many cameras. If you have a “live-view” button, do your composition, perform a live view check and take a mirror lock-up shot in the same sequence.

Access to the viewfinder is restricted… Yes, sometimes I simply cannot get to the viewfinder. When doing macro work, complex close-ups suspended under a tripod and when holding the camera high all create situations when the eye cannot easily get to the viewfinder. In this case the live view mode is a definite advantage and enable otherwise impossible shots.

Depth of field… The viewfinder has its own optical characteristics additional to the main photographic lens. Normally viewfinder lenses are pretty faithful and do not affect the view through the main lens. When using a fast lens, say f1.2 wide open aperture, the depth of field may be distorted by the viewfinder. It’s said live view helps you better see the areas of bokeh. I am sceptical. I have not seen this effect accurately on my Canon 5D MkII to make any difference. I am prepared to accept it works on other cameras. Try it and see.

Horizons, converging verticals and straight lines… Live view offers a set of lines dividing the screen up into thirds (nine segments). This “rule of thirds” grid is helpful in composition. I find it most useful when checking converging verticals when lining the camera up. However, a good electronic display of focus points laid out in your viewfinder is excellent for most compositions. The focus points usually allow for rule of thirds composition and more. So, live view offers an option, but no better than the viewfinder. Other cameras may differ on this, make your own choice.

Live view histogram… Some cameras allow the display of a live view histogram. This enables you to check your colour and light intensity prior to the shot. This saves later examination of lots of frames online. However, I prefer “Chimping”. The post-shot histogram review is the best way to tell if you have a good shot or not. If you do use the live view histogram beware of poor composition. The histogram takes up screen space I prefer to use for composition. So, not to my taste, but the opportunity is there on some cameras.

Live view can be useful

More cameras are providing good live view mode and offering more facilities with it. I think there are some good reasons to use this mode especially with a tripod. It certainly provides some useful functions. There are some severe shortcomings with live view composition and personal stance when using it. The good old viewfinder still wins the day for me. However, a lot depends on your camera. I hope these points have opened your eyes. I leave you to draw your own conclusions.

find out more...Photokonnexion tips by email
If you enjoyed this article please sign up for our
daily email service.
                                                 Find out more
#11030#

By Damon Guy (author and Photokonnexion editor)

Damon Guy - Netkonnexion

Damon Guy (Netkonnexion)

Damon is a writer-photog and editor of this site. He has run some major websites, a computing department and a digital image library. He started out as a trained teacher and now runs training for digital photographers.
See also: Editors ‘Bio’.

Can you really trust your camera battery? 12 ways to protect against battery failure.

A key component in your equipment is power.

Without power your camera stops. The battery is a most important link in the workflow of your shoot. Get it wrong, the shoot comes to an abrupt end. Here are some ways to make your battery power go further.

Cut the display time

The biggest drain on your battery is that big screen on the back of your camera. Modern LCD screens are pretty efficient compared to early models. They still use a lot of power. To cut power consumption reduce the time your shot shows on-screen. Most cameras are set to eight or ten seconds which is mostly a waste of power. Four seconds is plenty of time for a quick preview. You can easily pull the picture up to look again. The occasional ‘extra-look’ uses much less power than an extra four or six seconds of un-viewed screen time after every shot.

Live view

It makes sense to use screens less for other tasks. Where you can, use the viewfinder. Using ‘live-view’ is a really heavy drain on the battery. During live-view the screen is always-on. Also, if you have a DSLR, live view holds up the mirror. That too is a drain on the battery. Double whammy!

Here is another reason to use the viewfinder. The live-view screen shows much less contrast than your eye sees through the viewfinder. You cannot expect to frame a great shot when you can’t see the principle guide to ‘depth’ in your picture. Yup! Live view actually disables your ability to produce a great shot. Go figure!

Chimping

If you have not heard the term ‘chimping’ yet, I wrote about it in “Examine Shots Before Shooting Again – Chimping“. Resist the temptation to re-examine every shot. Learn to trust your judgement. I am a great believer in chimping, but once you have your shot pattern and settings correct you only need to re-examine shots if you change things. Again, you will be saving battery charge.

Power-saving mode

Most cameras have a power-saving mode. Check your manual. Normally power saving mode will shut your camera down after a set period. It goes to sleep until recalled. Set power-saving mode to a reasonable time, say, 30 seconds or less. That can save a lot of power. Many cameras are set for a minute as default.

Continuous auto-focus

Cameras continuously monitor movement through the lens in continuous auto-focus mode. That mode is for times when your subject might move or is moving. If shooting still shots turn this off. Otherwise, the camera continuously hunts for focus, unnecessarily using power. If you’re using a tripod, continuous hunting for focus also causes vibration. You will actually soften your shot by running this mode on a tripod.

Pop-up or on-camera flash auto-mode

Pop-up flash is a really bad light. It also uses a lot of power. Sometimes you need it, most of the time you don’t. Turn it off, or use its manual mode. Then it will not fire when least expected, or when not needed.

Another point here… use an off-camera flash. It has an independent power supply. That way you can cater separately for the flash, get better control of your light and control the main battery power.

Mirror lock-up

Lifting the mirror in a DSLR takes power. So does holding it open in some models. So, if you are using mirror lock-up mode then use it sparingly. “Mirror lock-up” is one of the pro-techniques for sharp shots. It is really worth knowing about, but, be prepared for battery strain.

Turn off your camera

I have done it myself. Left the camera on in the bag. Not generally a problem – auto-power-save sets for sleep after 30 seconds – right? Wrong. Beware ‘shutter-button gremlin’. Depress the shutter half way, it wakes the camera. My friend charged his battery overnight then took a four hour coach ride. The vehicle vibration continuously pushed the button against his bag. No battery left for the wedding! Disaster. Turn your camera off before bagging it.

Warmth

It’s a fact. Batteries use more power in cold conditions. Keep Your camera warm. Under your coat, in a warm car or engine compartment – anywhere. It helps keep things moving in the camera, preserving battery life.

Spares

Batteries get damaged or gremlins strike. Pro-photogs carry at least one spare, often a charger too. Hobbyists often don’t. One spare and some of the other techniques here will give you a decent shoot even if one battery had been used/damaged/lost. A spare is your cover.

Battery care

Prolonged storage can can cause batteries to break down. It’s prudent to remove batteries from the camera in storage.You don’t risk damage to your camera and can easily do a periodic recharge. I recommend you use and battery recharge batteries at least three times a year. Also, protect batteries from damp, chemicals, corrosives and contamination – especially salt. Protect them from hard impacts too. They can split and won’t work afterwards.

Rotation

Batteries, including rechargeable ones, have a fixed lifespan. At the first sign they are not holding a full charge dump them and buy a new one. Some batteries fail rapidly. You don’t want to be caught at that ‘special wedding’ when the battery ran down after twenty minutes? Keep your spares in use. Swap it/them regularly with the working batter. One other tip… permanently mark every battery with the purchase date. It’ll keep tabs on its replacement age.

Look after your batteries and they will give you great service and long shoots.