Tag Archives: Digital Image Sensor

How digital cameras work – With James May

How Digital Cameras Work?

• How Do Digital Cameras Work •
You don’t have to know how your digital camera works to enjoy it. But knowing a little helps you to enjoy it better.
[Image taken from the video].

Understanding your camera better…

You don’t need an in-depth know how. Just enough to make it easy to learn more. Knowing a bit about how digital cameras work is really useful. Here is a quick and easy intro…

A few words from me

Those who know the world famous TV show, Top Gear How do digital cameras work: link to Top gear on Wikipedia - External link - opens new tab/page know James May External link - opens new tab/page. He has a zany sense of humour. Recently he’s been doing simple science videos. In the video he shows how digital cameras work. Off-hand jokes and jibes at Richard Hammond How do digital cameras work: Richard Hammond - Jibes - External link - opens new tab/page make the fast-paced video fun. Watch and learn how your camera works.

How digital cameras work. With James May.

Head Squeeze  How digital cameras work - from Head Squeeze :: External link - opens new tab/page

Some things to think about…

The history in the video is a bit misleading. How digital cameras work was worked out in the 1970s. By the 1980s sensors were quite advanced. But, it was not until the 1990s that digital image sensors became consumer items. Then camera makers made them small and cheap. To find out more see: A History of Photography (pt.6). The Digital Age.

Mr. May gets the idea of a pixel wrong too. He talks about pixels being on the sensor. Many people have this idea. Pixels are in images on screen. Data for digital images is collected on a digital image sensor. Each point where the data for each pixel is collected is called a photosite. Just remember, photosites collect data on the sensor. Pixels display the data in the image on the screen.

For more information about pixels check these links…
Definition: Pixel; Pixels
Definition: Photosite; Photosites
Definition: Sensor; Image Sensor; Digital Image Sensor

For some more context on pixels in your images check this: Getting down to pixel level.

Comments, additions, amendments or ideas on this article? Contact Us
or why not leave a comment at the bottom of the page…

Like this article? Don’t miss the next — sign up for tips by email.

Damon Guy - Netkonnexion

Damon Guy (Netkonnexion)

Damon is a writer-photographer and editor of this site. He has run some major websites, a computing department and a digital image library. He started out as a trained teacher and now runs training for digital photogs.
See also: Editors ‘Bio’.
By Damon Guy see his profile on Google+.

Lag time – don’t miss the shot

Lag time - test one

• Lag time – test one •
There is a gap between pushing the button and the making the photo.
(image by Netkonnexion)

Every time you push the button…

There’s a period when not much happens. Lag time is the total time taken for the camera to complete the exposure process from the button push. In that process is a lot of detail. Here we look at lag time. With a simple test you can get a feel for the lag time in your camera.

Why is lag time important?

If you buy a camera for action shots you want minimal lag time. Otherwise you look and press, but the action has gone. Of course you can anticipate the action. This is how we all deal with lag time. But to know what time to anticipate you need a feel for the camera. A long lag time is likely to make your guess about when to press the shutter button less accurate. So it’s in your interest to know the lag time and practice with it. If you know the lag it makes it easer to guess the delay for shots.

Shutter lag – don’t misuse the term

Some people use the term shutter lag in a confusing way. They mean it to be the same as lag time. In the past this may have been the case. In early cameras most of the exposure process was completed by the shutter. Today we have a lot of other steps involved. The list of various time related things in the exposure process is quite long today…

  1. LCD activation of the picture (LCD display and electronic [mirrorless] viewfinders only).
  2. Thinking time between seeing a subject on the display and the finger push on the button.
  3. Time taken to get a focus.
  4. Aperture – time to calculate & set aperture size.
  5. Meter – time from light reading to exposure set up.
  6. Digital sensor start up to be ready.
  7. Shutter motor/mechanism actuation.
  8. Shutter opening.
  9. Digital capture of light data.
  10. Shutter closing.
  11. Data emptied from sensor ready for next exposure.

These items may overlap, run simultaneously or be in sequence. Some may not apply to some cameras. It depends on the camera model, design, efficiency and the components involved.

This list adds up to the total lag time. The first five items are not shutter related. They delay the firing of the shutter. They are shutter delay times. The other items are shutter lag items. They are responsible for the shutter and sensor capture of the exposure. They determine the shutter process from start to finish. These are the shutter lag items.

To be clear, lag time is the sum of all the lag items. Shutter lag is only those items related to the shutter-sensor system.

For a more detailed look at various components of lag times check out: Definition: Shutter lag; Shutter delay; Lag time; Processing lag;

Getting the shot – lag time explored

In order to know your camera better you can actually measure your lag time. So here is a method you can use at home. I have tested it using two different pieces of equipment and on two cameras with good results.

A word of warning. The on-board flash crosses all the other lag/delay times and may extend your total lag quite a lot. This is because it takes time to charge up ready for the flash. It will affect the results. Before testing turn off your flash. Check your manual if you are not sure how. Both these methods have back-lighting. You will get enough light without it.

Explanation/method: to measure the lag time we need to identify all the processes involved. I have done this for you above. This allows you to know what parts of the process are holding things up. You will see later that can help you save time.

Next we need to find a way to mark the start and end of the process. Fortunately the camera helps us. When the shutter button is pushed we know the exposure process is started. The clever part is that if we photograph a timer we know when the exposure process is finished because the clock will show the finish time.

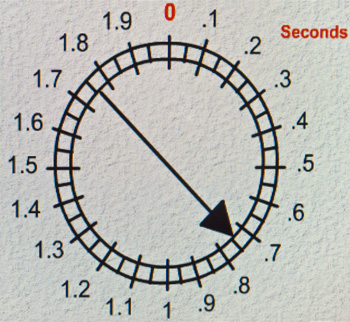
To find out our lag time is easy. We activate a clock at the same time as we push the shutter button. We do this while photographing the clock. When the shot is taken the end of the the lag time is shown on the photograph.

Two methods to try out

In the photo “Test one” above I have used this method with my smart phone. I set up the stop-watch app on my phone. Then I pushed “start” with my left hand. I simultaneously held the camera and pushed the shutter button. The key is to make sure you set off both the timer and shutter button at once. If you do, the the photograph will show the lag time. In the photo above it shows 69/100ths of a second. This is my lag time for a photo taken on my little Canon G12. Use a tripod or stand if holding your camera and pushing the button at once is not steady enough.

If you do not have a smart phone (or a stop watch) to photograph, try this web page…
This page will allow you to test your Digital Camera’s shutter lag… External link - opens new tab/page.
(Note: this page is about your total lag time even though it refers to the shutter lag).

Shutter Lag Test two

• Shutter Lag Test two •
Test your Digital Camera’s lag time External link - opens new tab/page.

Follow the instructions on that page. You will see a very slight retard on the clock at the ‘zero’ point. That gives you time to notice the top point and press the shutter button. The resulting photo will tell you the lag time on your camera.

I have run tests on my camera using both the web page and the stop-watch app method. They give consistent results. I feel confident you will find either test will work for you.

Pre-focus to get the shot

Notice on the second test page there are two tests. The second one shows you how you can shorten your lag time. If you pre-focus the camera that saves some pre-shutter time. Focus takes quite a bit of time. So if it is already focused when you take the shot your lag is reduced.

To reduce the delay with pre-focus press the button half way down while looking at the clock. The camera will focus and take meter reading. Then you can hold the half way position – this is called focus-lock. Hold your half-down position until, at zero. Then push the shutter button the rest of the way down. You will normally find your camera lag time is greatly reduced. Possibly by as much as a half. Something to bear in mind for future shots.

Accuracy

Of course you might take a totally bad reading for your fist shot. After playing I found that for both methods you need to practice a little to get consistent readings.

To ensure you get a good overall result I suggest taking ten readings after some practice. Here are readings from my run of ten… 0.53 + 0.53 + 0.69 + 0.98 + 0.89 + 0.66 + 0.74 + 0.65 + 0.66 + 0.74 = 7.07
If we divide the total by ten we will get an average reading. It will iron out any anomalous readings.
Thus: 7.07÷10 = 0.71 (rounded to two places). The lag time on this camera is therefore 71/100ths of a second.

This ‘average’ method provides us with a consistent standard over our readings. This is a more accurate method of gauging the lag time.

What have we done?

The things a modern camera does to take a picture has created a long lag. The lag time is the sum of all the different things that impact the exposure process. From button-press to complete capture-of-data is the lag time.

We have looked at two ways of testing the lag time: a stop watch app; and a web page timer. I have also suggested using an average reading to iron out anomalies.

If you go through this process you will know your camera much better. But more to the point you will have a new confidence. You will know how long it takes to complete an exposure. And, you will know how much time to delay for a shot.

Comments, additions, amendments or ideas on this article? Contact Us
or why not leave a comment at the bottom of the page…

Like this article? Don’t miss the next — sign up for tips by email.

Damon Guy - Netkonnexion

Damon Guy (Netkonnexion)

Damon is a writer-photographer and editor of this site. He has also run some major websites, a computing department and a digital image library. He started out as a trained teacher and now runs training for digital photogs.
See also: Editors ‘Bio’.
By Damon Guy see his profile on Google+.
Facts about focus… how much do you know?

Orb Out Of Focus

• Orb – Out Of Focus •

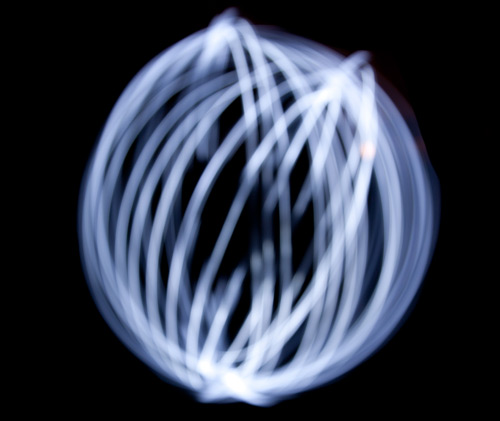
Focus is more complex than at first sight.

Focus, and the associated functions on a camera, take a little time to sort out in your mind. Here are some fundamentals and some obscure facts for you to think about.

Focus facts…
  1. When you point your camera at a single colour, blank space, solid blue sky or night sky the auto-focus will ‘hunt’ for some contrast. The lens will be unable to focus but keep trying. If it detects a difference of contrast in the frame it’ll be able to balance it out and use it to create a focus. If your lens is ‘hunting’, find something with a bit of colour or light contrast. Then it will stop hunting and focus. More…
  2. The light from your lens focuses on the “image plane”, the flat surface that is also the surface of the Digital Image Sensor. The circle of light it creates is bigger than the sensor. The light that falls outside the sensor area is normally inferior to the light which falls on the sensor surface. This is because the edges of the lens creates an inferior quality of light compared to the middle part of the lens. More…
  3. There is such a thing as a “fixed focus lenses”… they have no focus capability. They are put in the camera at time of manufacture and set to give a deep focus from a few meters through to infinity. Can you imagine why such a lens would be used in a camera? More…
  4. Bokeh appears in out-of-focus areas. Some people think that the prominent little circular highlights are the bokeh. This is incorrect. In fact bokeh is a statement relating to the quality of the out-of-focus blur. The blur itself is called… blur! More…
  5. Macro lenses are highly effective at focusing at short distances from the lens and to enlarging the image. Actually they will also focus at other distances too. Macro lenses produce a great portrait. More about macro lenses…
  6. When a lens lets light through the light follows something called the optical path. The focus is achieved on the optical path. However, in a DSLR when the mirror is down, the optical path ends up at the eye. The optical path is not the same all the time. More…
  7. Where you focus affects your exposure. Most people assume focus and exposure are two separate things. And, in fact, they are. But, your camera senses the light conditions where you are focusing and sets that focus at the same time as taking readings for the light meter. Change your point of focus and you may change the light reading. Even a tiny movement may change your exposure readings if your focus changes from a lighter to darker surface. Useful to know if you are in a darker environment with bright light sources around. Especially useful if you are trying to learn manual control.
  8. The ‘sensor plane’ is the surface on which the image is projected by the lens. It is the surface of the sensor itself. In former times it was the same surface that the film was laid upon. Any idea what other names might be applied to the same surface in a camera? More…
  9. Sometimes it is important to measure your focus distance precisely. For example if you want to repeat shots or vary the distance form camera to focus-point by a measured amount in a series of shots. Such measurements are often used in forensic photography, macro work and for working out scene sizes and distances. There is only one place where you can take a true measurement from on a DSLR. It is clearly marked. Know what it’s called and where it is? More…
  10. Consider turning off your auto-focus when using a tripod. The motor that works the auto-focus creates vibration that may affect your shot. It is less likely to have an effect on long exposures, but if you get into the habit of doing it you may help to sharpen your shots. Reducing any vibration is good when you are trying to sharpen your shots.
  11. The Plane of focus is a very important concept – it is about where you are focussing. It gives you an idea of what your focus is doing at any angle of the camera. You should really have a good idea about it if you want to make sure you are getting a proper focus on the subject of your shot. More…
Lots more to learn…

Focus is big subject and can become extremely technical. There is a lot more you can learn. These points are just some fun ideas to help you learn about different aspects of focus in general. If you have any comments, other ideas or want me to write about another aspect of focus – leave a comment at the bottom of the page.

Comments, additions, amendments or ideas on this article? Contact Us
or why not leave a comment at the bottom of the page…

Can you write? Of course you can!
Write for Photokonnexion...

We would love to have your articles or tips posted on our site.
Find out more…
Write for Photokonnexion.

By Damon Guy (author and Photokonnexion editor)

Damon Guy - Netkonnexion

Damon Guy (Netkonnexion)

Damon is a writer-photog and editor of this site. He has run some major websites, a computing department and a digital image library. He started out as a trained teacher and now runs training for digital photographers.
See also: Editors ‘Bio’.

Lenses and designations? Confused? An easy guide

• Lenses •

• Lenses •
Buying lenses optimised for your sensor is confusing.

Lenses are a big investment…

It is difficult to know which lens is optimised for your digital image sensor. There seems to be so many different designations. Here is a guide to which lens designation you want.

Explaining the differences

Brands like Canon and Nikon have their own lenses range. Third party manufacturers, like Sigma, Tokina and Tamron etc. manufacture lenses for brands like Nikon, Canon and others. if buying lenses the third party manufacturers have lenses which are equivalent to the Camera brand manufacturer or possibly better. Look around at online reviews to see what standard of lenses and prices are available.

Make sure you buy lenses fitted with the correct lens mount for your camera. Older models of cameras may have the correct mount but some of the more recent lenses might not be suitable to work with the camera. So check the mount and camera are compatible before buying.

Why are lens mounts specific to brands? It’s mainly historical – the development paths of the manufacturers differ. However, they also want their customers to stay loyal to the brand. This unfortunate situation means you have to reinvest in a new range of lenses if you change your camera body. Hmmm! Expensive.

There are two types of camera sensor. There are cropped sensors – which is a small size. These are more often referred to as APS-C format.

The other sensor format is full frame sensor. These are the size equivalent of the old film SLR frames on a roll of film.

Full frame digital sensors are less common than cropped sensors. The cropped sensors are easier and cheaper to manufacture. However, in recent years we are seeing an increase in full frame releases of new cameras. The higher resolution (more pixels) and potentially bigger print sizes are attractive to consumers. As full frame format gets cheaper they are likely to become more common.

The full frame sensor size is the same size as a 35 mm (36mm ×24mm) film frame in old SLR cameras. Because of the historical significance of the 35mm format modern DSLRs are based on the same standard. Lenses are normally designed to fit either the full frame format or the cropped format.

Lenses designed for the full frame sensor have an image circle that covers the whole 35mm sensor. These lenses tend to be more expensive because they need a wide circle of light thorough them to cover the sensor. They have bigger glass elements as a result.

Full-frame sized lenses are able to fit a camera with the same mount and a cropped sensor. The image circle from the lens remains constant. The smaller sensor size (APS-C) is therefore only able to process the light from the centre of the circle – the rest of the light spills over the side of the sensor. The resultant photograph is like a zoomed-in crop of the image that would have otherwise been taken with a full frame sensor.

This image-cropping effect of smaller sensors is known as the “crop factor”. It represents the ratio of the size of the full-frame 35 mm sensor to the size of the smaller format. The apparent zooming effect also gives rise to an alternative name – the “focal-length multiplier”.

The ratio of full-frame to crop tends to lie in the range 1.3–2.0 for most cropped sensor DSLRs. You might say that a 100 mm lens on a camera with a 1.5 crop factor creates an apparent zoom multiplying the focal length by 1.5. A 100mm lens would then appear to produce the same picture as a 150mm lens. This is not a true magnification since the focal length of the lens is the same on both cameras. Instead the cropped sensor is likely to produce a lower quality result than than the full frame sensor while revealing a closer result.

You can use lenses designed for full frame sensors on cropped sensors. It does not work the other way. A lens designed for a cropped sensor creates an image circle smaller than the full-frame sensor. It would create a circular image with very strong vignetting around the sides. Manufacturers recommend not using lenses designed for cropped sensors on full frame cameras.

Designations

To ensure that buyers purchase the correct lenses for full frame or cropped sensor manufacturers designate them with specific marques. Here is the breakdown of the most common designations…

 Manufacturer  Full frame
(and APS-C)
 APS-C
(cropped)
    Canon           EF pEF-S
    Nikon          FX DX
    Sigma          DG DC
    Tokina          FX DX
    Sony     Various‑incl.
3rd party mounts
DT
    Tamron          Di Di-II
    Samsung   Not available‑2013 NX
    Pentax Check manufacturer
specification
DA
  Konica‑Minolta Check manufacturer
specification
DT
Other related sources…

Lens manufacturers (Wikipedia) External link - opens new tab/page
Photography equipment manufacturers (cameras, lenses etc) (Wikipedia)  External link - opens new tab/page

Comments, additions, amendments or ideas on this article? Contact Us

find out more...Photokonnexion tips by email
If you enjoyed this article please sign up for our
Tips by email service.
                                                 Find out more

By Damon Guy (author and Photokonnexion editor)

Damon Guy - Netkonnexion

Damon Guy (Netkonnexion)

Damon is a writer-photog and editor of this site. He has run some major websites, a computing department and a digital image library. He started out as a trained teacher and now runs training for digital photographers.
See also: Editors ‘Bio’.

Can you write? Of course you can!
Write for Photokonnexion...

We would love to have your articles or tips posted on our site.
Find out more…
Write for Photokonnexion.

How to make a digital camera

How to make a digital camera

How to make a digital camera

A lot goes into making a digital camera.

Canon have made this video to explain the key processes and ideas that lie behind camera design and production. The video is Canon focussed, but the concepts apply to any digital camera.

All the key processes are mentioned in the video. It is particularly interesting to see the considerable technology that backs the manufacturing itself. Camera production is very high tech and the degree of precision involved is considerable.

Despte the complexity of the actual technology the video is a simple and easy watch. The ideas are explained in easy steps and the diagrams make it easy to see what is going on. No mad scientists were involved in making this video! Simple clear ideas and demonstrations are used throughout.

I found this a very useful video to watch. I am sure you will find it interesting and eye opening. Enjoy!

Skylight and UV filters

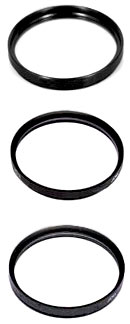
UV and skylight filters

• UV and skylight filters •
There is a debate about how useful they are…

What are UV and Skylight filters?

The keen starter in photography wants to protect their investment… Filters protect your lens – right? Or, is it that they stop damage from the sun? I want to clear up some myths and explain some half truths in this article. You may also save some money.

What are these filters for

Skylight and UV (UltraViolet) filters have a single purpose… to reduce ultraviolet light reaching film. The only difference between them is that skylight filters have a slight pink colour. Both filters prevent the slight tendency of some chemical films to acquire a slightly blue colour cast under some light conditions. (Yes, we are talking about film).

That was simple, wasn’t it?

Now the myths cleared up

UV and skylight filters have a number of myths surrounding them.

They prevent sunlight damaging my digital image sensor.
• No, they don’t. Sensors are UV insensitive or have built in filters (for both infra red and ultraviolet). UV (and IR) light has no effect on them.

They prevent the blue colour cast on sunny days.
• Not true. It is about 25 years since ultraviolet sensitive film was on sale. Even then, the film brands that were sensitive tended to only be sensitive in relatively few conditions; eg. when it was sunny at high elevations or beside the sea.

They provide more clarity in bright sunlight or at high elevations (over say, five thousand feet).
• Once upon a time… some colour film brands used a chemical that was sensitive to UV light. Around 30 years ago an ultraviolet inhibitor was developed that reduced the sensitivity of the film. Problem solved. The slight lack of clarity caused by the sensitivity went away.

They prevent lighter greys being over-bright when in black and white mode.
• Silver-based chemical black and white films were affected by UV. This is not a problem in digital cameras.

The skylight filter has slight pinkness that warms the picture up.
• No it doesn’t – pink is not a warming filter colour. Pink reduces blues in the image. Anyway, if you use auto-white balance any colour effect will be wiped out. If you use RAW there is no need for a filter as you can adjust in developing.

Actually these filters have problems

It turns out that UV and skylight filters can cause a few problems. Poor quality filters; inappropriate filter materials and lack of special coatings all take their toll…

Image effects…
Affects are created by using these filters. In particular over-exposure haze, flare and ghosting are created. The haze results from light bouncing between filter, lens elements and the sensor inside the body of the lens/camera. This creates a slight haze of over-exposure in very bright conditions. Flare, and therefore reduced contrast in the image, is sometimes caused by a beam of bright light being scattered by the filter. More expensive filters reduce this by having chemical coatings on (lens glass has coatings too). Ghosting is where spots of light appear in the image that were not in the scene. They originate from back reflection off the sensor onto the other lens elements or the filter. Usually this happens in low light situations stimulated by bright lights like car headlights.

Adding another glass (or resin/plastic) element…
Additional elements degrade the image. Cheaper filters can cause chromatic aerations, creating colour banding in an image. There may be additional light scattering. Some filters significantly reduce the light getting through (maybe as much as 1/3rd of a stop of light) leading to underexposure. Optical aberrations may be caused by poor alignment of the filter element (not flat/parallel) in its place. This causes loss of definition, particularly in some places where sharpness would be expected.

Are there any reasons to buy them?

Yes, but not many.

Protection:
UV and skylight filters do provide protection, creating a barrier against mechanical damage to your lens. The front elements glass or coatings on the surface are protected from dust, dirt, splashes and possible scratches or breakage from a bump, scrape or blow.
• Alternatively, consider a proper lens hood. They prevent angular light beams straying into the lens which can improve the image. They also greatly reduce the probability of damage to the lens too. Lens hoods are cheaper than filters, and don’t cause optical problems.

Supporting your dealer:
Filters are expensive to buy, but are profitable to sell. In these hard economic times you will be providing a rich return for your dealer and helping him survive a tough market.

A mistake to clear up

Somebody told me recently, “I always have this polarising filter on the front of my lens”. Wow! (It was actually a skylight filter when I looked). Polarising filters are great for reducing some reflections from some surfaces and may darken skies in some light conditions. Some people mix them up with UV and skylight filters. Just let me say for now, don’t keep a polarising filter on your camera.

By Damon Guy (author and Photokonnexion editor)

Damon Guy - Netkonnexion

Damon Guy (Netkonnexion)

Damon is a writer-photog and editor of this site. He has run some major websites, a computing department and a digital image library. He started out as a trained teacher and now runs training for digital photographers.
See also: Editors ‘Bio’.

How Safe Is Your camera sensor from dust?

The camera sensor is incredibly sensitive to dust. Your shots can be ruined!

The camera sensor is incredibly sensitive to dust. Your shots can be ruined!
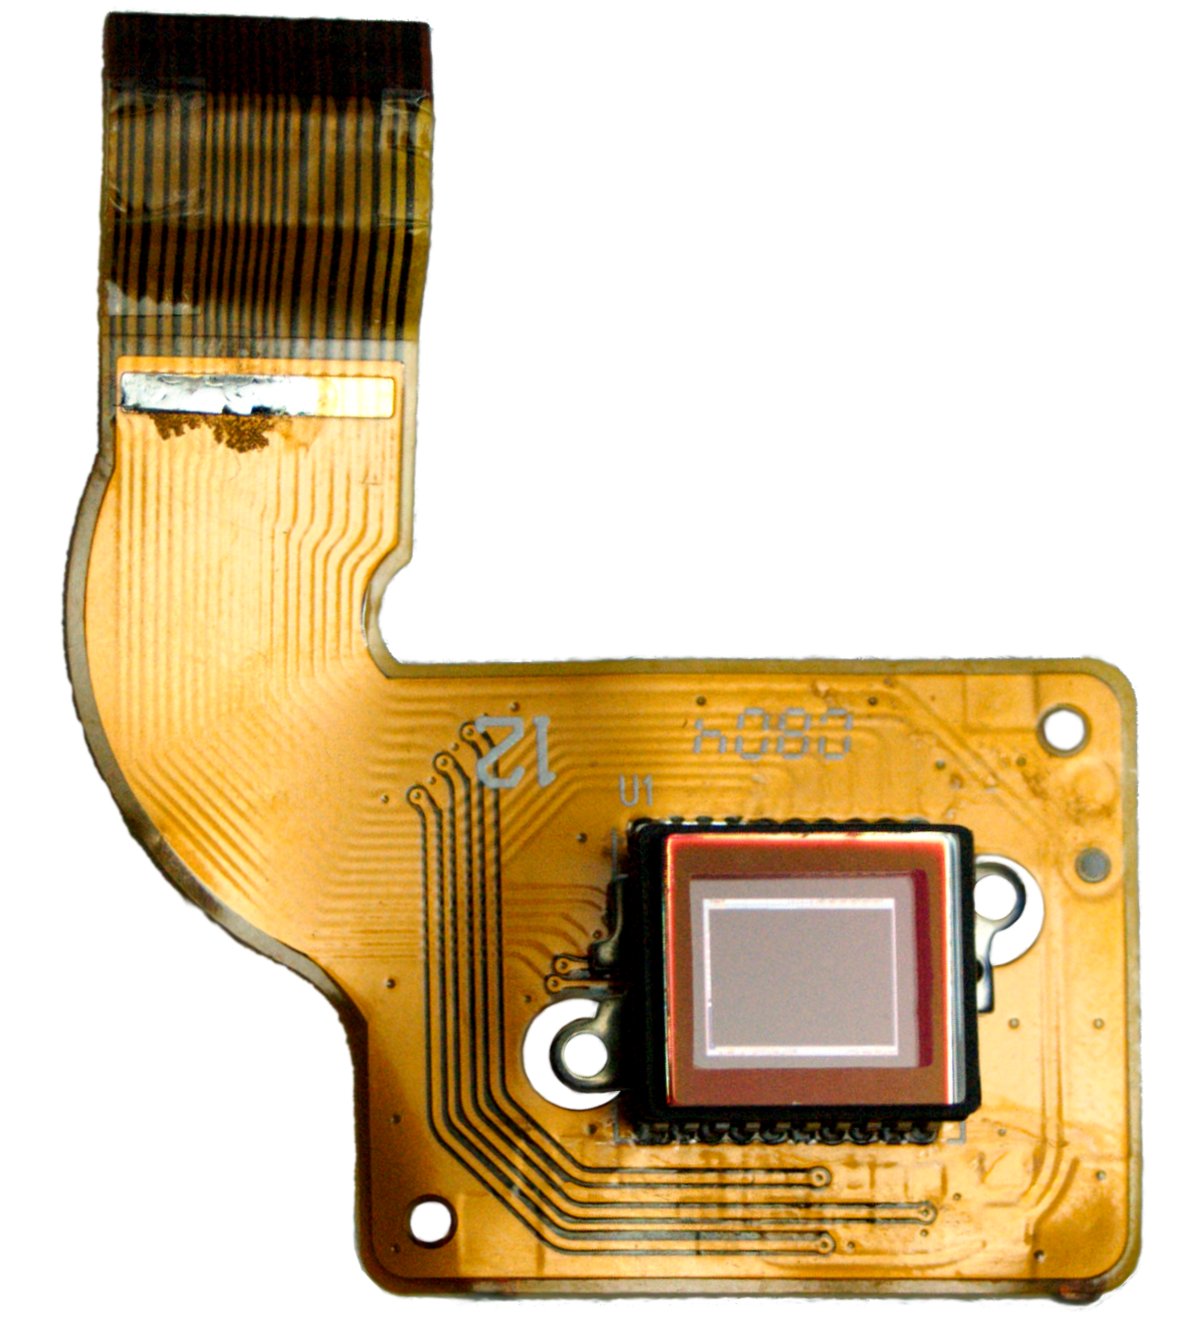
Image Sensor picture curtesy of Wikipedia  External link - opens new tab/page

Your image sensor is your camera!

Without it, you have no means of taking pictures. It makes sense to look after it and to prevent dust from getting onto the working surface. What can you do if it does get dust or other substances on it?

How does dust get onto your sensor?

In a variety of ways… The main entry point is the lens hole. Every time you open your camera, you expose the inside to dust. It is impossible to avoid this. However you can minimise the potential for dust entry…

  • Avoid any opening of your camera unless necessary.
  • Avoid dusty environments. Wipe down your camera with a slightly damp cloth and wipe dry before opening.
  • Avoid windy environments. Get out of the wind before opening.
  • Avoid damp environments: dry before opening. Moisture kills cameras and takes dust inside.
  • Hold your camera with the lens hole pointed toward the ground so that dust/skin/hair cannot fall into it.
  • Avoid having an open lens hole for any longer than necessary.
  • Do not breath or blow directly into the lens hole!
  • Avoid opening the camera in the warm soon after coming in from the cold. The same when entering air conditioned places from hot out-doors. Temperature differences cause air to be sucked in and moisture to condense inside the camera. Allow several hours to equalise temperatures inside and out before opening.

Some cameras leak in other places too… The battery cavity, plugs and jack holes for cables may allow air and dust inside. Every time you put a battery into the camera you are creating a piston to push air (and dust) into your camera. Beware – apply the same rules above for all plugs, batteries and cards movement.

I suspect dust on my sensor – how can I tell?

It’s sometimes difficult to tell if dust is on the lens or on the image sensor, or even if it is on the viewfinder. Here is how it is done.

A dust spot most often shows up on your pictures in the lightest areas. If you are looking for dust, hairs and specks then photographing blue sky does the trick. First, thoroughly clean your lens with lens cleaner and a proper lens cloth. It is best to do the photographs in aperture priority mode. Choose f22 or the smallest aperture. Zoom out to the maximum amount. Then, manually focus to infinity (the camera will probably not be able to auto-focus in a clear sky). Take a few pictures of the sky – the blue areas only.

Download the pictures to your computer. Enlarge them on-screen to the full size. Any dark spots, specks or lines you see on every picture in the same place are dust, other detritus or hairs. Birds, aircraft and UFO’s will be in different positions on the pictures.

What can I do about dust I find?

The simple answer is, clean it. This sounds terrifying. It really is not. It can be done in a few seconds with one simple piece of equipment. You will need to buy a blower. They are simple pump-action nozzles that expel fresh air against the sensor and blow off the dust. Here is the one I recommend… I have used them for years without any problem.


The Rocket Blower

Once you have your blower find out how to lock the mirror up on your DSLR. The mirror lock-up function will be somewhere in your menus. Check in your manual.

The procedure below is best with the camera on a tripod. You can look into the camera with your hands free to use the blower. There will be no danger of moving the camera while doing the blowing.
To blow-clean the sensor with the Rocket Blower:

  1. Mount camera on a fixed position/tripod away from contaminants.
  2. Take off your lens so the lens hole is open.
  3. Turn on your camera.
  4. Set mirror lock-up to enabled in your menu.
  5. Activate mirror lock-up for cleaning (as advised in the camera manual).
  6. There will be a click and you will now be able to see the sensor.
  7. Hold the blower so the nozzle points at the sensor, at about 60mm to 100mm from it.
  8. Squeeze the bulb of the blower about 3 to six times, directing the air at the sensor.
  9. Unlock the mirror lock-up (as advised in the camera manual).
  10. The mirror will click and drop.
  11. Turn off the camera.
  12. Replace the lens.
  13. Retest for dust – re-take sky pictures and view on the computer.
  14. Repeat if dust is still present. (Normally once or twice is enough).

The whole procedure for one test and clean-up should be about five to ten minutes.

Check that the procedure is compatible with instructions in your camera manual before proceeding. Follow any variations suggested.

Common Sense

Be sensible. While you are cleaning your sensor make sure you…

  • Use only air.
  • Use only the type of blower shown above (any similar brand).
  • Do not use compressed air (especially canned). It may damage your camera beyond repair.
  • Do not use other gases (they may contain particulates, corrosives or moisture).
  • Do not use anything to directly touch the sensor.
  • Do not use your mouth to blow into the hole – grease and bodily fluids will be forced onto the sensor surface and will not come off again.
If after three or four attempts you still have dust…

The next level of cleaning involves wiping the sensor with a sensor cleaning fluid and using a cleaning implement. This is a much more delicate operation. It should only be carried out if you are confident dealing with delicate electrical components. I do not cover this operation here. If not confident, take it to a properly accredited service agent for your camera manufacturer.

By Damon Guy (author and Photokonnexion editor)

Damon Guy - Netkonnexion

Damon Guy (Netkonnexion)

Damon is a writer-photog and editor of this site. He has run some major websites, a computing department and a digital image library. He started out as a trained teacher and now runs training for digital photographers.
See also: Editors ‘Bio’.