Category Archives: Post Processing

Any of the activities associated with the processing of the captured photographic or graphic file.

Three great ideas to make group shots more compelling

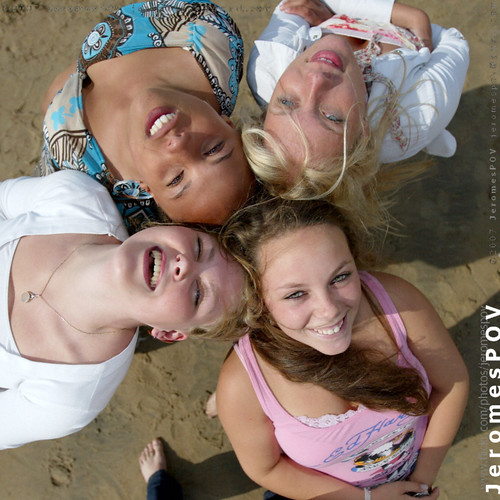
Group shots - Bloomingdale beach girls put their heads together by JeromesPOV, on Flickr

Bloomingdale beach girls put their heads together
Click image to view large
Bloomingdale beach girls put their heads together by JeromesPOV, on Flickr External link - opens new tab/page

Group shots are about togetherness.

It’s important in any picture is to connect subject and viewer. Some pictures are more compelling than others. Here are three powerful ideas for group shots.

Group shots and cohesion

More compelling group shots show cohesion. A happy group of friends shows great cohesion. Much more than people on a street corner waiting to cross. Something in a friend-group holds them together. There are many ways to build cohesion in a group shot. I try to get the group to put their heads together. When people want to bring their heads close, or touching, it shows great intimacy. Cohesion is strong.

There are many ways to show cohesion . Another form of it is arms around each other. You could ask your group to be leaning in the same way. That imparts a powerful group-force. Group hugs are fun! Another idea is to pose arms in a similar way or a direction. You can also use pointing legs.

Commonality in group shots

Group shots can hang together well without being intimate. A common theme in the group shows a dynamic togetherness. Colour is a good theme. If I am doing family portraits it is important to capture the faces. Any distraction takes away the family feel. Bring the family group close with similar colours and clothes. That helps prevent distraction from the faces to create togetherness.

Poses of all sorts can help too. When you are all doing the same thing it pulls the group together. The pose does not have to be intimate. It just needs to show a common theme in the pose.

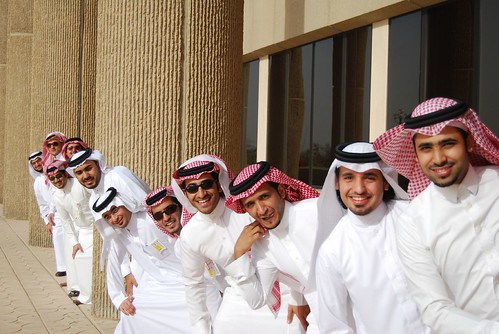
Group shots - Saudi Graduates by Ben SJ, on Flickr

• Saudi Graduates •
Doing something in common like the pose here, or wearing similar clothes helps the group to have a common theme.
Click image to view large
Saudi Graduates by Ben SJ, on FlickrExternal link - opens new tab/page

Framing

A strong element of composition in group portraits is framing. Find a frame to constrain your group shots in small places. It helps them look more cohesive. This is especially if the frame keeps them close together. A great example is wedding photography. Close members of the family pictured between tight columns outside a church is a good way to pull the group together. The columns prevent the eye from straying out sideways. The family hold the eye as a result.

More after this…

find out more...Photokonnexion tips by email
Enjoying this article? Please sign up for our
Tips by email service.
                                                Find out more
#11030#

Group intimacy through framing can be shot in trees or other landscape features. If the framing feature is not too strong the group will gain from being close and still be the centre of interest. Using landscape features is great for one-off family shots on holiday.

A traditional form of framing is the use of the vignette. You make a vignette in post production. Use a shadow or white-out technique at the edge of the picture and around the corners. It helps focus the eye gently to the centre of the picture.

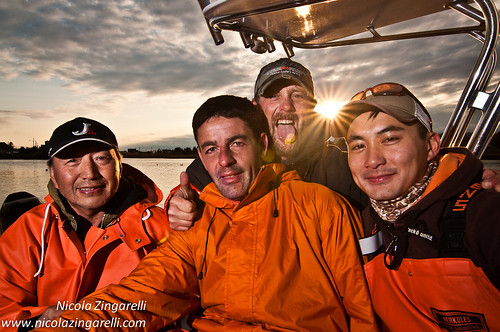
Fishermen ... and friends!

• Fishermen … and friends! •
Small group portrait shot in Green Harbour, Massachussets
This shot pulls it all together. Close head intimacy (right hand three). Togetherness pose (arm positions, smiles/expressions). Commonality in colour/clothes. Common theme – fishing. Framing – the boat roof stops the eye straying upward.
Click image to view large
Fishermen … and friends! Small group portrait shot in Green Harbour, Massachusetts by Nicola Zingarelli, on Flickr External link - opens new tab/page

Getting it all together

There are lots of ways to help make your group shots hang together. Try to add cohesion, commonality and framing to your group shots. You’ll be on the way to a compelling shot.

Netkonnexion

Damon Guy (Netkonnexion)

Damon is managing editor of Photokonnexion.com with professional experience in photography, writing, image libraries, and computing. He is also an experienced, webmaster and a trained teacher. Damon runs regular training for digital photographers who are just starting out.
See also: Editors ‘Bio’
By Damon Guy :: Profile on Google+

The secret to world travel – but staying at home!

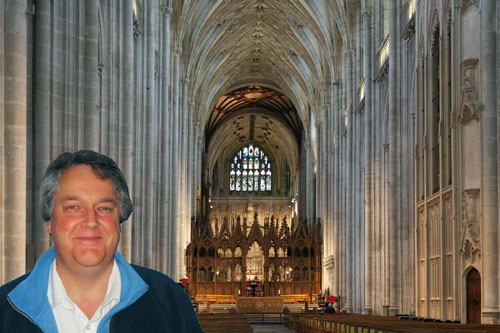
• Winchester Cathedral Chroma key image•

• Winchester Cathedral •
Chroma key work is quite easily done in Adobe PhotoShop and a range of other quality photo-editors.

When you want to be somewhere else…

There are places we would rather be than where we are now. I would like to be on an island paradise …not going to happen! But you can do it photographically. The secret is something called Chroma Key photography or green screening.

Chroma Key Substitution

In chroma key, often known as “green screen” photography, the subject is photographed against a uniformly lit green background. Then, in post production the subject is easily selected out from the green background. The selection can then be pasted into any other photographic background.

Any uniform colour can be used as a backdrop for the chroma key shot. The picture above is selected from a blue background and pasted into a picture of Winchester Cathedral in SE England. The two pictures were taken on different days.

To make the selection of the subject from the background it is important to light the background evenly. When the colour is even the selection is easy and can be completed in one operation. Colour variations from uneven light make it more technical to isolate the subject.

Green is the most frequently used colour in chroma key photography. The colour is very easily separated from human skin tones. Where the subject has green tones, blue is often used as the chroma key alternative. Blue is a common colour for clothing. It is therefore less suitable than a strong bright green which is not so popular as a fashion colour. However, green does have other advantages. The human eye is able to see more shades of green than any other colour. This makes it easy to see variations in the green when setting up the lighting. Green sensitivity is also built into software applications to match the abilities of the eye. This helps us to work with the background when doing awkward selections.

Fun and games

The substitution of a subject into any other photographic background provides great opportunities for doing fun things. Film stars can be placed in your garden. You can apparently travel the world without leaving your front room. Just find the right pictures and substitute yourself into the background of your choice.

Of course there are also opportunities for advertising, graphic art, product photography, still life, portraiture, action shots and many other false situations. Of course we should be careful not to be immoral about such things! Feel free to have fun though. You can really make it look like you have traveled the world.

How is it done?

Basically you need a chroma key background, lighting to illuminate it evenly, a camera and a subject. On a small scale this is easy to do. A lot of people doing chroma key work for the first time start with still life or table-top photography to get the technique right. Probably the most common use of the technique is for portraiture. Take a picture of yourself or your friends and then start playing. For this you need a larger screen…

The video is a complete introduction to the use of chroma key photography. You can take the same techniques and scale them to any size. The video introduces the ideas you need to grasp and shows how to set up the lights and the equipment. It also shows one of the software applications. After the video I will briefly look at that software for you.

How to Green Screen (Chroma Key) with Photography!

markapsolon  External link - opens new tab/page

Software

There is a whole range of software that is capable of doing chroma key. In essence chroma key software has two jobs. The first is to select the subject off the green background (or whichever colour you are using). The second is to successfully blend the abstracted subject with the new background.

The software from the video is called PhotoKey from FXHome  External link - opens new tab/page. It has been produced specifically for chroma key compositing. It is not alone in the market. However, there are not many applications specifically aimed at this work. Instead there are plenty of applications that do chroma key blending as part of a general suite of editing tools. There are also plugins for the same process to go into your favourite image editor.

The actual process for producing the final blended image is relatively quick and easy in most of these chroma key applications. The tools are usually quite self explanatory if you have some editing experience. As with any editor, you normally find the blending tools manage colours, contrasts, edging and so on. Ultimately you are creating a blend of the two images, but the best chroma key tools go further. At the end of working through the blending process you can make further changes in a good software suite or plugin. If you are satisfied with it you should be able to export your image to make a .png, .jpg or .tiff image.

The way to do it in Adobe PhotoShop

The general photographer is most likely to have use of a quality image editor like PhotoShop, Elements, GIMP, PaintShopPro and others. All these are able to do the type of work that PhotoKey can do. Admittedly it takes longer. But for beginners it is better to save your money for more general photography kit. For those who are interested, here is a short video explaining the Photoshop method of doing a chroma key composite. It is a simple technique using standard photoshop tools.

Isolating with a Chroma Key Background

This tutorial is aimed at Photoshop intermediate level users.

Overall…

Chroma key work is fun. There is quite a lot to learn, but it adds flexibility to your photographic work and post processing. The use of up to date quality image editors is probably better than splashing out on expensive specialist applications. Nevertheless specialist applications do a great job, saving time in post processing.

Can you write? Of course you can!
Write for Photokonnexion...

We would love to have your articles or tips posted on our site.
Find out more…
Write for Photokonnexion.

find out more...Photokonnexion tips by email
If you enjoyed this article please sign up for our
daily email service.
                                                 Find out more
#11030#

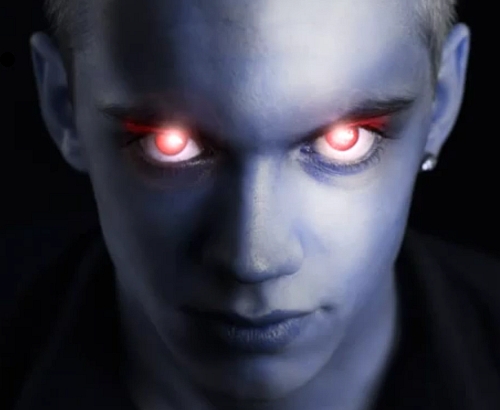
The simple secrets of dodge and burn – post processing

• Dodge And Burn •

• Dodge And Burn
Important techniques for affecting the light and dark in an image. (Video below).
lynda.com on YouTube  External link - opens new tab/page

Dodge and burn – powerful light/shadow effects

Two of the oldest techniques in the photographic skill set are dodging and burning. In the old days of chemical baths and film developing they were the most effective way of changing the image out of camera. Simple stuff really. During the development of your film you allowed parts of the developing film to become overexposed. Other parts of the film you allowed to become underexposed. The effect on the final print was to increase the brightness in some areas of the film and darken others.

In modern post-processing we still use these techniques. Most post processing software packages have ways to create dodges (whitening or brighten) or burns (darkening or blacking). The aim of this? Well its simple really. If you have a picture and you want to do any of these things you need these techniques…

  • Increase/decrease the intensity of shadowy parts of the image
  • Increase/decrease the intensity of brighter parts of the image
  • Brighten the bright spots and darken the dark spots to increase contrast
  • Darken down intensely bright spots in the image to prevent distractions
  • Brighten the darker areas in the image to bring out detail
  • Pick out highlights

More after this…

find out more...Photokonnexion tips by email
Enjoying this article? Please sign up for our
daily email service.
                                                Find out more
#11030#

Dodge and burn

Although this tutorial is based in PhotoShop, most of the techniques shown in this video can be used in most editing software. If your software does not have the same tools as those found in PhotoShop check your help files for more information.

You may have to do some trial and error experiments to get these techniques working – after all, the practice will give you control of your software. Trying out these skills will give you the basic command of light and dark in the post processing context. Dodging and burning are really important techniques. Watch the video for how the techniques are used.

Photoshop dodge and burn

lynda.com on YouTube  External link - opens new tab/page

By Damon Guy (author and Photokonnexion editor)

Damon Guy - Netkonnexion

Damon Guy (Netkonnexion)

Damon is a writer-photog and editor of this site. He has run some major websites, a computing department and a digital image library. He started out as a trained teacher and now runs training for digital photographers.
See also: Editors ‘Bio’.

Can you write? Of course you can!
Write for Photokonnexion...

We would love to have your articles or tips posted on our site.
Find out more…
Write for Photokonnexion.

Warning: you could delete your best image…

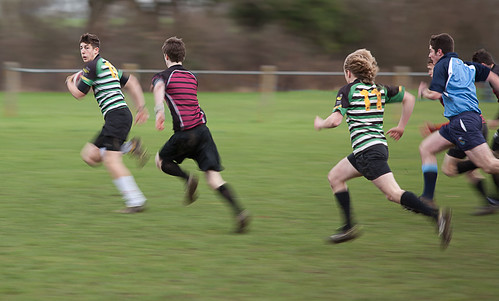
• The Chase Is On •

• The Chase Is On •
Click image to view large
• The Chase Is On by Netkonnexion on FlickrExternal link - opens new tab/page

Watch out for great images you missed.

It’s easy to do. People will tell you to delete your no-go images in-camera. But you will miss essential details that will fool you. Your best images can be lost that way.

Lack of detail

Your image in the camera screen does not show the whole story. The picture is resized to fit the camera screen. During resizing the picture loses a lot of detail. The camera preserves only the essentials for quick checks.

Consider the panning shot above which looked very poor on the camera screen. Lack of detail merged the heads into the background. Blur masked the image. Little or no detail was visible throughout. On my camera this shot was a no-hoper. Fortunately, experience tells me I need to keep shots to view them in full detail. Good thing I kept this shot. It scored high enough for a placement in a competition.

Two lessons…

Inexperience can mislead photographers. The back-screen on the the camera is no guide to a successful picture.

The blurring in this shot shows great movement. The important parts, the faces and heads, remain sharp. You could not see that clearly enough in-camera. The expression on the lead runner shows perfectly the emotion and duress of the getaway. His face tells a great story – the break-away with an anxious back glance. The sharpness and story did not show on the camera screen. Had I deleted in-camera a promising shot would have been lost.

More after this…

Second, the screen display on the camera lost an essential detail. The main light was coming in from the side away from me. The heads had a wonderful light-rim around them. It differentiated them from the background. That did not show on camera. The aesthetics, story and sharpness are greatly improved by this detail.

The moral

It is easy to miss important details on the camera screen. Little things that make the picture so detailed are often lost. If you delete on-camera before seeing images in full detail on your computer you could deprive yourself of great images.

By Damon Guy (author and Photokonnexion editor)

Damon Guy - Netkonnexion

Damon Guy (Netkonnexion)

Damon is a writer-photog and editor of this site. He has run some major websites, a computing department and a digital image library. He started out as a trained teacher and now runs training for digital photographers.
See also: Editors ‘Bio’.

Can you write? Of course you can!
Write for Photokonnexion...

We would love to have your articles or tips posted on our site.
Find out more…
Write for Photokonnexion.

This one peculiar idea can transform your photography

Compositional elements :: Look at a large number of photographs every day

Everything you see in a photograph is a composition. Looking at lots of photos every day, particularly good ones, helps you appreciate good images. The article shows you how to identify simple Compositional elements.

Involve yourself to improve

Every day, expose yourself to great images. The mind soaks up the goodness. But to make it effective you should also be seeing into the image. It is surprising, but the the good things about a photograph are seen with the first glances. Compositional elements in a photo jump out at you, even if you can’t tell me about them. I am going to show you how to find them with a simple exercise.

What is in an image? Compositional elements

When we look at an image it is often difficult to see what is good about it. Obviously our personal taste plays a part. Often however, other people who do not share our taste, also like it. The common appeal comes from the compositional elements of the image. Often these elements are very simple structural lines or edges. They help the eye through the image or lead the eye to the key subject. Composition is all about helping the eye to appreciate the main point of the image.

How do we pick out the compositional elements?

Knowing about composition is important. The “Rule of Thirds” and other simple rules help you to analyse a scene. You can use them to understand ways the eye uses compositional elements in a scene. Find out more about composition from our page: “Composition resources on Photokonnexion”. There are lots of posts there to help you with composition.

You can already spot basic compositional elements

The main compositional elements can be picked out by eye. Anyone can do it. This is what you do…

  1. Take a small piece of paper – postcard size is ideal.
  2. You are going to draw on the small piece of paper…
  3. Pick out a photo – any picture.
  4. Study it for five seconds.
  5. Put the picture out of sight.
  6. Using simple curved and straight lines make a skeleton sketch of the picture. Do it from memory take no more than thirty seconds.

That’s it. You have simply isolated the elements of the compositional structure.

Here is an example. Click this link and follow the short procedure above. to create the skeleton sketch.
Test Picture

Here is a good example of what you should see when you have finished your sketch: Test Picture Compositional Skeleton. It was done by my wife, who is not a photog or artist. Despite that, she has successfully isolated the major compositional elements in the picture. It shows how effectively this exercise can work

More after this…

find out more...Photokonnexion tips by email
Enjoying this article? Please sign up for our
daily email service.
                                                Find out more
#11030#

Analysis

The test image is of Honister Pass in the English Lake District. All the lines lead the viewer to one point. The exit in the hills in the distance is dynamically off-centre. That keeps your search for symmetry. You feel like you know where the road is going. It draws the eye into the picture. Your eye does not exit upward – the clouds hold the eye into the valley. You are drawn along the road into the image, giving it depth. The picture has a 3d structure and a strong mood.

The strong lines and balance of this picture make it simple to pick out compositional elements. With practice this procedure will help you analyse complex examples. With a few practice examples you will be able to pick out compositional elements by eye. If you do this in your head you’re on the way to doing compositional analysis through the viewfinder.

As you learn new compositional ideas you will pick out more compositional elements. Use them as tools of analysis. They will help you understand and compose in the frame while taking a shot. Soon you will compose to draw the viewer into the picture.

Rules don’t make things beautiful

Rules of composition are limited in many ways. They are more guidelines than rules really. So do not fear to break them. Instead, know the things that work well for the eye. Develop harmony and balance, learn to appreciate beauty. Look at as many great images you can every day. Knowing a little about why they are attractive will help you to create more beautiful and effective images of your own.

By Damon Guy (author and Photokonnexion editor)

Damon Guy - Netkonnexion

Damon Guy (Netkonnexion)

Damon is a writer-photog and editor of this site. He has run some major websites, a computing department and a digital image library. He started out as a trained teacher and now runs training for digital photographers.
See also: Editors ‘Bio’.

Can you write? Of course you can!
Write for Photokonnexion...

We would love to have your articles or tips posted on our site.
Find out more…
Write for Photokonnexion.

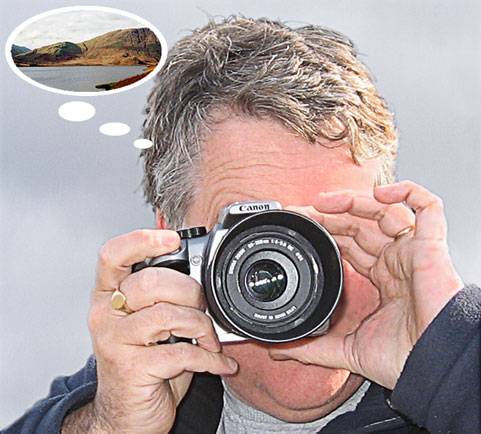
Visualise! 80 year old secret of world class photographer revealed

• Visualise the image you want •

• Visualise the image you want •
Learning to “visualise” the image you want gives you the edge.

Visualisation – a world-class skill anyone can learn.

Photographers are distinguished from “snappers” by consistently and deliberately making photos which spark a vivid image in the viewers mind. The photographer relies on a clear image in their own minds to guide the creation of this image, rather than capturing by good fortune like the snapper. World-class photographers visualise a detailed image in their mind before the button is pressed.

Anyone can learn to visualise

Back in the early 1930’s Ansel Adams, a world-class landscape photographer, applied this technique to his photography. He said that the control of a photograph…

…lies in the selection by the photographer and in his understanding of the photographic processes at his command. The photographer visualises his conception of the subject as presented in the final print. He achieves the expression of his visualisation through his technique – aesthetic, intellectual, and mechanical.
Ansel Adams; “The Studio Annual of Camera Art”, 1934

Adams’ correspondence of the time showed that others were aware too. Today we all recognise the value of learning to visualise great outcomes for our work, or sports and our future success. So, why not our photography?

Learning to visualise in photography

What is visualisation? Simple. It is a detailed image in your minds-eye of how you want your final picture to look. A successful photograph will recreate the detailed image in your mind as a picture on-screen or print. But the viewer who sees it will get an experience beyond a mere picture. A successful image will come alive in the viewers mind.

Creating the mind-image? It takes a little practice. As we all have images in our heads. The trick is to make the image a good one. When you visualise an idea for your picture, plan it out – fill out the details. Keep the image in your head. Refer to it constantly. You learn to develop that detailed image by learning to observe the outside world. When you look at someone’s hair look at the texture and how the light falls on it. Check the way the shadows fall on their face. Observe sitting positions that flatter their body shape. You see a million details of the world around you every day. Learning to create a true image in your head is about being able to visualise those details in your minds-eye.

When you see a scene? The “snapper” will point and shoot. The photographer will consider the details. Look at the colour and quality of the light. Understand relationships between light and dark, shadow and brightness. Look at the lines and edges in the scene. Want to raise the impact? Change the scene in your head until you are happy with it. Visualise every detail and every intention you have for your image. Then, go make the changes.

Alternatively, picture the best composition. Exclude the distractions, consider the elements of composition and how you want them to catch the viewers eye in the final photograph. Figure out how you want the depth of field, motion blur, brightness and so on. Complete a visual experience in your head that will make the image real. Then reproduce it photographically.

Starting from scratch to design a scene, or composing one to represent your view of it, both have the same outcome. If you can visualise the scene as vividly as if it were real, then you have a chance to pass that on. It is passing that on to your viewers that is important. You are trying to create a vivid image in the viewers mind.

Taking the picture… When you are able to visualise an exciting image in your minds-eye you have already got your picture. Next create it in-camera. Command the digital processes to recreate what you want for the final image. NOW, and not before, set up your camera. Then take the picture.

Camera control is essential, auto-mode will definitely not recreate what is in your head. What you will find is that as your minds-eye image-making gets better, your technical skills increase to match it. Work at it and images on-screen will flow from images in your mind.

Great pictures

…flow from great images in your mind. If you make a great picture from your visualisation of the scene you will in turn create a great image in the mind of the viewer. The photographer gets excited and passionate about this translation because it is a unique and powerful communication with the viewer. You can learn this… you just need to visualise the details in your mind. Practice, and you will make great images.

find out more...Photokonnexion tips by email
If you enjoyed this article please sign up for our
daily email service.
                                                 Find out more
#11030#

Damon Guy - Netkonnexion

Damon Guy (Netkonnexion)

Damon is a writer-photographer and editor of this site. He has run some major websites, a computing department and a digital image library. He started out as a trained teacher and now runs training for digital photogs.
See also: Editors ‘Bio’.
By Damon Guy see his profile on Google+.

Twelve Simple tips for atmospheric candlelight shots

Candles put out a wonderful light…

Everyone feels the atmospheric impact of candlelight. The colour and the low light seems to draw you in. Capturing that light is easy with a few simple hints. Lets look at what is needed…

Tripod…

There is nearly always low light associated with candle photography. That means working with longer exposures. A tripod is excellent for that. Indoors, beware of a wooden floor, any move you make can be transferred to the tripod. Floor vibrations can ruin a shot or make it soft. For sharpness remember to use the camera timer for the shot or a remote shutter release.

Lighting…

The best way to view candles is by their own light. Because they don’t use a tripod many people are tempted to use flash. Unfortunately flash will over-power the candlelight. It will take out the colour from the light and tend to create hard, sharp shadows. It will ruin the atmosphere of the candlelight. Make sure you switch off your flash. If you need more light the you can use as many candles as you need to raise light levels. They don’t need to be in the shot, but they will keep the light the same throughout the shot.

Composition…

First decide if your candle or candles are the subject or are props. This decision will affect your focus and how you lay out your scene. Candles can create a strong bright spot in the scene. If it is too bright the flame will form a burnt out white spot. Once you have arranged your scene, ensure that the candle will only draw the eye a small amount unless it is the subject. You should consider the placement of the candle in a way that might minimise the impact of the bright flame spot.

Positioning…

If all your candles are close together the light will tend to act as one light source. This will tend to act as a hard light creating more defined shadows. If you want the light to be softer and the shadows with less well defined edges set your candles further apart. If the light is to be cast on a face then soft light will be more flattering.

Movement…

One of the peculiarities of working with candles is that the flames are subject to the slightest air movement. Unfortunately candle flicker is attractive to the eye in real-time; but looks like a loss of sharpness in a still image. It is quite useful in close focus shots with a candle to use an air break of some kind nearby to stop air movement. In a table-top study use a large sheet of card to one side out of shot. That will help prevent air movements. If not, keep an eye on the flames when shooting. Try to capture the flame upright or, if using more than one flame, make sure they are all going the same way. They look more natural that way.

Since candle light is low intensity, make sure you also prevent other sources of movement in the shot. They will inevitably be blurred as the shot will be using a long exposure. This will look like a distraction against still flames.

Can you write? Of course you can!
Write for Photokonnexion...

We would love to have your articles or tips posted on our site.
Find out more…
Write for Photokonnexion.

Light intensity…

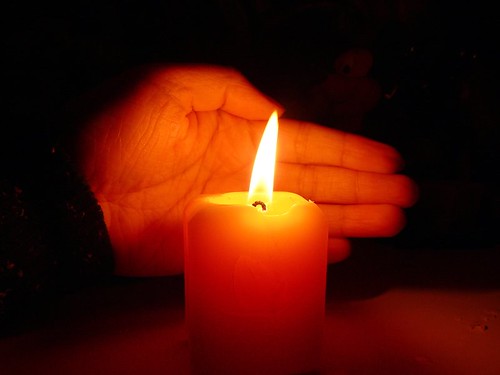
The light from a candle can be made much more intense if you use something to catch the light from the candle. A face, hand or other objects bring alive the picture and complements the candle. The presence of the object acts to reflect the candlelight. Light flesh tones are particularly good in this respect since the flesh colour is tonally close to the candlelight hues and they act as a reflector to bring out the light.

From

From “Candle Series” by Spicedfish
From “Candle Series” by Spicedfish on Flickr External link - opens new tab/page

Using reflectors in a candle scene is a great way to raise the light intensity. You can find other types of surface than the one in this picture in most scenes. Walls, ceilings and even off-shot reflectors are all good. Be careful to use neutral colours. Colour reflectors will affect the colour of the scene. If you are using a big card out-of-shot make it white. This will reflect the same colour light back into the scene, filling in the light.

Shadows…

The other side of light intensity is the shadows. The darker tones and strong contrasts of candle shots create most of the atmosphere. Spend time studying the shadows created in your scene. Strong contrasts are great subjects. If you create shadows that fall badly across your scene it will impact on the overall effect. The best use of shadows is often to the edges of the shot. If the light fades out to edges this holds the scene into the shot – naturally focusing the eye. Work with shadows to ensure the mood is harmonious.

Additional lights…

If you want to use fill light in the scene try to match the quality of light from your candles. Use soft light sources and natural light with hues matching the candles. Natural light will fill the scene well but tend to neutralise the colour of the candle light. The warm glow of candles is a great mix with evening, low-intensity light.

Some people use light with gels to give a warm glow. Warming gels can also be used with a flash. However, beware the power of flash. The candles will lose their soothing effect if all the shadows are taken away around the base of the candle and harsh shadows are introduced from one side. Typically use a diffused flash on the lowest setting – it also helps to be a distance away from the candles as well.

Multiple candles…

When working with one candle as subject the main focus of the shot is clear. However, there is a lot of scope for creativity. Consider two main issues. How to layout your candles and how to use the overall light with the layout. Using candles for making patterns is great fun and can produce excellent shots.
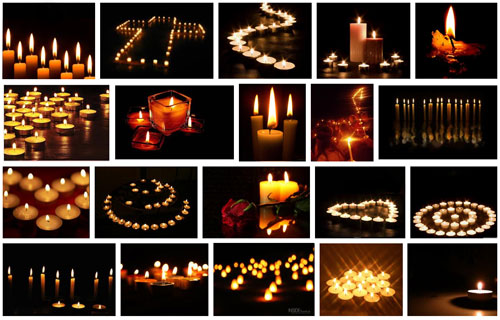
Patterns with candles

Making patterns with candles
Click to view Google Images “Candle Light” search

Try to keep the scene simple. Overlapping candles or indistinct objects in the pattern are confusing. Work with the sharp contrasts and keep your pattern well defined.

Exposure…

How long should you make your exposure? This depends, like any scene, on your light levels. To get more light in the exposure a long shutter speed is suitable for most candle shots. A range of 1/15 second down to 2 seconds is a good starting range with an ISO of 100. Camera settings vary significantly with reflectors, multiple candles or fill lights. Experiment to get it right. Aim to make the shot moody or atmospheric while providing detail for the eye to look at around the candle flame(s).

The main exposure concern with dark or shadowy shots is digital noise. If ISO is too high you will get more noise. It is better to use a low ISO, say 100 and have longer shutter opening. This reduces noise and means more detail is visible.

Lenses…

A fast lens allows a wider aperture. Faster lenses will allow a quicker exposure than a smaller aperture. Nevertheless, when experimenting check the depth of field. With big candle patterns, or larger subjects, a very wide aperture will give a very shallow depth of field. Too shallow and you will lose a lot of detail. On the other hand, lots of candles in the background with a shallow depth of field will produce pleasing bokeh. For choosing your lens, more than other aspects of your set-up, you need to have a clear vision of what you want your final shot to look like. Then do some “Chimping” to check results.

Prime lenses, especially the 50mm, will give an approximation to the human eyes. To capture the mood of a scene a 50mm will help. A wide angle lens close-up can provide great exaggerations of candle tallness or broadness – depending on lens orientation. There is great scope for artistic interpretation. Also remember that zoom lenses tend to foreshorten, reducing the apparent depth of the shot. With a zoom lens place your candles to give an impression of depth.

White balance…

The warm glow of candles is attractive. If you change the white balance you will change the characteristics of the warm glow. Candlelight shots are about moodiness and atmosphere. It is worth playing with the white balance to influence the shot and increase moodiness, but be careful you don’t remove it. You only need to adjust white balance when shooting in *.jpg as it will be fixed once the shot is taken. If you are shooting in RAW you have more flexibility with settings in post processing to control colours and the final exposure. If you cannot shoot in RAW then, again, make sure you do some “chimping” to get the colours right.

Being safe…

Although fun, candles are naked flames. It is all too easy in low light to leave something close to the candle. Fires start quickly and spread fast too. Feel free to experiment but make sure you don’t accidentally knock over candles, touch wall paper with one or do something else to set off a fire. Never leave candles alight and unattended. Always blow them out and wait for the smoke stop raising before leaving.

find out more...Photokonnexion tips by email
If you enjoyed this article please sign up for our
daily email service.
                                                 Find out more
#11030#

By Damon Guy (author and Photokonnexion editor)

Damon Guy - Netkonnexion

Damon Guy (Netkonnexion)

Damon is a writer-photog and editor of this site. He has run some major websites, a computing department and a digital image library. He started out as a trained teacher and now runs training for digital photographers.
See also: Editors ‘Bio’.