Category Archives: Insights

Documentary… Ansel Adams

Ansel Adams

• Ansel Adams •
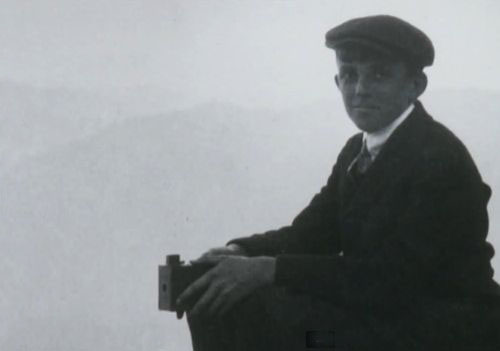
One of the all time greats in photography. This video is about his life, thoughts and work.
Image taken from the video.

The thinker-photographer…

There is a great deal to be said about Ansel Adams. He was a great photographer, thinker and artist. He was also an accomplished musician.

This post was about Ansel Adams.

Unfortunately the video was taken down from YouTube.

We have other Ansel Adams Resources on Photokonnexion.

At the time the video was removed it did not appear available online in another place. However, the subtext for the video as it was published is below. You may find it useful to use the text in case this video becomes available again at a later date.

Subtext for the video

Published on 29 May 2013
“The American Experience” Sierra Club Productions – Steeplechase Films
Ansel Adams is the intimate portrait of a great artist and ardent environmentalist — for whom life and art, photography and wilderness, creativity and communication, love and expression, were inextricably connected. ANSEL ADAMS, a ninety-minute documentary film written and directed by Ric Burns, and broadcast on national public television in April 2002, provides an elegant, moving and lyrical portrait of this most eloquent and quintessentially American of photographers. Written by Joshua Mueller
Category: Education
Licence: Standard YouTube Licence

Comments, additions, amendments or ideas on this article? Contact Us
or why not leave a comment at the bottom of the page…

Like this article? Don’t miss the next — sign up for tips by email.

By Damon Guy (author and Photokonnexion editor)

Damon Guy - Netkonnexion

Damon Guy (Netkonnexion)

Damon is a writer-photog and editor of this site. He has run some major websites, a computing department and a digital image library. He started out as a trained teacher and now runs training for digital photographers.
See also: Editors ‘Bio’.

A post to make you think… photographic creativity

Your Body My Canvas

• Your Body My Canvas •
Simply turn things upside down to get a new perspective.
(Image from the video).

Take a new perspective.

The greatest inventions are often originated by people who play with ideas. They are not afraid to experiment, to try a different way. Creativity is more than just the sum of your experience. It is also the capacity to make mistakes, to explore ideas beyond the norm and to simply have a go.

And so she tried painting…

This video captures so much about what makes photography exciting – the unique experience and personal extension that goes into making every picture. I gained a lot from this short video. Here are seven reasons I think you will gain from watching too…

  • Photographers try very hard to make a two dimensional image look 3D. Alexa Meade is trying hard to make a 3D image two-dimensional. A bizarre concept, but enlightening. It teaches us so much about the nature of ‘form’ – the 3D manifestation of objects.
  • She shows that the nature of shadow is both transient and yet fundamental to the creation of both 2D and 3D images. This is something that photographers really need to understand and be able to observe.
  • Alexa Meade gave up her aspirations and suddenly became a painter/photographer with no previous training. She took a chance, tried something different, and got caught up in the idea. This launched a unique career and artistic experiment that provides us with some excellent photographic insights. This video shows that experimentation is the manifestation of creativity. This is a principle that learner photographers will gain a lot from exploring.
  • In her work she is marrying painting and photography. Some of the worlds most creative people are successful because they take things that are completely disassociated and create a new synthesis. You can do this too. Take your previous knowledge, your wider experiences and try to put them together in novel or unique ways. You are certain to hit some new perspectives for your own photography.
  • Photography is about art meeting technology. What’s created is an interpretation which is a unique communication by the photographer. This project is an outstanding example of that idea.
  • Alexa Meade follows a wonderful creative process in her work. She works through her visualisation. Her concept defined, she then applies the technology… visualisation, concept, action. This is a great model for producing creative images.
  • The artist in Alexa Meade has found a unique way to express herself buy turning well formed concepts upside-down. Not only is that brave, but it’s likely to lead to more wonderful insights. Creative work is often about dumping convention and trying another way. Think how you could use this idea in your photography.
Alexa Meade: Your body is my canvas


Uploaded by Ted.com  External link - opens new tab/page

Comments, additions, amendments or ideas on this article? Contact Us
or why not leave a comment at the bottom of the page…

Like this article? Don’t miss the next — sign up for tips by email.

By Damon Guy (author and Photokonnexion editor)

Damon Guy - Netkonnexion

Damon Guy (Netkonnexion)

Damon is a writer-photog and editor of this site. He has run some major websites, a computing department and a digital image library. He started out as a trained teacher and now runs training for digital photographers.
See also: Editors ‘Bio’.

Ansel Adams – Master Photographer

Ansel Adams Video

• Ansel Adams BBC Master Photographers (1983 •
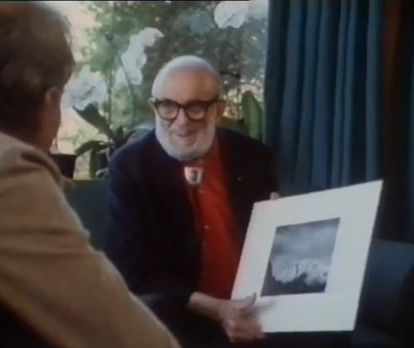
Ansel Adams speaks about his photography and his development.
Picture taken from the video.

Exquisite insights to a legend.

The videos I show are usually for you to quickly watch and learn. This one’s different. It’s longer (34 mins.). And, there is so much in it that you will want to watch it over and over again. The wonderful insights run deep and some show us how much photography has changed.

Ansel Adams’ ideas, photographic insights and depth of feeling is magnetic. He was probably one of the first philosophers of photography. He was one of the undoubted masters too. I hope you enjoy this video as much as I did.

Ansel Adams – “BBC Master Photographers” (1983)

Uploaded by: Rob Hooley External link - opens new tab/page

Can you write? Of course you can!
Write for Photokonnexion...

We would love to have your articles or tips posted on our site.
Find out more…
Write for Photokonnexion.

By Damon Guy (author and Photokonnexion editor)

Damon Guy - Netkonnexion

Damon Guy (Netkonnexion)

Damon is a writer-photog and editor of this site. He has run some major websites, a computing department and a digital image library. He started out as a trained teacher and now runs training for digital photographers.
See also: Editors ‘Bio’.

How safe is your lens from breaking or failing?

Sigma 120-400mm Lens

Some of your lenses will not get as much use as others…
but they can still get broken.

If you look after your lenses…

Generally lenses last for years. The well built and robust lenses last well and give great service. But despite looking solid and unbreakable they are vulnerable. Lets look at the situation.

What makes a lens vulnerable?

Lenses are often metal cased and quite heavy. While they are pretty resilient they still break or fail.

There are various vulnerabilities for modern lenses. Here are the sort of issues you should look out for…

  • Lens scratches – every lens has a front element that is open to the air. That element is highly vulnerable to impacts and scratches.
  • Lens glass breakage – the front element can be impacted by another object or bashed against something. It is breakable and may shatter.
  • Internal impact damage – everyone drops lenses! Modern ones are breakable. Internal components can break or go out of alignment. Jambing is common after an impact.
  • Electrical component failure – modern lenses are sophisticated electronic systems with motors and computers on-board. All these components are potentially liable to failure.
  • Dirt entering the lens body – happens surprisingly often. Sand and fine dust particles can enter in a number of places in the lens. The dirt gradually builds up in the lens.
  • Water and damp in the lens – these build up over time and cause the potential for rot, growth of fungus and corrosion of electronic contacts.
  • Mechanical failure – lenses wear out or deteriorate from wear and tear.
Lens damage – how does it affect me?

Lenses are expensive. The better lenses are an investment but are very expensive. For a good return from your purchase look after the camera and its lenses. A recent blog from Lens Rentals  External link - opens new tab/page exposes how they are vulnerable as a business to heavy wear and tear on lenses. They base their whole business on renting lenses. The renters are sometimes (frequently?) less careful with a rented lens (surprised?). Lens rentals get involved in lens repair a lot. As a result they have a range of things to say about different manufacturers, the different lens models and the various vulnerabilities.

Lens Rentals analyses the data related to the repair and maintenance of their lenses. They only keep lenses two years. They have data for lens returns from repairs, types of repair; failure rates and so much more. It is a worthwhile (but somewhat heavy article) to read. For the majority of us it is worth noting some rather more important impacts of lens damage…

Lens damage – the effects!

  • Repairs are very expensive – typically exceeding $100
  • Repairs take a long time (many weeks with shipping / factory queueing).
  • You may not get your lens back – if you decide you don’t want to pay.
  • You may be charged if you do not get your lens back.
  • You may be charged worldwide shipping costs in addition.
  • Repair costs may exceed the lens value if an old model.
  • Repair and shipping costs may exceed replacement cost.
  • You may have to pay a fee for a repair estimate.
  • Estimates may turn out to be inaccurate (rare).
  • You are going to be weeks without that lens even if repaired.

Lens repair is expensive and you will be without the lens a long time. It is therefore worth considering just buying another – especially for cheaper lenses. Or, if the damage is not too bad, just living with it.

A tiny scratch on the front element may irritate. They consider it important to have perfection, so they ship the lens for repair. A lens costing, say £600 may have a total cost of estimate, parts and repairs of around £150 for repairing the tiny scratch. You may be without the lens for, say three months. Is it really worth it? An alternative for many of us is to remove the tiny scratch in post processing, and save the money for an up to date replacement later.

About lens protection after this…

find out more...Photokonnexion tips by email
Enjoying this article? Please sign up for our
Tips by email service.
                                                Find out more


How do I protect my lenses?

Here are some ways to protect your lens against more common vulnerabilities…

  • Don’t drop your lenses! Always work on or over a surface so lenses cannot drop far. To reduce slipperiness: Do not change lenses while wearing gloves; have clean hands; always change lenses when dry and out of the rain; do not allow chemicals or grease onto the lens body. Place lenses on surfaces in the middle or away from the edge. Watch out for the lens rolling off tables etc. Don’t give your £1500 lens to a child!
  • Keep your lenses dry and chemical free! Water/chemicals in your lenses cause all sorts of problems. Going out into damp cold air or hot air from air conditioned rooms causes problems. Let the lens cool down/warm up slowly in your bag before use in the new conditions. Condensation can form in a lens if they suddenly change conditions. This will not suddenly have an impact but over time could cost you a lot of money. This precaution lengthens the life of your lens.
  • Keep your lens out of dust or take protective measures Wrap a plastic bag around it if you must use it in a dusty environment. Always wipe the lens down before putting it in the lens case or it will build up dirt in the case and pollute the lens more and more over time.
  • Keep your lens in proper, padded lens cases. Impacts are the most damaging events for a lens. Padded cases provide protection  External link - opens new tab/page when the lens is off the camera (a surprisingly damaging time for a lens).
  • Be careful where you put your lens/camera down. Lenses/cameras get kicked while on the ground! They also get knocked off things. So make sure they are secure against that. You can use a camera strap to secure it to something while is it put down.
  • Use a lens hood! The lens hood will protect against side swipes, frontal crunches and rain on the lens as well as prevent stray light from creating flare.
  • Use a skylight filter! While they are optically useless in most situations they are one way of stopping scratches and coating damage on the lens. They are cheap and relatively disposable. More on skylight filters here: Skylight and UV filters

Maybe it is not a damage issue, but you should be vigilant against theft. Be careful where you use or leave your lens. A recent video shows a lens theft while on-camera around the photogs neck. See this short video (24 seconds):
Thieves in Saint-Petersburg (Russia)  External link - opens new tab/page

Simply being careful…

In the end being careful and sensible with your lens will ensure that it remains an investment and not a disaster. Think about what you do with lenses, where you put them and the environments you use them in. But more than all of that, think carefully about insurance. Many of us walk around with huge amounts of money around our necks! Be acutely aware of your investment.

Comments, additions, amendments or ideas on this article? Contact Us
or why not leave a comment at the bottom of the page…

Like this article? Don’t miss the next — sign up for tips by email.

By Damon Guy (author and Photokonnexion editor)

Damon Guy - Netkonnexion

Damon Guy (Netkonnexion)

Damon is a writer-photog and editor of this site. He has run some major websites, a computing department and a digital image library. He started out as a trained teacher and now runs training for digital photographers.
See also: Editors ‘Bio’.

Can you write? Of course you can!
Write for Photokonnexion...

We would love to have your articles or tips posted on our site.
Find out more…
Write for Photokonnexion.

Review your own photographs

Low flying aircraft

• Low flying aircraft •
Click image to view large
• Low flying aircraft • By Netkonnexion on Flickr External link - opens new tab/page
Every picture has its merits. However is there enough in the picture to interest and invigorate the attention of your viewers? Sometimes, like this picture, if you don’t have a point worth making then you should not really bother with it.

A picture is a wonderful communication.

But like speech if there’s no point there is no impact. To help you see if you have made a great picture here are some guiding points.

We are going to consider…
• What you are communicating:
• Presentation:
• Camera technique:
• Technical Quality:
• Visual Awareness, Visualisation, Seeing and aesthetics:

Looking critically at your own picture

When you make a picture your previsualisation of what you want to achieve is critical to the outcome. If you don’t know what you are trying to make how can you make it convincing? So try to have a mental image of what your picture it going to look like when you make it. If you can see the image before you make it you should have a good point in mind – a reason for making it. All too often snappers see something and just ‘snap’. That being the case, few of the images will have real meaning or impact.

When looking at your own picture you must see if there is really something there. Are you really saying anything? Are you really communicating with the viewer of your picture? Or, is what you have just made only a simple picture? To have real impact is to create in the viewers mind an image. An image that means something to them. So look at your picture and honestly ask yourself what is the viewer going to get from it? What will it mean to them? If you find that you have really said something in the picture then the first criteria for success has been passed.

To this end you should consider how successfully each of these things has contributed to the success of the image…

  • Personal input: have you understood and connected with the subject
  • Appropriate communication the message, mood, ideas, and information you want to pass to your viewer
  • Complementary use of the photographic media (mounting, projection, printing, texture of print etc.)
  • Appropriate imagination and creativity / suitable timing for the shot
What about the other things?

• Presentation: It is important to have a good presentation for your picture. Have you edited out distractions and sensor/lens spots, removed the errant sweet rapper littering the foreground etc. In other words, have you done the little tidying up tasks that make the image stand up as clean representation of your original vision for it? If it is a print, is it well mounted in a non-distracting way. Is the printing immaculate or are there streaks and spots; over-run and smear.

• Camera technique: Is the sharpness the way you want it – deliberate softness is fine as long as that is making an artistic point in a way you intended. Is the depth of field right for the composition? Have you emphasised the point or simply missed the point. Is the digital noise too high, or the contrast too low. What you are looking for here is to see if your prowess with the camera has come through. Did your technique work or were there any errors or mistakes that detract from the delivery of your point? Some of the other things to consider are…

  • Viewpoint to the subject – exciting, interesting, different, right?
  • Choice of lighting – does it complement or complete the subject or is it at odds with your point?
  • Accurate focusing – accurate choice of focus for the subject.
  • Appropriate quality and choice of exposure.
  • Suitable use of depth of field (aperture).
  • Appropriate shutter speed for the subject (and shot timing).
  • Highlights and shadows (ensuring detail is retained)
  • Appropriate quality and choice of exposure – does the balance of light and dark complement or detract from the subject?
  • Is the quality of the light effective or bland; does is make a statement or is it of little consequence?

• Technical Quality:
In this category you should consider exposure, colour and tonal control…

  • Absence of processing faults (dust, spots, hairs, processing artefacts, image damage by sharpening etc.)
  • Appropriate adjustments of colour temperature; hue, saturation, colour balance etc.
  • Appropriate tonal use and control of the range of tones.
  • Good image finishing: removal of distractions, removal of abrupt or discordant features.
  • Appropriate use of levels, curves, colour management, filters, overlays etc (post processing)

In this category you are looking to make sure that the image is digitally developed properly. Is the exposure even or has it been obviously enhanced and changed. Is the light effective to make the point or has the exposure not been fine tuned. It is easy to take a picture, but all these thing go into making an image. Think about what you are trying to achieve and does this picture achieve it with its colour and technical delivery/

• Visual Awareness, Visualisation, Seeing and aesthetics:
Do you think that your shot, the one you have in front of you sees anything different? Are you reporting what you saw or expressing a point, message, communication, feeling… does this picture have IMPACT?

  • Is the composition, design and cropping of the image an effective aesthetic construction?
  • Appropriate simplification (minimising complexity and clutter)
  • Distractions / intrusions should not divert the viewers eye
  • Good use of light, mood, texture and colour
  • Good use of masking/manipulation where appropriate
What you are doing…

Each time you want others to look at your picture you want to impress them, to lift them, to… well, get out your message or point for the picture. The type of questions I have asked above are aimed at getting you looking at your images with a critical eye. If you are honest, you will find that none of your pictures will be satisfactory in all of the above. But if you find you are gradually improving your standard of delivery you will see that the above get closer to ideal with every new picture. Critically reviewing each picture before you publish print or show it to other people helps make sure you are producing something worth showing.

You won’t be right every time. But you will see as you develop, your comments will begin matching those of other people. You will than have a benchmark that tells you if your work is measuring up to peoples view of it. Or, more importantly to see if your picture is measuring up to your original vision of how you wanted the shot.

Comments, additions, amendments or ideas on this article? Contact Us
or why not leave a comment at the bottom of the page…

Like this article? Don’t miss the next — sign up for tips by email.

By Damon Guy (author and Photokonnexion editor)

Damon Guy - Netkonnexion

Damon Guy (Netkonnexion)

Damon is a writer-photog and editor of this site. He has run some major websites, a computing department and a digital image library. He started out as a trained teacher and now runs training for digital photographers.
See also: Editors ‘Bio’.

Fifty tips to set photography starters on their feet

There are some great things to learn.

When you are starting out and need to learn some things fast, it helps to have some guidance. Here are a few things photographers need to know to get started. And some things I wish I had known when starting photography…

Roller coasters ‘R’ us – Photo-learning list…
  1. If you want to learn fast take lots of pictures.
  2. If your pictures aren’t good enough, you’re not close enough.
  3. Spend more time reviewing your pictures than it took to make them.
  4. There are billions of types of light. Learn to see 10 types to start.
  5. Get obsessed with the quality of light and its properties.
  6. Work on image composition at least as hard as your technical skills.
  7. Use natural light as much as possible. Learn its variations.
  8. Don’t use on-board flash. It will ruin your shots.
  9. Make people a central study of your photography.
  10. Count 1000, 2000 slowly then take your camera from your face.
  11. Think carefully about how to do it well. Then follow a process.
  12. Clean your kit before you go out and when you’re back. Cameras hate dust.
  13. “Learners don’t need a tripod”. My biggest learning mistake.
  14. Sharpness is a habit – work hard to get it right from the start.
  15. Think “Why am I taking this picture?” for every shot you take.
  16. Add another lens to your “kit lens” as soon as you can.
  17. Great lenses are more use than an expensive camera. Spend more on them.
  18. Don’t cheap out on a tripod. Cheap ones will not do the job.
  19. Use your tripod.
  20. Own more than one memory card AND more than one battery.
  21. Learn the meaning of RAW and then shoot with it.
  22. “Your first 10,000 photographs are your worst.” ― H. Cartier-Bresson
  23. A keen digital photog can clear 10,000 shots in 14 days – shoot more.
  24. Make some photography gear. You’ll understand your needs.
  25. Gear lust replaces your photographic vision with a hole in your pocket.

More after this…

find out more...Photokonnexion tips by email
Enjoying this article? Please sign up for our
Tips by email service.
                                                Find out more


  1. Carry your camera with you everywhere.
  2. Look at 50 pictures by other people every day.
  3. Take a clichéd shot – satisfy your curiosity. Store it in a secret place!
  4. The “Rule of thirds” works nearly all the time. Learn it early.
  5. Simplicity is the ultimate sophistication.” Leonardo da Vinci
  6. Read your camera manual. Try something. Read that bit again. Repeat.
  7. Have a go at every setting on your camera lots of times.
  8. A proper stance will provide a steady hand-held camera position.
  9. Amateurs often do better pictures than professionals.
  10. And, Professionals do more good pictures, more often.
  11. If your photos look tired and drab – go manual – learn control.
  12. For every shot you do, look at 50 similar ones. How does yours look?
  13. Don’t panic. Usually there is no problem.
  14. No photo, however good, replicates reality. Cameras distort – get over it.
  15. If you see it one way, most people will see it a different way.
  16. Check all gear before you go. Have a list of what you need.
  17. Know why you are going to a location and plan shots in advance.
  18. Back up your files. If your hard drive crashes you will lose the lot.
  19. Wear the right clothes. You cannot do good photography if you are cold.
  20. Help someone else to learn. You will learn too, and make a friend.
  21. Learn the meaning of “exposure” – practice using manual settings.
  22. Learn “Depth of Field” and practice it with each of your lenses.
  23. Post processing is an art and part of photography. Learn it.
  24. Join a club or class – you learn fast with other photogs.
  25. Use Google Images to research every shot you take.
And one for luck!

Photography is fun. Make sure you go with that!

Comments, additions, amendments or ideas on this article? Contact Us
or why not leave a comment at the bottom of the page…

Like this article? Don’t miss the next — sign up for tips by email.

By Damon Guy (author and Photokonnexion editor)

Damon Guy - Netkonnexion

Damon Guy (Netkonnexion)

Damon is a writer-photog and editor of this site. He has run some major websites, a computing department and a digital image library. He started out as a trained teacher and now runs training for digital photographers.
See also: Editors ‘Bio’.

Cliché in photography – are you guilty and what to do about it

• Hat Selective •

• Hat Selective •
Click image to view large
Hat Selective By Netkonnexion on Flickr External link - opens new tab/page
It is one of the things we have a go at… selective colour. But, is it really effective?

Clichés are fun but can blow your credibility.

Everyone wants to try some well tried ideas in photography. They help you learn the basics with great examples. Beware, some things have been done so often they are clichéd. It is not wrong to do them. It might be right to keep them to yourself in some situations. Here is some advice about cliché in photography.

Advice

Caring, sharing websites around the web help you get honest, fun and supportive comments made. They are great places where learners can safely post clichés and enjoy doing it. In fact it is a good thing to do. You learn by doing the photos that other people have done, and by example. You get the obvious shots out of your system then move on to more creative photography.

Developing photographers cultivate observational skill helping them get past the cliché. I think the lifetime challenge for a photographer is to see what everyone else failed to see and were amazed they missed. Work to get past the cliché and publish the inspirational.

Photographs create the beautiful and – over generations of picture-taking – use it up. Certain glories of nature… have been all but abandoned to the indefatigable attentions of amateur camera buffs. The image-surfeited are likely to find sunsets corny; they now look, alas, too much like photographs.
Susan Sontag, “On Photography”, London, 1979

In a competition once I heard a judge say… “Ah, N – A – B – S – S!”. He didn’t say what he meant until he encountered the third sunset that evening. Several audience hands shot up to ask. He recounted the story of a judges seminar. They had seen so many sunsets the acronym stuck for “Not Another Bl..dy Sun Set! Taking a sunsets for the sake of it is not an achievement. It is a disappointment – unless something inspirational is included. Sunsets should set the scene, not be the scene.

If you publish a cliché on some websites, or in a personal gallery, you had better watch out for your credibility ratings. What else should we cut out from our online portfolio?

What are these clichés?

Bathroom mirror selfies: Doing “selfies” is fun. They’re examples of things we need to purge from our system. Lets face it most bathroom selfies are boring – of interest mostly to the person making them. Consider doing a mirror selfie in a truly palatial rest room (try the Palace of Versailles, Paris  External link - opens new tab/page).
Selective colour: I happen to enjoy some of these. But really, most of them are out of context. It is fine with a clear artistic point. Quite often there is not.
Black and white (B&W): Making a picture B&W does not make it artsy. A naff picture remains naff when converted to B&W. There are some well documented, excellent reasons to use B&W. It can ruin a shot, or doesn’t add anything. Use the technique. I love a contrasty B&W capture. However, make sure it works before publishing. The long history of B&W photos in street photography make a modern B&W look clichéd if done only for effect. It is NOT a “street photography” shot just because it lacks colour. There should be something else there that justifies that approach.
Flower: Your prize bloom is of extreme interest to you and your family. Most other people have seen stunning photos of blooms in magnificent gardens or with exquisite photography. These are the ones that capture the eye. If you have a truly inspired view of your blooms and a top technique, then publish.
“Perspective shots” in tourist spots: We have all seen them – pinch the Eiffel Tower between two fingers, Kiss the Sphinx, catch the sun between your hands; hold up the Leaning Tower of Pisa  External link - opens new tab/page. These are fun. We should all have one in the home album. Online they are definitely a cliché.
Fake lens flare: Flare is great when used to good artistic effect. Faux flare is just a disaster and easily spotted. Do it right with a proper shot or not at all.
Vintage iPhone apps: They’re not great because everyone else does them. Several years ago they were fun and different. Now, I think “Phone apps” look tired and frankly embarrassing. Over done or what!
Naff borders: Powerful borders filled with character, exotic flushes or effects make strong statements. If your picture needs that then it’s probably lacking in some way. Don’t publish it.
Over-saturated HDR: HDR has been vastly overdone. We are beginning to see HDR photographs that are not super-saturated, heavily rimmed and tonally wrecked. That’s good. HDR is a post-processing technique that is beginning to mature. If you use HDR, try it as it should be used, to enhance contrast depth. If you really notice HDR – it has been over cooked!
Your car on holiday: After 1000 pictures of the Grand Canyon the vista is not improved by the presence of your car in the last shot. Great shot for the hard drive. Not one to publish.
Fake gang signs, peace signs, bunny ears and naughty middle fingers: These have been over done. If you find them funny keep them to yourself. Remember, employers often use social network sites to check on prospective employees. Do you want a potential boss checking out your gangster signs and middle fingers shots!
Duck face: The average snapper gets quite a few of these. The silly poser with the pouting smackeroonie kiss lips! Just not good photography.
Making heart-shaped hands at sunset, weddings, engagements: These are usually just embarrassing. If you feel an occasion is romantic there are a multitude of soft focus, colour casts and posing angles that do the job so much better. There are a few other wedding clichés too…

  • Brides garter around the grooms head.
  • Posing to cut your partners throat with the cake knife.
  • Selective colour on confetti, wedding cakes, brides shoes etc.
  • “Bloke shots” – doing silly things in lines, with beer and mock genitals etc.

A few years ago there were thousands of shots of rings standing upright in open books. The ring casts a shadow heart-shape. They are good in the right place – the wedding ring ceremony. Certainly learn about the light/shadow relationship and have a go at a classic. Otherwise it’s an idea with a limited time and place. For examples: Google Image Search = Heart Ring Book  External link - opens new tab/page.

It is not just the amateur

Professional photographers are guilty of creating cliché in their work too. Take two minutes to enjoy this video poking fun at “Stock” photographers.

The Clichéd Stock Photo Song


GerritAndKit

Inspirational is good.

Are there any more of these cliché shots? Yes, hundreds… some websites are filled with nothing but these types of shots. So how do you avoid the mistake?

The cliché is something we can all spot – we’ve seen it so often it’s tiresome. Quietly have a go at the techniques – learn – move on. Don’t infest your online gallery with it. Cliché tends to come and go. In 20 or 30 years the retro effect will re-birth today’s cliches! That’s the time to release ones safely stored on the hard drive.

Your time as a photographer is best spent looking for inspirational images and developing a unique communication with your viewers. You will learn more by ignoring the cliché and working on your unique vision of the world.

Comments, additions, amendments or ideas on this article? Contact Us
or why not leave a comment at the bottom of the page…

Like this article? Don’t miss the next — sign up for tips by email.

Can you write? Of course you can!
Write for Photokonnexion...

We would love to have your articles or tips posted on our site.
Find out more…
Write for Photokonnexion.

By Damon Guy (author and Photokonnexion editor)

Damon Guy - Netkonnexion

Damon Guy (Netkonnexion)

Damon is a writer-photog and editor of this site. He has run some major websites, a computing department and a digital image library. He started out as a trained teacher and now runs training for digital photographers.
See also: Editors ‘Bio’.