Tag Archives: Image

Images should make a point… photographic meaning

No Image Today - put photographic meaning in every image you make.

• No Image Today •
There should be a point to every image you make. An image is a communication. Without meaning it is just a picture.

What is a true image?

If your picture has succeeded it has to conjure an image in the mind of the viewer. But if your picture is just that, a picture, it will not succeed. For the genuine photographer, nice is not good enough. A picture should have a meaning, a point, something that makes it a communication. It should have something that makes it an image in the viewers mind.

Photographic meaning… the punch in the picture

Uncertainty about the validity of an image is a necessary part of creativity. Especially in the sense that you should always question, “Have I actually said anything in this picture?” Photographic meaning is an important idea. To really comprehend it, ask yourself if your picture says anything. Be sure you have really transformed it into an image.

I remember once sitting by an autumnal birch tree. It had lovely little yellow leaves and was a nice shape. I took a picture of it. But in the end that picture was simply a nice tree. It spoke to me because of the few minutes pleasure it gave me as I admired it. The picture had nothing to say to anyone else. I never showed it to anyone else, ever. It was about my feelings. It said nothing and was of no benefit to anyone else. It had no photographic meaning. It’s now lost in the obscurity of hundreds of thousands of my other images. ‘Nice’ is simply not good enough to achieve photographic meaning.

We could be picky and obtuse. “Well, it had a non-fatalistic statement to make about the environmental impact of an autumnal tree in its cardinal state, doing what birch trees do… etc.”. Actually, saying anything about it would be mere fluff on the wind. It was a non-picture. Devoid of photographic meaning, it satisfied nothing in the viewer.

You could say the picture now has a ‘raison d’etre’ following this blog. But that was not a necessary, or sufficient, reason for the picture. It’s a post hoc justification for its existence.

The Photographer’s Eye: Composition and Design for Better Digital Photos

When I first read this I wondered how useful it would be. But I learned the importance of photographic meaning. Composition in all its forms is critical to great image-making. Read this book. It is a visual treat as well as a great insight to the power of design and composition in your photography.
The Photographer’s Eye: Composition and Design for Better Digital Photos

Communication

Think of all photographs you make as a way to communicate something. That birch tree picture did not speak to an audience. I remember it now because I sat and stared at the picture for ages thinking, “What was I thinking about to take this picture?”. As an image it conjured nothing in the mind of the viewer. As a picture it failed to pass the photographic meaning test.

Nice is not good enough – images must carry photographic meaning

The ‘birch tree’ incident, not the picture, serves as a reminder. Creativity should have a point – be an actual communication. Otherwise it will have no photographic meaning and little else to commend its existence.

A dedication – Photographic Meaning

This is dedicated to my friend Alison. She struggles to understand her own significance as a communicator. Actually, her astute photo-observations convey a lot of photographic meaning.

Comments, additions, amendments or ideas on this article? Contact Us
or why not leave a comment at the bottom of the page…

Like this article? Don’t miss the next — sign up for tips by email.

Damon Guy - Netkonnexion

Damon Guy (Netkonnexion)

Damon is a writer-photographer and editor of this site. He has run some major websites, a computing department and a digital image library. He started out as a trained teacher and now runs training for digital photogs.
See also: Editors ‘Bio’.
By Damon Guy see his profile on Google+.

Seeing what you want to create

• Mushrooms •

• Mushrooms •
Photographers learn many techniques to achieve a particular outcome or ‘look’ in their images. They go beyond reality to create a specific previsualised final image.
Click image to view large
• Mushrooms • By Netkonnexion on Flickr External link - opens new tab/page

Visualise the image you want to make.

Producing a picture can be as simple as point and shoot or as complex as a long planned production. To produce great images you often have to go beyond an elementary snap-capture. The best images are made from a careful thought process. The photographer has a goal in mind, a visualisation of what they want the final image to be.

What is visualisation?

People who use visualisation techniques seek to perform challenging tasks to achieve the visualised goal. The existence of a previsualised goal gives them a clear sense of being able to achieve the goal while trying to achieve it. Users of the technique report they gain an internal boost from having the outcome already in mind.

In sports users of the technique are taught to visualise an explosive use of energy through which they then see themselves complete a record breaking event or win a race. In business the user visualises a goal for their business and continues to enrich the detail and nature of the successful outcome in their mind while working toward attaining it in the real world.

In cinematography whole scenes are previsualised and committed to storyboard form. This creates for the director a clear, detailed mock-up of the scene(s). The storyboards augment and crystalise their mental visualisation of the scene. The latter provides a shared vision for the production team with which to pursue the quality cinematic outcome.

In still photography there has been a long tradition of visualisation. Ansel Adams and several of his contemporaries used the technique. Adams himself defined the use of visualisation as…

…the ability to anticipate a finished image before making an exposure.
Ansel Adams, The Camera, 1980

“.
Adams continued to write about visualisation in photography throughout his life and clearly attributed much of his own success as a photographer to being able to see the finished print in mind before he took the picture.

Adams came to understand the nature of the visualisation through the creation of one of his most important pictures. While working in Yosemite making a picture of the “Half Dome  External link - opens new tab/page” he was using yellow filters to darken the sky. This was a common practice at the time used to simulate in black and white the depth of colour in a sky. However, Adams imagined that the yellow filter would provide an insufficient depth of sky tone to show the drama of the scene before him. Instead he imagined the final print would look better with a darker sky-tone. Applying a red filter instead, he created in the final print the dramatic outcome he had visualised before setting up the camera.

This proved an important moment. He became aware the camera did not simply record a scene. Instead it could be set up to achieve an outcome he had imagined before making the exposure. This visualisation became his guide to the production of the image rather than the absolute reality in the scene.

This realisation enabled Adams to see past the literal and technical capture of the plain camera and lens combination. Instead he was able to create something “expressive” that was a manifestation of the vivid image he had visualised in his imagination.

Today photographers learn many different techniques to achieve a particular outcome or ‘look’ in their images. We see deliberate under or over exposure scenarios created from daylight scenes, or dramatic blood-red sunsets over-saturated to emphasis the power of the retiring sun. The use of visualisation allows the photographer to see in their minds-eye what they want the final image to look like.

Visualisation does not ensure the success of an outcome but it does provide a powerful guide in the process of achieving success. As the photographers visualisations become more detailed and their artistic talents develop so does the visualisation.

Where visualisation is used the technique can only be successful if the appropriate technical steps are deployed. The successful rendering of the visualisation can only come out of a quality photographic process. However, there must also be an interdependence.

Visualisation can be achieved artistically without knowledge of the photographic process. And, the act of visualisation is improved with practice. At the same time, the scene conjured in the minds-eye must also be achievable by the available photographic skills. As skills develop their visualisation skills are more likely to respond to the growing range of techniques the photographer knows. In other words, as a photographers experience grows what is achievable through visualisation also develops. The strength and quality of the visualisation will also be better in areas where the photographer has practised and polished skills.

So, we can reliably infer that visualisation and skill set work together. Landscape photographers will tend to produce better sunset visualisations and images because that is their area of practice and expertise. At the same time fashion photographers will see an outcome for an image that shows off an article of clothing or a delicate facial bone structure because that is how they spend the majority of their time. Each has their specific photographic skill set and technical process. Each photographer also has their own artistic and observational skills that help build expressive visualisations for the type of images they want.

Practice and development

Visualisation is a dynamic and evolving skill. As you become familiar with new techniques your ability to achieve a particular visualisation develops. Visualisation is a skill that develops with awareness of the potential and an ability to imagine a great image before you produce it. The earlier you start to try deliberate visualisation and planning for its fulfilment the more likely you are to take control of your development as a photographer.

By Damon Guy (author and Photokonnexion editor)

Damon Guy - Netkonnexion

Damon Guy (Netkonnexion)

Damon is a writer-photog and editor of this site. He has run some major websites, a computing department and a digital image library. He started out as a trained teacher and now runs training for digital photographers.
See also: Editors ‘Bio’.

find out more...Photokonnexion tips by email
If you enjoyed this article please sign up for our
Tips by email service.
                                                 Find out more

A simple lighting technique with lovely light

The mobile phone light... soft and effective.

The mobile phone light… soft and effective.

Table-top photography works with soft light.

When you are doing still life shots you want soft, gentle light. Exposures can be longer so you can create lovely gentle shadow graduations. Your mobile phone provides an excellent light source for this. Here is how it is done.

White source image

The basic technique is to put a bright white image onto your mobile screen. When you display it on the mobile screen the illumination produces a white light. This is a wonderful, quite localised soft light for your shot. The steps in detail are…

  • Open your favourite image editor
  • Create a new image (approx size 800 pixels by 600 pixels)
  • Paint it brilliant (pure) white
  • If you are on your computer save the image then upload it to your phone
  • If you are on your mobile phone save the image to a known folder
  • When you want to use the light, display the image on screen

The white image on screen produces enough illumination to create the light you want for your table top image.

Other ways to use your mobile as a light source

Of course many mobiles are also capable cameras in their own right. So here are two other ways to use them:

Photographic light: Lots of mobiles have a “flashlight” app. This will allow you to use the camera flash as a photographic light onto your still life scene. Many on-camera (pop-up flash) flash units are very strong and have a harsh light. The flash on a mobile is often much softer and sometimes is coloured to be a similar colour to daylight (approx 5500 Kelvin). This ‘daylight balance’ is a great light and worth using if you have it. Prop your phone up with the flashlight app activated and start shooting.

Coloured light source: Traditionally coloured light is produced using colour gels. However, some apps on mobile phones can create both a white light or a range of other coloured lights. One such app for example is: Tiny flashlight + LED. This is an app. for Android phones, but there are other apps. for different operating systems. If you cannot find a suitable app. you can produce a colour image like the white one above. Store that on your phone and open the image when you want that colour light.

Versatile

While the light from the screen of your phone might not be very strong, for a long exposure that is not too important. The light is wonderful and soft. As it comes from a wide source it creates lovely wrap-around shadows. These are just great for still life. Other features of phones can help with the lighting for your photography too. So, have a look at your mobile in a new light – see what you think.

By Damon Guy (author and Photokonnexion editor)

Damon Guy - Netkonnexion

Damon Guy (Netkonnexion)

Damon is a writer-photog and editor of this site. He has run some major websites, a computing department and a digital image library. He started out as a trained teacher and now runs training for digital photographers.
See also: Editors ‘Bio’.

Simple mistakes to avoid in photography

The quick way to improve:

…Is undoubtedly to listen to the mistakes that others made. Here are some easy things you can do to improve your photography in leaps and bounds. Getting lots of practice is the first step. The more you shoot the more you will get to know what works and what does not. However, going further than that takes a little diligence. So here are some things to do for quick improvements…

1. Not reading the manual

Get the manual out. Learn a technique from the manual. Then go out and use that technique.

2. Not reading the manual again in six months

Repeat (1) in six months. Using your camera will become easier and your memory will be refreshed.

3. Not making friends

The most fun you can have in photography is with friends. Join a club, find some other camera owners, join a website that shares comments… whatever you do – get people to look at your photos and help you with tips and tricks.

4. The equipment you own

Read “Seven deadly photographic sins” and realise that you should concentrate on learning everything about the equipment you own. Once you are an excellent photographer with your current equipment then consider new stuff, but not before.

5. File resolution

Shoot with the largest file size and highest resolution. If you do not know how to do that consult the manual. This is important. Using tiny files and low resolution will really frustrate your improvement.

6. Not checking the image

Beginners often click away without checking the image. Shoot-and-hope mostly fails. Check your screen, check and check again. Reduce the number of shots you take. Concentrate on composition – make the images you do take higher quality. Read up on “Chimping” the gentle art of screen checking!

7. Deleting in camera

Do not delete in camera… There are many good reasons for this…

  • Constant deleting shortens the life of your memory card – only ever format the card.
  • Unless very experienced you are probably not qualified to say if a shot is good or bad.
  • You cannot possibly tell if an image is good enough in the low resolution of a camera screen.
  • As your ‘eye’ develops you will change your idea of what is a ‘delete’. I have seen an image voted Best-shot-of-the-day but listed as a deleter by the author before the vote.
8. Not looking at the image in full size

There is only one sure test of sharpness, look at the image in full resolution. When you pull the image up on screen it is reduced and sharpened. Expand it to 100% to see it as you took it. Read your software manual to see how.

9. Ignoring the light

Find out all you can about light – all types of light and all sorts of lighting situations. You can find a whole range of resources here… Light and Lighting – Resource pages on Photokonnexion. Your knowledge of light will make you a great photographer if you focus on that alone.

10. Not using a tripod

The best sharpness tool is using a tripod. Never forget your tripod and you will always have sharp images!

For more on this subject and some detail of how to get past these mistakes read: Mistakes beginners make and how to overcome them

Here is a short video with four more great tips for you to take on board…

Mistakes to Avoid as a Beginner Photographer

startphotography channel External link - opens new tab/page

find out more...Photokonnexion tips by email
If you enjoyed this article please sign up for our
daily email service.
                                                 Find out more
#11030#

By Damon Guy (author and Photokonnexion editor)

Damon Guy - Netkonnexion

Damon Guy (Netkonnexion)

Damon is a writer-photog and editor of this site. He has run some major websites, a computing department and a digital image library. He started out as a trained teacher and now runs training for digital photographers.
See also: Editors ‘Bio’.

Skylight and UV filters

UV and skylight filters

• UV and skylight filters •
There is a debate about how useful they are…

What are UV and Skylight filters?

The keen starter in photography wants to protect their investment… Filters protect your lens – right? Or, is it that they stop damage from the sun? I want to clear up some myths and explain some half truths in this article. You may also save some money.

What are these filters for

Skylight and UV (UltraViolet) filters have a single purpose… to reduce ultraviolet light reaching film. The only difference between them is that skylight filters have a slight pink colour. Both filters prevent the slight tendency of some chemical films to acquire a slightly blue colour cast under some light conditions. (Yes, we are talking about film).

That was simple, wasn’t it?

Now the myths cleared up

UV and skylight filters have a number of myths surrounding them.

They prevent sunlight damaging my digital image sensor.
• No, they don’t. Sensors are UV insensitive or have built in filters (for both infra red and ultraviolet). UV (and IR) light has no effect on them.

They prevent the blue colour cast on sunny days.
• Not true. It is about 25 years since ultraviolet sensitive film was on sale. Even then, the film brands that were sensitive tended to only be sensitive in relatively few conditions; eg. when it was sunny at high elevations or beside the sea.

They provide more clarity in bright sunlight or at high elevations (over say, five thousand feet).
• Once upon a time… some colour film brands used a chemical that was sensitive to UV light. Around 30 years ago an ultraviolet inhibitor was developed that reduced the sensitivity of the film. Problem solved. The slight lack of clarity caused by the sensitivity went away.

They prevent lighter greys being over-bright when in black and white mode.
• Silver-based chemical black and white films were affected by UV. This is not a problem in digital cameras.

The skylight filter has slight pinkness that warms the picture up.
• No it doesn’t – pink is not a warming filter colour. Pink reduces blues in the image. Anyway, if you use auto-white balance any colour effect will be wiped out. If you use RAW there is no need for a filter as you can adjust in developing.

Actually these filters have problems

It turns out that UV and skylight filters can cause a few problems. Poor quality filters; inappropriate filter materials and lack of special coatings all take their toll…

Image effects…
Affects are created by using these filters. In particular over-exposure haze, flare and ghosting are created. The haze results from light bouncing between filter, lens elements and the sensor inside the body of the lens/camera. This creates a slight haze of over-exposure in very bright conditions. Flare, and therefore reduced contrast in the image, is sometimes caused by a beam of bright light being scattered by the filter. More expensive filters reduce this by having chemical coatings on (lens glass has coatings too). Ghosting is where spots of light appear in the image that were not in the scene. They originate from back reflection off the sensor onto the other lens elements or the filter. Usually this happens in low light situations stimulated by bright lights like car headlights.

Adding another glass (or resin/plastic) element…
Additional elements degrade the image. Cheaper filters can cause chromatic aerations, creating colour banding in an image. There may be additional light scattering. Some filters significantly reduce the light getting through (maybe as much as 1/3rd of a stop of light) leading to underexposure. Optical aberrations may be caused by poor alignment of the filter element (not flat/parallel) in its place. This causes loss of definition, particularly in some places where sharpness would be expected.

Are there any reasons to buy them?

Yes, but not many.

Protection:
UV and skylight filters do provide protection, creating a barrier against mechanical damage to your lens. The front elements glass or coatings on the surface are protected from dust, dirt, splashes and possible scratches or breakage from a bump, scrape or blow.
• Alternatively, consider a proper lens hood. They prevent angular light beams straying into the lens which can improve the image. They also greatly reduce the probability of damage to the lens too. Lens hoods are cheaper than filters, and don’t cause optical problems.

Supporting your dealer:
Filters are expensive to buy, but are profitable to sell. In these hard economic times you will be providing a rich return for your dealer and helping him survive a tough market.

A mistake to clear up

Somebody told me recently, “I always have this polarising filter on the front of my lens”. Wow! (It was actually a skylight filter when I looked). Polarising filters are great for reducing some reflections from some surfaces and may darken skies in some light conditions. Some people mix them up with UV and skylight filters. Just let me say for now, don’t keep a polarising filter on your camera.

By Damon Guy (author and Photokonnexion editor)

Damon Guy - Netkonnexion

Damon Guy (Netkonnexion)

Damon is a writer-photog and editor of this site. He has run some major websites, a computing department and a digital image library. He started out as a trained teacher and now runs training for digital photographers.
See also: Editors ‘Bio’.

What about the title?

Pictures are like jokes. If you need to explain them, they don't work.

Pictures are like jokes. If you need to explain them, they don’t work. However a title provides context – not explanation. It is a part of the communication.

Explain your picture? Really?

All too often I come across pictures that are untitled. I think a title is very important. I would like to take a little time to explain why I think a title helps the viewer.

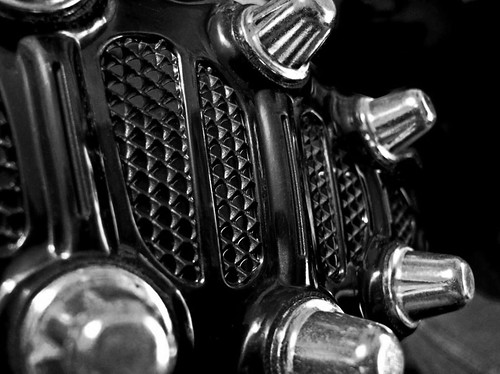
My image above is quite a strongly defined image. However, if you have no idea what it is, then no matter how strong it is, or how well it is exposed… you don’t connect with it. Pictures are like jokes. If you need to explain them, they don’t work. Every picture is a communication. The author, in seeing something and then photographing it, has made a picture they want to show others. To leave a picture untitled, or un-captioned, may be a type of statement. However, to leave the viewer hanging, is also a statement – one of disconnection.

It is true that some pictures explain themselves, or at least explain something of themselves. An untitled sunset for example is still a sunset. More to the point, it is just another sunset. There are millions (billions?) of sunset images out there. So one more untitled one is, well, just another. Unremarkable.

The title however, conveys the feeling the author has about that picture. It may not explain the picture. It will explain the point of the authors commitment to the picture or the context of its meaning. That is worth a lot to the viewer. A couple on a sunset lit beach entitled “The Power of Love” explains the authors meaning and connection to the image. Suddenly the image comes alive in the viewers mind. An insight is gained into the vision of the author in their dedication of the title.

In everything there is meaning

If you want your picture to be depersonalised from you, then by all means leave it untitled. Everything has meaning. Human nature reaches for explanation. An untitled picture allows the viewer to own the picture by projection. They put their own meaning into the image unguided by the author. If that is what you, the author, intended then the title should be a dedication to the viewer.

The title is a part of the communication of the image. Good communicators take every opportunity to pass the message. Think carefully next time you leave an image untitled. You are saying a lot about your ability to communicate and nothing about the image.

Oh! By the way. My image above is called, “New Rugby Boots”.

By Damon Guy (author and Photokonnexion editor)

Damon Guy - Netkonnexion

Damon Guy (Netkonnexion)

Damon is a writer-photog and editor of this site. He has run some major websites, a computing department and a digital image library. He started out as a trained teacher and now runs training for digital photographers.
See also: Editors ‘Bio’.

Can you write? Of course you can!
Write for Photokonnexion...

We would love to have your articles or tips posted on our site.
Find out more…
Write for Photokonnexion.

Important File formats – JPG

Quick and easy – not very flexible

Digital images come in a range of standard file types which computers, cameras, mobiles and scanners are able to understand. However, they are not able to interpret all image file types. Only those they are programmed to use. It is important that you know about the file types you use because they can seriously affect your photography. I am going to introduce you to .jpg files. They are the most common file types used in digital cameras.

Which file type you have is labeled by the file extension. That is the three characters after the last dot in the file name. If you cannot see this file extension refer to your computer help files to find out how to display extensions.

A file with a .jpg extension, for example ‘myimage.jpg’, is what we call a JPEG file (pronounced – ‘j’- peg). That stands for the “Joint Photographic Experts Group” who formulated the .jpg image standard published in 1992. In digital terms that is a long time ago. However, the JPEG standard has been highly successful and has proved robust. It is not perfect, neither does it do everything.

First and most importantly .jpg files are what is called a ‘lossy compression‘ format. Media files contain a lot of data – very large quantities in fact. Most of that data is used to create colour variations and tones that are very subtle. In a photograph a lot of tones and hues are not noticed by the eye. To save storage space and speed things up your camera dumps a lot of that unseen data when it creates .jpg files. That’s fine as long as the lost data is stuff the eye cannot see in the photograph. The benefit is that the lost data makes files smaller, as well as quicker and easier to move, send and store.

There is a down-side to .jpg files. Every time you open, edit and save a .jpg file it goes through the compression routine – dumping more data. For files you are going to edit on a regular basis this is bad news. Each save will lose some of the data that creates the image. As a consequence the quality of the image will be damaged over a series of edits.

Lossy compression in .jpg files damages the file each edit/save cycle

Lossy compression in .jpg files progressively damages the file each edit/save cycle. Eventually, the loss of data becomes visible. The image is a composite of four versions showing increasing compression left-to-right. Left hand side – the image shows low compression with 60% of the original data still in the file. Right hand side – only 2% of the original data is left. Over-compression, various edits and resizing all have an effect on final quality of the image.
Best viewed large. Click image for full size.

As you can see from the images the damage ruins the picture. However, a low compression is a good optimum. The file is smaller and still of acceptable quality. The small size allows easy use for things like posting on the Internet.

There are other implications of a lossy format. The lost data seriously reduces your options for editing the image. Other file formats keep that data. Most notably these are the ‘RAW’ formats from your camera manufacturer. RAW files are created by the camera directly from each of the sensor points in the digital image sensor in your camera. A RAW file stores all the data. In doing so, the file is preserving the data for you to make significant changes to the image later. These changes are often not possible with a .jpg file. While some small colour changes, brightness and other aspects of the file can be changed in a .jpg file, the degree of change is limited. When editing a RAW file you have a considerable amount of potential to recover over exposure, underexposure, colour casts, hues, tones and other attributes of your photograph.

The JPEG standard has produced a robust file standard that is widely used. The compressed size means a lot of data is dumped. This reduces the editing flexibility for the photographer. On the other hand the file is small and easy to store. It produces a good image as long as it is not over-compressed. However, to guard against loss of quality always retain an original copy of your file. Only edit your file copies so that you can go back to the original .jpg file if things go wrong.

By Damon Guy (author and Photokonnexion editor)

Damon Guy - Netkonnexion

Damon Guy (Netkonnexion)

Damon is a writer-photog and editor of this site. He has run some major websites, a computing department and a digital image library. He started out as a trained teacher and now runs training for digital photographers.
See also: Editors ‘Bio’.

Can you write? Of course you can!
Write for Photokonnexion...

We would love to have your articles or tips posted on our site.
Find out more…
Write for Photokonnexion.