Category Archives: Equipment

equipment, supplies, gear, accessories, accompaniments, accouterments, apparatus, appliances, appurtenances, articles, attachments, baggage, belongings, contraptions, contrivances, devices, equipage, facilities, fittings, fixtures, gadgets, impedimenta, implements, kit, machinery, material, paraphernalia, rig, tools, utensils

When is a tripod not a tripod?

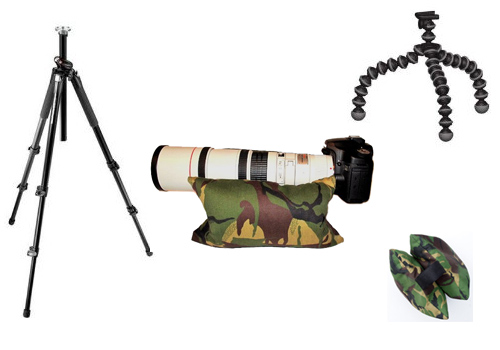
Tripods & Bean Bags

Tripods & Bean Bags are great alternatives to a full sized three legged contraption. And there is one other option too!

A tripod is not a tripod when it’s another stabiliser!

I suggest everyone use a tripod for the sharpest image. Of course they are not always practical. However, there are alternatives. Here are ideas for stabilised working without tripod.

Working alternatives

Working with a tripod is perhaps evidence for careful attention to detail. After all the use of a tripod does require some persistence. They can be heavy, they certainly take up space and take a little time to put up when you want to take a shot. On the other hand, they definitely increase the sharpness of the shot and allow longer exposures. They also provide a firm platform to work with when working a scene, giving the photographer flexibility to walk around. They also provide a vantage point for the camera during the shot – a solid holding point for the camera in difficult situations.

Using different versions of tripods extend their usefulness. The Joby Gorillapod  External link - opens new tab/page series of tripods are excellent. They provide a solid platform for taking photos which can be adapted to almost anything as a holding point. So instead of a long set of three legs, the existing bendy legs can be used to grip fences, poles, furniture, walls… well pretty much anything you can think of using. They are light and practical and can be used in most situations as long as you can find a place to anchor them. They do not work at their best with a very heavy camera and lens setup. So they do have their limitations. However, for most entry level DSLRs, medium sized DSLRs and most normal lenses they are great.

The other possible tripod-alternative product to consider is the bean bag. There have been a number of different types of bean bags made over the years. The idea is that you can use a bean bag to bed down your camera on a variety of surfaces. Wall tops, rocks, the ground, cars, even furniture are all perfectly acceptable for using the bean bag. The one that I recommend is the Maxsima – Professional Camera Bean Bag – ‘twin bags’ 262×162. Lens support Bean Bags for Wildlife photography etc.. also Designed for use on a Vehicle / Car door  External link - opens new tab/page. It provides a solid and adaptable way to put your camera on a hard surface to prevent damage to the camera (from abrasion, chips and dirt). This is, in effect, a cheap and efficient way to make a solid stand-point from which to make a shot. It is not as accurate as a tripod – you may have to massage the bean bag into the right shape to get the camera pointing exactly where you want it. In general however, it is a great way to work when you have limited options, especially at ground level or when working with other surfaces.

Another, simple option!

The final option you have is somewhat surprising. Its simplicity is also its flexibility. And because it is so simple, a lot of photographers forget to use it as an option. Try rolling up your jumper, jacket or even your coat! If you make a ball or cushion on which to put your camera you have a way to protect it from the ground or abrasive surfaces. But it provides a simple and solid surface for your camera. Lots of photographers forget the simple answer. They often think of the high-tech solution. But sometimes it pays to work smart when you are in a situation and you are caught out.

By Damon Guy (author and Photokonnexion editor)

Damon Guy - Netkonnexion

Damon Guy (Netkonnexion)

Damon is a writer-photog and editor of this site. He has run some major websites, a computing department and a digital image library. He started out as a trained teacher and now runs training for digital photographers.
See also: Editors ‘Bio’.

Can you write? Of course you can!
Write for Photokonnexion...

We would love to have your articles or tips posted on our site.
Find out more…
Write for Photokonnexion.

Easy bird pictures in your own back yard

• Bird Compilation •

• Bird Compilation •
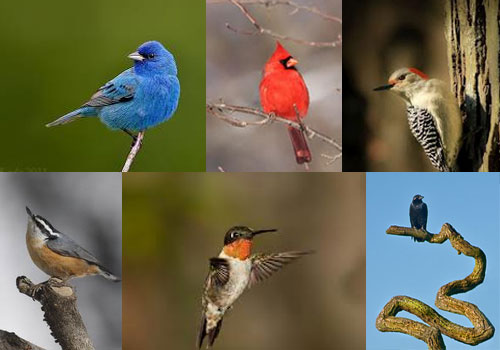
You can have a great time with these simple tips – a world of birds in your own back yard.

Birds offer endless photographic opportunities.

I’ve been fascinated by birds since boyhood, particularly birds of prey. Recently I’ve followed some keen bird photographers. I find that the small birds in my back yard are facinating too. Lets get started on some backyard photography. This will be a fun project for starting over the weekend.

This video gives down to earth, simple advice about working with birds close to home. Getting started in Feeding and attracting the birds mid-Winter gives a lead for the birds nesting in the spring. I am going to get started now. It’s Winter here and I am looking forward to spring.

How to Photograph Garden Birds


How to Photograph Garden Birds – RandoMnBest  External link - opens new tab/page – Uploaded on 28 Jan 2011

find out more...Photokonnexion tips by email
If you enjoyed this article please sign up for our
daily email service.
                                                 Find out more
#11030#

By Damon Guy (author and Photokonnexion editor)

Damon Guy - Netkonnexion

Damon Guy (Netkonnexion)

Damon is a writer-photog and editor of this site. He has run some major websites, a computing department and a digital image library. He started out as a trained teacher and now runs training for digital photographers.
See also: Editors ‘Bio’.

Can you write? Of course you can!
Write for Photokonnexion...

We would love to have your articles or tips posted on our site.
Find out more…
Write for Photokonnexion.

Twelve Simple tips for atmospheric candlelight shots

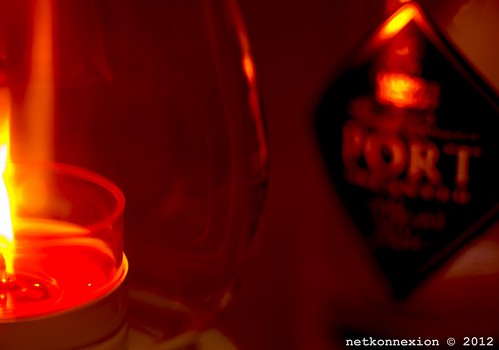
Candles put out a wonderful light…

Everyone feels the atmospheric impact of candlelight. The colour and the low light seems to draw you in. Capturing that light is easy with a few simple hints. Lets look at what is needed…

Tripod…

There is nearly always low light associated with candle photography. That means working with longer exposures. A tripod is excellent for that. Indoors, beware of a wooden floor, any move you make can be transferred to the tripod. Floor vibrations can ruin a shot or make it soft. For sharpness remember to use the camera timer for the shot or a remote shutter release.

Lighting…

The best way to view candles is by their own light. Because they don’t use a tripod many people are tempted to use flash. Unfortunately flash will over-power the candlelight. It will take out the colour from the light and tend to create hard, sharp shadows. It will ruin the atmosphere of the candlelight. Make sure you switch off your flash. If you need more light the you can use as many candles as you need to raise light levels. They don’t need to be in the shot, but they will keep the light the same throughout the shot.

Composition…

First decide if your candle or candles are the subject or are props. This decision will affect your focus and how you lay out your scene. Candles can create a strong bright spot in the scene. If it is too bright the flame will form a burnt out white spot. Once you have arranged your scene, ensure that the candle will only draw the eye a small amount unless it is the subject. You should consider the placement of the candle in a way that might minimise the impact of the bright flame spot.

Positioning…

If all your candles are close together the light will tend to act as one light source. This will tend to act as a hard light creating more defined shadows. If you want the light to be softer and the shadows with less well defined edges set your candles further apart. If the light is to be cast on a face then soft light will be more flattering.

Movement…

One of the peculiarities of working with candles is that the flames are subject to the slightest air movement. Unfortunately candle flicker is attractive to the eye in real-time; but looks like a loss of sharpness in a still image. It is quite useful in close focus shots with a candle to use an air break of some kind nearby to stop air movement. In a table-top study use a large sheet of card to one side out of shot. That will help prevent air movements. If not, keep an eye on the flames when shooting. Try to capture the flame upright or, if using more than one flame, make sure they are all going the same way. They look more natural that way.

Since candle light is low intensity, make sure you also prevent other sources of movement in the shot. They will inevitably be blurred as the shot will be using a long exposure. This will look like a distraction against still flames.

Can you write? Of course you can!
Write for Photokonnexion...

We would love to have your articles or tips posted on our site.
Find out more…
Write for Photokonnexion.

Light intensity…

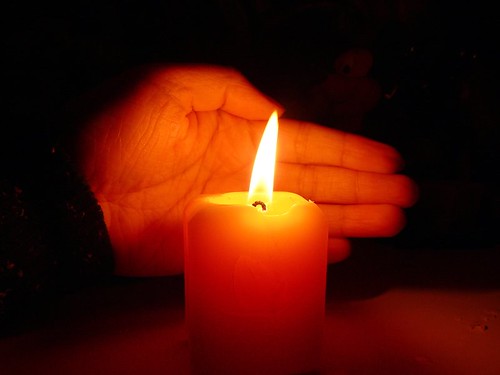
The light from a candle can be made much more intense if you use something to catch the light from the candle. A face, hand or other objects bring alive the picture and complements the candle. The presence of the object acts to reflect the candlelight. Light flesh tones are particularly good in this respect since the flesh colour is tonally close to the candlelight hues and they act as a reflector to bring out the light.

From

From “Candle Series” by Spicedfish
From “Candle Series” by Spicedfish on Flickr External link - opens new tab/page

Using reflectors in a candle scene is a great way to raise the light intensity. You can find other types of surface than the one in this picture in most scenes. Walls, ceilings and even off-shot reflectors are all good. Be careful to use neutral colours. Colour reflectors will affect the colour of the scene. If you are using a big card out-of-shot make it white. This will reflect the same colour light back into the scene, filling in the light.

Shadows…

The other side of light intensity is the shadows. The darker tones and strong contrasts of candle shots create most of the atmosphere. Spend time studying the shadows created in your scene. Strong contrasts are great subjects. If you create shadows that fall badly across your scene it will impact on the overall effect. The best use of shadows is often to the edges of the shot. If the light fades out to edges this holds the scene into the shot – naturally focusing the eye. Work with shadows to ensure the mood is harmonious.

Additional lights…

If you want to use fill light in the scene try to match the quality of light from your candles. Use soft light sources and natural light with hues matching the candles. Natural light will fill the scene well but tend to neutralise the colour of the candle light. The warm glow of candles is a great mix with evening, low-intensity light.

Some people use light with gels to give a warm glow. Warming gels can also be used with a flash. However, beware the power of flash. The candles will lose their soothing effect if all the shadows are taken away around the base of the candle and harsh shadows are introduced from one side. Typically use a diffused flash on the lowest setting – it also helps to be a distance away from the candles as well.

Multiple candles…

When working with one candle as subject the main focus of the shot is clear. However, there is a lot of scope for creativity. Consider two main issues. How to layout your candles and how to use the overall light with the layout. Using candles for making patterns is great fun and can produce excellent shots.
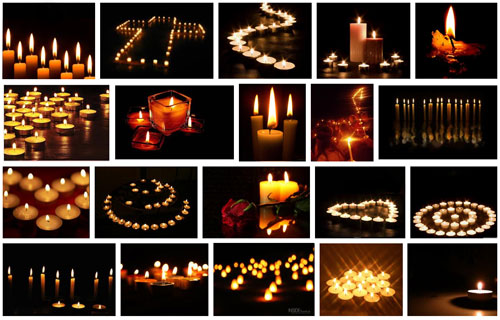
Patterns with candles

Making patterns with candles
Click to view Google Images “Candle Light” search

Try to keep the scene simple. Overlapping candles or indistinct objects in the pattern are confusing. Work with the sharp contrasts and keep your pattern well defined.

Exposure…

How long should you make your exposure? This depends, like any scene, on your light levels. To get more light in the exposure a long shutter speed is suitable for most candle shots. A range of 1/15 second down to 2 seconds is a good starting range with an ISO of 100. Camera settings vary significantly with reflectors, multiple candles or fill lights. Experiment to get it right. Aim to make the shot moody or atmospheric while providing detail for the eye to look at around the candle flame(s).

The main exposure concern with dark or shadowy shots is digital noise. If ISO is too high you will get more noise. It is better to use a low ISO, say 100 and have longer shutter opening. This reduces noise and means more detail is visible.

Lenses…

A fast lens allows a wider aperture. Faster lenses will allow a quicker exposure than a smaller aperture. Nevertheless, when experimenting check the depth of field. With big candle patterns, or larger subjects, a very wide aperture will give a very shallow depth of field. Too shallow and you will lose a lot of detail. On the other hand, lots of candles in the background with a shallow depth of field will produce pleasing bokeh. For choosing your lens, more than other aspects of your set-up, you need to have a clear vision of what you want your final shot to look like. Then do some “Chimping” to check results.

Prime lenses, especially the 50mm, will give an approximation to the human eyes. To capture the mood of a scene a 50mm will help. A wide angle lens close-up can provide great exaggerations of candle tallness or broadness – depending on lens orientation. There is great scope for artistic interpretation. Also remember that zoom lenses tend to foreshorten, reducing the apparent depth of the shot. With a zoom lens place your candles to give an impression of depth.

White balance…

The warm glow of candles is attractive. If you change the white balance you will change the characteristics of the warm glow. Candlelight shots are about moodiness and atmosphere. It is worth playing with the white balance to influence the shot and increase moodiness, but be careful you don’t remove it. You only need to adjust white balance when shooting in *.jpg as it will be fixed once the shot is taken. If you are shooting in RAW you have more flexibility with settings in post processing to control colours and the final exposure. If you cannot shoot in RAW then, again, make sure you do some “chimping” to get the colours right.

Being safe…

Although fun, candles are naked flames. It is all too easy in low light to leave something close to the candle. Fires start quickly and spread fast too. Feel free to experiment but make sure you don’t accidentally knock over candles, touch wall paper with one or do something else to set off a fire. Never leave candles alight and unattended. Always blow them out and wait for the smoke stop raising before leaving.

find out more...Photokonnexion tips by email
If you enjoyed this article please sign up for our
daily email service.
                                                 Find out more
#11030#

By Damon Guy (author and Photokonnexion editor)

Damon Guy - Netkonnexion

Damon Guy (Netkonnexion)

Damon is a writer-photog and editor of this site. He has run some major websites, a computing department and a digital image library. He started out as a trained teacher and now runs training for digital photographers.
See also: Editors ‘Bio’.
A quick look at image stabilisation

Image Stabilisation

Image Stabilisation

Image stabilisation helps you get a sharper picture.

Good images rely on a steady hand or a tripod. You also get a help from the image stabilisation in your camera or lens. These systems help your lens stay steady. Here we are going to get a look at what is involved and how to use it.

What is image stabilisation?

The term “Image stabilisation” represents a number of technologies used to reduce blurring caused by camera movement during exposure. It compensates for movement in two planes. These are referred to as pan (lateral twisting or yawing movement) and tilt (vertical or pitching movement).

Camera movement is recorded as blur when the shutter is open long enough for the movement to be captured. The slower the shutter speed the more likely it is that the movement will be detected. The tiny, but continuous movements of our hands tend to make hand held shots a little soft. Longer exposures will be even softer since the tiny movements will continue blurring the shot throughout the exposure.

Using an image stabilisation technology allows a mechanism to off-set or compensate for the movement not prevent it. Extreme or large movements will still cause blur during the exposure. However, image stabilisation systems are designed to compensate for the movements created by the almost imperceptible movements of our hands while hand-holding a shot. Typically recent image stabilisation systems will compensate for exposures four to sixteen times longer than could be hand held without the compensation. This would mean that instead of using a shutter speed of 1/250th of a second, you can use image stabilisation to get a shutter speed of around a 1/30th of a second and still get similar image quality. This could significantly improve the light levels in your exposure.

Types of image stabilisation

Optical image stabilisation: This type is mounted in the lens. It uses high speed motors to shift a lens element around changing its orientation to compensate for the movement of the camera. It is highly accurate, compact and fast. It does add quite a lot of weight (and expense) to the photographic lens unit overall. However, it performs really well under all types of movement even fairly extreme movement that might be found in panning for example. It will not prevent the gross movement blur, but will compensate for the tiny variations while panning for example.

In-camera stabilisation or sensor shift stabilisation
This technology uses motor technology to move the Digital Image Sensor to compensate for the movement of the camera. This method concentrates the stabilisation in the camera body and therefore it is only paid for once on the purchase of the camera body (unlike lens-based systems). Sensor shift technology tends to mean the lens is lighter too making handling easier for some people. This type of system does not cope as well as lens-based systems for more extreme movements. Long focal lengths and telephoto lenses will tend to exaggerate the degree of movement of a beam of light hitting the sensor. Consequently the sensor needs to be able to compensate for more extreme vibrations or movements to get the same image quality as a lens system. As the sensor shift system is limited by its range of movement it has limited tolerance at the more extreme end of the range.

Stay sharp!

Many learners find that the softness they get when using a DSLR is very frustrating. While image stabilisation helps, it does not cure the problem. Remember that these systems can only compensate, not prevent, movement blur and softness. So you need to take other steps to make your shots sharp. Here are some issues to consider regarding image stabilisation…

High ISO (in manual control modes): Raising your ISO can help reduce movement blur because you are making the sensor more sensitive to light. Your image sensor will be exposed more readily allowing you to still have a faster shutter speed to take your shot – then movements don’t have time to make the shot soft. Remember, high ISO may increase your digital noise, particularly with very high ISO levels (say 800 or more).

One way to overcome this softness created by hand movement is to raise the and set a faster shutter speed The point and shoot mode or auto mode of your camera will do this to ensure your get sharp shots in most daylight situations. Of course this means a short exposure which may not be suitable for your shot.

Wide aperture(in manual control modes): This too will allow more light into the shot and will allow you to have a faster shutter speed. However, the depth of field will be reduced and that will reduce your sharpness in some areas of the shot.

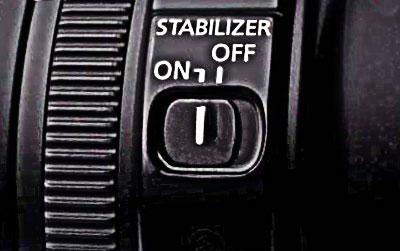
Use a tripod: Using a tripod is probably the best way to get a sharp shot. In most situations you should turn off your image stabilisation to use a tripod. The motors that do the stabilisation actually create vibration in the tripod and can cause softness. Some systems compensate automatically for being on a tripod so read your technical manual to get guidance for your camera.

Panning: This will definitely create movement blur. But some image stabilisation systems have mechanisms to reduce the vertical movement while panning. In this case make sure you know how to switch to this mode. The difference it can make to getting a moving object sharp is surprising.

Mirror lock-up: Vibration is caused when the reflex mirror in a DSLR flips up. You can lock up these mirrors while you take the shot. The procedure for that is different on every camera so check the manual for the correct method. The image stabilisation mechanisms will not compensate for movement caused by the mirror movement.

Careful use of the shutter button
Don’t stab the shutter button. Roll your finger onto the button gently depressing it. If you stab at it there will almost certainly be an erratic movement that the image stabilisation will not be able to compensate for.

Eagerness!
While enthusiasm is great, taking the camera away from your face too quickly can induce movement before the exposure is complete. Image stabilisation will not compensate for this type of action. Try to count to two before taking the camera away from your face.

Improving overall

Image stabilisation systems vary in their effectiveness according to model, camera, lens, use and how much movement there is. They can be very effective in helping you gain control over your sharpness but they are not the final answer. Sharpness involves a range of techniques and procedures which you will need to learn and practice to improve. Nevertheless, if you are hand-holding a shot you will get significant improvements in sharpness by using these systems. If you want to know a little bit more detail about image stabilisation you can see some more detail in Definition: Image stabiliser; Image stabilisation.

find out more...Photokonnexion tips by email
If you enjoyed this article please sign up for our
daily email service.
                                                 Find out more
#11030#

Can you write? Of course you can!
Write for Photokonnexion...

We would love to have your articles or tips posted on our site.
Find out more…
Write for Photokonnexion.

By Damon Guy (author and Photokonnexion editor)

Damon Guy - Netkonnexion

Damon Guy (Netkonnexion)

Damon is a writer-photog and editor of this site. He has run some major websites, a computing department and a digital image library. He started out as a trained teacher and now runs training for digital photographers.
See also: Editors ‘Bio’.

Nine simple guidelines for great interior shots

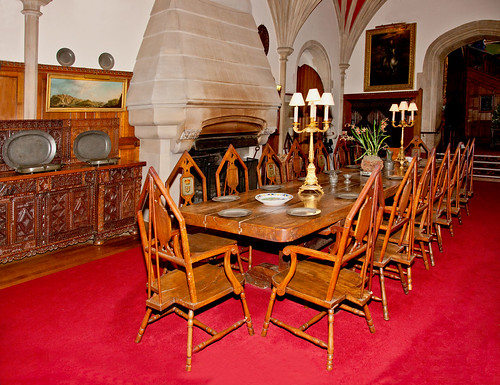
• Dining Room • For great interior shots follow the guidelines

• Dining Room • For great interior shots follow the guidelines
Click image to view large
• Dining Room • By Netkonnexion on Flickr External link - opens new tab/page

Photographing interiors is easier with simple rules.

We have all taken interior shots at some time. Indoor subjects are wide ranging. What about when you want to take a picture of the room itself? Here are some simple rules to help you get it right.

Why would you want to take a picture of the room?

Actually there may be many reasons. In the picture above the shot was taken because of the historical interest. It is a record shot. Of course there are lots of other types of shots you might want to take in an interior. Here are some examples…

  • Historical interest
  • Insurance record
  • Design interest
  • Before and after shot
  • House or room for rent
  • Hotel room for holiday snap
  • Hotel room for advertising
  • Colour and décor sampler for decorating plans
  • Sales and marketing photo for building sale purposes
  • Comparison with other places
  • Artistic impressions or interpretation

You get the point. Rooms can have a lot of reasons to be the subject of a photograph.

Some simple guidance…

1. Give yourself a clear purpose for the shot(s): Without such a purpose how will you know the best approach, what to include and exclude and how much of the room to take in. So know why you are doing it and what you hope to gain from the photograph. It helps to write it down.

2. Minimise distractions: As with any type of photography your primary purpose can be affected by distractions in the shot. Think carefully about the purpose of the shot. Remove anything that is discordant or will not add value to that purpose or will distract the eye. Take out objects that are too bright, nothing to do with the shot; something that may confuse the purpose of the shot.

3. Work on the brightness: Remember, the normal lights in a room will probably have a colour cast which will have an impact on the overall colour. If possible use daylight adjusted lights or off camera flash units. Use the flashes to light up specific areas of the room. Highlights like that add to the atmosphere in a room. Be consistent with the natural lighting and any artificial lights that may be in evidence as permanent fittings so the lighting does not look out of place. If you only have the on-camera flash make sure you have it set to a sufficient power to light the whole room. Arrange the furniture so that the light coming from the camera does not leave harsh shadows on the floor in front of you. Flash is inclined to leave such shadows which make the room look very angular and uncomfortable. Rooms that have soft, bright and well lit aspects are more welcoming and give an air of comfort.

4. Windows and doors: These are important parts of a room. Depending on your purpose you may need to show them. If they are looking out onto a bright exterior, or directly to the outside you may have a problem. The outside is quite likely to be much brighter than inside. More than two stops of brightness will almost certainly burn out. This creates a very bright white area of the shot. That’s very distracting. It will take the viewers eye straight away from the subject. One way to counter-act that is to raise the internal light levels so the contrast from inside to out is not so large. That will probably require some additional flash units or other lighting around the room. Alternatively, you could lower the incoming light by closing curtains or the door. However, you light the room remember to use the appropriate white balance settings on your camera. Colour casts can spoil the shot. It is also better to shoot in RAW so you can adjust the colour balance in post processing.

5. Straight lines and verticals: Rooms and interior spaces often look odd in pictures because the straight lines are not straight and the verticals are converging. You must prevent this if your purpose for the shot is to make the room look normal. Use a lens that minimises distortion and set your camera on a level for the shot so it minimises convergence in the upright lines. If you are unable to prevent the lines from bending or converging then make sure you can straighten them in an editing application in post processing. Of course if you are making this photograph for artistic reasons, anything goes.

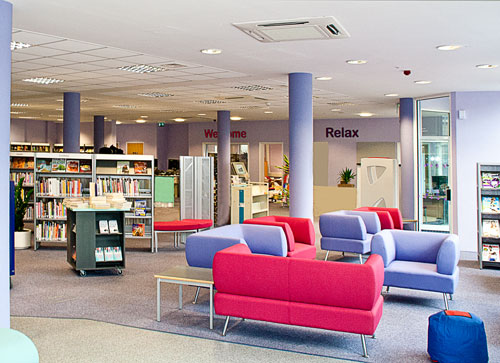
Langley Library

Use furniture to give the impression of depth.
Place pieces so they look like there is a succession into the depth of the room.

6. Impart depth to the room: Taking just any old shot you will find that the room often looks flat, or lacking in depth. The effect of zoom lenses and maybe an on-camera flash will exaggerate that effect. You can do three things to off-set that effect…

  • Use lines in the room to give the impact of depth as they trend away from you (eg. the table in the top shot above).
  • Create a foreground, mid-ground and far point of the room. Taking a shot with a piece of furniture directly in front of you, something mid-way into the room and something on the far wall will do the trick.
  • Strategic placement of lights down the length of the room will draw the eye down the room too.

7. Adjust comfort levels to suite your purpose for the shot: Every room has what I call a comfort level. It the room is cold and uninviting the comfort level is low. If you intend your room to look like a medical clinic then find ways to give it a low comfort level. Harsh lights, angular furniture, sparse layout… anything that will make it look uncomfortable.

If you want to sell a new home to a home-loving family then you need to raise the comfort level in the room. Soft lights, soft furnishings, rounded corners, bright and inviting cushions… these things help people to feel comfortable. Your pictures should reflect the reason you are taking the picture.

8. Use appropriate lenses: Different lenses have different effects. If you use wide angle lenses they will distort the long dimensions. Use it in portrait view and the lens will appear to make the room look high. If you use a wide angle lens down the length of the room it will make it look long and thin. If you use a zoom lens it will have the effect of foreshortening the room. A 50mm lens will tend to show the room much as the eye would see it. Every room or interior space is going to be interpreted in different ways. The best guidance is to look for a lens that will best exaggerate sizes, or complement dimensions to suit your stated purpose for the shot.

9. People: The inclusion of people in a room can be either a good or bad thing. It all depends on how you want to portray the space and the purpose of the shot. In an entertainment space lots of people enjoying themselves will make the shot good. In a warm, homely room one or two people chilling out and enjoying the comforts will also sell the shot. On the other hand, a record shot should really be about the room, factual and un-distracted.

If it is solely the room you intend to show then it is probably better not to include people.If you do include people then make sure it complements the purpose for the shot.

Interiors are satisfying to photograph

There may be lots of reasons to take pictures of rooms, but that makes it important that you think about what you are trying to portray. If you have a clear purpose for the shot then you can match the layout, furnishings, lighting etc to meet the purpose you have set. Think about layout, depth and finishings. Think about people. There is a lot to consider. However, interior shots can be very satisfying indeed. Practice makes perfect, so work on the points above.

find out more...Photokonnexion tips by email
If you enjoyed this article please sign up for our
daily email service.
                                                 Find out more
#11030#

By Damon Guy (author and Photokonnexion editor)

Damon Guy - Netkonnexion

Damon Guy (Netkonnexion)

Damon is a writer-photog and editor of this site. He has run some major websites, a computing department and a digital image library. He started out as a trained teacher and now runs training for digital photographers.
See also: Editors ‘Bio’.

Easy ideas for controlling your flash unit

Specular highlights

Bath toy
Specular highlights are distracting and draw the eye which spoils the shot.

Flash is a great benefit and a problem all at once!

Most people don’t realise two things about flash. First, the standard setting is nearly always too powerful. Second, the highlights resulting from flash are very distracting.

Working with flash power

Like all things in photography you need to think carefully about using flash. It is not simply click and move on. Most improving photographers are just beginning to make shots rather than snaps when they begin to see the quality and colour of light. So it is easy to miss some of the impacts that flash has on a subject. Here are a few consequences of a flash shot…

  • An over-bright subject.
  • Strong highlights with a tendency to wash out colours.
  • Specular highlights that create sharp, bright spots that distract the eye.
  • Bright foreground, dark background.
  • Flesh tones strongly whitened giving a sick look to the face.

Each of these is almost always down to using too much power in the flash. So, the way to over come these issues is to do two things. Turn down the power of the flash and diffuse the flash so it scatters the light.

Turning down the flash is simple. You must find the setting that adjusts the flash power level. This is easy if you are using an off camera flash because the unit usually has a display and a dial or buttons to change the settings. On-camera (pop-up) flash is usually adjusted by finding a menu setting that turns the power up or down. You may need to consult your camera manual to find where that setting is found.

The key to getting the right setting for your flash is to understand how to change it. Most off-camera flash units are marked up so there is two stops of light on the flash. Normally if the flash is marked 1:1 then that is full power, and more often than not this is the default setting. You can usually turn this down by one third of a stop of light at a time. Each time you stop down the setting one stop you are halving the light it emits.

Pop-up flash units may not be marked so clearly. Some are marked [low – medium – high], others, particularly point and shoot cameras, may just have “full | half”. More sophisticated pop-up units may also be marked in the same way that off-camera flash units are marked. Which ever your flash is, you should practice with it so you have an idea of how powerful it is and how much the settings can change the impact of the flash.

Flash diffusion

The best way to get used to using flash and controlling the power is experimenting. However, the issue of nasty highlights is the other problem the inexperienced user often does not spot at first. Strong highlights raise the light levels so you can see the tonal changes in the colour of the surface the light hits. This helps to define the shape of an object. So, for example, a brighter top on a ball and dark shadows under it help to define the spherical shape.

If the light intensity is too high, particularly on reflective surfaces, the reflected light level will exceed the level the camera can cope with. The highlight then becomes blown out. The light is so bright in that area that it becomes a bright spot where all the detail is lost to pure white. Unfortunately such strong, blown out areas, are severe distractions. In the picture above, the small reflective points, called specular highlights, are also strongly distracting. So what can you do to avoid these nasty effects?

If your power adjustments are not working and you still have blown out spots or highlights then you should consider diffusing the flash. This makes a difference in two ways. The diffused light will scatter the light from the flash over a wider area. This effectively lowers the light intensity even further in the area of the highlight since the light is not hitting it from a direct focused hard light from the flash.

Secondly, diffused light spreads the effect of the light. This makes it more likely to bounce off other surfaces nearby. These surfaces then become multiple mini-light sources. All these sources hitting your subject create a soft light which is much less likely to create specular highlights or very strong colour-destroying highlights.

So how do you do this diffusing? I just love this great flash diffuser. Designed to fit your off-camera flash unit it is an ingenious design and easily adaptable to any flash unit. Check out the Rogue FlashBender 2 – off camera flash. If you have an off-camera flash this is the best. It is the most adaptable diffuser I have ever used. You attach it to the flash with a wrap around grip. The big diffuser stands up above the lens of the flash. It is tough, flexible and creates a lovely daylight-white light. It is superb for portraits and still life work. Coupled with adjustments to the power settings on your flash it gives you excellent control and helps reduces highlights and the effects of hard light direct onto the subject.

For off camera flash there are a range of diffusers available. They are based on various different mounting or reflector principles too. So, you need to look around to see if you can find a diffuser that suits you.

For pop-up flash the options are not as easy. However, I recommend one of two options. I have successfully used ordinary white tissue paper sticky taped over the pop-up flash to both reduce and diffuse flash. However, while this works well, reducing the light by about a full stop, it is a temporary solution. Also, if you use the flash a lot the extra insulation may cause the flash to over heat. So, not for regular use.

My favoured options for pop-up flash diffusion are one of these three methods…

Professor Kobre’s Lightscoop, Standard Version Bounce Flash Device, Universal Model, fits over the Pop-up Flash of most SLR Cameras This diffuser produces a very effective ceiling bounce for the diffusion. However, make sure that in rooms where you use it there is no strong colours on the ceiling or it will cause colour casts.


Gary Fong Puffer – Pop-Up Flash Diffuser for Canon / Nikon / Pentax / Olympus / Panasonic- Lumix pop-up flashes A well reviewed unit, and has the advantage of an easy fit. The other advantage is that it diffuses the light moving forwards. The other two units here bounce the light which puts you slightly at a disadvantage in controlling the flash light direction.


Cateye LETS Flash Reflector/Diffuser Hybrid, for use with DSLR pop-up flashes Although I have not used this one personally, I know some people who have. I have had some very good feedback on this unit and it seems to work effectively in a wide range of situations.


Great shots with flash…

Yes, like everything else in photography, to get good with it, you have to practice use of flash. However, first you need to make sure you can spot the highlights, specular highlights and over-powered flash. Once you know what you are looking for you can adjust your flash power.

The best way to gain control of your flash is reducing the power, or at least adjusting it. Also, the more you soften the harsh, hard flash light the less distracting and natural the highlights will be.

Whatever you decide to do to make your flash manageable do plenty of experimenting to gain control of the light. Don’t forget to Examine Shots Before Shooting Again – “Chimping” to check for highlights. The practice will pay you back in great, well lit shots many times over.

find out more...Photokonnexion tips by email
If you enjoyed this article please sign up for our
daily email service.
                                                 Find out more
#11030#

By Damon Guy (author and Photokonnexion editor)

Damon Guy - Netkonnexion

Damon Guy (Netkonnexion)

Damon is a writer-photog and editor of this site. He has run some major websites, a computing department and a digital image library. He started out as a trained teacher and now runs training for digital photographers.
See also: Editors ‘Bio’.

Thinking about colour

What do we really see? Do you and I see red the same?

What do we really see? Do you and I see red the same?

Can you and I agree on colour?

Do you and I see the same colour when we look at a red object? We may be seeing completely different hues, or tones. There is no way to objectify colour. We see it, have have name for it, but we cannot agree that we see exactly the same thing. What we see is an internal experience and we cannot share it with other people.

White balance

When we see a photograph taken under the influence of a tungsten or fluorescent light we can clearly see the colour casts. Modern DSLRs have standard white balance settings to neutralise these colours as they are so common. What about colour casts that are not so common? Well, in that case we need to set up a custom white balance setting.

The problem is, we do not have an objective measurement of colour that means the same to everyone. However, if we can standardise colour against something, then we would have a way of sharing a colour on a fixed basis. You may see a slightly or very different colour to me. But when you do, if it is standardised, it does not matter. That’s because we can both agree on it against the same standard.

Light which may appear white to the eye is not necessarily an even distribution of colours. The visible colour spectrum contains a combination of colours which together form white. The various colour temperatures in that mix are manifest at the different colour wavelengths. In photography we use a neutral grey (18% grey) as a calibration point that represents the 50% point in the eyes’ contrast range between brilliant white and perfect black. We can use this grey level to allows us to neutralise colour casts generated by sources which are not on the white light spectrum.

How do we neutralise these colour casts using 18% grey? Well, if certain scenes are slightly off colour or we are unable to create a clean white in a white environment there is probably a colour cast or the camera is compensating for too much brightness. For example, it’s common to have grey snow if the camera overcompensates for brightness in the whites. If we calibrate the camera for a custom white balance we can set white settings to be true to the scene in which the grey card is used. To establish the calibration point we photograph the 18% grey card within the light that contains the colour cast. Then we set the 18% grey point to be correctly grey (18%) and this will even out the colour cast. Check your manual for the exact procedure for your camera model.

Of course this assumes that the manufactures got the colour range-calibration correct. However, there is good evidence that we all agree the calibration points produce consistent colour results. So, if we calibrate the camera to the 18% grey card in the ambient light (with colour cast) the same camera colour range will shift from the colour cast to make the camera see the card as 18% grey again. The adjusted colour is a custom white balance – but it adjusts the colours to be consistent with the grey card standard.

Is Your Red The Same as My Red?

In the video we see that it is difficult to agree on the colour match between people. The video shows how different people can see a colour in a unique way but still agree on the existence of the colour even though our experience of it can differ. However, in reality we can only behave as if we agree that colours are the same. We do not have actual knowledge they are same to everyone. Hmmm! Mind bending… but worth thinking about

find out more...Photokonnexion tips by email
If you enjoyed this article please sign up for our
daily email service.
                                                 Find out more
#11030#