Tag Archives: Planning

Getting Started With Action Shots (Action shots Pt. 1)

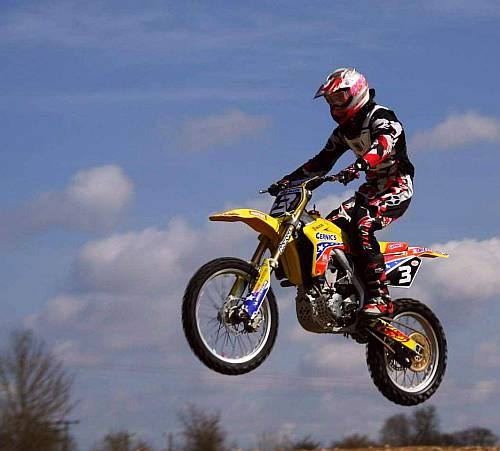
Action shots capture the eye and the imagination...

Action shots capture the eye and the imagination… you must work to give the viewer something to think about. Make them think ahead about what might happen if it all goes wrong! The excitement will capture the imagination.

Three tips to think about when taking an action shot

Action shots are fun to do and great when you pull them off. Like in any other aspect of photography, it is the preparation that creates the best shots. Here are three tips to get you prepared. We will be providing other articles to look at some of the techniques later too.

Knowing where to be

For action shots to make an impact the viewers imagination has to be fired by the photograph. They have to feel two things…

  • Wow! I could never do that!
  • He/she is going die (or be badly hurt)

An action shot gets people involved because the viewer is at once fascinated and repelled. So, to capture their imagination you have to be in the place that best brings out these emotions. Of course there is no one way to do this. You need to be able to spot the breath-taking points. Bring on the excitement!

Study the sport carefully. Get the magazines. Read the papers. Get to know where the great pictures are taken. Get to know the pictures themselves. The pictures taken by others are a lead for you. In particular, before an event make sure that you pick the right place to be for the best shots. Get a map of the event site. See if you can spot where to find the best jumps, the worst corners… whatever makes the shot. Try and match previous photos in magazines to the map so you know where to be. And, when buying tickets make sure you get one that gives you access to the action locations. Otherwise, your whole shoot will fail. You may have to pay more to be at an action point.

On location

The good action shot is often more about how the picture portrays the action than just the location. The first thing you should do is scout out the location. Often an early arrival will help a lot. You will have less crowds and can pick your spot. Believe me this is important. Getting challenging and thrilling shots is impossible if you have to do everything over the heads of the crowd in front of you.

Chosen your place? Now see what sort of shots you can get. Remember, the essence of good action shots is in the fear. Fast, off-the-ground, dust, up-side-down, vertical… look for the fear factor, then make it look worse. From your chosen point you need to be able to get under it, get behind it, be in front of it. You need to face the danger with your picture. I obviously don’t mean get injured. You need to have your lens positioned to capture the decisive action. Bring out the defiance of the moment. Try angles from above, from below, on the side, from the front, from the back… all views possible.

Capturing the moment

Work the action. Often, especially at events, you will need to take the same shot time and time again. Each time you will be hoping to capture the right attitude, angle, height etc. The frustration will be a low hit rate. I have frequently been to events and taken over 1000 action shots during the day. I may be lucky to get 30 good keepers. When the action is fast, uncontrollable, and action packed, it is difficult to control what you are capturing at the exact moment you press the button. So you need to try and try again. Practice will pay off.
More after the jump…

The best way to get started is to freeze the action. Here are a few things to help you…

  • Use Shutter priority and set your shutter speed to fast. 1/320th second upwards for body sports; 1/500th sec for fast action sports; maybe as high as 1/1250ths second for high speed motor sport. The timing is relative. Be prepared to try it out and check what works later by reading the EXIF data on the computer. Then you can analyze the shot for use in the next event.
  • Pre-focus and pre-position on the point where you want to catch the action. Set your focus up in advance and have the auto-focus off so you just click and catch when the action fills the frame. Then, hold your position until the shot comes together and CLICK.
  • For each shot know what you are trying to capture. If you have seen a rally car take a corner six times look for the best vantage. Then capture that one. Once you have captured it a few times look for another vantage point. Don’t just blindly fire off shots. Watch for the action and quite deliberately go for that shot and nothing else until you think you have it right.

Frozen action shots are exciting and fun. However, it takes time with any skill to get the best results. So don’t be afraid to keep practicing.

By Damon Guy (author and Photokonnexion editor)

Damon Guy - Netkonnexion

Damon Guy (Netkonnexion)

Damon is a writer-photog and editor of this site. He has run some major websites, a computing department and a digital image library. He started out as a trained teacher and now runs training for digital photographers.
See also: Editors ‘Bio’.

Time – 5 Essential Tips For Photographers

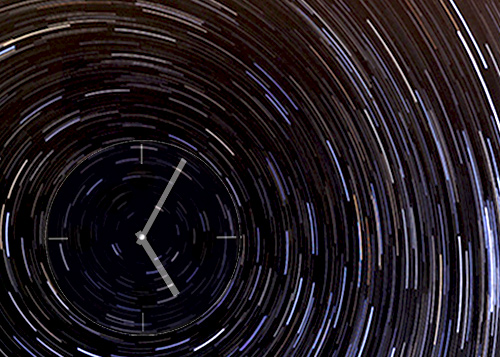
The cosmic clock is ticking... photographers should be aware of time

The cosmic clock is ticking... photographers should be aware of time

Time is an imperative for photographers

An essential element of photography, time impacts on us photographers in many ways. Here are some of the issues you should be thinking about.

The Obvious
Of course… shutter speed, the time the shutter is open. We all know that it is one of the most important aspects of taking a photograph. Tip number one: is to know the impact of shutter speed on the other two important aspects of exposure. I am talking about ISO and Aperture. Without a clear understanding of how these three components interact photographers are doomed to live with auto-settings.

Shutter speed, ISO and aperture all work together to produce your exposure. Between the three of them there is a balance. Raise/lower one of these and one or both of the others have to be adjusted to compensate. Your exposure is a dynamic balance between these three elements. Shutter speed is inseparable from the other two. Read up on the three components of exposure so you understand the impact of shutter speed.

Less Obvious

Composition is a time related activity. We all think about the best way to take a shot. What do we included or exclude? How do we frame? What angle is best? The questions are endless… the compositional variations are too. Actually, the important issue is getting the shot. Some people walk up to a scene snap and go. Have they considered the composition fully? There is a balance to be had. Time is important. I find that as my students develop the shot consideration-time shortens. They spend less time thinking about ‘the’ shot and more time working on variations… hunting for the right shot; working the scene. Tip number two is learn the settings on your camera and practice thinking about compositional elements but remember the time. Get in a number of shots, different angles, perspectives and so on. As you practice these skills try to work to time. Don’t machine-gun your shots. Work the scene – quickly, efficiently.

Being there

Timing is everything: If you don’t turn up you will miss the shot. In photography getting to the right place at the right time is everything. If you are late you will miss something… I am certain that quite often it will be the importing ‘thing’. Tip number three… leave on time, know where you are going and leave enough time to set up before you are going to take the shots. It sounds an obvious tip. However, there is a hidden component. The most important part of getting the shot is being in the right place at the right time. That will need some work. Work the scene before the event; the day before, the hour before. Which ever is right. Know where you will be taking the shots. Know what are the best places to stand. Know in advance what shots you want to take. This planning is essential if you want to make the right moves when you are doing your shoot.

Knowing the time: A lot of activities in photography are about time of day. The Golden Hour at the beginning and end of the day is quite a precise time. Knowing when it starts and ends is something you should think about if you are to make the best use of your time. Precise timings for the Golden Hour are calculated as are the angle of the sun to a particular location. It is therefore possible for you to know what time you need to be at a place to catch the golden glow of this great time of day. And, you can find out what direction to look in if the sun is not apparent when you arrive. If you don’t know the terrain you could turn up at a location and find that your times are out because the hills prevent you seeing the sun at that time.

Tip number four… know the time, and direction of your shot in advance and make sure the light is right! Consult a map to work out if you will be in hills. Ordnance Survey maps  External link - opens new tab/page have contours to indicate the lie of lines of hills and their height.

You can find out the times of the Golden Hour on The Photographer’s Ephemeris (Desktop computer version) The Photographer's Ephemeris | External link - opens new tab/page – the site helps you plan outdoor photography in natural light. The website will show you how the light will fall on the land, day or night, for any location around the earth. There are phone apps available too. Details available on the site.

You can also find the position of the sun  External link - opens new tab/page at any time of the day.

Tip five… Other important times of day you should know about:
Dawn and Dusk times: dawn is the start of the morning golden hour; Dusk is the end of the evening golden hour. However, having a knowledge of exactly what time the sun rises and sets lets you know how much time you have left on your shoot (or when it is about to start).
Mid-day: this is the time the sun is likely to be harsh, producing hard light. Mid-day is not a good time for photography. Colours may be washed out and the overhead sun reduces those all-important shadows. Remember, local DST (Daylight Saving Time) may may affect the time the sun is overhead.
Moon phases and times: The moon is a great addition to night shots. Knowing when it is up and what phase it is at is important. There are several websites with Moon tables and times.
Astronomy: The astronomical side of photography is great fun and very rewarding. You will need to have precise timings of astronomical events starting and finishing as well as knowing where to look.

Contribute A Definition?

Send us a definition of a photographic word or phrase...

Send us a definition for our list of photographic words and phrases. Simply write a clear definition and send it in. Include an original picture if you wish. Give us your name and a link to your website and we will credit your work.

By Damon Guy (author and Photokonnexion editor)

Damon Guy - Netkonnexion

Damon Guy (Netkonnexion)

Damon is a writer-photog and editor of this site. He has run some major websites, a computing department and a digital image library. He started out as a trained teacher and now runs training for digital photographers.
See also: Editors ‘Bio’.

Project Based Learning is Best

Colins Complete Photography Course.
A great book available on Amazon

The best way to improve is to do…

When you read a book, you learn things. However, practical application is different to book knowledge. I am reminded of a great line in a film, “…there’s a difference between knowing the path, and walking the path” (Morphus – ‘The Matrix’). In Collins Complete Photography Course you get to “walk the path”.

Actually doing photography is what teaches us to move forward. This book is about taking our inspiration, our passion, and developing our skills through project-based photographic work. Its about getting involved; getting inspired. Learning through projects.

This is a project based way to take the important steps that lead you to get control of your camera, get control of your ideas, get control of your confidence. Step by step the book takes you through the things you need to master photography. By inspiring you to undertake projects it helps you to get an insight into one interesting aspect of photography at a time – learning from inside the experience. It is a great book to grab your enthusiasm and to express your art… while learning.

Here are some things that others have said about: “Collins Complete Photography Course

“This is a really instructive book…” By Mrs. C. Leigh.

“…if your photography has gone a bit ‘flat’ or you’re struggling to find a subject, it would be worth buying this book for the inspiration alone.” By J. Mousley

“An excellent book for anyone starting on their photographic journey…”. By ‘Fellingmal’

 
If you want to move your photography forward this book can take you on a great journey. It is an opportunity not to be missed. Buy it now…
Collins Complete Photography Course


Photography Tips to Improve Your Online Selling…

Online selling? Make your product shots interesting

Selling online? Make your product shots clean, interesting and good looking.
Click to view large.

Online selling? Better sales – great looking products

Selling online is about getting your product noticed. Nobody will pay top dollar for your product when others look better? A great photo is essential to your sale. Here are some questions to ask yourself. Does your product photo…

  • Look great?
  • Look clean?
  • Show everything important?
  • Show the product is in great condition?
  • Represent the true colour?
  • Show only the product?

Make your buyer think, “Yes, I want THAT one”! If lots of people want it then you can get a high price. If your photograph is dull, cluttered, dirty and with poor colour… forget it. Someone else will make the sale. Here are a few tips to help you get your online selling product looking good.

Photographic background for online selling

Make sure that your background is looking good when online selling. White is a colour that looks crisp, clean and bright. It can lift the mood of your shot immediately. It is also a neutral colour so it goes well with most others. It will not clash with your product and will look great.

You can buy large white card sheets cheaply from a local art or stationery suppliers. Look after it and you can use it hundreds of times for your online selling backgrounds. You might also try this technique for white backgrounds… Simple photography in the bath – high key shots.

Use a card bent in the middle so you can see it below and behind the product. Or, use two boards jointed with white tape to hide the join. This gives the feeling of infinite white space around your product. Clean crisp white to infinity in your image is a great way to display a product for online selling. Online catalogues use this technique a lot.

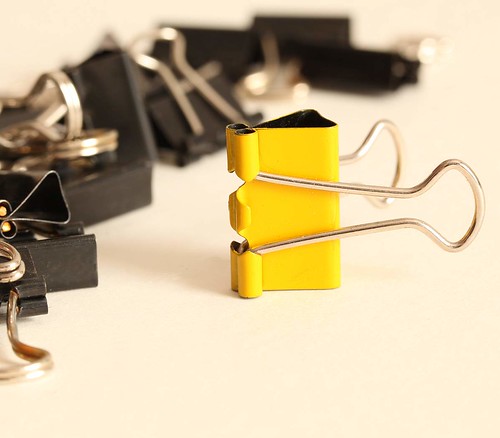
For very brightly coloured or white products, use another neutral colour. Off-white, cream or black cards are great as backgrounds. They will not distract buyers from your product. Black is good for focusing the attention on the subject. Cream is a slight contrast from yellows or very bright colours. Make sure your colours and background are sympathetic to the subject. If they clash your online selling will bomb.

Distractions…

Make sure there is only your product in view. Other items are a distraction for the buyer. They will wonder why it is there and what it has to do with the sale. Online selling relies on your product being the centre of attention. Simplify the scene as much as possible. Present the product as a centerpiece.

Make your online selling products interesting

Try to present the product in an interesting way. If there are multiple items in the product you can arrange them artistically. If you have only one item take it from an interesting angle. Try to think how most people look at the object and take the shot from a different viewpoint. If you normally look down on an object, look at it from below. If you normally see it from the side take it from above and so on. If someone sees the shot from a different view they will often spend more time looking at it. That is when you will be most likely to make a sale.

Warning: Check your photo for unexpected reflections or body parts. Many Internet joke sites have unfortunate pictures of people who did not notice dodgy additions to the shot!

 
• eBay Photography the Smart Way •
Creating Great Product Pictures that Will Attract Higher Bids and Sell Your Items Faster.
It stands to reason that you should present a product well. Nobody will buy awful looking products. Great sales rely on a great looking product. It’s quite easy to improve your skills.

This book will help you to get to grips with making your product look outstanding.   • eBay Photography the Smart Way •


Show the product in full

Consider if you need more than one view of your product. Some sites allow you to have several photos. Try to capture it from all sides without too many shots or you can cause indecision. With one picture, shoot from the best side so it presents well.Online selling pays off if you spend a little time presenting it in full and from the best angle.

Bring out all the good points. Product marketing aims for the ‘unique selling points’ of a product – the reasons why people want to buy it. So ensure you have these in the photo if possible. If not, write about it in your posting.

If there are accessories, additional products or extra items included, think carefully how to photograph them. Consider just listing them with the product on your advert. Extra photographs of something which is not the main product may weaken your message.

Lighting the shot for online selling

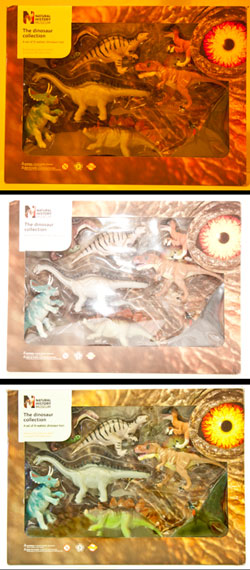
If using images straight from your camera beware of light casts. Indoors tungsten bulbs and fluorescent lights can strongly colour the scene. Choose the ‘Tungsten’ or ‘fluorescent’ setting in your ‘White balance’ menu. This will off-set the colour cast. You will get a more realistic colour.

If you get the lighting right your product will be much more likely to sell

The right lighting will help you sell your project.

Top: Underexposed, dim light with a tungsten colour cast - unappealing.

Middle: Nasty highlights, too bright, reflections, washed out colour - distracted buyer.

Bottom: Diffused light, proper camera settings - An attractive product.
.

The important part of your photograph is the light. Make lighting simple and bright. One diffused light, slightly off from one side is best. Try not to make it a hard light. That will cause harsh shadows and highlights and make it look ugly. Diffuse the light as much as you can so it is a soft light. Hang a piece of white cotton in front of the light, or use some other type of diffusion. This will allow the brightness but keep the shadows soft and flattering to your product. Also try to light your product to avoid unnecessary black spots. If the detail is lost, so is your online selling customer.

Harsh lights and flash both create over-brightness which is ugly and distracting. It puts customers off. Most people use flash – it’s easy and already set up in their camera. Unfortunately, it is often far too bright and harsh, sharpening the shadows and washing out the colours. Many cameras allow you to turn down the flash. Look through the menus for the flash control. If you are close to the product for the photo then the lowest setting is probably fine.

You may also need to diffuse the flash. You can put tissue paper over the flash panel and tape it on. Alternatively you can deflect the flash or point it at a wall/ceiling so the light is bounced around the room. This gives a nice even and diffused light.

If you used bounced light for your online selling photographs, be careful about coloured walls. They can cause colour casts. This leaves your product looking odd coloured and unattractive.

Look out for nasty highlights, bright sparkles and bright reflections. They are totally distracting and will put off potential buyers. Find a way to light your product to get rid of them. Good online selling requires your customer to like the product and not be distracted by the photography!

Taking the shot

Here is a quick checklist…

  • Make sure the whole object is properly in focus.
  • For maximum sharpness use a tripod – very important.
  • Make sure the product is spotless – really work on cleanliness.
  • Set white balance and lighting correctly to get the best colours.
  • Arrange your scene in a pleasing way.
  • Get close to fill the frame to provide the most detail you can.
  • Try not to lop bits off your subject – get it all in the frame.
  • Shoot and re-shoot… get it right.
Finally…
Practice for online selling

Don’t assume you will get it right straight away. Take a shot and look at it very carefully. Re-shoot several times if necessary. Download the shot and look at it on the computer. Be prepared to go back to get it right.

If you are serious about selling things online this is your chance to do it well. The key is good lighting and careful attention to detail. With practice you will get it right quicker, increase your business and have fun with your photography.

Comments, additions, amendments or ideas on this article?
Contact Us or leave a comment at the bottom of the page…

Like this article? Don’t miss the next — sign up for tips by email.

Damon Guy - Netkonnexion

Damon Guy (Netkonnexion)

Damon is a writer-photographer and editor of this site. He has run some major websites, a computing department and a digital image library. He started out as a trained teacher and now runs training for digital photogs.
See also: Editors ‘Bio’.
By Damon Guy see his profile on Google+.

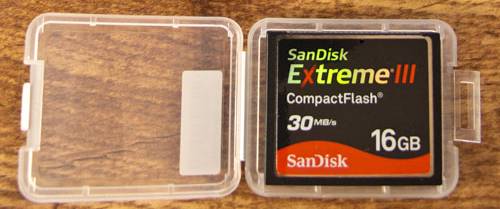
Memory Card Rotation – play it safe

All types of memory card should be rotated in use.

Make sure you use all your memory cards. Don't let them hang about unused.

Make sure you use your memory cards

It is too easy to let your memory card stay in your camera. If you have more than one card the chances are it is in the camera and the others sit in your kit bag. In fact memory cards can deteriorate with handling or even just being knocked about with the other gear you have. It is important to protect your cards because if one fails you stand to lose a lot of data one day. These days big capacity cards can mean literally thousands of images on the card. If you lose that data you will be sorry. Remember these cards are vulnerable media, and they can also deteriorate with use. Here is what to do…

  1. Mark each card with a unique reference number to identify it.
  2. Keep accurate records of purchase date for each card.
  3. On your record note the date each time the card goes in the camera.
  4. Tick it off as ‘formatted’ when you clean up after a shoot.
  5. Use the records to rotate the next into the camera ensuring regular use.
  6. Replace each card every 2 years, (less for pros.). Discard old ones.

Here is an example record table you can use for one card. Put as many rows on to the record sheet as you need.

Memory Card Record Table

Memory Card Ref. Number: 2012.001
Date purchased: ..10/02/2012..

Date into camera Date used Date out Formatted Y/N Roated Y/N
 04/05/2012  04/05/2012  05/05/2012  Y  Y
         

If you put your record-table on a word processor or spread sheet you can print it out and quickly fill it in. Over a period of time you will get a picture of your memory card use. From this you will be able to predict when to buy new ones for your rolling programme, how much they are used and what sort of time period your cards are in your camera between uses. I also have a ‘shots’ column which tells me how many shots I have taken on that card on each shoot. At the end of each row a short space for notes. I note in that space what date I retired the card, did I have problems, any special issue to note and so on… Design your record to suit the type of use you are making of your card.

This record system helps you to be safe about your memory cards. If you are careful and fill the record sheet in every time it will also help you remember if you downloaded the shots last time or not! Hopefully with this ‘record strategy’ you will never have a catastrophic card loss.

By Damon Guy (author and Photokonnexion editor)

Damon Guy - Netkonnexion

Damon Guy (Netkonnexion)

Damon is a writer-photog and editor of this site. He has run some major websites, a computing department and a digital image library. He started out as a trained teacher and now runs training for digital photographers.
See also: Editors ‘Bio’.

Don’t Look Bad in Front of Friends and Family

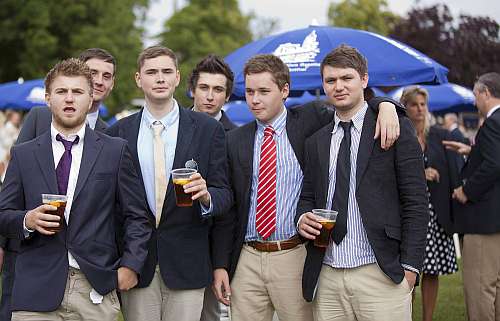
A day out with the boys.

A photography shoot for friends. A photo shoot demands careful thought. When you know you will be doing shots for friends or family you want to get it right. Be prepared so you look good and perform well.

The key to shooting in front of people you know

So you are interested in photography! Before long you’ll be asked to take photos for family or friends. You may already have been asked – it happens to all of us. The impromptu shot is not too bad. It is more nerve-racking to do when you have been specially asked for an event, party, wedding, or important occasion. You don’t want to let anyone down. You certainly don’t want to look a fool because you fluff-up on the day. So how do you carry it off?

Approach your task with confidence, preparation and planning. Make sure all the bases are covered. Here is what you do…

Advance Preparation

Ask what is expected of you. You need to know…

  • How important is this?
  • What/who you will be shooting.
  • Who you will be working with/for…
  • When you will be doing it.
  • Where will you be doing it.
  • Why you will be shooting.
  • How you will do it (is there a brief?)

You can probably think of other questions to ask. Just, make sure you know what the shoot is all about.

If you don’t have any of the required skills, get online and find out what you need to know. Be clear about what’s needed and plan to cover your learning work with time for practice before the event. Leave ordering time for buying things and delivery too.

Leading up to the shoot

Finalise the equipment you need. Here is a preliminary list…
2 cameras; 2 flash units; Lenses, charged batteries (x4?); Memory cards; chargers; lights/stands; light/flash modifiers/reflectors; suitable clothing (cold or hot gear as appropriate); umbrella(?); contact/business cards; tripod…

Why two cameras and equipment? If one is damaged on an important event, and you quietly pull out another and carry on – the professional. Think how confident you will feel too. Access to only one camera? See if you can borrow one for the day. Otherwise do the best you can. I skipped over lenses. The ‘glass’ you need depends on the shoot. If you don’t have what you need, consider hire. The deals are pretty good for a weekend or a few days. If your contact considers this an important enough event they may pay for hire. Try to get the hire ahead a few days so you can try the equipment before the shoot.

Visit the location of the shoot in advance. You need to know about the shoot location…

  • What size is the location
  • How light/dark it is
  • What power provision
  • How many people can it hold
  • What are the rules (especially if a business)
  • Do you need location permissions
  • What’s the access/parking
  • Is parking near/far
  • What scope is there for your shots
  • Light and shady places
  • Natural backdrops available
  • What else will be put out (tents, food, disco, stage…)
  • Bbar times/licensing
  • Where can’t you shoot
  • Other things you need to know fo your event
Planning the shoot itself

Think out how you are going to handle the shoot. Don’t make it up on the day. You will not be creative and get all the shots you need. Do some sketch plans how you are going to make the best of the location. Pick several places to shoot. Pick places for groups or singles. Plan the main shots you want and their order – a professional approach.

When you have a plan check it through with your contact. It is important they know you have got it in hand. Also they will have confidence that you are going to do the job they asked.

The day before

Check all the equipment works, batteries charged, cards clean, everything packed, camera ready; lens cleaned and packed, pack lens wipes too. Make sure you have a route and maps addresses ready too.

The transport arrangements should be prepared and ready. Pack your kit to be ready to leave early. Review all your plans for the shoot. You will be more spontaneous if you already have a shoot plan in your mind. You may need to have a shot list as your main plan to follow. You should have your ideas and plans in order in your head. Don’t forget your wallet or money! Finally, give your friend a call. Check it is all OK and to reassure that you are ready.

On the Day

Dress for the occasion – everyone looks at the photographer. Look good, wear appropriate clothes.

You must arrive early to set up. So, leave early for the shoot. Check traffic reports beforehand. If you get there in plenty of time you will look and feel more professional. If you have setting up to to do – arrive an hour early. To just re-scope the location arrive half an hour early. Leave enough time to park too.

While you are traveling, review your plan in your mind. Try to relax if you are nervous. Its understandable but you will need to be ready for the fun! Visualise and mentally rehearse your shots while you travel.

On arriving report to your contact. Make sure they know you are there and get any ‘latest news’ Something always crops up on a shoot. You need to know changes in arrangements straight away.

Once you have all this in hand, you can set up. Then you are into shoot mode… off you go! You the professional… Be confident, follow your plan, make sure you enjoy yourself!

Can you write? Of course you can!
Write for Photokonnexion...

We would love to have your articles or tips posted on our site.
Find out more…
Write for Photokonnexion.

Out on a Night Shoot – Night Composition

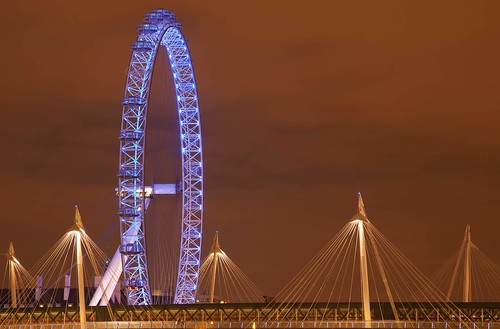
A new angle on the London Eye.

A new angle on the London Eye. Be careful with long exposures, the urban environment can create strong colour casts. Click to view large.

Thinking Ahead

Planning your night shoots are essential. Working in the dark can be dangerous and is more difficult. Make sure you plan ahead – read this first: Planning and Preparing for a Night Shoot

Night Composition

Night-time and low light composition is similar to daytime – the rules of composition don’t change. However, expect to account for the following:

  • Highlights and shadows have different impacts at night compared to daytime. Practice in the garden at home before your shoot. Then you will be able to see the different quality of light that creates shadows and how much more powerful highlights can be.
  • Low light and night leads to longer exposures. Be aware of any bright lights you will have in your field of view. You may need to think about the direction or angle of the shot to compensate.
  • Be aware of very strong colour casts, especially in urban areas. Neon lights can make some strong orange or green effects. Be prepared with a knowledge of how to compensate using white balance settings.
  • Cloud levels can affect light levels, especially in urban areas. Clouds reflect light back down – you can lose the blackness of sky in heavy cloud cover. Wilderness shots can be ruined by nearby light sources like cities. Plan for this by pre-visits. Colour casts may be intensified by cloud cover.
  • Night reflections are brighter than day reflections – be aware of the difference with your settings. Night reflections will still need a longer exposure, but you may need to experiment with the settings or take a range of shots to get it right. It is easy to over-expose a night shot with bright reflections.
  • Consider the shot angle relative to bright lights. They may produce great flare – fun to shoot and it looks good (see the bright multipoint street light in the photo above). It can also mean colour banding and bright reflection spots inside the lens. This leaves orbs of light all over your shot. Consider excluding very bright lights, especially if they are coming in from the side. A lens hood is always worthwhile at night.
  • If you are doing light painting or catching light trails from something moving, watch the background. Some light trails are ruined by the colour or brightness of say, a shop front. Compose for different angles or heights to avoid it.
  • The light/dark contrasts are much stronger at night. So you might consider black and white instead of colour – especially when there are strong neon colour casts.
  • Preparing your shot is important. Advanced practice helps, but often the actual settings are done on the spot. Do lots of shots. Try different settings and lengths of exposure. You will certainly mess up some shots – we all do. The more you experiment (especially in your first few night shoots) the better you will get at estimating what works.
  • Be logical in your experiments. Start using the light meter in your camera to get a good exposure setting. Then go up one third of a stop and shoot again. Then one third more… until you are certain you have it all covered. Do the same going down a third from your ideal, then another… and so on.
Light Battles Dark

Digital cameras cannot see the same wide range of contrasts as the human eye. The range of contrasts at night is far too wide for even top-of-the-line cameras. Try and find a happy medium, avoiding very bright lights in particular. Make sure you have your histogram turned on and set to ‘blink’ if the white detail is lost. Than you will be able to spot very bright lights in the screen after each shot. You can then change your shot.

Weather Conditions – night effects

In wilderness areas, away from light pollution, ‘dark’ is very dark! It sounds odd to say that. However, most urban dwellers do not really know how intense ‘dark’ can be. They have always been used to street lights. With no cloud the darkness can be very intense on moonless nights. So you really need a torch (flash-light). Wilderness long exposures will be much longer than if you took a night shot in an urban environment.

Cloud may lighten the environment a little in the wilderness, and quite a lot more in an urban environment. They reflect the light back. So it may increase any colour casts from local light sources like neon street lights. Fog can create some odd colours at night too. Sometimes orange neon colours turn greenish. Darkness under trees may look black, but may come out bluish in post processing – depending on light levels and background colours.

Strong local light sources and reflected light may mean that the sky is very dark and the ground level is comparatively light. This is especially true when photographing light trails from cars. The light from a busy road can light up the local area. Our eyes see a constant level of light. But over a long exposure the light levels get very high in the shot. Try shooting to exclude the sky so that there is less contrast against bright lights near the ground. Alternatively you might shoot upwards to get the sky – shooting above the light at ground level.

The Moon and stars

The moon is a strong light source. Be careful with it in the frame if you want to include other things. It can be too bright causing highlights or flare on your lens. Check your screen after each shot (Chimping). If you are shooting at ground level the moon can help by lighting the sky. This lessens the sky ‘darkness’ making light levels at ground level manageable.

The Earth rotates and as it does so the moon and stars change position relative to us on the ground. To the eye the movement is not apparent. However, to a stationary camera they both move. If your exposure is too long then they will leave a track. Short exposures will not be too noticeable. If you are exposing for more than 15 seconds the stars will start to have an elongation noticeable to the eye in a high resolution image. This is an approximation as the atmospheric conditions and your position on the Earth’s surface will both change this time. However, it is worth considering how long your exposure will be when you can see stars in the frame.

On the other hand, very long exposures can create exciting star-tracks. These are where the movement of the Earth cause the stars to create long arcs of light during a long exposure. Look up “star tracks”  External link - opens new tab/page in Google Images .

Practice

Night shooting is great fun. With practice and awareness of the above you can get great results. Fortunately you don’t need to go far to practice. Your garden or the street outside is a great place to start. Try out some of the ideas in your local area before planning a more complex shoot on location. You will benefit from what you learn.

Have fun with your night shots!

By Damon Guy (author and Photokonnexion editor)

Damon Guy - Netkonnexion

Damon Guy (Netkonnexion)

Damon is a writer-photog and editor of this site. He has run some major websites, a computing department and a digital image library. He started out as a trained teacher and now runs training for digital photographers.
See also: Editors ‘Bio’.