Tag Archives: Maintainance

10 Tips for Saving Your Camera

It is so easy to kill your camera... do your best to protect it

It is so easy to kill your camera… do your best to protect it

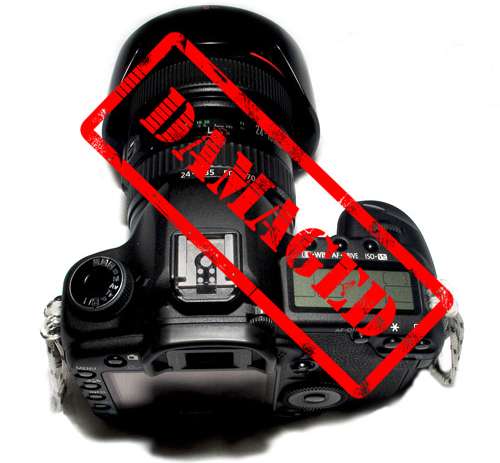
Camera damage is devastating!

If you are like me you go everywhere with a camera. I would be lost without it. The one time I did damage a camera it cost me a lot of money and I was without it for nearly three months. Now I take precautions. Here is my spin on protecting and maintaining your camera.

1. Keep it clean

Surprising, but many people do not do this. I regularly wipe my camera all over on the outside with a dry but very clean cloth. Invisible dust and dirt lurk on your camera. If you have been out for a day on a shoot it will collect lots of dirt. Before you put it in the camera bag wipe it down. It keeps the dirt out of your bag and ensures that all the equipment stays free of camera-killing dust.

2. Changing lenses, opening doors

Keep your camera clean inside too. If you open any part of your camera do it in a dust, moisture and liquid-free place. If dust gets inside it will stick to everything, especially the sensor, mirror and any glass. You will gradually get spots and marks on your shots. As this builds up it becomes a big problem. When changing lenses hold the open camera lens-hole pointing downward. Dead skin, hair and dirt will fall into it from you as you change the lens if it is pointing upward.

3. Cleaning lens glass

Use a blower to blow the lens clean first. Do not use your breath. You will exhale a mist of biological vapour with grease and all sorts of other bio-chemicals onto the lens. This will not clean it and WILL make it attract more dust. Do not put lens cleaner fluid directly onto a lens. Instead, put a tiny drop onto the cloth and wipe that around the lens. Get into the habit of wiping your lens regularly and renew your lens cloth/cleaner regularly too. They soon accumulate dirt and then become more damaging than cleaning. Always keep your lens cloth in a bag to keep dust off it. Keep a lens cap on when you are not using the lens to keep it clean and safe from knocks.

4. Temperature

Extremes of hot or cold can damage your camera. So where possible protect it from heat sources or extreme cold. Most cameras have a working temperature range and you should try to work within that (usually stated in the manual). However, if your camera does get hot or cold never open it until it has returned to room temperature. The atmosphere inside a camera is quite well sealed even if it is not waterproof. If you open it the sudden change of air temperature and moisture can cause condensation or in-draughts of air. This will get moisture and dust deep into the body. Simply leave your camera in its bag for about 12 hours at room temperature for everything to equalize if you are unsure.

5. Moisture, water, chemicals and salt

Unless your camera is waterproof avoid getting it wet. Many cameras are “weatherproof”. Actually this means that a bit of damp in the air is OK. Any more than that and you risk serious damage to your camera. So, if you must go out in a boat, the rain, or near open water keep it under cover or in its bag. I have a roll of black trash bags in my car boot. In the event of rain I push a fist-sized hole through one corner of the bag and stick out the lens hood. Then I work inside the bag. Simple, quick and dry.

Always keep your camera away from exotic chemicals. Vapours, dry chemical dust and gases may damage your camera permanently. Keep clear of spills and ensure anything that is accidentally deposited on your camera is removed/neutralized quickly.

If working near salt water wipe your camera clean with a very slightly damp cloth to remove salt after use. Salt is corrosive and will cause all sorts of problems. If it penetrates your camera it attracts moisture and corrodes electrical parts. Salt also dries and leaves thin deposits on your lenses. Do NOT wipe with a dry lens cloth. Dry salt can damage the lens coating or even the lens itself. One of my waterproof cameras was completely destroyed by salt corrosion once. I did not clean it before storing it. Very costly! If your camera is waterproof wash it in clean fresh water and dry it in a warm place for several days before storage.

6. Wind-blown dust and sand

EEEEEK! Deadly stuff for cameras! If you work on beaches a lot, as I do, just don’t bother if it is windy. Or, if you must go on the beach, make sure your camera is enclosed in a sealed bag. Dust gets everywhere when it is windblown. If your lenses get dust or sand under the focus rings you can say good-bye to your lens soon after that. Wipe the camera down after coming off the beach. Never open it in dusty, sandy environments. That includes not opening the battery chamber or any other orifice or cover.

7. Straps

Straps are surprisingly vulnerable. They often have plastic buckles that get stepped on, knocked or caught in things. Believe me, although they are robust, fittings do break. Inspect all fittings on your straps regularly for wear and damage. Especially check the straps where they are attached to the camera. The little slots for the straps are quite sharp and they gradually saw through the strap. Do not use any chemical cleaners on your straps as they can break down. Wipe them clean regularly with a damp cloth to keep dust from impregnating the material. Use straps all the time when carrying your camera. Remove them if you can when using a tripod. They move or blow around and cause vibration and may catch on clothing etc and pull over your camera.

8. Drops, shocks and knocks

Most modern cameras are built to take the knocks of day to day use. Some people have taken extreme measures to test this. However, if your pride and joy is worth anything to you take care not to drop, knock or shock it. This means constant vigilance. Keep it in a good, padded bag. Don’t let kids or pets near it. Make sure it is strapped, tied, or otherwise fixed to something so it is secure if knocked or dropped. Over the years I have dropped a very expensive pro-lens, two cameras, a cheap lens and a range of other equipment. Of those, the cheap lens broke. The others were all secured or in great bags. Believe me you will drop or knock your equipment. If you have taken adequate precautions you will be OK. Otherwise you will be out of pocket.

9. Handle with care

If you have to push it, pull it, turn it or lever it with any force – something is wrong. Everything on your camera should be easy to open, close, turn, twiddle or use. If something does not work easily it may be jammed or broken. Don’t make matters worse. Check the instructions in your manual first to see if you have done it right. If it is not right, or you cannot see a reason for the problem take it to a camera shop. They may help you immediately if it is a simple problem. If it is more complex then get an expert to fix it. Better to be safe than sorry as they say!

10. Power, cables and sockets

I have never broken a cable socket in a camera. I know people who have. Sockets are expensive to fix. Keep cables clean, undamaged and untwisted. If someone trips over your cable they may be hurt – your camera will be destroyed! Damaged sockets and suddenly-tugged cables cause all sorts of problems. When you have cables plugged into your camera make sure you have them secured or away from places where they can get caught. Before connection/disconnection of any cable turn off your camera. Sudden electrical surges may damage internal components. The same applies to memory cards and connections to computers or radio-triggers etc. To avoid undue wear and tear on cable sockets in your camera make sure cables do not carry weight. If they tug constantly on the socket eventually it will not fit the cable any more. So find a way to keep the weight off the socket.

Oh! And, remember these…
  1. Clean everything and remove batteries before storage.
  2. Replace memory cards and batteries every two to four years before they wear out.
  3. As my old Dad used to say, “…and if all else fails read the manual!”

There, three extra tips for free!

By Damon Guy (author and Photokonnexion editor)

Damon Guy - Netkonnexion

Damon Guy (Netkonnexion)

Damon is a writer-photog and editor of this site. He has run some major websites, a computing department and a digital image library. He started out as a trained teacher and now runs training for digital photographers.
See also: Editors ‘Bio’.

Memory Card Rotation – play it safe

All types of memory card should be rotated in use.

Make sure you use all your memory cards. Don't let them hang about unused.

Make sure you use your memory cards

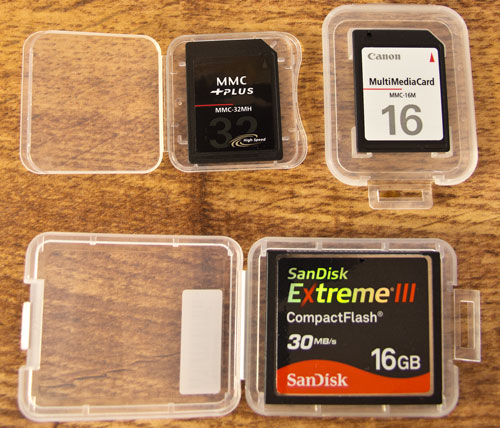
It is too easy to let your memory card stay in your camera. If you have more than one card the chances are it is in the camera and the others sit in your kit bag. In fact memory cards can deteriorate with handling or even just being knocked about with the other gear you have. It is important to protect your cards because if one fails you stand to lose a lot of data one day. These days big capacity cards can mean literally thousands of images on the card. If you lose that data you will be sorry. Remember these cards are vulnerable media, and they can also deteriorate with use. Here is what to do…

  1. Mark each card with a unique reference number to identify it.
  2. Keep accurate records of purchase date for each card.
  3. On your record note the date each time the card goes in the camera.
  4. Tick it off as ‘formatted’ when you clean up after a shoot.
  5. Use the records to rotate the next into the camera ensuring regular use.
  6. Replace each card every 2 years, (less for pros.). Discard old ones.

Here is an example record table you can use for one card. Put as many rows on to the record sheet as you need.

Memory Card Record Table

Memory Card Ref. Number: 2012.001
Date purchased: ..10/02/2012..

Date into camera Date used Date out Formatted Y/N Roated Y/N
 04/05/2012  04/05/2012  05/05/2012  Y  Y
         

If you put your record-table on a word processor or spread sheet you can print it out and quickly fill it in. Over a period of time you will get a picture of your memory card use. From this you will be able to predict when to buy new ones for your rolling programme, how much they are used and what sort of time period your cards are in your camera between uses. I also have a ‘shots’ column which tells me how many shots I have taken on that card on each shoot. At the end of each row a short space for notes. I note in that space what date I retired the card, did I have problems, any special issue to note and so on… Design your record to suit the type of use you are making of your card.

This record system helps you to be safe about your memory cards. If you are careful and fill the record sheet in every time it will also help you remember if you downloaded the shots last time or not! Hopefully with this ‘record strategy’ you will never have a catastrophic card loss.

By Damon Guy (author and Photokonnexion editor)

Damon Guy - Netkonnexion

Damon Guy (Netkonnexion)

Damon is a writer-photog and editor of this site. He has run some major websites, a computing department and a digital image library. He started out as a trained teacher and now runs training for digital photographers.
See also: Editors ‘Bio’.

20 Ways to Protect Files on Memory Cards (Part 1)

The flash memory card in your camera is not a safe environment for files.

The flash memory card in your camera is not a safe environment for files.

The Danger

Memory cards are NOT safe media. The shocking truth is they are insecure, vulnerable, damageable and corruptible! I have seen a grown man cry after losing a whole day of shots! I am going to go cover ways to prevent losing files.

Problems and Solutions

1. Do not use ‘dirty’ memory cards! Corrupt files, old data, errors and old data can cause problems, errors or corruptions – especially if the card has been in another camera or mobile device.
Solution: Every time you put a card into your camera…
– Check you have already downloaded any files on it.
If it is OK…
– Format the card using the on-camera format system.
Regular formats ensure that the card database is refreshed, errors are corrected and old data is deleted. Only format the card in the camera. Other formats may be different to the camera system. If you do not normally remove the card (recommended) then format it at the start of every shoot.

2. Inserting and removing memory cards can damage them or the camera. Compact flash cards are particularly vulnerable. Tiny wires (40) are pushed into it when inserting the card. Put it in too hard or the wrong way round and you can cause serious damage. Small format cards can be bent on inserting which can literally break the chip. The contacts on all memory cards are vulnerable to grease, dirt and damage. Most cards will exceed over a million read/write cycles. However, they will not survive near that number of inserts/removals – even under perfect conditions.
Solution: Push the card in slowly and gently. Do not force it. Ensure it is in the right way around. Ensure it is the right type for the slot. Don’t touch contacts. Minimise the number of times you handle your card. If you have time download your files from the camera. It’s slower but saves handling the card.

3. If your camera reports an error your files could be overwritten if you carry on shooting.
Solution: Stop shooting immediately. Remove the card and use another to continue shooting. Corrupt files and errors can be recovered with rescue software and there are data services that can recover lost files. Nothing can be done if files are overwritten.

4. Don’t put all your eggs in one basket. One card and a failure will put you out of action.
Solution: Carry at least three cards. If one fails you have one to replace it and still have space on the third. If you were on the second card when it failed you still have the third. Less than three there should never be!

5. High capacity cards = high losses! If your files are precious (wedding shots for example) you are at high risk if you have a large card and put all the files on it.
Solution: It is better to have small batches of files on many disks than lose them all on one disk. If you only have a few files on a disc then others on other discs are safe. Professionals download or change cards frequently.
More after the jump…

6. Do not delete files while on the camera. The deletion process is error-prone. Advice from many sources, including manufacturers, indicates that deleting in the camera can cause corruptions. This may prevent access to the rest of the card, damage many files or prevent file removal. (Note: deleting and formatting are different processes).
Solution: It is better to delete your files once they have been downloaded and onto your computer where you can manage them properly and back them up.

7. Do not fill up the memory card. There is a chance that filling the card will prevent further access to it or may corrupt the software on the card. Card problems often occur on filling a card.
Solution: Finish shooting before filling the card. Download the files safely and then format the card before re-using. Change the card if you do not have a way to download immediately.

8. Do Not remove a full card from the camera. Some corruptions occur when you try to access a full card using a different system to the camera. Do not attempt to delete files to make space as this can also cause corruptions or files to be overwritten.
Solution: Download files from a full card using the camera. This may take longer than usual. If you have to remove the card to carry on shooting, put it back in the camera when downloading later at your computer.

9. Do not individually delete files to clean a card. The on-camera delete leaves file residues. The file remainders can cause problems later.
Solution: The recommended way to ‘clean’ all cards is to format the card in camera. The format process reduces the accesses, deletes all file data and cleans up the database the camera uses to manage files on the card. This will minimise the risk of corruption and errors.

10. Do not turn off your camera immediately after a shot. It can destroy your files. Your battery running out has the same effect. If the camera is deprived of power while processing a shot it may corrupt its record in the database of file information. Worse, it may damage the database, possibly damaging other picture files.
Solution: Wait at least fifteen seconds after your last shot before turning off your camera. Never let the battery get low. Have a spare battery on hand.

By Damon Guy (author and Photokonnexion editor)

Damon Guy - Netkonnexion

Damon Guy (Netkonnexion)

Damon is a writer-photog and editor of this site. He has run some major websites, a computing department and a digital image library. He started out as a trained teacher and now runs training for digital photographers.
See also: Editors ‘Bio’.

Can you write? Of course you can!
Write for Photokonnexion...

We would love to have your articles or tips posted on our site.
Find out more…
Write for Photokonnexion.

Quick Tips to Save your Lens from dust

Dirt track motorsport is awesome photography - watch the dust fly!

Dirt track motorsport is awsome photography - watch the dust fly! And, spend time cleaning your camera afterwards!

Dust is death

…to a photograph. Spots distract the viewer and make for unnecessary post processing. They are most obvious when they appear on a bright continuous colour – like sky.

The trick is to keep your lens wiped regularly. Make sure you have a good lens cloth with you when out shooting. Replace it regularly to keep it from accumulating dust.

Dust is really invasive. You cannot see the really tiny particles. However, those particles penetrate the moving parts. Over time your lens function will be affected. So you need to wipe your camera regularly to preserve it.

You cannot help getting your equipment dirty. Rain drops, even tiny drops, form around dust particles. The particle remains suspended in the drop until it lands on your camera and dries! Then it leaves a particle of dirt on the case. There are lots of other ways to get dust on your camera too. Those ground level shots for the unique perspective don’t help!

The dust thrown up at a car rally is awesome. Great shots! But, you need to spend time cleaning the dust off afterwards. In particular, modern lenses are so high-tech that dust in the moving parts can ruin them. A dirty case will also deposit dirt inside your camera when you change a lens. Before you take the lens off, clean your lens glass and barrel and the camera case. Pay attention to the areas around the focus rings to remove dust near moving parts.

Dirt biking is great photography - clean up afterwards...

Dirt biking is great photography - clean up afterwards...

Doing the cleaning

After you have cleaned your lens glass – go the extra distance. Take another lens cloth – make sure it is a micro-fibre or low-lint cloth of some sort. Spray lens-cleaner straight onto the cloth. Make sure there is only a slight mist of spray on your cloth. The slight dampness will lift, and retain the dust, on the cloth (until it dries). Then do the same with a new cloth. This time wipe it all over your camera and lens barrel. Too much spay and you risk droplets running down the case into the focus rings. Liquid drops and moving parts do not mix! DO NOT spray your camera directly – it will blast a fine jet of liquid drops into the vital parts!

When you have wiped the camera/lens barrel with the misted cloth, gently dry the whole thing with another cloth. It is best not to mix the two cloths. Otherwise dust you have just wiped off will be rubbed back onto the clean casing as the spray on the cloth dries!

Research photography cleaning equipment.  External link - opens new tab/page to Research photography cleaning equipment..

Recommended cleaning tool
Dirt on your camera, or worse, on your digital sensor? You need this tool. An efficient blower, the stream of air will clear dirt and grit from damageable places. Use it to clear dirt from the camera sensor and to blow out dust . It is an indispensable tool for the keen photographer. Giottos GTAA1900 Rocket Air Blower – Black  External link - opens new tab/page.

Comments, additions, amendments or ideas on this article? Contact Us
or why not leave a comment at the bottom of the page…

Like this article? Don’t miss the next — sign up for tips by email.