Tag Archives: Planning

Knowing Your Wildlife Subject

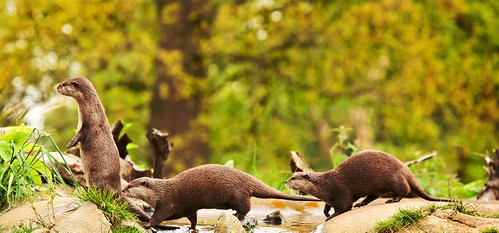
Find out everything you can about your wildlife subject

Find out everything you can about your wildlife subject. It will save you time and you stand a better chance of getting the shot you want.

Do your research in good time before your trip

Photographing wildlife is one of the most satisfying photographic subjects. When we get a great shot we feel terrific. However, if your back-to-nature shot is to be a success then you should make sure you know what you are doing. Preparation and research is essential. Find out how to improve your chance of a good wildlife shot.

Define the shot you want

For any sort of wildlife consider what you want to achieve… and what is practical. Doing a Google image search for the animal you want to shoot will reveal hundreds of pictures that relate to your subject. It really helps to go through those and see what is possible, and what you like. Getting ideas about shots will help you to visualise what works. On location it will also help you clarify ideas for when and how to take the shot. Pick out a few pictures you like. Review them often to keep what you want in your mind.

Research the creature

A lot of photographers go on location to photograph a particular animal and never see one. They appear on location assuming they will find an animal but don’t know where ‘exactly’ to look or when. Wildlife is often rare, shy, wary of humans or deep in the natural cover of the landscape. Knowing roughly where an animal or bird lives is definitely not the same as knowing its habitat or how it uses its environment. Read up on Wildlife Photography. Make time to learn the nesting, habits, feeding and hunting activities. Without a good knowledge of these you will stand little chance of tracking down your intended animal. Read the work of experts. Then you will be able to build up a complete understanding of the animal and how to photograph it in the wild.

Health and safety

This is about both you and the animal. Wild animals are just that – wild. If you disturb them they may, in their surprise, attack you. On the other hand, if you surprise them they may abandon a nest or kill their own young as a result of the stress. Often wild animals are only found in wild places too. Most of us today are not used to these places and don’t know the ways of the country very well. Chasing an animal down in unfamiliar territory (mountains, wild open areas etc) could prove hazardous to you. Particularly in the winter.

Get to know the shots and the areas where you will get them by going on guided shoots. There are lots of companies that specialize in overseas and local wildlife shoots. They will know when the animals will be visible and where to find them. They probably have great hides to use while observing and imaging your chosen beast. They will also be able to show you what is the best equipment to use for photographing and tracking down you chosen animal.

Get trained up to cope with the environment you will be shooting in. Too many people each year get lost or die because they had no idea how to cope with the conditions they encountered. That could have been avoided with a few simple, and fun, sessions with expert trainers.

Knowing the moods of your subject

Using guides will help you get to know more about what you can reasonably expect from a shoot. You will find out about the animals moods or habits and what time of day it is out-and-about. The mood of an animal is all-important to the shot. Catch it doing anything natural and you have the type of shot that is a winner. However, if an animal is stressed or wary, scared or protecting young – your shot is unlikely to be what you want. Knowing the mood and normal activities of an animal is crucial to getting the candid shots that make great photos.
More after the jump…

Composition

Great wildlife shots are also about Composition. A good wildlife photographer works within the environment. They know all about where they are and what they are after. They place themselves in locations for the best shot of their animals. If you don’t have a natural and pleasing background for your shot all your efforts will be wasted with the animal. Hides, walls, tracks, vehicles, local roads and buildings can all impact your shot. So you need to give careful consideration to not only the location of the shoot, but where you will be pointing the camera when the animal happens past.

Time

Wildlife photography can be very time consuming. Good wildlife photographers may wait weeks for a particular shot, or some such length of time. If you visit the Wildlife Photographer of the Year External link - opens new tab/page website you will see comments next to shots by the winners about the photos. Sometimes they mention their preparation and time. It is useful to see what is involved.

Don’t always expect to come back with what you want. You may be lucky. I hope you are. But, whatever, be patient. Wildlife photography is great fun, very rewarding and often fruitful. Success only comes consistently if you know what you are doing.
Enjoy!

By Damon Guy (author and Photokonnexion editor)

Damon Guy - Netkonnexion

Damon Guy (Netkonnexion)

Damon is a writer-photog and editor of this site. He has run some major websites, a computing department and a digital image library. He started out as a trained teacher and now runs training for digital photographers.
See also: Editors ‘Bio’.

Five Steps to Help Your Street Photography

Here is an interesting video from street photographer John Free (johnfreephotography.com and youtube.com/user/JohnFreePhtography). He has worked up a system called the Five F’s. They are five steps to taking a photograph. Here they are…

  1. Finding – find your shot, search passionately for what you want to shoot!
  2. Figuring – build your composition and express your passion!
  3. Framing – decide how you are going to show it, frame it up in-camera
  4. Focusing – Focus precisely. He advises not to use auto-focus
  5. Fire – shoot your capture.

Watch the video (5 mins 33 secs). It is certainly food for thought.

Can you write? Of course you can!
Write for Photokonnexion...

We would love to have your articles or tips posted on our site.
Find out more…
Write for Photokonnexion.

Tips for Candid Teenager Shots

Let your teenage subject pose in their own way... their ideas are important

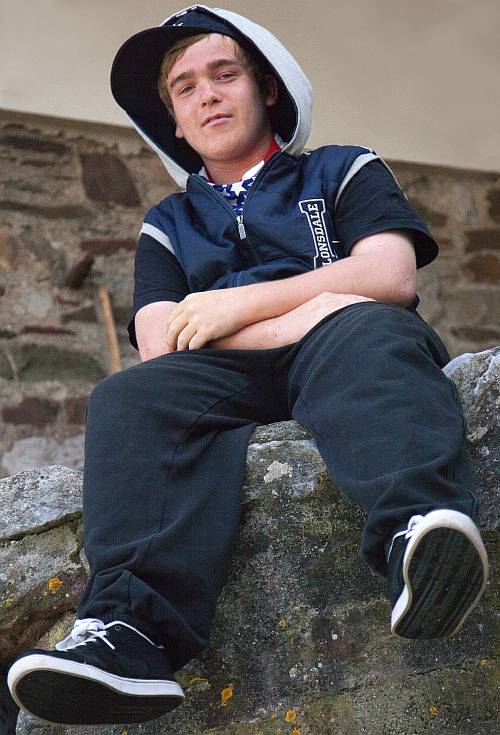
Photographing teenagers? Do it their way! Let your teenage subject pose in their own way... their ideas are important. Angles and poses should vary.


More than any other time in life,teenage is about self expression. Teenagers crave acknowledgement for who they are. So, if you can persuade a teenager to be photographed, make sure you keep their attention. Give them the license to dress and do the things they want. Praise them for who they are and what they want to be. That way you will develop the rapport you need. Here are some tips to make sure your shoot gets results…

Clothes

Teenagers often have completely different ideas about clothes to you – especially if you are a parent. They may want to dress just to annoy their parents. To get the shots, get with the programme. The more outrageous the clothes the more you will excite the viewer. Concentrate on the character of the person wearing the clothes rather than the clothes themselves. In the expression and actions of the teenager you will find the emergent personality – encourage it.

Props

Try to catch your subject with something that tells a story and characterises them. Think of a skateboard, some sports equipment, a musical instrument, perhaps a book. Catch them in the act of practising their interest. The shot is not about what they are doing but how they are expressing themselves. A stance of defiance, a pout of annoyance, a fist-shake of triumph… these are expressions of their actions and character. These are the things that convey them as unique and expressive people with their own character. They are also the things that people find interesting and which make good shots. Teenagers are self-conscious about themselves. If they are doing something with a prop, and especially if expressing an emotion too, this is when they will be most natural in their pose and reactions.

Experiment with environments

A teenager out of their preferred environment is an uncomfortable person. The best candid shots are when the person is completely relaxed about the shots you take. Take them where they are happiest. Teenagers love to ‘hang-out’ – mixing in the company of other teenagers. This is where they will express themselves best. However, you may need to be creative in your shots. You might want to capture them with their friends. Otherwise you may need to be creative to separate them out.

Be prepared to pepper your shots with captures that are not at the moments the teenager expects. Then you can be away from the others if that is the shot you want. A clever shot is often to shoot between friends to get your subject, but shoot very close to exclude the others. The active teenager will not even notice you taking these shots if they are doing something fun. Anything that involves concentration is a great way to pick up the best expressions and actions – particularly if they are successful, winning or doing it right.

Remember, that some great expressions can be had when they don’t get it right too! Strong emotions come out in disappointment and defeat. These are still important expressions of character. Work with the teenager in a variety of situations. Don’t make sessions too long. The idea is to engage them and get them working with you. It may take several shoots to get what you want. Teenagers love to be acknowledged. Capture them as they want to be seen.

Angles

Face to face may work. However, teenagers like the ‘different’ approach. Go with it. From above, from below, from the side, behind… they love something different. Ask them how they want shots done. They may be silly about it. Go with that too. Once they see you are serious and not judgemental they might have useful suggestions. A wide range of angles and your shots are more interesting. If they help you make it interesting and unique then your shots will capture the viewers imagination. A comfortable teenager is a cooperative teenager.

On Their Level

Teenagers are often smaller than you. Don’t be tempted to take all your shots from above. Get down to their eye level. This puts you on equal terms with them. They love that they can then express themselves directly. It’s much easier to build a rapport with eye-to-eye correspondence. It is always more engaging in the final picture too. On their level you are in their world. This is where you will see them as they are. Do something silly down there. If they join in you have the shoot under control…

Get close!

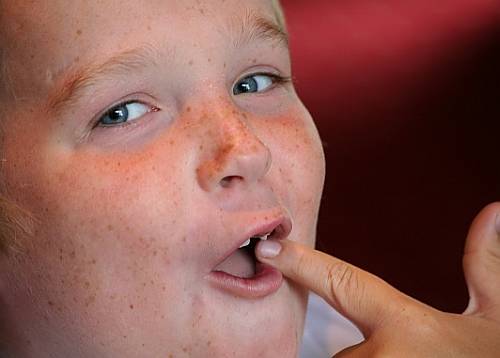
If this is one of your first portrait sessions you might want a space between you and the subject. Wrong – get in close! Really close. Get the subject to fill your lens. Use a long lens, or draw in close-up and shoot. Either way the visual impact will be much greater. Nearly every branch of photography benefits from getting in close to the subject. Nearly every photographer takes time to appreciate that the close, big shots are the best. Close up it’s easier to lose the background and along with it the distractions. You will penetrate right into the expressions of your subject. Your viewers will get the full visual impact of the study.

Get in close to increase the visual impact.

Get in close - you'll increase visual impact and reduce background distractions.

Have Fun!

Remember, most of your work with teenagers is about building a rapport. Go with them, go with being silly, go with the flow. Then the shoot will begin to roll along once they get comfortable. Have fun with teenagers, and they will give you a great shoot!

Damon Guy

Doing a Creative Shoot

Photography is a way you express yourself - a facet of your creativity.

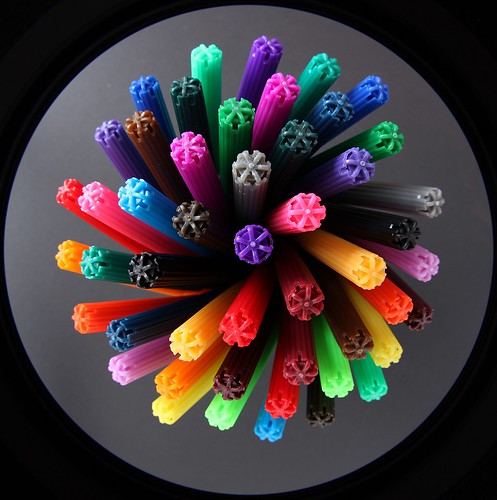
'Creation 'De Pens' on your perspective!' By Damon.
 
Photography is a way you express yourself - a facet of your creativity.

Setting Up From Scratch

Perhaps the most challenging form of photographic expression is the ‘scene-from-scratch’. It requires no more skill than any other photograph of any other scene. It demands the same level of achievement. It requires the use of photographic techniques like any other photo. It may require a certain amount of experimentation like any other shot. However, the ‘scene-from-scratch’ also requires you to construct the scene itself to which you will apply your photographic skills. It is a skill that is different to the photographic process.

The picture above, ‘De Pens’, is one such ‘scene-from-scratch’. I spent days attempting to visualise how I wanted the scene to look. I raised questions for myself and wrestled with my imagination over the shot. Familiar? Well, here are some ideas to help you through the creative process and to get you to the shoot.

Crystalise your idea:

The creative process always starts with an idea. It is usually unclear and unformed. So you need a vision. Creating a picture in your head does not come easily to everyone. However, with practice you will be able to ‘see’ a scene in your minds-eye that is the vision you seek. You can develop that facility by practising the placement of each element of the scene. Start with one item. Observe it, become completely aware of all its facets – know it intimately. What is its size, weight? Is it coloured? Is it shaped how you want it? Is it the one you want or do you need another similar one? Once you know that item, then you can look at others. Is the first item alone? What is its position relative to other things in the scene? How many other things? Once you are seeing these things in your head you can move them around your scene in your head as well. Now you have begun to crystalise the scene and to create the vision. You are aiming at having a picture in your head that is the final scene you want to achieve – in glorious perfection. Once you see the scene how you want it in the final photograph you are ready to start putting things together…

Practice creating the scene:

This helps to crystalise the vision and to put the technical issues into perspective. Creating a shot, like mine above, you need to consider many things. Will the shiny plastic create nasty highlights? Will bright light cause the loss of colour? How will the pens be held in place during the shot? And, many other questions come to mind. Laying out the scene Will help your thought experiments. It will also help you to understand what techniques you will need to use for the shot. Perhaps most important – you will be able to anticipate problems.

Create the lighting:

You need to consider lighting in every photograph. After all, a photo is created only by the light. Start by trying out the lighting in your crystallisation process. So, think of these…

  • Soft light – How are you going to diffuse it? How far away? What source? Shadow/blacks control?
  • Hard light – How are you going to focus it? Distance? What source? Highlight control?
  • Coloured light – What colour, hue depth? What creates the light? Natural, artificial, filtered?
  • Other equipment… reflectors, diffusers, gels, boards, speedlites, cables, radio connectors…

Resources

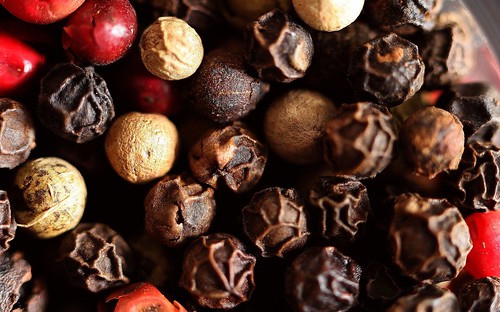
Even simple shoots sometimes require purchasing in advance. I had in mind a shoot involving peppercorns. Fascinating little seeds, especially when seen close up. There are a number of species that produce peppercorns and I wanted as many types as possible. Surprisingly, it took me three weeks to find a supplier of mixed peppercorns. So consider a shopping list as early as possible or your shoot may not go well on the day!

Mixed Peppercorns

'Mixed Peppercorns'
 
To get the right resources you must prepare in advance.

Photographic equipment

Think about what you will need for the shoot – especially if you are on location. Some things – camera – are obvious. Some not so… I forgot a memory card only once! I was thinking more of which lenses are appropriate. Make sure you have an appropriate tripod. Is your lighting sufficient and mobile. I have a pair of 1000watt studio lights. They have batteries for location work, but not so good to take up a mountainside. Advanced thinking about what you need will help you to organise for the day. By the way, experience has taught me that on location you should always have two colours of ‘gaffer tape’ and about 8 studio clamps. Works for me anyway. Do you require any special photographic equipment? Don’t forget cables. Nearly everyone does at one time or another – and lens cloths.

Techniques

Being creative is about learning techniques perhaps even developing them. However, if you are planning a shoot of some kind where you need a specific technique it makes sense to learn and practice it before you start your shoot. I was once invited to photograph a rare orchid in the wild. It was at a site of special scientific interest. I was quite excited – this was a secret location and I was privileged to be there. My friend had arranged the morning and we turned up with our macro lenses and everything we needed. What I did not know was my friend had no idea how to use his new macro lens. I spent most of my precious morning teaching him and not photographing orchids! What a waste of a shoot. He lost out too. Make sure you practice to get the standard of results you need for your shot before you start your shoot. Otherwise you may get nothing reliable or worthwhile from it.

Clothes and Props

It may sound obvious – it’s not. Weather can turn suddenly. So you need to be sure that you have what you need to stay warm, dry and safe when on location – especially if you are outside. Models or subjects need to do the same. You also need to have the clothes or props required to be able to create your scene. Often, when on location there is quite a lot of standing around. If you are the photographer you are responsible for direction AND safety. Make sure you keep everyone safe and warm. That includes making sure the props are safe (and not likely to blow over or fall down and injure someone). If out in winter you may need to lay on accommodation or shelter for anyone on the shoot with you. And, even back in the studio, you need to make sure that scantily clad models are warm and alert. A scantily clad young lady with hypothermia does not look sexy – no matter what she is wearing!

Planning for the Shoot

If it is just you and your camera, you can just have a go. If it does not work, well, you can try again. Factor in a few resources and even one other person and you have a different ball game. Suddenly you need to be organised and well set up in advance. I have always tried to impress on people that they should know what they want to do on site before they set off. So have a plan. Even if it is a sketchy one. Everyone makes some things up on the spot. Some people have nearly everything planned down to the last crisp for lunch. Do what you can – and note where you made mistakes. Keep notes and lists for next time. The actual shoot scene should always be drawn out or laid out with a model in advance so you can partially realise the visualisation in your minds-eye. Then you are ready for the site when you arrive. In the studio, on the dining room table or even on the bedroom floor, a planned scene can help you decide how to start and what you might do if it does not work out. A good starting point helps you get ahead from the off. It also helps you be more confident in changing things if you can play around with preconceived ideas on a model or drawing rather than start moving things around a lot just to experiment. So have some ideas ready for change if your first idea is not good. Make sure that your contingency plans include an alternative shoot in case the original plan is blow away by something unforeseen.

Review and Feedback

Has it gone OK? Was it a disaster? What did you forget? What did you need but did not realise you needed? Who did what wrong? What went right. What do you need to know for next time? I could go on and on… there is a lesson here. Write down all the things you need to remember. Create a list of all the things you need. Make a note of the good, the bad and the ugly. I keep a little notebook of lists for such occasions. Make sure you get feedback from any participants too. If they tell you they were fed up, take note! You may want them again. They sure won’t come back a third time if you mess up on the second attempt. So fix your ways!

What Next?

The renown French scientist Louis Pasteur famously said: “…chance favours only the prepared mind.” Photographers take note. If you have properly organised yourself and prepared in advance you will be more likely to get a good result from your shoot. Unhappy accidents happen to those who rely on chance and have not prepared for an unlucky event. Clear ideas, the best equipment you can muster, planned activities and contingencies and appropriate safety precautions make things go faster, safer and more efficiently. And, you get a better result.

Related links:
My Still-life Photography Adventure!

Photography, Philosophy and Time

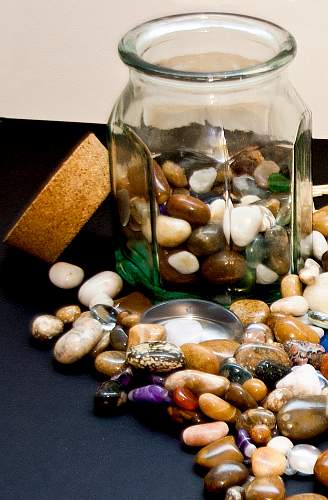
Its the big thing in your jar hold your attention.

The big things in your jar should hold your attention.


I want you to read this story. It is about you and me and anyone trying to make time for
photography…


The Mayonnaise Jar and the Two Glasses of Wine

When things in your life seem almost too much to handle and 24 hours in a day are not enough, remember the mayonnaise jar and the two glasses of wine.

A professor stood before his philosophy class and had some items in front of him. When the class began, wordlessly, he picked up a very large and empty mayonnaise jar and proceeded to fill it with golf balls. He then asked the students again if the jar was full. They agreed it was.

The professor then picked up a box of pebbles and poured them into the jar. He shook the jar lightly. The pebbles rolled into the open areas between the golf balls. He then asked the students again if the jar was full. They agreed it was.

The professor next picked up a box of sand and poured it into the jar. Of course, the sand filled up everything else. He asked once more if the jar was full. The students responded with a unanimous yes. The professor then produced two glasses of wine from under the table and poured the entire contents into the jar, effectively filling the empty space between the sand. The students laughed.

Now, said the professor, as the laughter subsided, I want you to recognize that this jar represents your life. The golf balls are the important things; your family, your children, your health, your friends and your favorite passions; things that if everything else was lost and only they remained, your life would still be full.

The pebbles are the other things that matter like your job, your house and your car. The sand is everything else; the small stuff. If you put the sand into the jar first, he continued, there is no room for the pebbles or the golf balls. The same goes for life. If you spend all your time and energy on the small stuff, you will never have room for the things that are important to you. Pay attention to the things that are critical to your happiness.

· Play with your children.
· Take time to get medical checkups.
· Take your partner out to dinner.
· Play another 18 holes of golf.

There will always be time to clean the house and fix the disposal. Take care of the golf balls first; the things that really matter. Set your priorities. The rest is just sand.

One of the students raised her hand and inquired what the wine represented. The professor smiled. I’m glad you asked. It just goes to show you that no matter how full your life may seem, there’s always room for a couple of glasses of wine with a friend.

– Author Unknown –

What do you need to do now?

If you read “Go take some photographs” for the line above that says “Play another 18 holes of golf” you will understand. The things in life that are important are the ones that you are passionate about. Take photos – make beautiful images – be passionate.

Enjoy your camera…

By Damon Guy (author and Photokonnexion editor)

Damon Guy - Netkonnexion

Damon Guy (Netkonnexion)

Damon is a writer-photog and editor of this site. He has run some major websites, a computing department and a digital image library. He started out as a trained teacher and now runs training for digital photographers.
See also: Editors ‘Bio’.

Can you write? Of course you can!
Write for Photokonnexion...

We would love to have your articles or tips posted on our site.
Find out more…
Write for Photokonnexion.

Wait for the Critical Moment

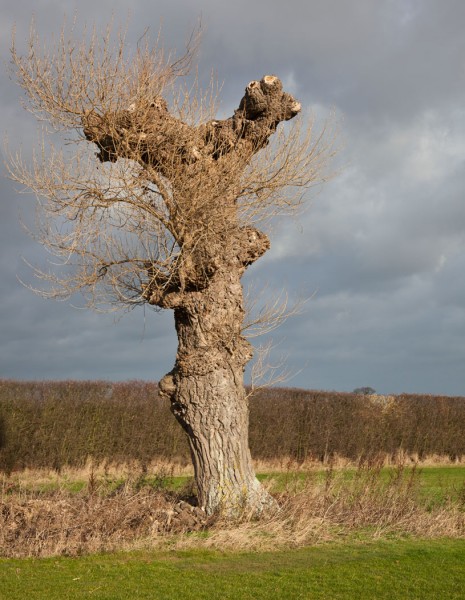
Great light, you have to wait for it with some skys

Great light, you have to wait for it with some skys...

The light you use makes or breaks the shot. This tree, sad and lopped in its old age, is a case in point. Look at the sky. There are some great greys and tonal variations in the sky – as you can see. At ground level, there would not normally be much in the way of a great prospect for good light considering this sky.

In the background, behind me, I saw an advancing break in the clouds. I took a few lacklustre shots to try out the feel of my capture. This practice gave me the feel for what I was doing. The light was hopeless. I could see some wonderful watery yellow light coming through the early morning clouds in the approaching break. So I waited and waited.

Eventually I was rewarded with a few seconds of excellent bright yellowy light to illuminate my chosen subject. Literally, a few seconds. Then it was gone. The rest of the morning was a grey, dull day.

Look at the world around you before you take your shot. Practice and try out the idea you have, but create a vision in your mind of what you are trying to achieve. Then, wait for the moment. In this case it was a burst of light. Another time it may be the position of someone or something. Or it could easily be an element of light. Be prepared to put the time in to get the shot.

Have fun, but make sure it counts…

By Damon Guy (author and Photokonnexion editor)

Damon Guy - Netkonnexion

Damon Guy (Netkonnexion)

Damon is a writer-photog and editor of this site. He has run some major websites, a computing department and a digital image library. He started out as a trained teacher and now runs training for digital photographers.
See also: Editors ‘Bio’.

Can you write? Of course you can!
Write for Photokonnexion...

We would love to have your articles or tips posted on our site.
Find out more…
Write for Photokonnexion.

Shoot Less – Keep More

Shoot less: To avoid collecting a myriads of poor quality shots, make every shot count.Shoot less: To avoid collecting a myriads of poor quality shots, make every shot count.

To avoid collecting a myriads of poor quality shots, make every shot count.

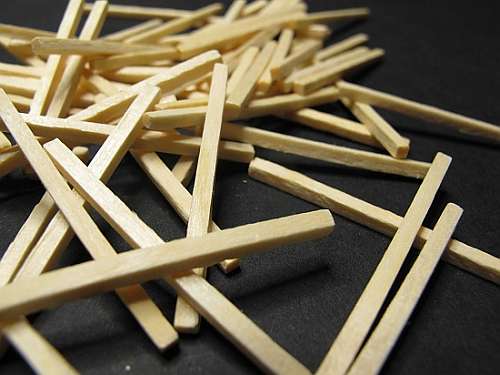
Avoid collecting matchsticks! Shoot less.

Do you seem to take photographs as if you were shooting a machine-gun? Is that really necessary?

The vast majority of photos taken today are just background noise. If you have a reason to make an image then you should be taking care to ensure the worth of that shot. Many top photogs have noted there is always something that defines the shot, gives you a reason to take it. So if you want to make your photography count, then choose your shot and take care with it. Make it work. If there is nothing that draws you in to take a shot – don’t push the shutter button.

Think carefully about every shot and you will take less shots. Each will be more meaningful. Each will have a reason for being taken. You will keep more for your future library of photographs.

Stop using the Scatter-gun Technique – shoot less

Photographers end up with a lot of captures in a session because they do not have enough confidence in their shooting ability. They press the shutter button and hold it down to capture a whole string of shots. They hope one will come out. They may just take dozens to “make sure”. The This “poke-and-hope” method is a dead-loss. If you are actually practising a technique, like panning, it may be what is required. Most often it is just taking “pod luck”. It is never OK to fire off more and more shots in case you have messed up. You will never improve your confidence or standard if you take simply repeat your mistakes at high speed. A mistake is a mistake no matter how many repeats you take.

Try a new technique – deliberately shoot less shots.

Aim to raise the standard of every shot, each time you take one. Taking care with your shots means running through a series of steps to make sure you have got it all right. Shoot less haphazard shots and shoot more thought out and properly composed shots. Take the time to set up the shot to get everything the way you want it. Take the time. Build your confidence.

Taking time will give you confidence, and the thought process will help you dedicate a caring approach to each shot. Care and attention that you put into every shot will return more keepers and quality shots.

Here is a list of things to help you take less shots, and get better pictures…

Before the shoot:

  • Research your shoot in advance – list your aims.
  • Pick your place to shoot – research location and site.
  • Practice the techniques before you go to the shoot.
  • Plan out what shots you want to get.

On the shoot aim to shoot less shots than previous shoots:

  • Pre-plan each shot before you lift the camera.
  • Know what you want to achieve in this shot.
  • Set up the camera for your shot.
  • Take command, tell people what you want them to do.
  • Line your shot up in advance – do not snap away.
  • Time the shot for the right moment.
  • Take a proper stance to stabilise the shot.
  • Carefully take the shot.
  • Review the shot on the LCD screen.
  • Make adjustments to improve the next shot.
  • Shoot with carefully for the next shot – try to shoot less overall
Productive shooting – shoot less and keep more

Shooting productively, means leaving a shoot with higher quality images and fewer discards. If you shoot less you Your time is better spent if you have been productive, and your post-processing will be cut. Most of all you will find that looking through your shots is more rewarding. Make a conscious effort to improve your productivity. Aim to make every shot a keeper. Train yourself to follow a sensible work-flow and you will considerably improve your photography.

Comments, additions, amendments or ideas on this article? Contact Us
or why not leave a comment at the bottom of the page…

Like this article? Don’t miss the next — sign up for tips by email.

Damon Guy - Netkonnexion

Damon Guy (Netkonnexion)

Damon is a writer-photographer and editor of this site. He has run some major websites, a computing department and a digital image library. He started out as a trained teacher and now runs training for digital photogs.
See also: Editors ‘Bio’.
By Damon Guy see his profile on Google+.