Tag Archives: exposure

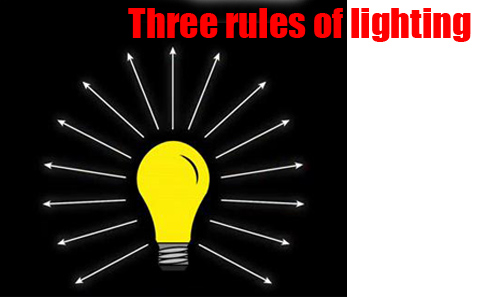
Three rules of lighting… simple, but effective

• Three Rules of Lighting •

• Three Rules of Lighting •

The simple explanations are the best.

Here at Photokonnexion we try hard to provide simple explanations for the things we all want to learn about our favourite subject. If you think anything is too complicated let us know on our Contact Us page or leave a comment below the article.

Well, here is a video in the spirit of simple explanations. I really do not need to explain before you see it… just watch and enjoy.

More after this…

find out more...Photokonnexion tips by email
Enjoying this article? Please sign up for our
Tips by email service.
                                                Find out more…
#11030#

Three Rules of Lighting for Photography

“We talk about the three important rules regarding the behaviour of light. As photographers we can use these rules to achieve the type of lighting we want, including the look of soft light.” – Ed Verosky
© Ed Verosky 2012  External link - opens new tab/page

For more background on lighting

Don’t forget to check out our Light and Lighting resource pages and especially the links on Hard Light and Soft Light. These are essential to the understanding of light.

All our resources can be found in the menu at the top of the page.

By Damon Guy (author and Photokonnexion editor)

Damon Guy - Netkonnexion

Damon Guy (Netkonnexion)

Damon is a writer-photog and editor of this site. He has run some major websites, a computing department and a digital image library. He started out as a trained teacher and now runs training for digital photographers.
See also: Editors ‘Bio’.

Can you write? Of course you can!
Write for Photokonnexion...

We would love to have your articles or tips posted on our site.
Find out more…
Write for Photokonnexion.

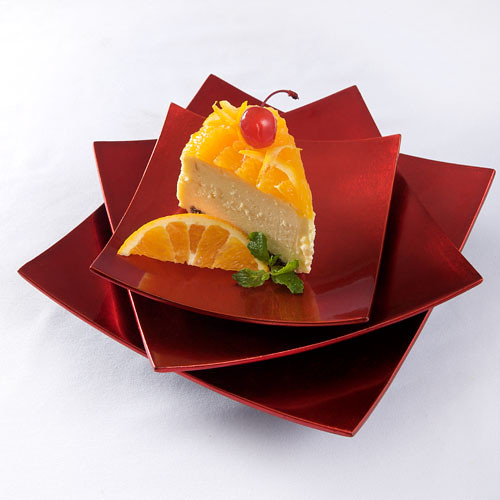
The simple secrets behind good food photography

Food for Her World Vietnam magazine.

Food for Her World Vietnam magazine.
Food styling by Dang Phuong
Photography by Mads

Food for the World Vietnam magazine. Photography by Mads • on FlickrExternal link - opens new tab/page

We all love good looking food…

Food photography? So, what makes it look really good? I love to cook and make tasty food. But, great cooks also have a skill with presentation. It is the presentation which really makes great food shots too.

Food photography seems to be centred on three things – good looking food composition; great light and picking the right focus/centre of interest. Duh! Wait a minute, isn’t that pretty much photography summed up all over? OK, I jest. There are some specific ideas and techniques involved. Good food photography seems to require a particular approach.

Here are some introductory points for good food photography. You should look to achieve…

  • Experience with small-sized and table-top compositions.
  • A working knowledge of lighting at the table-top scale.
  • Simple natural light from one source (window).
  • Able to use reflectors/black cards to shape the light.
  • Simple centre of interest in the shot.
  • Carefully chosen depth of field.
  • Very simple, but rich backgrounds.

And with the food itself…

  • Natural and where possible bright colours.
  • The colour mix should work together.
  • Avoid odd clashes of colour.
  • The food combinations should be simple and few.
  • Focus on the main interest.
  • Avoid highlight bokeh spots where possible.
  • Try to emphasis the texture of the food (lighting).
  • Use simple but eye catching cutlery and plates.
  • Avoid cluttering the shot with too much food.
  • Give the food a big/deep background.

More after this…

Book recommendation:

Food Photography:
From Snapshots to Great Shots

Simple advice on lighting including great diagrams. The pictures include camera settings. Excellent advice on setting up a table-top studio which was also inexpensive to do. Lots of tricks and techniques like the pros use. Great presentation ideas.


Food Photography Tips – Video

In this video we look a range of ways to look at and shoot food. It is a great introduction to food photography basics. The video uses graphic images for a broad introduction to the art of angles, framing and creating drool inducing food photos.


Damon Guy - Netkonnexion

Damon Guy (Netkonnexion)

Damon is a writer-photographer and editor of this site. He has run some major websites, a computing department and a digital image library. He started out as a trained teacher and now runs training courses in digital photography.
See also: Editors ‘Bio’.

Can you write? Of course you can!
Write for Photokonnexion...

We would love to have your articles or tips posted on our site.
Find out more…
Write for Photokonnexion.

The secret to world travel – but staying at home!

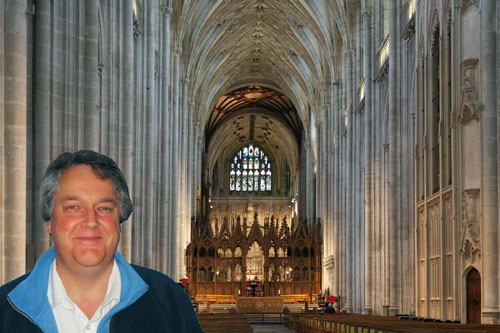
• Winchester Cathedral Chroma key image•

• Winchester Cathedral •
Chroma key work is quite easily done in Adobe PhotoShop and a range of other quality photo-editors.

When you want to be somewhere else…

There are places we would rather be than where we are now. I would like to be on an island paradise …not going to happen! But you can do it photographically. The secret is something called Chroma Key photography or green screening.

Chroma Key Substitution

In chroma key, often known as “green screen” photography, the subject is photographed against a uniformly lit green background. Then, in post production the subject is easily selected out from the green background. The selection can then be pasted into any other photographic background.

Any uniform colour can be used as a backdrop for the chroma key shot. The picture above is selected from a blue background and pasted into a picture of Winchester Cathedral in SE England. The two pictures were taken on different days.

To make the selection of the subject from the background it is important to light the background evenly. When the colour is even the selection is easy and can be completed in one operation. Colour variations from uneven light make it more technical to isolate the subject.

Green is the most frequently used colour in chroma key photography. The colour is very easily separated from human skin tones. Where the subject has green tones, blue is often used as the chroma key alternative. Blue is a common colour for clothing. It is therefore less suitable than a strong bright green which is not so popular as a fashion colour. However, green does have other advantages. The human eye is able to see more shades of green than any other colour. This makes it easy to see variations in the green when setting up the lighting. Green sensitivity is also built into software applications to match the abilities of the eye. This helps us to work with the background when doing awkward selections.

Fun and games

The substitution of a subject into any other photographic background provides great opportunities for doing fun things. Film stars can be placed in your garden. You can apparently travel the world without leaving your front room. Just find the right pictures and substitute yourself into the background of your choice.

Of course there are also opportunities for advertising, graphic art, product photography, still life, portraiture, action shots and many other false situations. Of course we should be careful not to be immoral about such things! Feel free to have fun though. You can really make it look like you have traveled the world.

How is it done?

Basically you need a chroma key background, lighting to illuminate it evenly, a camera and a subject. On a small scale this is easy to do. A lot of people doing chroma key work for the first time start with still life or table-top photography to get the technique right. Probably the most common use of the technique is for portraiture. Take a picture of yourself or your friends and then start playing. For this you need a larger screen…

The video is a complete introduction to the use of chroma key photography. You can take the same techniques and scale them to any size. The video introduces the ideas you need to grasp and shows how to set up the lights and the equipment. It also shows one of the software applications. After the video I will briefly look at that software for you.

How to Green Screen (Chroma Key) with Photography!

markapsolon  External link - opens new tab/page

Software

There is a whole range of software that is capable of doing chroma key. In essence chroma key software has two jobs. The first is to select the subject off the green background (or whichever colour you are using). The second is to successfully blend the abstracted subject with the new background.

The software from the video is called PhotoKey from FXHome  External link - opens new tab/page. It has been produced specifically for chroma key compositing. It is not alone in the market. However, there are not many applications specifically aimed at this work. Instead there are plenty of applications that do chroma key blending as part of a general suite of editing tools. There are also plugins for the same process to go into your favourite image editor.

The actual process for producing the final blended image is relatively quick and easy in most of these chroma key applications. The tools are usually quite self explanatory if you have some editing experience. As with any editor, you normally find the blending tools manage colours, contrasts, edging and so on. Ultimately you are creating a blend of the two images, but the best chroma key tools go further. At the end of working through the blending process you can make further changes in a good software suite or plugin. If you are satisfied with it you should be able to export your image to make a .png, .jpg or .tiff image.

The way to do it in Adobe PhotoShop

The general photographer is most likely to have use of a quality image editor like PhotoShop, Elements, GIMP, PaintShopPro and others. All these are able to do the type of work that PhotoKey can do. Admittedly it takes longer. But for beginners it is better to save your money for more general photography kit. For those who are interested, here is a short video explaining the Photoshop method of doing a chroma key composite. It is a simple technique using standard photoshop tools.

Isolating with a Chroma Key Background

This tutorial is aimed at Photoshop intermediate level users.

Overall…

Chroma key work is fun. There is quite a lot to learn, but it adds flexibility to your photographic work and post processing. The use of up to date quality image editors is probably better than splashing out on expensive specialist applications. Nevertheless specialist applications do a great job, saving time in post processing.

Can you write? Of course you can!
Write for Photokonnexion...

We would love to have your articles or tips posted on our site.
Find out more…
Write for Photokonnexion.

find out more...Photokonnexion tips by email
If you enjoyed this article please sign up for our
daily email service.
                                                 Find out more…
#11030#

The simple secrets of dodge and burn – post processing

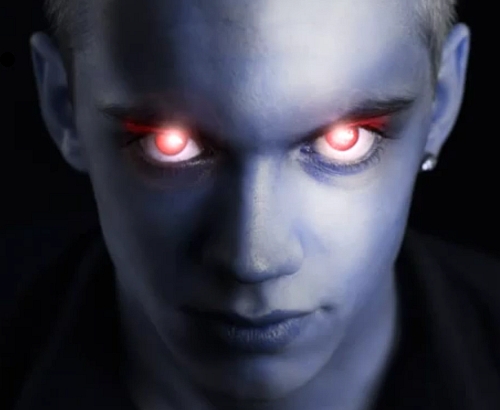
• Dodge And Burn •

• Dodge And Burn
Important techniques for affecting the light and dark in an image. (Video below).
lynda.com on YouTube  External link - opens new tab/page

Dodge and burn – powerful light/shadow effects

Two of the oldest techniques in the photographic skill set are dodging and burning. In the old days of chemical baths and film developing they were the most effective way of changing the image out of camera. Simple stuff really. During the development of your film you allowed parts of the developing film to become overexposed. Other parts of the film you allowed to become underexposed. The effect on the final print was to increase the brightness in some areas of the film and darken others.

In modern post-processing we still use these techniques. Most post processing software packages have ways to create dodges (whitening or brighten) or burns (darkening or blacking). The aim of this? Well its simple really. If you have a picture and you want to do any of these things you need these techniques…

  • Increase/decrease the intensity of shadowy parts of the image
  • Increase/decrease the intensity of brighter parts of the image
  • Brighten the bright spots and darken the dark spots to increase contrast
  • Darken down intensely bright spots in the image to prevent distractions
  • Brighten the darker areas in the image to bring out detail
  • Pick out highlights

More after this…

find out more...Photokonnexion tips by email
Enjoying this article? Please sign up for our
daily email service.
                                                Find out more…
#11030#

Dodge and burn

Although this tutorial is based in PhotoShop, most of the techniques shown in this video can be used in most editing software. If your software does not have the same tools as those found in PhotoShop check your help files for more information.

You may have to do some trial and error experiments to get these techniques working – after all, the practice will give you control of your software. Trying out these skills will give you the basic command of light and dark in the post processing context. Dodging and burning are really important techniques. Watch the video for how the techniques are used.

Photoshop dodge and burn

lynda.com on YouTube  External link - opens new tab/page

By Damon Guy (author and Photokonnexion editor)

Damon Guy - Netkonnexion

Damon Guy (Netkonnexion)

Damon is a writer-photog and editor of this site. He has run some major websites, a computing department and a digital image library. He started out as a trained teacher and now runs training for digital photographers.
See also: Editors ‘Bio’.

Can you write? Of course you can!
Write for Photokonnexion...

We would love to have your articles or tips posted on our site.
Find out more…
Write for Photokonnexion.

How to use camera angle to change body shape

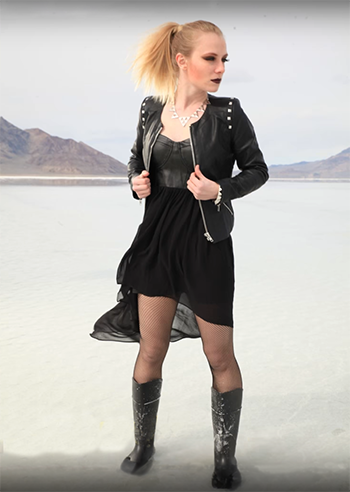
How camera angle affects body shape.

How camera angle affects body shape.
[Image taken from the attached video].

Camera angle affects body shape

How you approach your subject can significantly affect their shape. The camera height affects the relative size of parts of the body. The part of the body nearest to the camera appears largest. So the angle you take to the body can affect emphasis and shape. Your lens can also affect body shape too. These two factors in your shots can really change the view of your subject.

Basic shooting positions that show camera angle affects body shape
  • Getting down low gives your subject height and presence.
  • At waist level the angle is even across the body placing no strong emphasis on any one part of the body.
  • At eye level the head appears more significant and you can really draw out the features of the face, focus on the eyes for best effect.
  • From above the head and shoulders are emphasised and the legs are foreshortened.

From these basic positions you can also use different camera lenses. A 50mm lens is the lens that most closely matches the visual abilities of the human eye. Using one of these will help you to see the body as the eye will see it. On the other hand a wide angle lens (around 24mm) will help to bring out the emphasis of the body length. If you use a wide angle lens in portrait view from below you will tend to make your subject look statuesque – tall and grand. If you view the subject from above you will shorten the body and legs and make them look squat. These forms of emphasis have powerful impacts in pictures where you are trying to portray a persons presence. Statuesque tends to convey power and presence. Bodies that appear more compact tend to emphasis a more physical presence.

How camera angle affects the body shape – a video

The video brings out in detail the above points. The shoot is on the Bonneville Salt Flats, which is a wonderful location – even if it is flooded! The white of the salt brings out some great high contrast shots. You really can see how camera angle affects body shape.

TheSlantedLens External link - opens new tab/page (Published: 02.Apr.2013)

By Damon Guy (author and Photokonnexion editor)

Damon Guy - Netkonnexion

Damon Guy (Netkonnexion)

Damon is a writer-photog and editor of this site. He has run some major websites, a computing department and a digital image library. He started out as a trained teacher and now runs training for digital photographers.
See also: Editors ‘Bio’.

Can you write? Of course you can!
Write for Photokonnexion...

We would love to have your articles or tips posted on our site.
Find out more…
Write for Photokonnexion.

Inexpensive Close-Up Photography – Reverse Rings

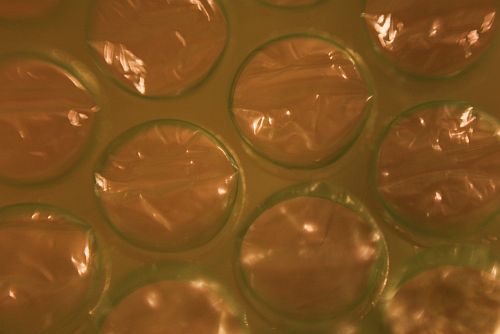
Bubble Wrap

Green bubble wrap shot with Canon 50 mm f/1.8 lens reversed.
Hand-held to the camera body.
• Bubble Wrap •
By Archaeofrog

Anyone can use reverse rings.

Close-up or macro photography is something every photographer should try. However, a macro lens can be an expensive investment. This series covers inexpensive ways to get great close-up results. The first article “Inexpensive Close-Up Photography – close-up rings” discussed using close-up lenses that attach to your existing photographic lens. A second way to achieve close-up results, surprising as it may sound, is to reverse your DSLR camera’s lens by mounting it on backward.

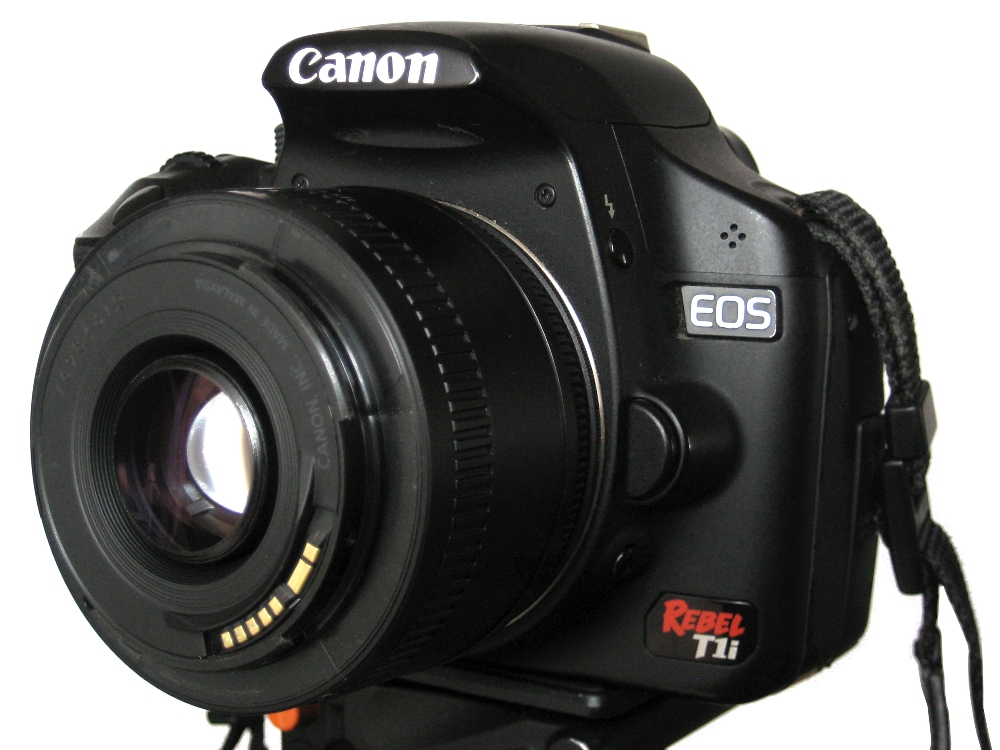
It is possible (but awkward) to simply handhold your lens backwards against your camera body, as in the top photograph. I don’t recommend it, as it can allow dust or other debris into your camera that may affect the sensor. The inexpensive alternative is to purchase a reverse ring camera mount adapter that fits your lens (based on its diameter) and the make and model of your camera body.
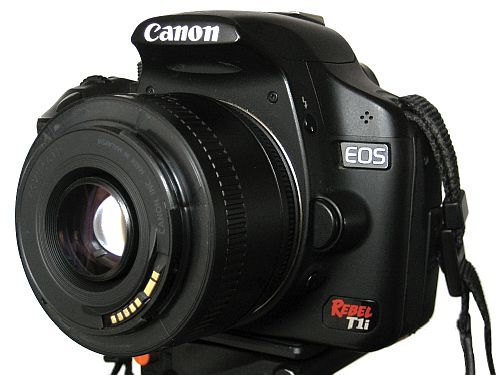
Canon Reversed Lens

Canon 50 mm f/1.8 lens attached backwards to a Canon T1i body using a reverse ring. The depth of field preview button is visible underneath the lens release button.
Click image to view large

How to use the reverse ring

First, remove any filters you have on your lens. To use a reverse ring, screw the ring securely on to the front of your camera lens filter thread. Hint, it is easiest to screw the ring on while the lens is in the camera body. After attaching the reverse ring to the lens, remove the lens from the camera body. Now reverse it and fit the lens-mount side of the ring into the camera body and lock it in place. You will no longer be able to use the autofocus function of your camera or adjust the aperture of the lens once it is reversed, but you will be able to adjust the shutter speed and ISO. Your camera may display an aperture value of F00 or other default. I recommend that you change the shooting mode on your camera to aperture priority or manual. In aperture priority mode, the camera will calculate and set the shutter speed for you, while in manual, you will set it yourself. Now you are ready to use the lens.
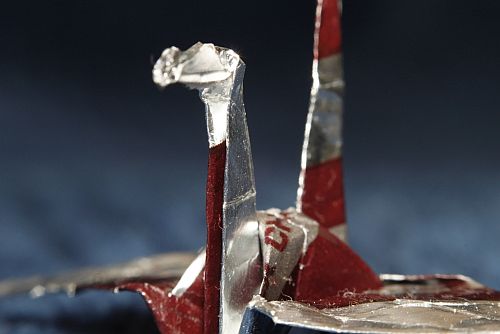
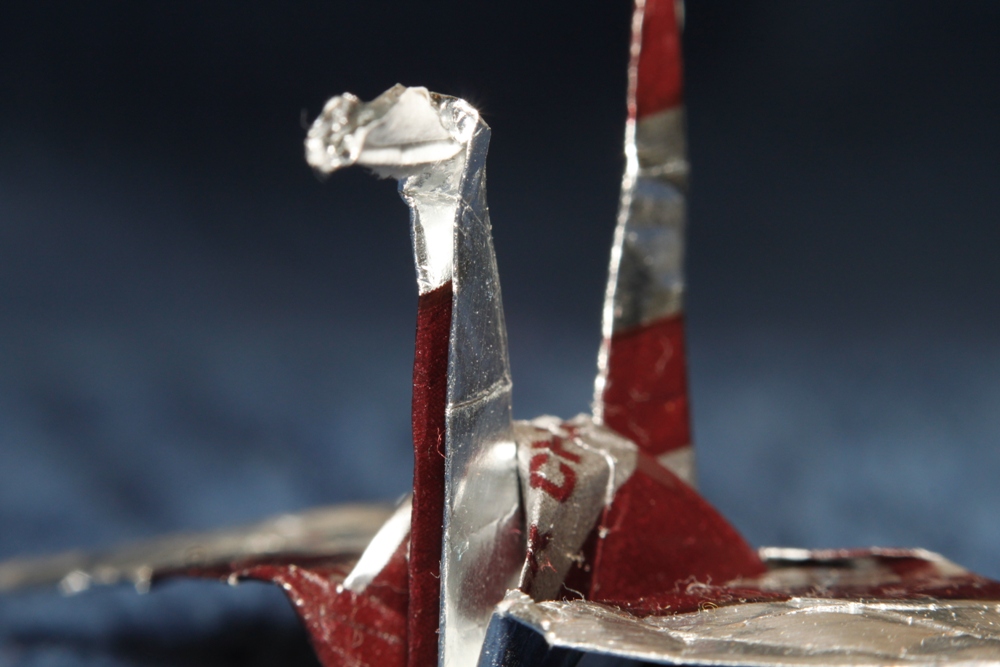
Origami Crane

• Origami Crane •
Click image to view large
Origami paper crane folded from a bite-sized Hershey wrapper.
Captured with a reverse-mounted Canon 50 mm f/1.8 lens

A reverse ring gives better results when used with a prime lens rather than a zoom lens. Prime lens are often faster, which means that they have a wider maximum aperture and can use a faster shutter speed, even in lower light.

You can use any type of lens, although light lenses are recommended. Very heavy lenses may damage the reverse ring mount adaptor or the lens filter thread.

Using a zoom lens, particularly when fully zoomed out, can be awkward to support. Because the lens is reversed, zooming the lens requires you to be further from the object you are photographing and does not give such a close-up view of the subject. The working distance (distance from the lens to the object in focus) is about five inches with the Canon 50 mm f/1.8 lens reversed. Using my Tamron 18-270 mm zoom lens at 18 mm, I have to be within about two inches to get an object in focus, while it is greater than six inches at 270 mm.

Adjusting the aperture

When your camera lens is not attached to a camera, its default position is to be open to its widest aperture. So, for the Canon 50 mm f/1.8 that would be f/1.8, which results in a very shallow depth of focus. In the crane picture above, the neck of the crane is in focus, while the beak and tail are not. When I reverse this lens on my camera, the aperture will still be f/1.8, and I will be unable to adjust the aperture value after the lens is reversed on the camera. But there is a work-around.

Most DSLR cameras have a ‘depth of field preview’ button. The purpose of this button is to allow you to look through the viewfinder and see exactly what your camera will see at the aperture that is set. When you press that button, the blades inside the camera lens close down to the selected aperture. This will allow you to set the aperture for your lens. (Please note: not all DSLRs have a depth of field preview button).
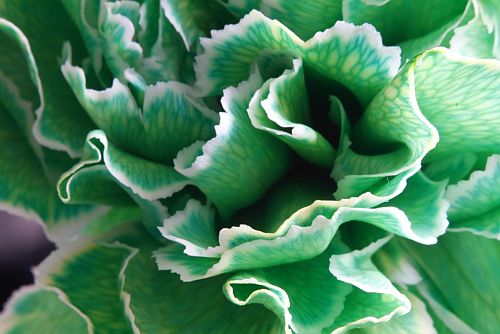
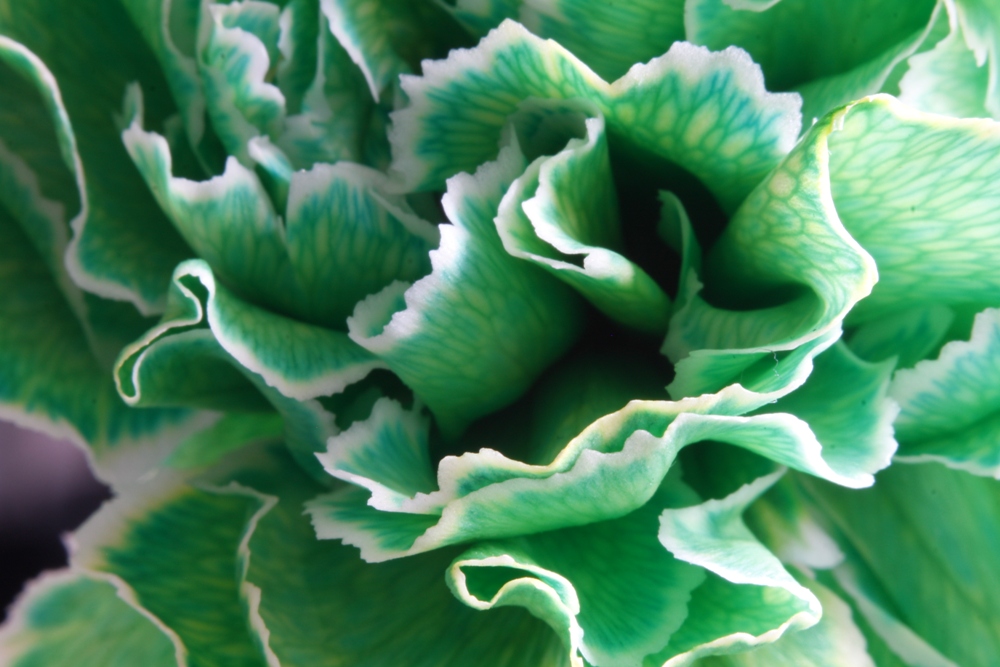
Carnation at F22

• Carnation at F22 •
By Archaeofrog

Here is the procedure. Using aperture priority or manual mode on your camera, dial in the aperture that you want to use for the shot. Next, depress and hold the depth of field preview button. While still holding down the button, press the lens release button and remove the camera lens. Then you can mount it on your camera body using the reverse ring. The camera lens will maintain whatever aperture you had selected. If you want to return to the default position or change the aperture again, simply put the lens back on the camera the regular way and repeat the process. Tip: if working outside, you may want to set your aperture first and reverse the lens indoors, to avoid dust getting into the camera body and on the sensor.

Advantages and limitations of reverse rings

The reverse ring is a fun and easy way to experiment with close-up photography. The ring itself is very inexpensive, usually less than $10 USD (around £7-£8 UK), and is small enough to fit in a purse or pocket. Depending on the lens that you reverse, you can get very close to macro-level results.
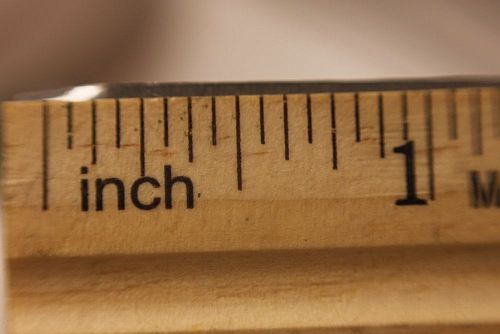
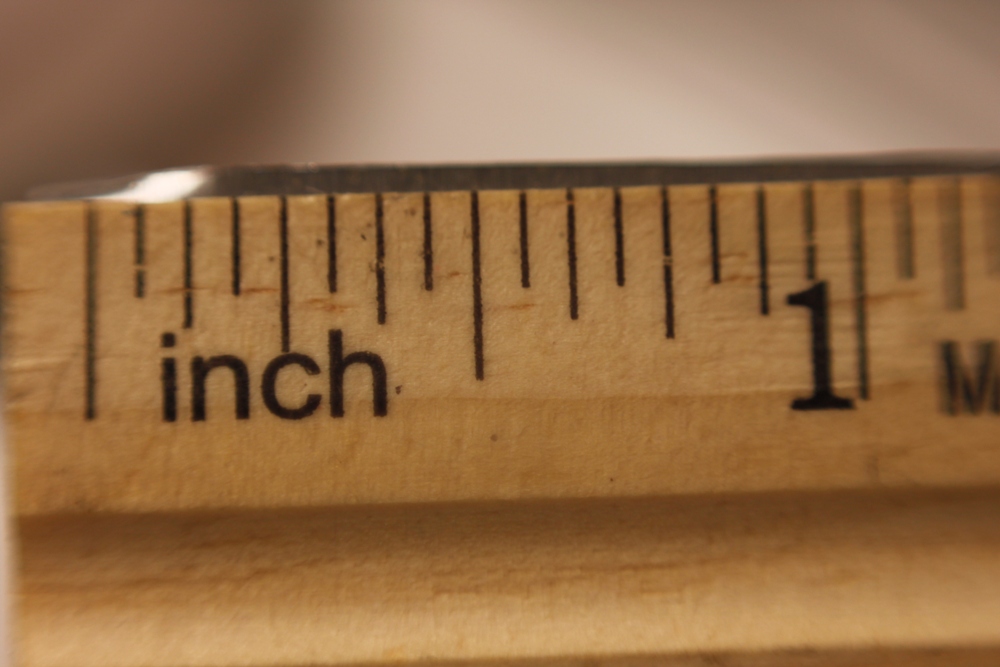
Ruler

• Ruler •
Click image to view large
This photograph of a ruler demonstrates the scale of a reverse-mounted Canon 50 mm f/1.8 lens, which gets down to an image of about an inch and a quarter wide and has a working distance of about five inches.

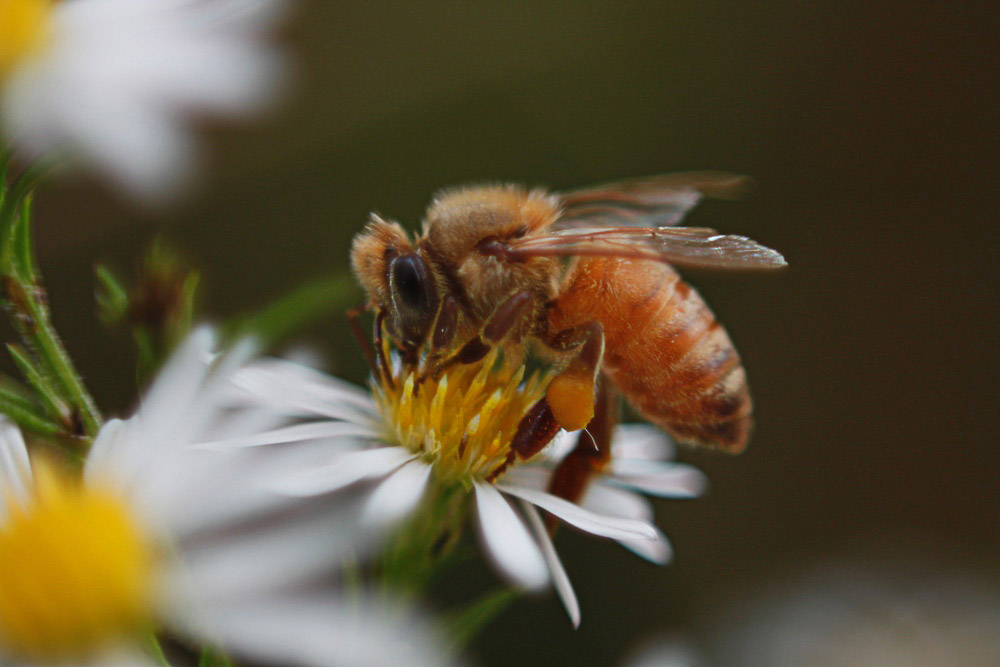
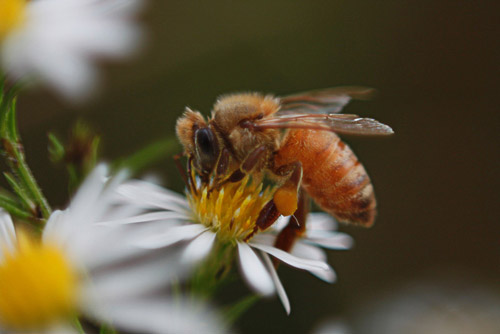
Like other close-up techniques, using a reverse ring does require you to be physically close to the objects you are photographing. Depending on your lens and your comfort level, however, you may still be able to capture detailed shots of slower moving insects, such as the bee below. A reverse ring is also ideal for indoor shots or other stationary details.
Bee

• Bee •
Click image to view large
Bee photographed using a reverse-mounted Canon 50 mm f/1.8 lens.

You will lose some of the automatic functions of your camera, including autofocus, with a reverse ring. The electrical contacts that normally carry signals to the lens are not in contact with a reversed lens. This is not that much of a disadvantage. Generally, with close-up shots, you get better results when using manual focusing.

While you can adjust the aperture (on some cameras), there is an additional step of setting the aperture using the ‘depth of field preview button’ before reversing the lens.

As with any close-up or macro technique, the depth of field (area in focus) will be very shallow. You can maximize sharpness by keeping the camera lens parallel to the object being photographed. In the photograph of the bee, above, the body of the bee is parallel to the camera lens and stays in focus. The flower is perpendicular to the lens and falls out of focus quickly.

Another technique to maximize sharpness is to use a smaller aperture like f/22, but this may require a longer shutter speed than you can easily hand-hold. You can solve this problem by using a tripod for stationary objects, which allows you to use a longer shutter speed to achieve the desired sharpness.

All close-up techniques benefit from the additional stability of a tripod. Although, as you can see from the shots above, you can get effective results from hand-held techniques.

A flexible option

Overall, a reverse ring is an inexpensive and portable way to use your existing lens for close-up photography. Depending on the lens you reverse, there is enough working distance to photograph insects, flowers, or any other small subjects that interest you. There is flexibility to adjust the aperture value before reversing the lens, which gives you a little control over the depth of focus. It is an inexpensive option to get you started in the tiny world of close-up photography.

Buyers guide

The inexpensive nature of these rings makes a quick purchase worthwhile. Remember that you will need to buy the ring that suits your specific camera mount (eg. Canon, Nikon etc). The size of the filter thread on your lens is important too. On the following link you can find a range camera mount types as well as thread sizes…
Reverse ring camera mount adapter products  External link - opens new tab/page

A great lens for doing close-up work is a 50mm prime lens. More information on buying 50mm prime lenses including product links can be found in…
Are your pictures distorted? Considered a 50mm?

For general reference: 50mm Prime lens product listing  External link - opens new tab/page
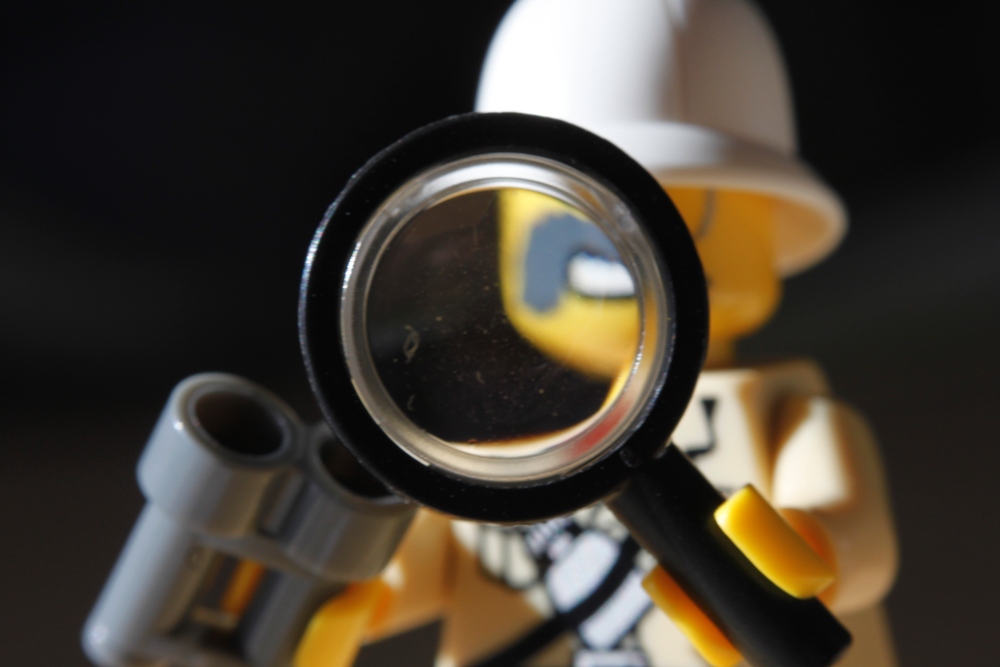
Lego

• Lego •
Click image to view large
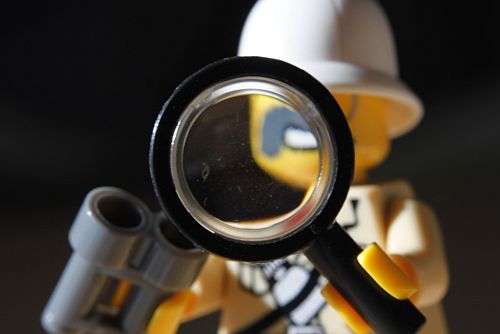
Lego explorer mini-figure.
Using a reverse-mounted Canon 50 mm f/1.8 lens at f/1.8.
• Lego • By Archaeofrog

Articles on Close-Up and Macro Photography
by Katie McEnaney

Part 1 of this series focused on using close-up lenses. Part 3 will cover extension tubes, and Part 4 will bring all these techniques together with a range of close-up ideas and tips.

Inexpensive Close-Up Photography – close-up rings
Inexpensive Close-Up Photography – Reverse Rings (this article)
Inexpensive Close-Up Photography – Extension Tubes
Inexpensive Close-Up Photography – Tips and Tricks

By Katie McEnaney (contributing author)

Katie is an elementary school teacher in Wisconsin, USA. She is an avid photographer with wide interests. She is always interested in learning more and growing in her photography.
By Katie McEnaney (Archaeofrog)

Can you write? Of course you can!
Write for Photokonnexion...

We would love to have your articles or tips posted on our site.
Find out more…
Write for Photokonnexion.

Why pro-photographers insist on using lens hoods

Lenses

Lenses

Lens hoods are all about control.

The control of your lens, control of difficult light and control over lens damage. Yes, believe it or not even pros make mistakes with flare and break or damage lenses. Lens hoods provide cover for you and perform a specific and important control function over the light that can create ugly flare or the sheen of overexposure.

In the video Phil Steele looks at the way that lens hoods help your shots get properly exposed. Remember, the best shots are taken by the photographer finalising every last detail in the chain of events that lead to releasing the shutter. Knowing about lens hoods is one of those shot makers-or-breakers. Get it right and the blacks in your picture will show just that little extra saturation and contrast that intensifies the shot bringing out depth and realism.

Lens Hoods – Why, When, and How to Use Them

SteeleTraining

By Damon Guy (author and Photokonnexion editor)

Damon Guy - Netkonnexion

Damon Guy (Netkonnexion)

Damon is a writer-photog and editor of this site. He has run some major websites, a computing department and a digital image library. He started out as a trained teacher and now runs training for digital photographers.
See also: Editors ‘Bio’.

Can you write? Of course you can!
Write for Photokonnexion...

We would love to have your articles or tips posted on our site.
Find out more…
Write for Photokonnexion.