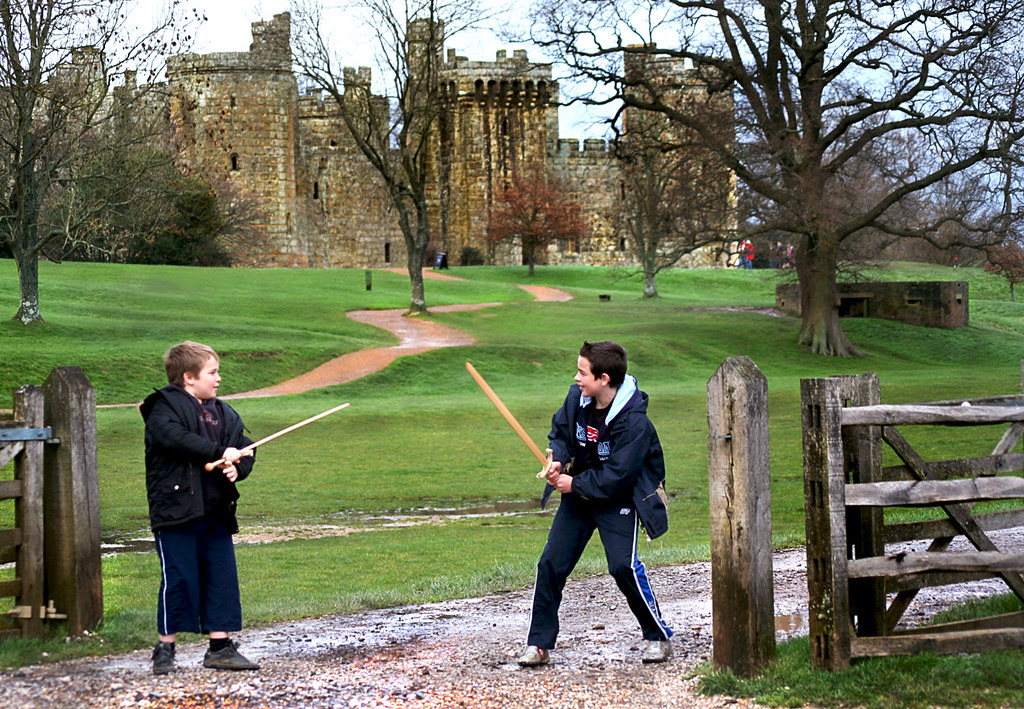
• Young Knights battle at the gates to the castle •
Click image to view large
• Young Knights battle at the gates to the castle • By Netkonnexion on Flickr ![]()
The foreground interest fools the eye into seeing depth. In this case the path line and undulations in the mid-ground also help.
Understanding the power of the foreground…
Is the first step to creating a sense of depth in your pictures. Our eyes use markers like foreground, lines and background to gauge depth in the landscape. If we provide these in a two dimensional picture we fool the eye into seeing depth there too.
Foreground Interest – Video
Bryan Peterson explains in the video how to take a position that brings out the foreground interest. It’s easy. Make sure you shoot past something close when shooting into the scene so you can see a progression of depth… foreground, mid-ground and background. Simple.
adoramaTV ![]() With Bryan Peterson
With Bryan Peterson
Scale
In fact you can use this landscape trick in the studio, or even a small room. Position yourself close to a foreground object and shoot past it into the room or scene. For example, use a chair or a table to occupy a part of the near end of the picture. That gives you a close marker allowing the eye to gauge a distance into the room. Here is an urban shot using the same principle…
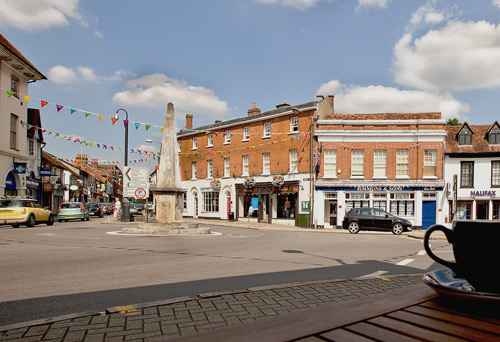
• Monument •
The presence of the coffee cup on the table gives an immediate scale marker to the eye. The rest of the scene has depth because the eye can match the scale differences progressively as it looks into the scene.
The very well known scale of the size of a coffee cup in the picture is the clue to the depth of the rest of the shot. The eye/brain system does the rest. Simple principle – simple composition.
Comments, additions, amendments or ideas on this article? Contact Us
or why not leave a comment at the bottom of the page…
Start Photokonnexion email subscription now!
Photokonnexion Photographic Glossary – Definitions and articles.
Composition resources on Photokonnexion
adoramaTV
By Damon Guy (author and Photokonnexion editor)

Damon Guy (Netkonnexion)
See also: Editors ‘Bio’.
 Photokonnexion tips by email
If you enjoyed this article please sign up for our
Tips by email service.
Find out more…