Category Archives: Light and Lighting

Anything to do with light, lighting, soft light, hard light, light work, light use, light quality, etc.

Reflecting on ways to work with the best light

Reflectors

• Reflectors •
A session with reflectors is a way to control the sun
and get the lighting you want on your subject.
[Image taken from the video]

The control of light is not always obvious.

Reflectors and other shapers of light make a big difference to the scene. Often photographers go to great lengths to work with reflectors. Here are a few simple tips to bear in mind when you want to shape light – particularly outside.

When you need a reflector

You can use reflectors in any type of environment. They are best used where you need to even out the light on your subject. Remember that if you are using a reflector the source light is the main or key light. The reflection from your reflective surface is in proportion to the power of the key light. This proportionality is important. Often, more than one light is difficult to balance. Using only one light source you can create a natural balance with the reflectors. It is difficult to get reflected light out of proportion. There is always some loss in the reflection. This ensures that the light on your subject will be less intense than the key light but related to it by its proportion. The result looks more natural.

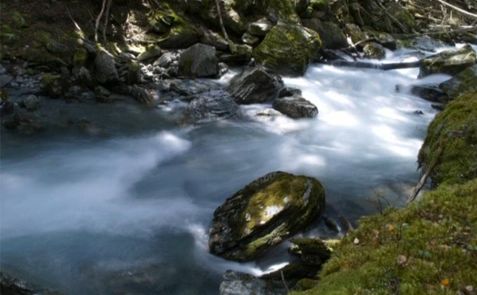
Shade is as important as light

When you are working in the fullness of light it is common to be confronted with strong reflections from the subject itself. Specular highlights, reflections off of curved surfaces and shiny areas are the most difficult to control. However, bright reflections on larger areas like flat areas of glass or even areas of flesh like bare arms can also be really difficult to control.

If you have these sorts of reflections you can reduce the worst of them using a polarising filter. Of course the only sure way is to reduce the intensity of light overall. This means creating shade. Again, the most important issue here is to reduce the light in proportion to the ambient light around you. This helps the light to remain looking natural because it is derived from the main light once again.

Don’t spend a fortune

For most of us expensive reflectors and shade creators are out of reach. As with most things however, the amateur can create the same effects as the professional without the expenditure.

Reflectors can be created from white sheets, curtains, even large pieces of card. These things can be purchased inexpensively and propped up easily to create the effect you want. What is more important than the material that creates the reflection is the way you use the reflections themselves. It is important in very bright light that the reflections are used to infill darker areas of shadow to even out the contrasts. Then your camera can cope and you will see a more controlled light on your subject.

Shade too can be created easily. Use solid card sheets or even blankets on poles. I do quite a lot of car photography. Often specular highlights can be eliminated by hanging a thin white sheet on two poles in the line of the light. The main light – normally the sun – will penetrate a thin sheet so that a proportion of the light will continue to illuminate the subject. Again, the proportionality is important. Things always look more natural if the light is proportional to the surrounding ambient light.

Using Reflectors – Photography & Video Tutorial

In the video J.P. Morgan, a successful photographer, uses lots of resources and equipment to manipulate light in all sorts of ways. First, he looks at how the light is best exposed to the subject. He uses the light to create a rim light. This helps to reduce large, strong areas of reflection and helps to define the body shape.

When he has the light direction right and well controlled he uses a gold reflector to give the light a pleasant colour – an evening sunlight yellow. This lifts the colour of the faces in the shot.

The other thing that J.P. Morgan does is use the shade and reflectors to create fill. The sun provides the main light but the levels of light off the reflectors allows a lower level light intensity creating a natural light. This does not look like it has been deliberately projected at the subjects. It is a soft light that beautifully wraps around the children. It evens out the contrast between the brighter light and the darker areas.

Look at the way the equipment is used in the video. But spend your time afterwards thinking about how you can substitute affordable reflector materials and ways to create shade. Making your own kit can be fun and just as effective brand equipment.

The video is just over six minutes.

The Slanted Lens DSLR Lighting Tutorials  External link - opens new tab/page

If you want to buy an affordable reflector set, here is the one I use. These reflectors work very well and are flexible in the way they can be used. The whole set also folds away into a great compact bag. The pack contains five effects (silver, gold, white reflector/diffuser, grey and black)…

42″ Photographic light reflector set (5 in 1)
Ex-Pro 5 -in- 1 Photographic Light Reflector – 42″ (110cm) Silver, Gold, Black, White & Translucent, Collapsible.
This is an excellent reflector set, robust and effective as well as easy to store. I highly recommend this as a standard piece of equipment.


Comments, additions, amendments or ideas on this article? Contact Us
or why not leave a comment at the bottom of the page…

Like this article? Don’t miss the next — sign up for tips by email.

By Damon Guy (author and Photokonnexion editor)

Damon Guy - Netkonnexion

Damon Guy (Netkonnexion)

Damon is a writer-photog and editor of this site. He has run some major websites, a computing department and a digital image library. He started out as a trained teacher and now runs training for digital photographers.
See also: Editors ‘Bio’.

Seeing the subject… refining your vision

Beat it up!

• Beat it up! •
Click image to view large
Beat it up! By Netkonnexion on Flickr Photographers eye :: Seeing the subject… refining your vision | External link - opens new tab/page
To really look at a subject you have to see it as you have never seen it before.

Cultivating the photographers eye…

What the “eye” really means is difficult to define. One thing’s sure. As “photographers eye” develops you see things differently. Refining your vision to see differently is how you develop your version of the ‘eye’.

Looking at the scene

In Working the scene I described how to walk through the scene, understand the angles and ideas that relate to the scene and ways to find “the” shot. At first it is not a simple process. You are developing a habit. Doing things that you would not do naturally.

Standing up and using the camera from your normal eye position makes your subject look like you always see it. Surprisingly, it is also the same way most others see it too. Where is the novelty, interest and insight in that? Photographers eye, Seeing the subject in a different way requires refining your vision.

Well, you can change it all by studying your subject from new angles, new light and with new perspectives.

What if the scene is a close up subject?

A wonderful thing about photography is the ability to isolate a subject, get in close to it and examine it in a way we normally do not try to do with our eyes.

The challenge is to do things differently so we can see things differently. In this blog I often urge people to get in close – fill the frame. That is one way to see a subject anew. There are others. Below, there are some ideas to get you to see your subject differently.

Photographers eye – Getting in close:

Really close means a macro lens. If you don’t have one then you can get some macro extension tubes. These are an inexpensive way to do macro photography. However, the way to see things differently is to try and see the subject in ways that are different to the everyday perspective. Using a macro lens, tubes, or even very close with an ordinary lens you need to be versatile. Get around your subject, see it from at least ten different positions. Try to make every shot different. Take every shot as if you are seeing the subject as a new object. Don’t just look at the whole subject, get right into the tiny detail, all of the tiny details. (See Amazon search results for macro extension tubes External link - opens new tab/page).

Photographers eye – Getting the Angles

Developing your vision is not just about details, even if there are lots of them. Try taking each detail from a whole range of angles, under, over and from the back too. Angles on a subject help to start you looking at the aesthetics of an object. Look for curves, pleasing intersections, great lines, diagonals… Anything that helps you to see the beauty in a subject and shows it in a new way.

Photographers eye – Using different lenses

If you have them, explore the subject using a range of lenses. Get wide. Go long. Try fish-eye. Work with a prime. Go with whatever lenses you’ve got. The idea is to show the subject in a variety of different ways. Every lens has its peculiar characteristics and distortions. Training your eye to see a subject in different ways by using different lenses is one way to become sensitive to photographic perspectives. You will begin to see how a camera sees. If you only ever use one lens you will begin to see everything in a plain way. If you can see things in a variety of different ways you will begin to start looking at things differently.

Photographers eye – seeing different light, different exposures

Light is the essence of everything we do in photography. While you are working with small subjects (like in my picture above) you can make changes to the light. You can use ambient light, window light, natural light, reflected light and domestic lights. Then there are coloured lights, soft light, hard light, and even laser light. Then, you also have dozens of different ways to use artificial photographic lights too. Added to these different illuminations you can also develop a whole range of exposures. You can explore your subject as under-exposed, over-exposed, dark or bright. You can use shadows, different light angles, different light heights. There are literally thousands of ways to light and expose any one subject. Explore as many of them as possible.

Other variables:

Try different backgrounds, different colours and different textures on your subject. Vary through monochrome, colour, colour intensity… try it against black or against white. Use different depths of field, more bokeh, less bokeh. Blur, movement… Try everything. Just make it you mission to look for the different way of doing it.

Refining your vision – developing photographers eye

Developing your vision as a photographer is about understanding the way you can shoot things differently to other people. You are trying to deliver to your viewer a different view of the world. To find what you are good at, what your unique perspective is, you must explore a universe of different approaches. Work with new angles, light variations, colours… well everything discussed above and more.

When you see a new subject get into it, explore it, by trying everything you can to see it anew and in a new light (literally). After a while, with practice, you will develop the photographers eye. To do that you must learn to see new ways that you can take a shot without actually needing to take it. Then you will be envisioning the shot in advance. You will also be developing your eye – your unique eye. You will have learned to see differently and to have put your particular style into your shots.

Comments, additions, amendments or ideas on this article? Contact Us
or why not leave a comment at the bottom of the page…

Like this article? Don’t miss the next — sign up for tips by email.

By Damon Guy (author and Photokonnexion editor)

Damon Guy - Netkonnexion

Damon Guy (Netkonnexion)

Damon is a writer-photog and editor of this site. He has run some major websites, a computing department and a digital image library. He started out as a trained teacher and now runs training for digital photographers.
See also: Editors ‘Bio’.

What good is a lens hood?

Five Types Of Lens Hood

• Five Types Of Lens Hood •
Attribution: Photo of five lens hoods for a mix of lenses; March 2013; Author: Geni; Permission: GFDL CC-BY-SA

Using a lens hood is important.

It is not always clear why we need a lens hood. Why do we need them and what are they for? Actually they are pretty important and can help prevent some nasty visual artefacts.

What is going on in the lens

Normally photographic lenses perform really well. They receive light reflected from your subject as parallel beams. These are focused by the lens into an image formed on the digital image sensor.

When light hits the lens from the side the situation is slightly different. Some of the light is refracted through the lens correctly. Some of the light however, is reflected off the surface and lost. But there is a percentage of light that goes astray in the lens. It can be bounced around in the lens – reflecting around from the surfaces of different lens elements internally. If it does so, on each reflection some of the light will get through to the sensor. Each time that happens there will be a slightly side-shifted ghost image. All sorts of light aberrations can be created by this internal reflection in the lens. It is these that cause the artefacts you see in the image.

Light is also scattered by inconsistencies in the lens glass. Chemical, and structural variations in the glass can impact on the way the light travels through the lens. This scatter contributes to the problem. These artefacts, and often an associated haze, are called lens flare and can be worse the further to the side that the light enters the lens. Flare and haze will not only form a distraction but also act to wash out the colours in your shot and reduce contrasts. These will make your picture look flat and lifeless. Unintended flare can simply kill the effectiveness of the shot.

A sharp angle of side-light can therefore cause all sorts of visual image ghosts which are not there in the scene. You can see a range of different types of flare in this Google image search…
Google images: Example lens flare images  External link - opens new tab/page

In general, poor quality glass and multiple elements in the photographic lens will tend to create more flare. Of course better lenses (read: “more expensive”) can help to reduce the problem. Higher quality lenses will incorporate a range of ways to reduce the problem. These include optimised lens-element design, surface coatings and non-reflective surfaces/parts internally as well as high quality glass. Despite that no lens is immune to flare.

What does a lens hood do?

The most common reason we use a lens hood is to reduce the incidence of a bright light source hitting the lens from the side. This will act to reduce the chance that the lens will suffer from the flare problem. In other words, the hood will help to keep the light coming in from the front of the lens in parallel rays.

It is simple really. Put up a wall at the side and the side light is cut out. However, it is not so simple to design a lens hood that will do that without obstructing the lens. The field of view of the lens cannot be allowed to catch the hood sides. If it does it will leave its mark on the image. So all sorts of hood shapes and sizes are required to match the visual characteristics of the lens. Lens hoods are quirky shapes because they have been designed to optimally reduce the side incidence of light and not interfere with the field of view.

Common design elements include “petal” shaped edges. These allow the corners of the sensor a wide field of view without interference in the corners from the hood. The long petal shape must be along the long side of the sensor (landscape view). If you put it on the other way the side of the picture will show the edge of the hood and light will also get in from the top (or bottom) because the cover is insufficient there.

There are conical shapes and cylindrical shapes too. When these don’t have petals they are designed to accommodate the full field of view of the lens from any angle. You may find that these types of hoods are common on lenses where the front of the lens extends when changing focal length. As the extension of the lens will change the field of view the hood shape must be wide enough for the widest angle of view. But it cannot have petals because they would rotate with the lens and at some focal lengths would interfere in the picture.

Lens hoods do more…

As you can see you should buy a hood for your lens that has specially been designed for it. If you don’t, you risk the hood intruding in your shot, or not providing sufficient protection against flare.

Hoods can help in other ways too. When you have a lens hood on the lens it acts as a primary protection for your vulnerable front element. Once, when I was panning to follow a bird with a heavy/expensive pro-zoom lens I whacked the lens hood off the glass of my car window. I am convinced I would have broken the window and damaged the front lens element if I had not had a lens hood on. It harmlessly bounced. Phew! I use hoods whenever I can these days.

Lens hoods also help to reduce over exposure generally from incident reflected light on bright days. There may be no direct bright light source shining into your lens. But it helps to reduce the high levels of brightness from the side regardless. That helps to reduce the overall high light levels and especially the contrast.

Lens hoods are worth the effort

Lots of learner photographers forget the lens hood. Yet it can have quite a significant impact. Even if it is not significant, when you are trying to get a sharp image and reduce the colour wash-out in bright light every little detail counts. Great images come from the attention to detail.

Comments, additions, amendments or ideas on this article? Contact Us
or why not leave a comment at the bottom of the page…

Like this article? Don’t miss the next — sign up for tips by email.

By Damon Guy (author and Photokonnexion editor)

Damon Guy - Netkonnexion

Damon Guy (Netkonnexion)

Damon is a writer-photog and editor of this site. He has run some major websites, a computing department and a digital image library. He started out as a trained teacher and now runs training for digital photographers.
See also: Editors ‘Bio’.

Visual toolbox for photographers

Sharpen up your creative photography…

It’s easy when starting photography to over emphasis the importance of gear. In fact it’s ‘photographers eye’ that really makes the difference. Your vision and insight into a scene are critical to producing a wonderful image.

Sage advice from a world master

The Visual Tool Box by David duChemin is all about the skills of composition. He goes into depth around the background ideas which help you look at a scene. The ultimate success in photography is to make your image a pleasure to view. Aesthetics rule – it’s as simple as that. This book is dedicated to teaching you the tools you need to develop the ‘eye’.

David duChemin says,

These are the lessons I wish I’d learned when I was starting out.
The Visual Tool Box by David duChemin

This is my kind of book. He writes superbly, in simple, readable form. His examples are excellent and the pictures are just amazing. But most of all the book is organised for learners to extend their knowledge in easy, well structured steps. This book is all about putting new tools in your photographic tool box and it achieves that with an ease that any beginner will find a joy.

Composition

The book is packed with examples of the sort of compositional ideas that really work – for anyone. Just look at some of the topics covered…

  • Manual
  • Optimize Your Exposures
  • Master the Triangle
  • Slower Shutter Speed
  • Learn to Pan
  • Use Intentional Camera Movement
  • Use Wide Lenses to Create a Sense of Inclusion
  • Learn to Isolate
  • Use Tighter Apertures to Deepen Focus
  • Use Bokeh to Abstract
  • Consider Your Colour Palette
  • Lines: Use Diagonals to Create Energy
  • Lines: Patterns, Lead my Eye, Horizons
  • See the Direction of Light
  • Light: Front Light, Side Light, and Back Light
  • Quality of Light: Further Consideration
  • White Balance for Mood
  • Light: Reflections, Shadow, Silhouettes, Lens Flare
  • People
  • Experiment with Balance and Tension
  • Use Your Negative Space
  • Juxtapositions: Find Conceptual Contrasts
  • Orientation of Frame
  • Choose Your Aspect Ratio
  • Use Scale
  • Simplify
  • Shoot from the Heart
  • Listen to Other Voices (Very Carefully)

And there is plenty more content to complement and extends these ideas. What’s not shown in a list is the excellent and sage advice throughout the book. I will let David duChemin have the last word…

Pace your-self. Anyone can master a camera; that just comes with time. It’s the other stuff — learning to think like a photographer — that takes so much work and allows this craft to become the means by which you create art.
The Visual Tool Box by David duChemin

And it is thinking like a photographer that you will quickly learn from reading this book.

How to buy this great book

This book was originally published as an ebook. However, it is no longer available in that form. The book has moved into the real world. It will be available on Amazon as a Paperback From 31 Mar 2015.
The Visual Toolbox: 60 Lessons for Stronger Photographs (Voices That Matter)You can per-order the book from Amazon.

Comments, additions, amendments or ideas on this article? Contact Us
or why not leave a comment at the bottom of the page…

Like this article? Don’t miss the next — sign up for tips by email.

Damon Guy - Netkonnexion

Damon Guy (Netkonnexion)

Damon is a writer-photographer and editor of this site. He has run some major websites, a computing department and a digital image library. He started out as a trained teacher and now runs training for digital photogs.
See also: Editors ‘Bio’.
By Damon Guy see his profile on Google+.

Documentary… Ansel Adams

Ansel Adams

• Ansel Adams •
One of the all time greats in photography. This video is about his life, thoughts and work.
Image taken from the video.

The thinker-photographer…

There is a great deal to be said about Ansel Adams. He was a great photographer, thinker and artist. He was also an accomplished musician.

This post was about Ansel Adams.

Unfortunately the video was taken down from YouTube.

We have other Ansel Adams Resources on Photokonnexion.

At the time the video was removed it did not appear available online in another place. However, the subtext for the video as it was published is below. You may find it useful to use the text in case this video becomes available again at a later date.

Subtext for the video

Published on 29 May 2013
“The American Experience” Sierra Club Productions – Steeplechase Films
Ansel Adams is the intimate portrait of a great artist and ardent environmentalist — for whom life and art, photography and wilderness, creativity and communication, love and expression, were inextricably connected. ANSEL ADAMS, a ninety-minute documentary film written and directed by Ric Burns, and broadcast on national public television in April 2002, provides an elegant, moving and lyrical portrait of this most eloquent and quintessentially American of photographers. Written by Joshua Mueller
Category: Education
Licence: Standard YouTube Licence

Comments, additions, amendments or ideas on this article? Contact Us
or why not leave a comment at the bottom of the page…

Like this article? Don’t miss the next — sign up for tips by email.

By Damon Guy (author and Photokonnexion editor)

Damon Guy - Netkonnexion

Damon Guy (Netkonnexion)

Damon is a writer-photog and editor of this site. He has run some major websites, a computing department and a digital image library. He started out as a trained teacher and now runs training for digital photographers.
See also: Editors ‘Bio’.

Circular Polarising filters

Polarising filter range

• Polarising filter Range •
The polarising filter is one of the more useful filters in the kit bag.

The polarising filter – one of the more useful filters

Strong Sun, low in the sky, can cause problems. Direct rays of light into the camera, specular highlights and washed out colours create photographic distractions in the image. Here is how to reduce the problem.

Watch for highlights – gain some benefits

Bright spots, difficult reflections and big highlights are a very strong draw for the eye in an image. Try to check around the frame when composing. Find ways to reduce these strong areas in the shot.

If you cannot reduce the reflections, highlights or washed out colours from bright light you should consider using a polarising filter. They are relatively inexpensive and have an incredible impact on the shot. If you use them right polarising filters can…

  • Reduce strong reflections: this gives a deeper, richer appearance to water, allows you to see into water and through glass and brings out strong images reflected in shiny surfaces like mountains etc.
  • Reduces the “washed out” effect of bright light: Colours that are whitened or lose their intensity in bright light can be made richer and more saturated. Skies and water in particular will get more depth of colour.
  • Reduces the intensity of bright light: Polarising filters reduce the total light entering the camera because they reflect/absorb some of the light. This helps bring down the overall levels of light.
Fitting polarising filters

Most polarisers are bought as circular screw tread attachments that screw into the front of your photographic lens. The filter part is mounted in a ring that freely rotates on top of the screw thread. It can turn without tightening or loosening the mount when it rotates. Screw the filter directly to the front filter-screw thread on the lens.

A polarising filter come in multi-filter kits. These can be fitted to the front of your lens. A frame is fitted onto the lens filter screw. Various filters can be slotted into the frame, including polarising filters.

Gentle rotation

To gain a benefit from your polarising filter you need to adjust it to suit the light. You can twist the filter part in the mounting in either direction The rotation of 90° is enough to see the full effect. Twist it gently until the full or desired impact is seen in your viewfinder. You should see slight darkening, increase in colour saturation and reduced highlights, particularly from shiny surfaces.

With a little practice you can easily see the full benefit of the filter. However, some highlights are still strong enough to create white spots and distractions. So still be careful when composing.

As a guide, if your sunglasses are polarised you can look at a scene quickly and see an immediate effect. If they help you to see more colours and reduce reflection and highlight impact then get your polarising filter out and screw it on the lens. Sunglasses help you to make the decision to get out the filter, but obviously they do not have a photographic impact. They will be of a different strength to your filter too. So you will still need to compose and adjust the filter.

How they work

Polarising filters act to filter the incoming light. They allow some specifically aligned light waves to pass through and not others. In so doing the filter effect does two things. First, they reflect or absorb some of the light where the waves are not aligned. Secondly, they allow the aligned light through. This light reduction and alignment is enough to ensure the glare, brightness and strong highlights are weakened.

For a more informed look at the detail of polarisation filters you can get more information here.

Buy now!

If you don’t have a polarising filter for your favourite lens then buy one now. You’ll see an amazing difference.

Buy the correct filter size. Check the thread size of your lens – normally found at the front edge of your lens. A mid-range size would be 58mm. My small lens is 52mm and my largest 88mm. Look for that size on the filter you order.

Have a look at the what’s available…
Circular polarising filters – buy one now!  External link - opens new tab/page.

Recommendation!
Hoya 58mm Circular Polarizing Filter
These are great value polarising filters. Check out the one seen here then search for one the size of your lens.


Comments, additions, amendments or ideas on this article? Contact Us
or why not leave a comment at the bottom of the page…

Like this article? Don’t miss the next — sign up for tips by email.

By Damon Guy (author and Photokonnexion editor)

Damon Guy - Netkonnexion

Damon Guy (Netkonnexion)

Damon is a writer-photog and editor of this site. He has run some major websites, a computing department and a digital image library. He started out as a trained teacher and now runs training for digital photographers.
See also: Editors ‘Bio’.

Can you write? Of course you can!
Write for Photokonnexion...

We would love to have your articles or tips posted on our site.
Find out more…
Write for Photokonnexion.

Shooting waterfalls and moving water… great for Autumn

Moving water shots

Moving water shots are some of the most romantic landscape shots. They are really easy and fun to do. (Image from the video).

Wow! September already…

With Autumn around the corner I am thinking about great projects for the when the leaves start to turn. Here’s a great idea for you to follow up to make the best of the Autumn colours.

Why Autumn

The summer is great for doing wide open landscapes. Especially around the Golden Hour or at dawn when the light has those wonderful reds, golden or yellow colours.

Autumn is better for doing great shots under the forest canopy and those great shadowy dell shots. The Sun’s lower in the sky and there is reduced contrast with fewer distracting bright spots peeping through the trees from the sky. The light is great and the lower aspect is better for creating contrasts in moving and falling water. On top of that the autumnal colours are exciting. More to the point the range of Autumnal colours create depth and contrast. That is something that uniform green of the summer months tends to reduce.

So think about doing your waterfall and forest shots in the next two months or for your local Autumn. You will really benefit from greater contrasts, colours and light angles.

How to blur water for a dreamy effect

To get you started on great water shots here is an introductory video on the way to slightly blur water in your shots. It helps to make the water take on a more motion-filled ethereal dreaminess.
Uploaded by: Gordon Laing (28 Dec 2007)

A couple of extra tips

Sometimes, especially when working under trees with those hidden waterfalls you will get large contrasts with the surrounding environment. Such contrasts often cause highlights that are distracting. Here are a couple of extra tips to help get past this distraction…

  • If you find you are doing a shadowy moving water shot in the trees but the brightness is still too high try using a polariser filter. This will help to increase the contrasts and overall reduce the incoming light. Polarisers reduce the light by up to about two stops which really helps when working with water. It will also reduce sharp reflections which can be confusing in moving water – especially under trees.
  • If you need to reduce the light even more you can try a Neutral Density filter (ND filter) This type of filter is like sunglasses for your camera. You can find out more here… and here is a range of resources on filters.

Comments, additions, amendments or ideas on this article? Contact Us
or why not leave a comment at the bottom of the page…

Like this article? Don’t miss the next — sign up for tips by email.

By Damon Guy (author and Photokonnexion editor)

Damon Guy - Netkonnexion

Damon Guy (Netkonnexion)

Damon is a writer-photog and editor of this site. He has run some major websites, a computing department and a digital image library. He started out as a trained teacher and now runs training for digital photographers.
See also: Editors ‘Bio’.

Can you write? Of course you can!
Write for Photokonnexion...

We would love to have your articles or tips posted on our site.
Find out more…
Write for Photokonnexion.