Tag Archives: Ideas for photographs

Seeing the subject… refining your vision

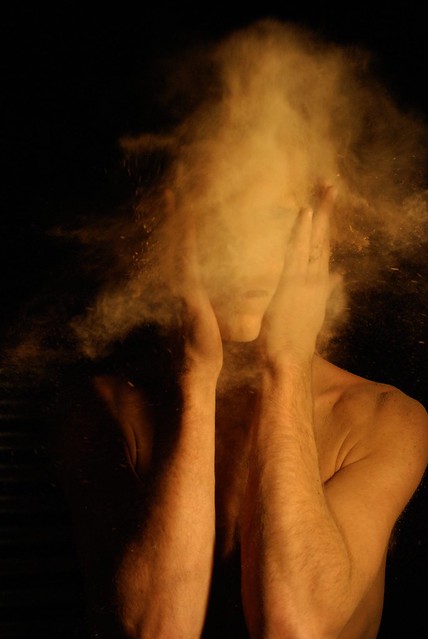
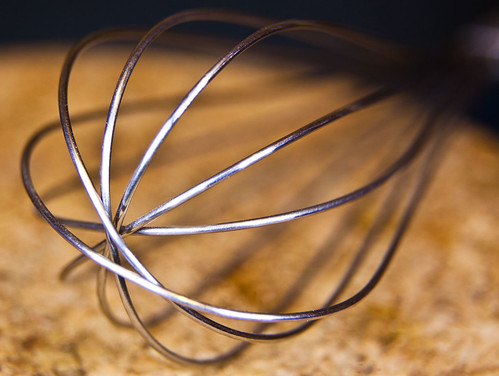
Beat it up!

• Beat it up! •
Click image to view large
Beat it up! By Netkonnexion on Flickr Photographers eye :: Seeing the subject… refining your vision | External link - opens new tab/page
To really look at a subject you have to see it as you have never seen it before.

Cultivating the photographers eye…

What the “eye” really means is difficult to define. One thing’s sure. As “photographers eye” develops you see things differently. Refining your vision to see differently is how you develop your version of the ‘eye’.

Looking at the scene

In Working the scene I described how to walk through the scene, understand the angles and ideas that relate to the scene and ways to find “the” shot. At first it is not a simple process. You are developing a habit. Doing things that you would not do naturally.

Standing up and using the camera from your normal eye position makes your subject look like you always see it. Surprisingly, it is also the same way most others see it too. Where is the novelty, interest and insight in that? Photographers eye, Seeing the subject in a different way requires refining your vision.

Well, you can change it all by studying your subject from new angles, new light and with new perspectives.

What if the scene is a close up subject?

A wonderful thing about photography is the ability to isolate a subject, get in close to it and examine it in a way we normally do not try to do with our eyes.

The challenge is to do things differently so we can see things differently. In this blog I often urge people to get in close – fill the frame. That is one way to see a subject anew. There are others. Below, there are some ideas to get you to see your subject differently.

Photographers eye – Getting in close:

Really close means a macro lens. If you don’t have one then you can get some macro extension tubes. These are an inexpensive way to do macro photography. However, the way to see things differently is to try and see the subject in ways that are different to the everyday perspective. Using a macro lens, tubes, or even very close with an ordinary lens you need to be versatile. Get around your subject, see it from at least ten different positions. Try to make every shot different. Take every shot as if you are seeing the subject as a new object. Don’t just look at the whole subject, get right into the tiny detail, all of the tiny details. (See Amazon search results for macro extension tubes External link - opens new tab/page).
Photographers eye – Getting the Angles

Developing your vision is not just about details, even if there are lots of them. Try taking each detail from a whole range of angles, under, over and from the back too. Angles on a subject help to start you looking at the aesthetics of an object. Look for curves, pleasing intersections, great lines, diagonals… Anything that helps you to see the beauty in a subject and shows it in a new way.

Photographers eye – Using different lenses

If you have them, explore the subject using a range of lenses. Get wide. Go long. Try fish-eye. Work with a prime. Go with whatever lenses you’ve got. The idea is to show the subject in a variety of different ways. Every lens has its peculiar characteristics and distortions. Training your eye to see a subject in different ways by using different lenses is one way to become sensitive to photographic perspectives. You will begin to see how a camera sees. If you only ever use one lens you will begin to see everything in a plain way. If you can see things in a variety of different ways you will begin to start looking at things differently.

Photographers eye – seeing different light, different exposures

Light is the essence of everything we do in photography. While you are working with small subjects (like in my picture above) you can make changes to the light. You can use ambient light, window light, natural light, reflected light and domestic lights. Then there are coloured lights, soft light, hard light, and even laser light. Then, you also have dozens of different ways to use artificial photographic lights too. Added to these different illuminations you can also develop a whole range of exposures. You can explore your subject as under-exposed, over-exposed, dark or bright. You can use shadows, different light angles, different light heights. There are literally thousands of ways to light and expose any one subject. Explore as many of them as possible.

Other variables:

Try different backgrounds, different colours and different textures on your subject. Vary through monochrome, colour, colour intensity… try it against black or against white. Use different depths of field, more bokeh, less bokeh. Blur, movement… Try everything. Just make it you mission to look for the different way of doing it.

Refining your vision – developing photographers eye

Developing your vision as a photographer is about understanding the way you can shoot things differently to other people. You are trying to deliver to your viewer a different view of the world. To find what you are good at, what your unique perspective is, you must explore a universe of different approaches. Work with new angles, light variations, colours… well everything discussed above and more.

When you see a new subject get into it, explore it, by trying everything you can to see it anew and in a new light (literally). After a while, with practice, you will develop the photographers eye. To do that you must learn to see new ways that you can take a shot without actually needing to take it. Then you will be envisioning the shot in advance. You will also be developing your eye – your unique eye. You will have learned to see differently and to have put your particular style into your shots.

Comments, additions, amendments or ideas on this article? Contact Us
or why not leave a comment at the bottom of the page…

Like this article? Don’t miss the next — sign up for tips by email.

By Damon Guy (author and Photokonnexion editor)

Damon Guy - Netkonnexion

Damon Guy (Netkonnexion)

Damon is a writer-photog and editor of this site. He has run some major websites, a computing department and a digital image library. He started out as a trained teacher and now runs training for digital photographers.
See also: Editors ‘Bio’.

A simple project with fruit – a tutorial for fun!

• Orange •

• Orange •
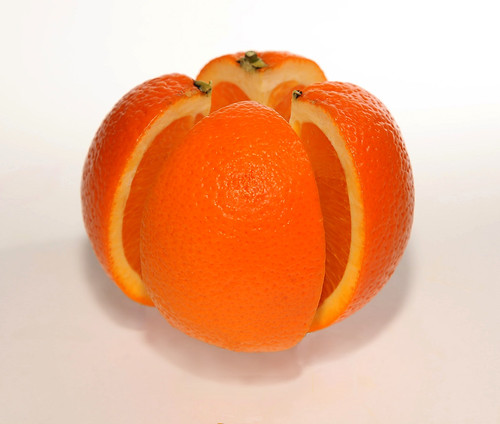
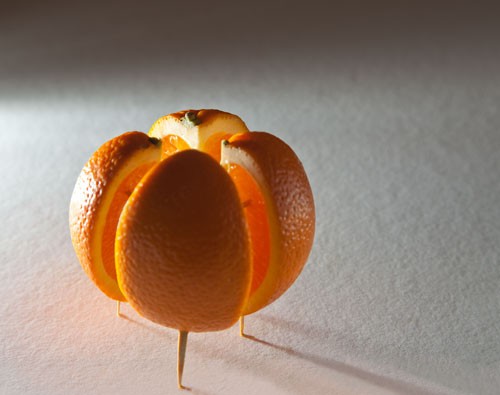
Have a go at producing a floating orange in “exploded view”
Click image to view large
Orange By Netkonnexion on Flickr External link - opens new tab/page

Fruit is fun!

This tutorial will show you how to photograph fruit in all its glory – in a unique way. There are ways you can make the project your own with plenty of room for creative ideas. It is an easy project giving you some useful tips for still life lighting and working with a high key background. Have fun!

The picture of the orange

The picture above shows an orange, a wonderful fruit, in all its glory. We can see both inside parts and out. In this tutorial I will show you how to create this yourself and show some other similar examples to give you some ideas of your own. This tutorial will cover the following simple steps:

  1. Pick a good firm, clean orange.
  2. Cut it into quarters.
  3. Assemble the orange in an “exploded view” using toothpicks.
  4. Create lighting to show off your orange without highlights.
  5. Finally you will clone out the toothpicks on the computer.
Choose your fruit

Be careful, make sure that your orange is nicely shaped, no odd depressions or bruises, and as firm as possible, not over-ripe. Check the skin for consistent colour too. You want your orange to look delicious. No one will be interested in your shot if it is damaged, dripping and discoloured. Also, wash and gently wipe the skin before starting the tutorial. The skin should look bright and clean. Dirt, hairs and marks will really draw the eye of the viewer. Don’t let them be distracted.

Constructing the orange

Cut it in four pieces top to bottom (two cuts). It helps not to have too many cuts. Cut carefully and accurately. If you hack the orange you will be adding distractions to draw the eye. Be careful and slow to ensure accuracy.

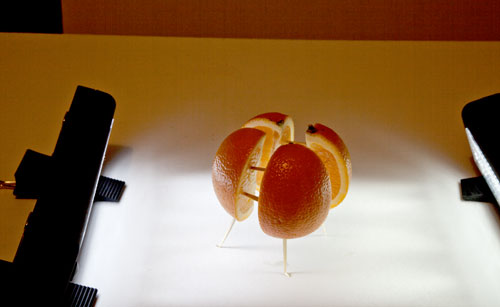
Once cut we are going to assemble the orange in an “exploded view”. That is the term used to describe an “almost” assembled item that is floating in space so you can see how it would assemble. To hold the pieces apart I arranged the quarters using tooth picks. In the picture below you can see how the orange is braced with the toothpicks. The picture also shows how the back lighting is set up.

• The toothpick set-up and initial back-lighting •

• The toothpick set-up and initial back lighting •
• The toothpick set-up and initial backlighting • By Netkonnexion on Flickr  External link - opens new tab/page

You can see from the picture the orange is held firmly together by the toothpicks. It is also supported by four toothpicks as legs. We want the orange to be slightly off the ground so it has the feel of an independent object in space.

The white card under the orange extends to the edge of a table. On a chair a little way back from the table is another upright card. You can see the white back-card is very bright. I used a strong light under the table to illuminate that card giving it a high-key brightness. There are some links at the end to explain more about high-key effects.

We want to take the final shot with a little shadow under the orange. This give the impression the orange is floating in space. I will light the orange from the front with a flash. You can use the flash on your camera. However, that will create a very sharp shadow since flash is a very hard light. This means very harsh, sharp-edged shadows that will be quite dark.

In the next picture you can see how I created some under-lighting below the orange to soften the shadows created by the flash. I have two cheap Rolson 61770 72 LED Camping Lights. These are really flexible for table-top still-life and can be easily set up for fill light. They are great lights and affordable.

The underlighting setup to soften the shadows and create fill light.

• The underlighting setup to soften the shadows and create fill light •
• The underlighting setup to soften the shadows and create fill light • By Netkonnexion on Flickr External link - opens new tab/page

The lights under the orange and the back-lit card provide light on all sides except the front. If you have an off-camera flash you can use that, off-set to one side, for the front lighting. It is important to off-set so that you prevent ugly highlights on the front of the orange. Better still you could bounce the light off the ceiling if it is white. That way the orange will be evenly lit from above. To find out more about off-camera flash and some great opportunities for affordable models see:

If you only have a pop-up or on-camera flash then you should find a way of diffusing the light from it. Alternatively you could create a diffused reflection. You should be trying to find ways to prevent the flash pointing directly on the orange. Bright highlights would be created that are distracting and ugly.

Once the lighting is set up to your satisfaction you need to position the orange for the final shot. It is important to spend a little while positioning the orange so it obscures as many of the toothpicks as possible ready for your final shot.

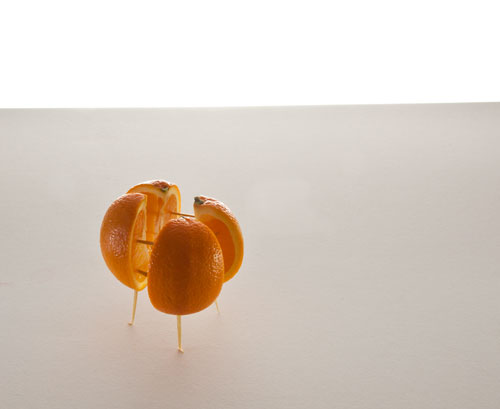
The final position ready to photograph the orange obscures as many of the toothpicks as possible.

The final position ready to photograph the orange obscures as many of the toothpicks as possible. Then there is less cloning work to do on the computer.
The positioned orange By Netkonnexion on Flickr External link - opens new tab/page

You can see from the picture that the orange is positioned so most of the internal toothpicks are not visible and the legs are minimised. Once the shot is taken we are going to clone out the remaining sticks. So if you have less showing you have less cloning-out to do.

Now you are ready to take the shot – shoot it! Make a few attempts. Do plenty of chimping to ensure you have the lighting right. Pay special care to minimising highlights on the orange. When you are ready you can download your shots to your computer.

The remaining work is to clone out the toothpicks. You will need to very carefully clone the white surface around the legs over the legs themselves until you can not see them any more. Pay attention to any shadows so that they remain realistic and consistent after your cloning is finished. When cloning over the toothpicks in the orange interior use the same coloured flesh of the orange to clone out the remaining toothpicks you can see.

If you are not familiar with cloning techniques you can see a tutorial here: Getting Started With Cloning.

find out more...Photokonnexion tips by email
Enjoying this article? Please sign up for our
daily email service.
                                                Find out more…
#11030#

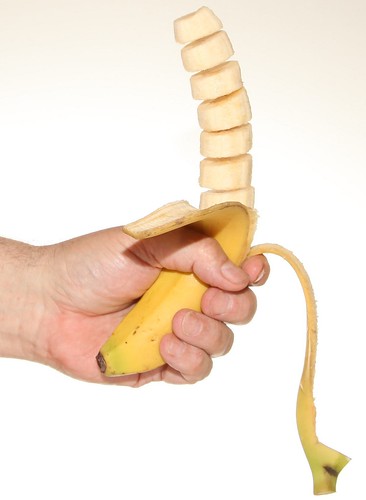
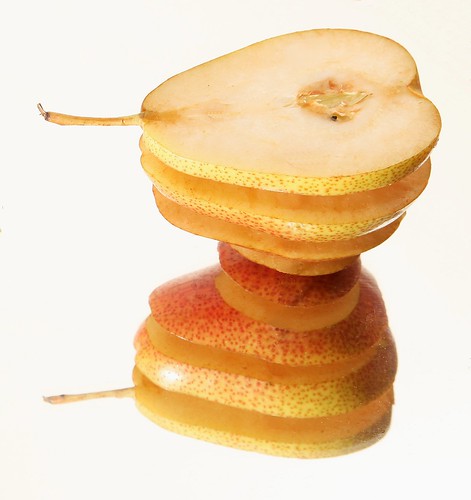
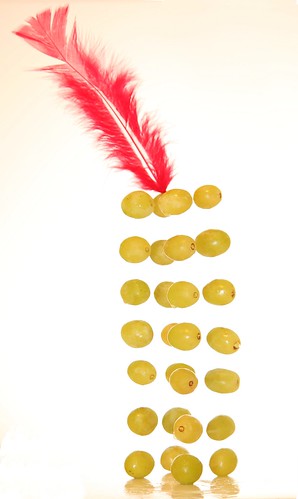
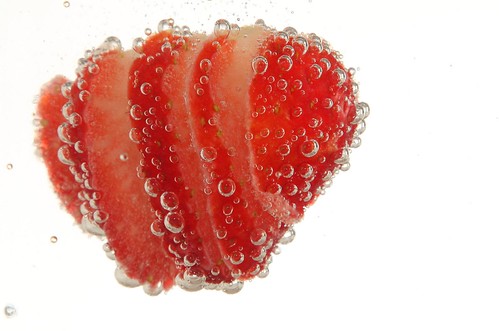
If you want to try other ideas here are a selection of other fruit-cut pictures below. All done using toothpicks or cocktail sticks. There is an infinite variety of things you can do using this technique so have lots of fun!

• Sliced Banana •

• Sliced Banana •
Click image to view large
The banana slices were held together with cocktail sticks while the shot was taken. Then they were cloned out afterwards.
• Sliced Banana • By Netkonnexion on Flickr External link - opens new tab/page


• Sliced pear on mirror •

• Sliced pear on mirror •
Click image to view large
A half pear was sliced and held in the exploded view with toothpicks. However, the pear was on a mirror – giving the effect of an inverted pear.
• Sliced pear on mirror • By Netkonnexion on Flickr External link - opens new tab/page


•  Alexander The Grape •

• Alexander The Grape •
Click image to view large
Each grape was painstakingly held apart using cocktail sticks.
• Alexander The Grape • By Netkonnexion on Flickr External link - opens new tab/page


• Strawberry Layer Drink •

• Strawberry Layer Drink •
Click image to view large
The strawberry has been sliced and held together with toothpicks. Then it has been placed in sparkling water to create the bubbles.
• Strawberry Layer Drink • By Netkonnexion on Flickr External link - opens new tab/page

By Damon Guy (author and Photokonnexion editor)

Damon Guy - Netkonnexion

Damon Guy (Netkonnexion)

Damon is a writer-photog and editor of this site. He has run some major websites, a computing department and a digital image library. He started out as a trained teacher and now runs training for digital photographers.
See also: Editors ‘Bio’.

The wonderful effects created by dust and vapour

Our atmosphere is the most amazing place.

As photographers we know the atmosphere is where we get our best action. Bad weather makes for great photographs. Sometimes it is not just the weather that is great. All sorts of other particles, droplets, dust and vapours really add to atmospheric action. These things provide us with a whole range of great effects and fun photography.

What to look for…

So how can we exploit the benefits of these localised changes to the atmosphere? It is simple really, like at any other time we first need to look for great light. So, the best times to get these effects are first thing in the morning and in the last light of the day. The light coming in at an angle provides great illumination of the odd dust disturbance, or rising steam cloud.

The light aside, to capture these effects we have to find places where local effects of particles and vapour can be found. So here are some places to look for the effects that are so eye-catching.

Cold mornings… Car exhausts; steam rising from grates in the ground; breath of people and animals; cold places, warm steam. Yes, all these give the sort of local steam and vapour that we want. These are in fact effects we can produce ourselves. Hot water on cold ground can produce a wonderful vapour that catches the light and provides a great ‘shoot-through’ opportunity for catching the early morning or evening light.

Dust… On hot dry days dust can produce the most wonderfully atmospheric conditions for shooting. Of course dust is double fun because it often also colours the light as well as creating great local conditions for a shot. Again you can create dust effects by shooting on dusty ground as someone drives a car by the camera. Animals, people and vehicles are all great for creating dust if you can find a place where it is common place. And, it is fun to in a very light wind to spread it around yourself.

Heat… There are just so many things! Steaming cups, food, baths, engines, steam trains, water-cooling towers, showers – the list is endless.

Water spray… Fountains, waves, hoses, high wind and water, watering cans – there are just so many ways to create a fine spray. Once you have the spray, artificially created or naturally, it is all about catching some wonderful light as you shoot through it. With water spray there is also the added benefit that if the light is strong you may also get a rainbow effect too which makes for some great extra light effects.

Children… I think some of the most fun photographing spray, dust and vapour can be had with children. If you can think of a way to get kids to spray water the ensuing mayhem is just brilliant photographic material.

It really just comes down to finding, or making, some great light and putting it together with your vapour or dust. Lets look at some inspiring pictures to give you ideas for seeking out fun dust, spray and vapour shots.

Here is one you can try in the kitchen. Great textures here…

Water vapour by Di's Eyes, on Flickr

Water vapour by Di’s Eyes, on Flickr
Click image to view large
Water vapour by Di’s Eyes, on Flickr External link - opens new tab/page

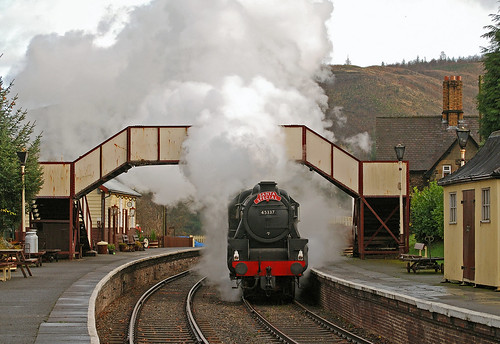
Trains are pretty atmospheric by themselves, but add smoke or steam and…

Steaming under the bridge by midcheshireman, on Flickr

Steaming under the bridge by midcheshireman, on Flickr
Click image to view large
Steaming under the bridge by midcheshireman, on Flickr External link - opens new tab/page

Get Photokonnexion tips by email!
We send you tips daily – find out more…

Start email subscription now!
#11030#

 
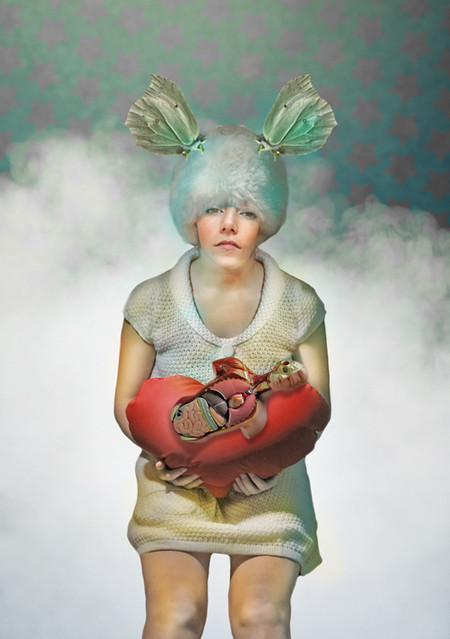
It takes all sorts, but if you are inventive enough you can use steam for a great backdrop…

Steam of madness by giorgia *, on Flickr

Steam of madness by Giorgia on Flickr

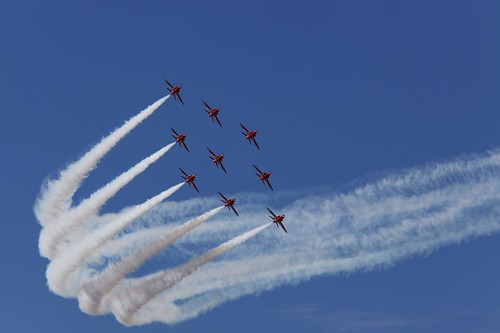
Exhaust vapour and vapour trails are fun ways to capture localised effects too…

• Red Arrows • by Netkonnexion, on Flickr

• Red Arrows • by Netkonnexion, on Flickr
Click image to view large
• Red Arrows • by Netkonnexion, on FlickrExternal link - opens new tab/page

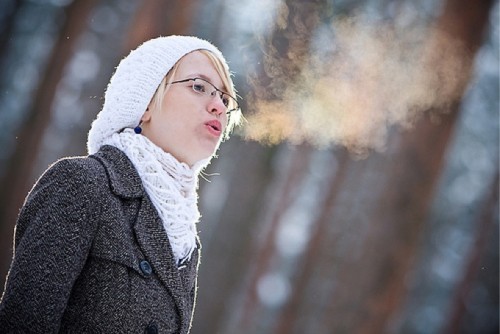
Condensing breath can be a source of some fun pictures…
Check out this search on Google Images… Search: “Condensing breath images”

Condensing breath photo

Condensing breath can be fun to photograph and provides interest for the viewer.
Seen on: Contrails Are Condensation, But Not Like Your Breath @ contrailscience.com/

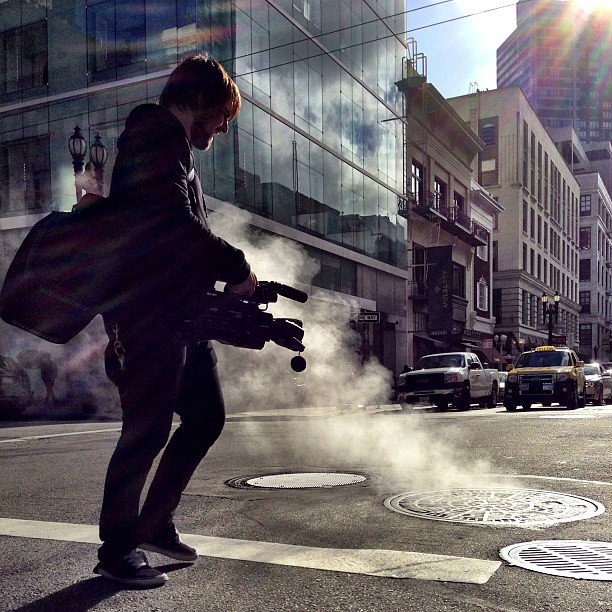
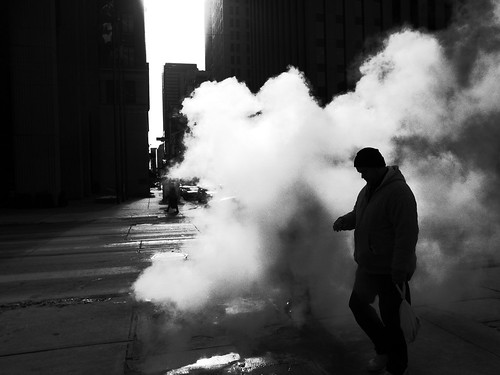
Street scenes with steam or vapour are great…

Steam #streetphotography by Joe Pemberton, on Flickr

Steam #streetphotography by Joe Pemberton, on Flickr
Click image to view large
Steam #streetphotography by Joe Pemberton, on FlickrExternal link - opens new tab/page

Great light silhouettes make the scene something special…

Steam from old City Hall by simon.carr, on Flickr

Steam from old City Hall by simon.carr, on Flickr
Click image to view large
Steam from old City Hall by simon.carr, on Flickr External link - opens new tab/page

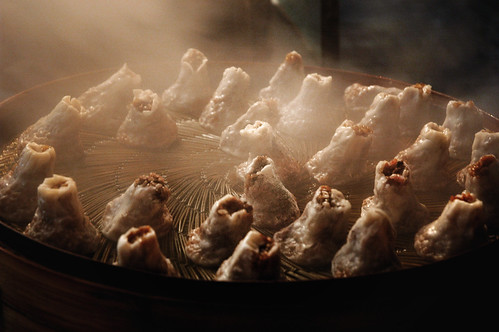
Here is a fun idea… I am sure there are lots of places where this sort of food preparation does the trick!

Steaming-Dumplings by T in CHINA - Until they grow Tea i Switzerland : ), on Flickr

Steaming-Dumplings by T in CHINA – Until they grow Tea i Switzerland : ), on Flickr
Click image to view large
Steaming-Dumplings by T in CHINA – Until they grow Tea i Switzerland : ), on Flickr External link - opens new tab/page

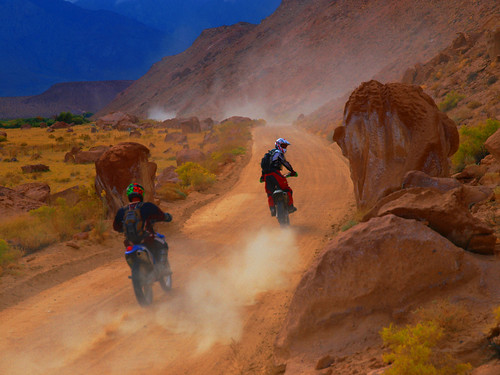
Dust provides great creative potential…

Chalk Bluff Dust by pendeho, on Flickr

Chalk Bluff Dust by pendeho, on Flickr
Click image to view large
Chalk Bluff Dust by pendeho, on Flickr External link - opens new tab/page

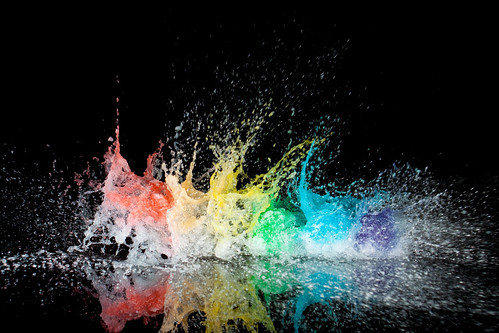
Colorfully Cold by Ryan Taylor Photography, on Flickr

Colorfully Cold by Ryan Taylor Photography, on Flickr
Click image to view large
Colorfully Cold by Ryan Taylor Photography, on FlickrExternal link - opens new tab/page

By Damon Guy (author and Photokonnexion editor)

Damon Guy - Netkonnexion

Damon Guy (Netkonnexion)

Damon is a writer-photog and editor of this site. He has run some major websites, a computing department and a digital image library. He started out as a trained teacher and now runs training for digital photographers.
See also: Editors ‘Bio’.

Random words to give you a creative boost…

Any subject has scope if you use imagination.

Your inventiveness provides an extended insight to a specific subject. Given any word you should be able to do something different with a photograph, something exciting. Think about stretching your mind, and of course your photography.

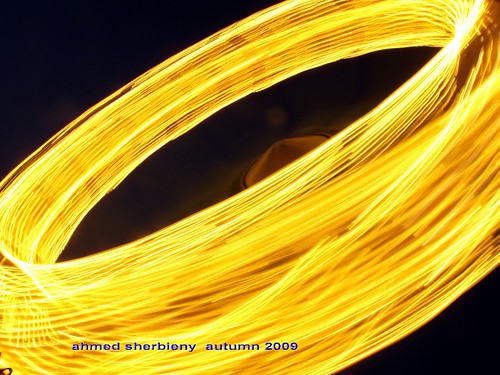
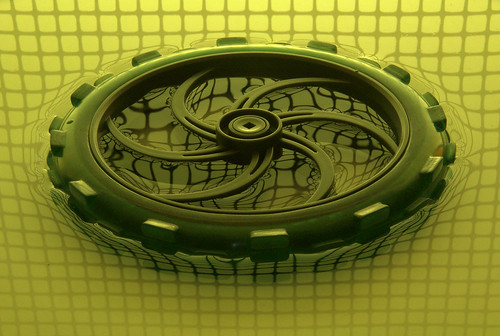
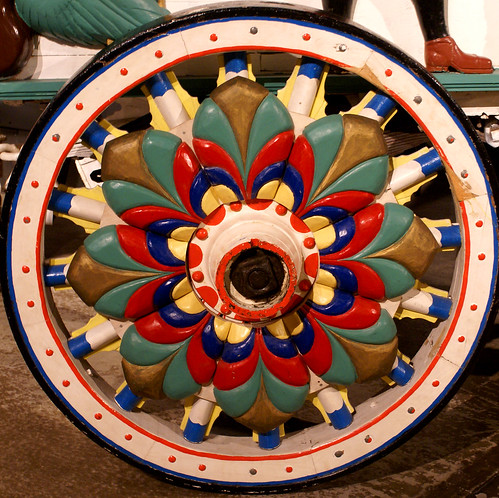
In this post I have included pictures which are all indexed with the term “wheels”. A simple subject, but not maybe what immediately comes to mind. And, that of course is the point. The idea is to fix some subject in your mind and then go out with your camera and try to do something creative with it.

Have a go. Create five pictures with the term “wheels”. If you come up with a term you would be prefer that is fine too. Try a random work from a dictionary or a book. The point is that you can get out and try something different…

See what you think about these ideas to get you going. Have fun!

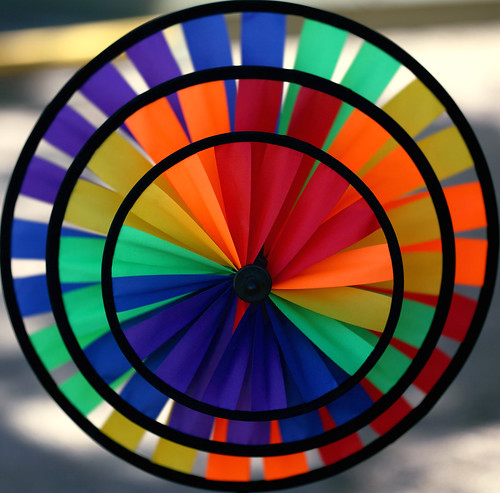
3 Wheels • by cobalt123 on Flickr

• 3 Wheels • by cobalt123 on Flickr
Click image to view large
• 3 Wheels • By cobalt123 on Flickr External link - opens new tab/page

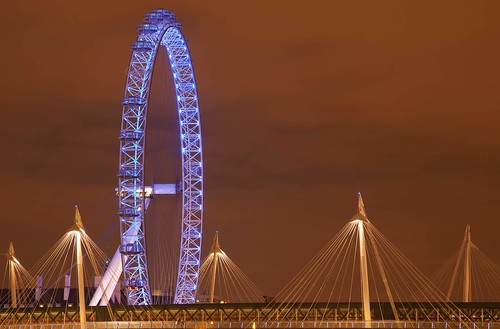
• London Eye • by Netkonnexion on Flickr

• London Eye • by Netkonnexion on Flickr
Click image to view large
• London Eye • by Netkonnexion on FlickrExternal link - opens new tab/page

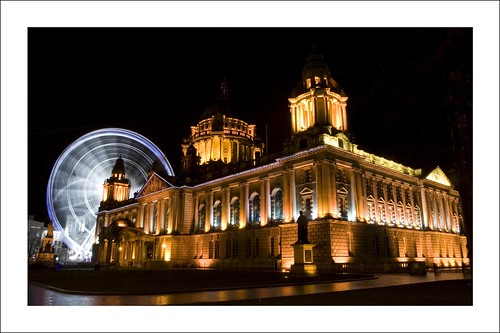
Belfast City Hall and Wheel

• Belfast City Hall and Wheel •
Click image to view large

• Belfast City Hall and Wheel • By Felipe Pitta on Flickr External link - opens new tab/page

Wheel rides

• Wheel rides •
Click image to view large
• Wheel rides • by Ahmed Sherbieny (Flickr)External link - opens new tab/page

• Wheel warp •

• Wheel warp •
Click image to view large
• Wheel warp • By Scottdd222 on Flickr External link - opens new tab/page

External link - opens new tab/page
• Circus Wheel 2 •

• Circus Wheel 2 •
Click image to view large
• Circus Wheel 2 • By Atelier Teee on Flickr External link - opens new tab/page

If you want to see a variety of other image ideas you can use this search on Google images…
More wheels on Google Images