[Todays article comes from contributing author, Honest Blossom]
Taking shots in soft light is so easy with a soft light source. A tablet can provide just that.
{Image by Damon Guy}
Mobile devices give us new tools
Mobile photography is on the rise. Yet despite high usage of smart phones and tablets many believe nothing beats photos produced on a DSLR.
Mobile devices do have a place in the photogs bag. Many pros use mobiles ![]() effectively. Photographer-author Anne Hamersky used her iPhone 5 to take photos for her book, “Farm Together Now
effectively. Photographer-author Anne Hamersky used her iPhone 5 to take photos for her book, “Farm Together Now ![]() (jointly authored with Amy Franceschini and Daniel Tucker)”.
(jointly authored with Amy Franceschini and Daniel Tucker)”.
Apart from being used as cameras, smart phones and tablets in photography have huge potential. They can assist with simple lighting, easy viewing of images, and controlling cameras.
1. Simple Lighting
You don’t need professional lighting equipment to create a soft light. Your tablet can create shadow graduations on your subject. How? Use a bright-white image on your screen (Download white-screen image here). Point the display toward your subject. It will create soft light and shadows. You can also use your smart phone to light smaller objects. The screen illumination produces white light. It’s a source of localized soft light in your image.
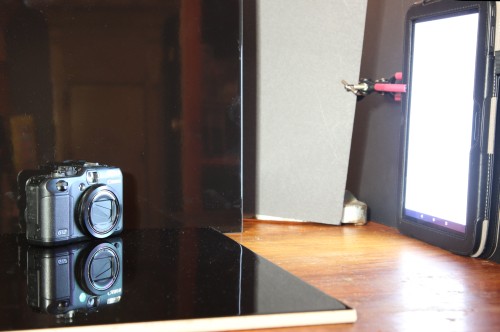
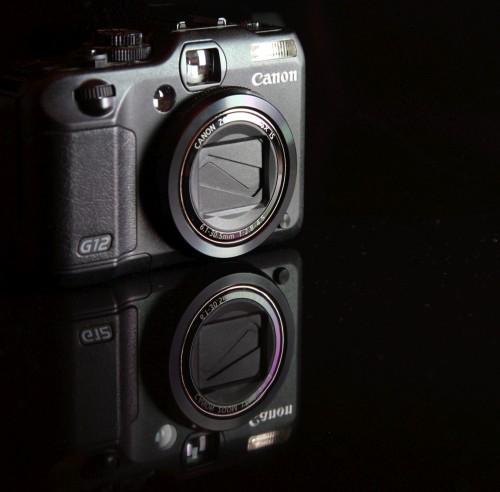
The camera image at the top of this article was taken using the table-top studio set up in this image. Simple to do and simple to set up.
Use tablets in photography to create direct light too. Devices with built-in flash can be used as a photographic light. Use a flashlight (torch) app. There are also some LED light apps. that you can use on your tablet to create coloured light sources.
2. Camera Controller
Want to control your camera functions via your tablet? Try the Chainfire app for Android devices. You can use your tablet as a Canon EOS camera controller. Here is how to do it:
- Install the Chainfire app
 .
. - Connect your DSLR to the tablet via a USB OTG connector line and a mini USB cable for the camera. {Tip: It’s best to get a longer USB cable}.
- Turn on the camera and the app to view the subject.
Navigating through the app is easy, as it uses the controls of your camera. Photos taken using the camera can also be saved to the memory card of the tablet. I suggest downloading photos to your computer later. Photos take a lot of space and are safer on a PC.
View a guide on how to use the Chainfire app ![]() . Also read more details on the Chainfire website
. Also read more details on the Chainfire website ![]() .
.
3. Field or Preview monitor
It’s advisable to opt for a tablet with at least a 9-inch display. The main purpose of using a tablet is as an extended monitor. You will get a better preview of the subject than the small display on your DSLR. According to O2, tablets such as the Apple’s iPad Air (9.7-inch screen) and ‘Samsung Galaxy Tab S’ (10.5-inch screen) are the best preview monitors you can use on a photo shoot ![]() . They allow more space to view and work with the images. You are less likely to strain your eyes with decent sized screens.
. They allow more space to view and work with the images. You are less likely to strain your eyes with decent sized screens.
Using tablets in photography to control the camera uses the same procedure as any shoot. Taking the shot is set up and released from the mobile. You will need a USB OTG connector to use the tablet as a preview monitor. Applications such as the DSLR Controller, GoPro, CamCap, Helicon Remote, and DslrDashboard are the advisable software to use.
Tablets in photography – top devices
What are the top tablets for photographers? There are various devices to choose from. They offer many features and functions. Choosing one can be quite confusing when picking the best to help your shoots.
To make it easier, consider the other reasons you’re buying the tablet. Email and editing photos or other uses are also important. This will help narrow down your list of choices, as most devices have their own strengths. It will also help to opt for a tablet that has been recommended by other photographers. Here are some examples:
- Apple iPad with Retina Display
- Samsung Galaxy Note Pro 12.2
- Sony Xperia Z2 Tablet
- Microsoft Surface 2
- Lenovo Yoga Tab
Mobile devices have found their way into DSLR photography because of powerful camera lenses and relevant apps. These assist professional and amateur alike. The changes have come about because using tablets in photography helps and simplifies our work.
Comments, additions, amendments or ideas on this article? Contact Us
or why not leave a comment at the bottom of the page…
Like this article? Don’t miss the next — sign up for tips by email.
Photokonnexion Photographic Glossary – Definitions and articles.
DSLR – Definition.
Photog – Definition.
Pros use mobiles ![]() .
.
Book title: Farm Together Now ![]() .
.
Use a bright-white image on your screen (Download white-screen image here).
A simple lighting technique with lovely light.
Chainfire application for Android ![]() .
.
View a guide on how to use the Chainfire app ![]() .
.
Chainfire website ![]() .
.
the best preview monitors you can use on a photo shoot ![]() .
.