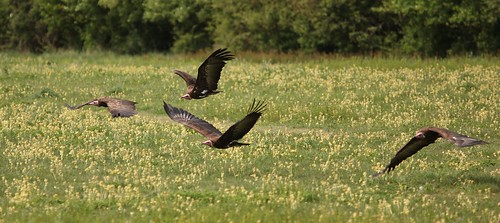
Vultures on the wing – the capture of these birds needs the same panning techniques as any other moving objects.
Click image to view large. “Vultures on the wing” By Netkonnexion on Flickr ![]()
The capture of birds in flight is fun.
Birds rarely stay still for long and move fast when flying. The techniques here will provide basic ways for you to master birds-in-flight photography. The ideas build on techniques used in other areas of photography.
Panning techniques
Bird-in-flight shots are about movement. With any moving thing the only way to capture a sharp shot is to pan with the subject as it moves. Bird-in-flight panning uses the same techniques as other action shots. To learn panning techniques check out this series Action shots – How to….
As with any photographic technique, mastery comes with practice. If you are learning panning to photograph birds, start by panning cars. They are big targets and move with consistent speeds. They come past at regular intervals so practice is easy. You can practice almost anywhere and you will learn to pan quickly. Then, when you are ready, move onto smaller bird targets when you have mastered the simple movements and turning speeds.
Camera settings
Applying simple panning techniques is easy but the detail is important. The speed at which the birds are flying is critical. The focus you need to use is equally as critical. Here are some simple steps to set up the shots…
- Take a photograph of your subjects using automatic mode. You will use this as a starting point. Note down the settings for:
• ISO,
• Shutter speed and
• aperture. - Next, set the camera to manual mode.
- Set your manual settings to those you noted from your auto-mode shot. You are going to gradually vary the settings until you get them right.
- The ISO setting will need to be fixed (for now). Leave it as you set it from your first (automatic) shot.
- Aperture is going to be an artistic decision. If you need to have the background sharp then you can tend toward higher F.stop numbers – say F11. If you need it soft (with bokeh) then use a wider aperture (F 4.0 to F5.6).
- Shutter speed is going to dictate how much movement you will see in the wings. To be safe, start with a faster shutter speed to freeze the action (500th, or 200th with flash).
You will be making changes to these settings from your original setting you noted from the auto-mode shot. Just remember, all settings are related. They balance. A change one way with a setting will need a compensation with another setting. If you need to move toward a faster shot to freeze the action you need to…
- Change the manual setting for shutter speed by one click toward a faster setting. This will be one third of a stop on most DSLRs.
- Then, to balance the settings, move the aperture setting one click off toward a larger aperture. This is because if you have less light coming in (faster shutter) you will need to open the aperture to compensate.
- You can repeat this process until you get the bird to freeze in its movement.
If you set a faster shutter speed, you need to open the aperture to compensate for less light getting in. A wider aperture reduces your depth of field. If you want to keep the depth of field as it was, then you need to increase the ISO by one third of a stop instead.
In other words, to move a setting towards your desired position you need to keep the balance of the other settings by equal amounts.
Focus and framing
When capturing birds-in-flight the focus is critical because the bird is moving. Set your camera focus to “continuous auto focus”. Continuous focus mode adjusts the focus as the bird moves. This allows your camera to maintain some focus control for the moving target.
You also need to set your focal length to approximately where you are going to capture the bird in flight. This means being ready with the approximate focal length to capture the incoming flight path of the bird(s). You may have no idea where the next bird is going to come from. However, you can make some approximate guesses based on experience and your location. The rest is up to you.

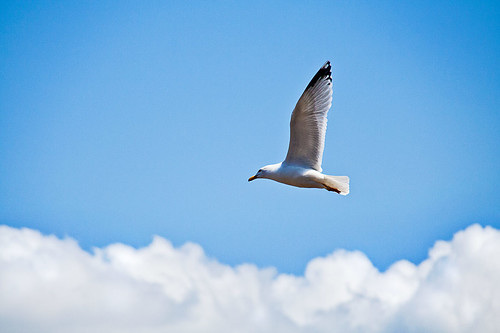
Zoom out from the shot leaving enough room to hold the bird in the frame while panning. Click image to view large.
“Seagull in flight” By Netkonnexion on Flickr ![]()
Setting up the framing is the critical final step.
You need to be able to confidently place the bird in the frame for the shot. However, it is not easy to frame the bird so it fills the frame because they move so fast and are a small target. If you fill the frame when panning you will find it very difficult to get the subject consistently in the frame throughout the pan. So, zoom out. You will have to crop the shots later to bring the bird up to size. Yes, this probably means you are going to have to take more shots and do more post-processing. Unfortunate, but it is in the nature of these types of shots.
You should also consider leaving some room in front of the subject so it looks like it has some space to fly into. If your bird is right up against the edge of the picture in the direction it is going it looks like it is about to fly into something. The viewers eye naturally follows the line of flight and they will be distracted by that line if it is about to fly directly out of the frame.
Applying the techniques
So now you have the settings and you have the location/focus/framing worked out. The rest is practice. Now it’s shoot and wait – shoot and wait. It is time to apply yourself, to try out the techniques.
My personal experience with birds has involved plenty of practice and trial and error. What you read here will give you the essentials. Applying them is about doing some photography and learning as you go along. Enjoy it, panning and photographing birds in flight is great fun.
 Photokonnexion tips by email
If you enjoyed this article please sign up for our
daily email service.
Find out more…
Action shots – how to… A comprehensive course in action shots (including panning)
Composition resources on Photokonnexion
Definition: Exposure
Definition: Aperture
Definition: f number
Definition: ISO
Definition: Shutter Speed
Depth of field
