Tag Archives: Action shots

Low light action shots – tips for getting them right

“Low light action shots” is contributed by Melanie Hyde (Bio) of PaintShopPro.com Low light action shots | External link - opens new tab/page.

Low light action shots need care to get them right.

Low light action shots need care to get them right.

Action photography itself can be extremely challenging. Being in the perfect place at just the right time, capturing that incredible moment. Then, hoping to transport anyone who sees your photo across time and space to take them back to the moment the image was taken. It’s a truly a magical experience, whether you’re taking the picture or the viewer.

Given the challenges that come with action photography, removing most of the light only makes it all the more difficult.

There is good news. The same principles of action photography and proper exposure apply. It’s just a little more challenging to get those low light action shots.

Light sources for your low light action shots

When it comes to taking low light action photos, you’ll need to combine the available light sources. This will help to make the most of the situation. First, take a look around and identify whether the lighting is constant or variable.

Constant Light

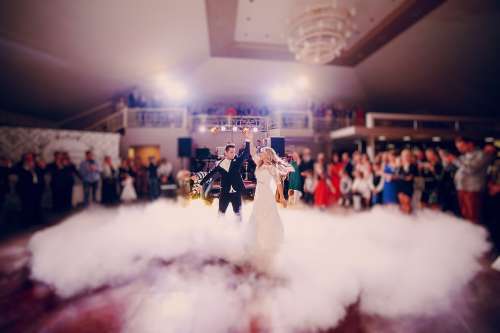
Constant light occurs within your setting when you can isolate out a source for a shot. Framing the shot is important so that the light is consistent for that shot. The next shot may have a different source – you need to isolate the light for that too. For example, if you were shooting a wedding reception, you might capture an image of the bride and groom on the dance floor. Then, you turn around and capture an image of the bride’s parents dancing across the room. Depending on the setting, the lighting may be different between the two subjects but consistent within each shot.

When lighting is consistent, operating your camera becomes much easier. The camera can adjust to meet the needs of the low light action shots. Here are a few points to keep in mind when shooting with constant low light:

  • Shoot in shutter priority mode so the camera can adjust.
  • Use Auto White Balance so the camera can adjust.
  • Manually control your ISO.
Variable light

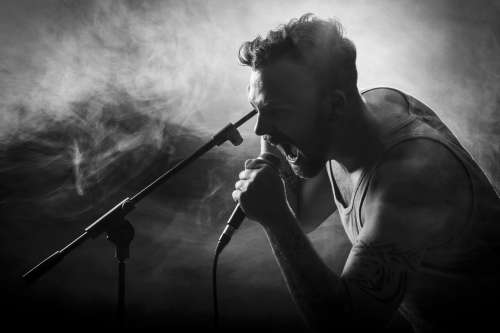
Variable light occurs when light sources are constantly changing and are inconsistent across your field of view. Imagine you’re photographing the lead singer at a rock concert. You may have to deal with strobes, spotlights and pyrotechnics. The constant changes in light sources will cause your camera to struggle to automatically expose the image correctly.

Low light action shots with variable light sources can confuse your camera - go manual.

Low light action shots with variable light sources can confuse your camera – go manual.

When dealing with variable light conditions it’s usually best to go manual. In this situation, remember to:

  • Manually set your aperture and shutter speed.
  • Manually set your White Balance.
  • Manually set your ISO.
Balance aperture, shutter speed, and ISO

You have three ways to control the way your camera exposes an image. Aperture, shutter speed, and ISO. To successfully capture great low light action shots, you must be able to manipulate these elements. Select settings that allow you to capture the highest quality image for the ambient light conditions.

The exposure triangle helps you to keep your shot’s exposure within the capability of the camera and lens. So when going manual your settings should allow these three essentials to balance. Look in your viewfinder to get the needle settled in the centre for a proper exposure. For more detail check out The Exposure Triangle – An aid to thinking about exposure.
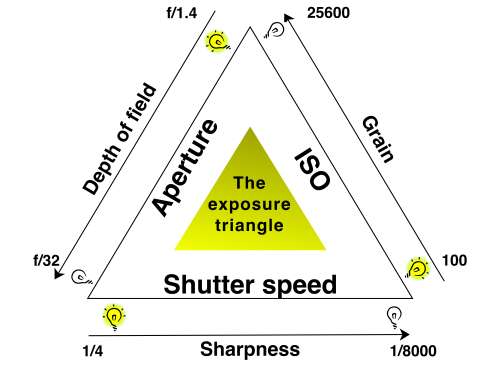
The exposure triangle is an idea that helps you balance aperture, shutter speed and ISO for a good exposure.

The exposure triangle is an idea that helps you balance aperture, shutter speed and ISO for a good exposure.

Start with shutter speed

Low light action shots are by definition going to be in difficult light for your camera. Getting your shutter speed right can be tricky. However, it has a huge impact when shooting movement in low light. The following diagram will help you select the right setting.
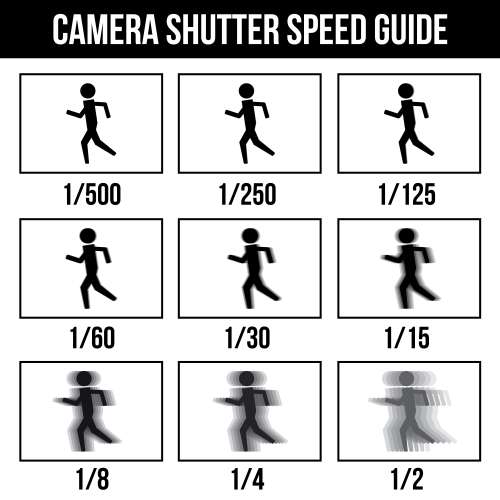
Camera shutter speed guide.

Camera shutter speed guide :: Low light action shots need the right camera speed. If the shutter speed is too low you get blurring.

You have to select a speed that is fast enough to capture the motion clearly and without blur. The speed should still slow enough to deal with the lack of light. For action shots, it’s always best to use the fastest shutter speed that the light allows. It is a balancing act so you will need to practice.

Select the widest aperture for your low light action shots

In action photography, capturing crisp and clean images is usually the priority. When shooting with low light settings, it’s crucial to get as much light to your sensor in the small amount of time that your shutter is open as possible.
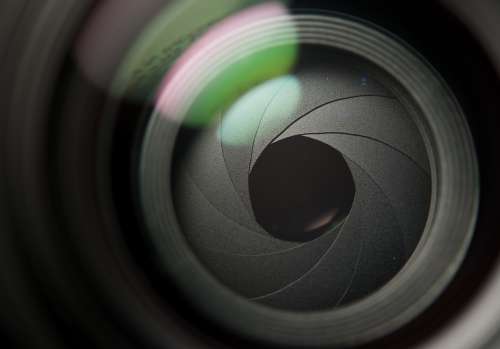
For low light action shots use a wide aperture to increase the incoming light.

The aperture sets the initial amount of light coming into the lens. For low light action shots use a wide aperture to increase the incoming light.

To accomplish this, use the widest aperture that your camera allows. While shooting in shutter priority mode, you allow your camera to do this automatically. Shooting in manual mode however, you’ll need to keep a close eye on your exposure. You need to make sure that your images are not underexposed in the low light.

Using high ISO

Are your images are consistently coming out blurry with your aperture is as wide as can be? Consider stepping up your ISO settings.
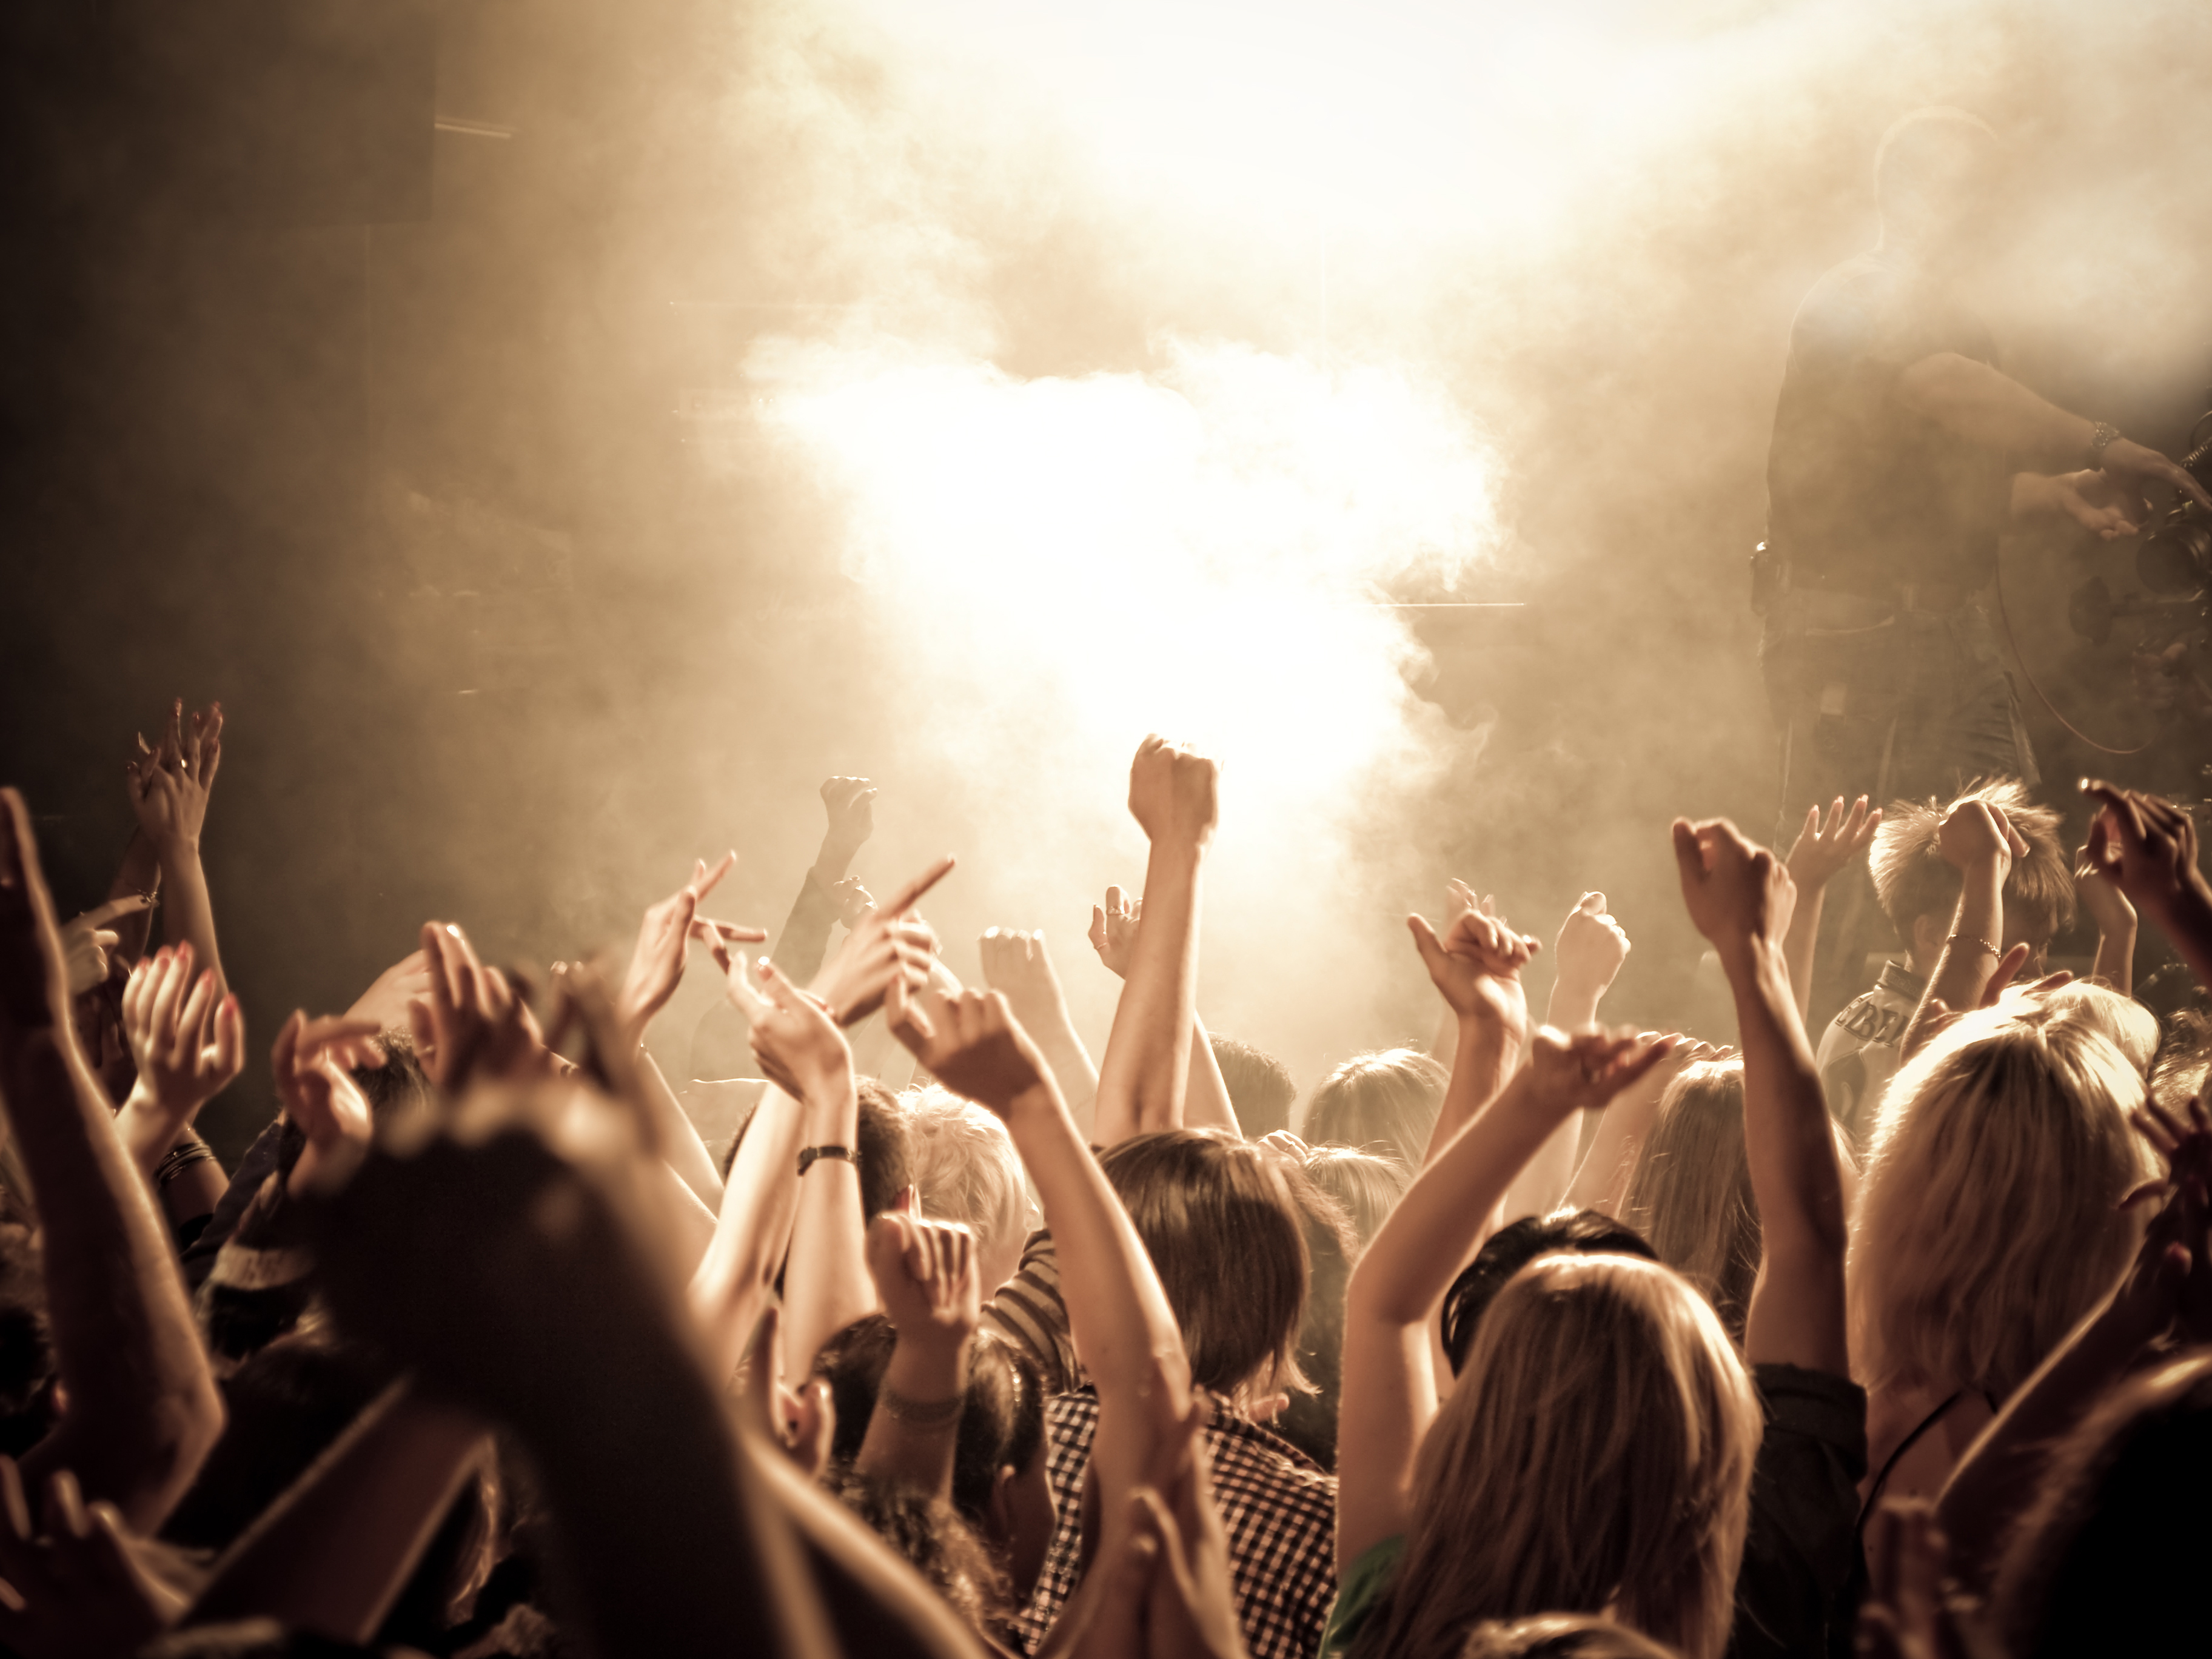
Your low light action shots can really win the day if you get your ISO right.

On the dance floor the light is almost always difficult. Your low light action shots can really win the day if you get your ISO right.

By changing your ISO, you alter your camera’s sensitivity to light. The higher the ISO, the more exposed your image will be. Just be cautious: using a higher ISO may introduce more “noise” to your photos. This noise can often be reduced or corrected in a post-processing software like PaintShop Pro Low light action shots | External link - opens new tab/page or Lightroom Low light action shots | External link - opens new tab/page. (Shooting in RAW is especially helpful with noise reduction).

Check your work as you go

Throughout the shoot, use your histogram. (See: Can you use the histogram on your camera?) It will help to make sure you’re exposing your images correctly. The histogram shows the distribution of the type of light in your shot. It aims to help you capture a consistent amount of light across the full spectrum of your image.
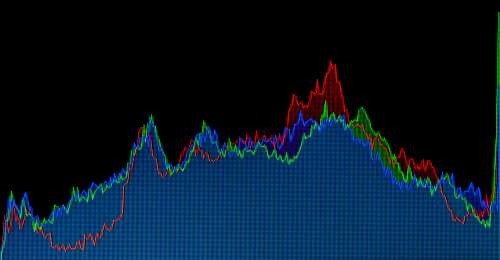
The histogram on your camera helps you ensure effective use of light in your exposure.

The histogram on your camera helps you ensure effective use of light in your exposure.

The histogram on your camera helps you ensure effective use of light in your exposure.

You’ll also want to make sure that your white balance looks good and adjust accordingly. In most cases, your camera is going to be able to set white balance automatically, but you may need to tweak it; especially if your lighting is wildly inconsistent.

Increase your odds

Low light action shots are all about being in the right place at the right time with the right equipment.

Use the fastest lens you can find. The wider the aperture, the more light your lens allows to strike your camera sensor. Anything higher than F2.8 will cause you to struggle with exposure.

Set the camera to continuous drive. This equips your camera to capture a burst of images every time you press the shutter release and gives you a better chance of capturing that perfect picture.

Use a fast memory card. Your camera can only capture images as fast as it can write them to the memory card. If you snap too many images in rapid succession, you’ll have to wait for the card to catch up with your camera and you might miss “the shot.”

Be prepared to shoot…a lot. You’re going to have a lot of images that are no good. So remember to keep tinkering with your settings. The key is shooting lots of images at different settings until you get the perfect mix.

Don’t forget to have fun

Low light action photography can be both challenging and fulfilling. As you refine your skills and your eye for lighting, action, and composition, remember to regularly experiment and try new settings.

Comments, additions, amendments or ideas on this article? Contact Us
or why not leave a comment at the bottom of the page…

Like this article? Don’t miss the next — sign up for tips by email.

How many types of blur are there in photography?

Blur by Netkonnexion - types of blur

Blur by Netkonnexion
Click image to view large
Blur By Netkonnexion on Flickr External link - opens new tab/page
There are many types of blur in photography.

Not all blur is equal.

There are various types of blur. It sounds odd. In fact there is a lot more to blur than most people realise. It is quite a varied subject. It is used in nearly all aspects of photography. From abstracts to zooming, we will find some aspect of blur. Lets take a look…

Okay bokeh…

First up, and one of the best known types of blur, is Bokeh. This Japanese word means haze or blur. It originally referred to the quality of blur. Today we use it to describe the actual blur. A sharp subject and a blurred background is created by a blur of tiny circles where each of the tiny points of light are not focused, that is bokeh. It is created by the lens and aperture.

When you use a wide aperture, say f4.0 (or wider) you get a shallow depth of field. The depth of field is the sharp part of the picture. The rest, the out-of-focus part, is blurred. That blur is the bokeh.

Bokeh can add a whole range of composition effects. It is also has its own aesthetic quality. The quality of the little ‘circles’ varies as does the true circular shape of the circles themselves. Photographic lenses with apertures that are more circular produce the best bokeh. Some apertures are more like regular polygons (say a hexagonal). Polygon bokeh is not as pleasing to the eye as circular bokeh. Fewer sides on the polygon forms a less circular bokeh circle. It may even form an obvious bokeh polygon. Manufacturers go to some lengths to make the bokeh pleasing. One way to make the bokeh more circular is to add blades to the aperture diaphragm. That can raise the cost of the lens.

Subject-movement types of blur

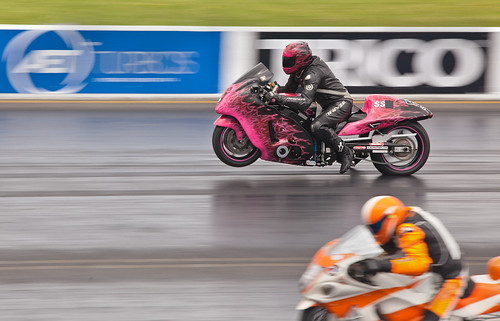
When a subject moves in front of your stationary camera the resulting image has a blurred subject. This is movement blur. The types of blur which include movement can be varied. In the picture above the motor bikes are moving at around 90 miles per hour. When taking this shot I was panning with the far bike resulting in that bike being sharp. The pan meant that my camera was not paced at the same speed as the nearest bike. As a result its movement was relatively out of synchronisation with my camera. The nearest bike was in relative movement and thus blurred.

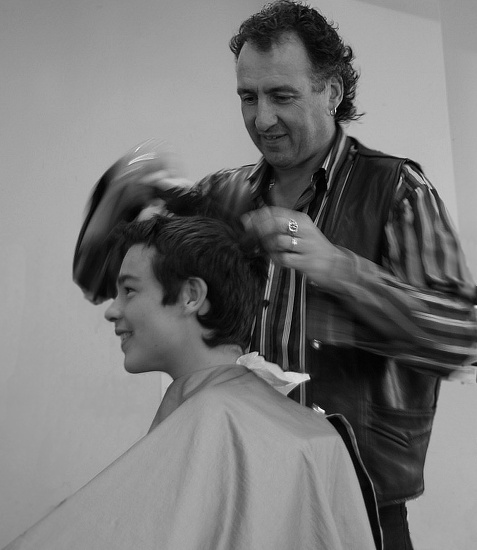
In “The Barber”, below, I have set my camera to capture the blur of his working hands. As with any movement shot, you want some of the shot blurred and some sharp. If it is all blurred it just looks badly taken.

The Barber

• The Barber By Netkonnexion in 365Project •
Click image to view large
The Barber By Netkonnexion in 365Project External link - opens new tab/page
The movement of the hands is blurred to simulate his hair cutting work. Types of blur created in-camera are most effective.

Movement of the subject is controlled by shutter speed. To get it right you have to practice with the speed of that subject. Try the subject at slow speed first. Once you have an idea of the settings, speed the subject up. As you develop a feel for the speed-of-movement versus the shutter-speed you will be able to get a sharp background but a blurred subject.

More types of blur… Camera movement

When a subject is moving pan your camera with it. I did that in the bike picture at the top of the page and got a sharp bike placed against a blurred background. That is not bokeh in the background. As the camera panned with the bike it captured a stationary background. However, as the camera was moving it created a movement blur on the background.

Movement blur of the background normally occurs when panning. If you hold a stationary camera out of a car window and take a long exposure and the same type of blur will result. However, nothing will be sharp in that case (unless something next to you is travelling at your exact speed).

Done right background blur from camera movement has great impact. In the motorbikes above it gives a race feel. It looks really fast.

Some blur is not so good

Hand movement during a shot causes all sorts of blur. You get blurred shadows, blurred faces, possibly jerky tracks… not good at all. However, you can have some fun with this sort of movement. Some famous pictures have been created by deliberate hand movements. There are lots of shots, like tree shots  External link - opens new tab/page, where the movement of the camera creates a surreal or abstract view of the subject. Some people have tried throwing their camera and triggering it in mid-air – some bizarre results can be obtained (including a smashed camera).

Out of focus types of blur

Of course it is possible to completely blur a shot quite deliberately. Some pleasant aesthetic effects can be achieved. Wedding and romantic photographers love the “soft focus” shot. This is a deliberate very slight lack of sharpness. It emphasizes the romantic, soft nature of something… kittens, brides, the first kiss, baby and so on. Google images of soft focus shots provides quite a good range of possibilities for this type of blur.

The soft focus shot can be created different ways. Each give slightly different types of blur. You can literally set the lens to manual focus. Then when properly focussed pull the focus slightly back. so as to create a small amount of blur. Another way to do it is to use a soft focus filter. These are simply screwed to the end of the lens and give the same effect. When I was first starting out in photography many wedding photographers carried a flesh coloured or white nylon stocking. Pulled tight over the lens while the photograph is taken it creates a soft focus effect. Others like a skylight (ultraviolet) filter with a tiny amount of grease smeared on it. All these work, but give you a slightly different soft focus effect. Experiment… have fun!

Zoom blur

One of the less well known types of blur – zoom blur. You need a steady hand or better, a tripod. It makes the picture look like the world is rushing toward you very rapidly.

Adjusting the zoom during exposure creates zoom blur. Set your camera to have a long exposure – around one second is good. Balance the shutter speed with the ISO and aperture to get a proper exposure. You will need to use manual focus to adjust the zoom in the shot. Press the shutter button and rotate the zoom focus ring. A short turn or through its full arc – the amount of turn gives different effects. With a bit of practice you can reduce hand-shake blur. A smooth zoom throughout the exposure creates some great effects. Look through this page of zoom blur images on Google for some ideas…  External link - opens new tab/page.

Artificial blur

Most image editors have software filters to create types of blur. In fact there are a variety of different software filtersavailable. Gaussian blur is one common type. It softens or smooths the image, but also causes loss of detail. There is also rotational blur (self explanatory); linear blur or movement blur – you choose the direction of the blur. Other editng packages will have other blur types too.

Artificial types of blur do not have the same effect as blurs created in-camera. Artificial blur tends to lack depth. Whereas, blur using depth of field gives depth to a picture. The bokeh and movement blurs both have the impact of realism and depth as they vary throughout the depth of the image. Applying a uniform artificial blur can affect the realism. Applied with care and artful work you can make artificial blur look real. It is all about care and attention.

Are there more blurs?

There are probably other types of blur. They may fit into one or more of the categories above. Why not let us know about others. I would like to hear of new ideas and types of blur.

Comments, additions, amendments or ideas on this article? Contact Us
or why not leave a comment at the bottom of the page…

Like this article? Don’t miss the next — sign up for tips by email.

By Damon Guy (author and Photokonnexion editor)

Damon Guy - Netkonnexion

Damon Guy (Netkonnexion)

Damon is a writer-photog and editor of this site. He has run some major websites, a computing department and a digital image library. He started out as a trained teacher and now runs training for digital photographers.
See also: Editors ‘Bio’.

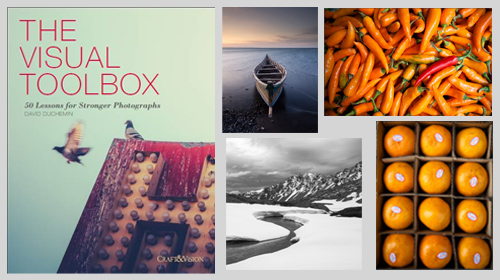
Visual toolbox for photographers

Sharpen up your creative photography…

It’s easy when starting photography to over emphasis the importance of gear. In fact it’s ‘photographers eye’ that really makes the difference. Your vision and insight into a scene are critical to producing a wonderful image.

Sage advice from a world master

The Visual Tool Box by David duChemin is all about the skills of composition. He goes into depth around the background ideas which help you look at a scene. The ultimate success in photography is to make your image a pleasure to view. Aesthetics rule – it’s as simple as that. This book is dedicated to teaching you the tools you need to develop the ‘eye’.

David duChemin says,

These are the lessons I wish I’d learned when I was starting out.
The Visual Tool Box by David duChemin

This is my kind of book. He writes superbly, in simple, readable form. His examples are excellent and the pictures are just amazing. But most of all the book is organised for learners to extend their knowledge in easy, well structured steps. This book is all about putting new tools in your photographic tool box and it achieves that with an ease that any beginner will find a joy.

Composition

The book is packed with examples of the sort of compositional ideas that really work – for anyone. Just look at some of the topics covered…

  • Manual
  • Optimize Your Exposures
  • Master the Triangle
  • Slower Shutter Speed
  • Learn to Pan
  • Use Intentional Camera Movement
  • Use Wide Lenses to Create a Sense of Inclusion
  • Learn to Isolate
  • Use Tighter Apertures to Deepen Focus
  • Use Bokeh to Abstract
  • Consider Your Colour Palette
  • Lines: Use Diagonals to Create Energy
  • Lines: Patterns, Lead my Eye, Horizons
  • See the Direction of Light
  • Light: Front Light, Side Light, and Back Light
  • Quality of Light: Further Consideration
  • White Balance for Mood
  • Light: Reflections, Shadow, Silhouettes, Lens Flare
  • People
  • Experiment with Balance and Tension
  • Use Your Negative Space
  • Juxtapositions: Find Conceptual Contrasts
  • Orientation of Frame
  • Choose Your Aspect Ratio
  • Use Scale
  • Simplify
  • Shoot from the Heart
  • Listen to Other Voices (Very Carefully)

And there is plenty more content to complement and extends these ideas. What’s not shown in a list is the excellent and sage advice throughout the book. I will let David duChemin have the last word…

Pace your-self. Anyone can master a camera; that just comes with time. It’s the other stuff — learning to think like a photographer — that takes so much work and allows this craft to become the means by which you create art.
The Visual Tool Box by David duChemin

And it is thinking like a photographer that you will quickly learn from reading this book.

How to buy this great book

This book was originally published as an ebook. However, it is no longer available in that form. The book has moved into the real world. It will be available on Amazon as a Paperback From 31 Mar 2015.
The Visual Toolbox: 60 Lessons for Stronger Photographs (Voices That Matter)You can per-order the book from Amazon.

Comments, additions, amendments or ideas on this article? Contact Us
or why not leave a comment at the bottom of the page…

Like this article? Don’t miss the next — sign up for tips by email.

Damon Guy - Netkonnexion

Damon Guy (Netkonnexion)

Damon is a writer-photographer and editor of this site. He has run some major websites, a computing department and a digital image library. He started out as a trained teacher and now runs training for digital photogs.
See also: Editors ‘Bio’.
By Damon Guy see his profile on Google+.

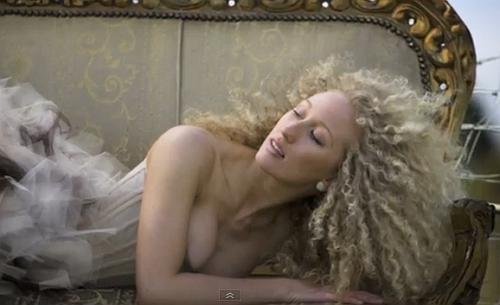
Action portraits… easy to do

Action Portraits

• Action Portraits •
Getting the shot in action situations is not difficult although the lighting can prove a key aspect of success. (Shot taken from the video)

Getting it right…

Most photographers have a go at action shots. Vehicles are common targets – they are easy to find and fun to do. Action portraits can be great fun too and you can do them at home.

Lets talk flash…

 Set up pictures at home to show some action.

Easy action shots at home for anyone.
“Some more bed-jump!!” by Mr Din, on Flickr  External link - opens new tab/page

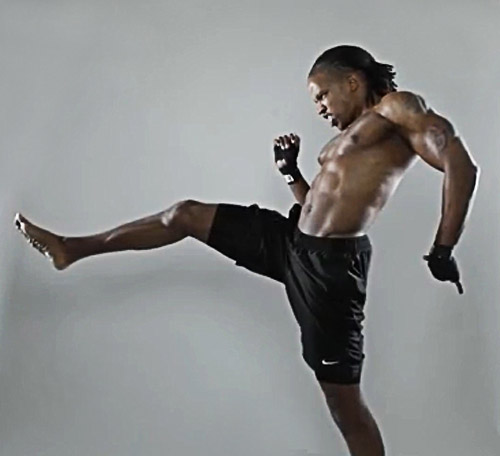
In its most basic form, it’s a portrait of someone in motion (action?). The wonderfully muscled fighter in the shot above is one way to go. On the other hand pictures of your grand children jumping into the air can be just as effective – and probably more relevant for many of us!

Use off-camera flash for best results

The basic technique is to capture the action with a flash. You can use the on-board flash on your camera. However, it will tend to leave tight shadows on the wall behind the action because the flash is directly in line with the optical axis of the camera. Such shadows look artificial and are difficult to remove in post processing. They look as if there is a slight double image. In the picture of the jumping children the flash is from the left hand side. If you look carefully the shadows are projected away from the kids giving a more realistic feel.

Off-camera flash can be placed to the side of the shot and used to illuminate the scene, give it a little depth and off-set those harsh shadows. For this you can use an off-camera flash. I use this one…

YONGNUO YN460 Flash Speedlite for Canon Nikon Pentax Olympus…  External link - opens new tab/page
This is an excellent buy… it is inexpensive and can be used for any off-camera flash situations. It is reliable, robust, flexible and effective.

I have several of these flash units. At about one fifth of the price of a branded product they are excellent value. If you want to get something a little more sophisticated you can get the YONGNUO YN-560 II Flash unit  External link - opens new tab/page – also a great product. With inexpensive remote flash triggers  External link - opens new tab/page you can set them off when not connected to the camera.

What are you going to capture?

Plan out your scene in advance. You will need someone to be the action taker. You could use more than one person. Then, work out what they are going to do. Jumping on the spot is a favourite. You also try jumping or stepping off something like a chair or low table. You can do skipping, walking, Kung Fu, Juggling, tumbling, hula-hoop, playing ball… well all sorts of things.

How do you do it?

I am assuming that you will be working in a domestic room with a white wall behind the actions.

It is best to use a robust tripod to mount your camera. This is essential. Action shots often cause floor movement and you want a good tripod (Manfrotto 055XPROB)  External link - opens new tab/page and tripod head (Manfrotto 322RC2 Grip Ball Head)  External link - opens new tab/page to give you a chance.

You will need to pre-focus your shot and have it ready to take because you cannot easily compose for action in progress. So set up the camera in advance. Here are some typical settings to get you started…

  • Turn off image stabilisation on your lens.
  • Focus your lens on your subject then turn off the auto-focus.
  • Set white balance to the appropriate ambient light setting.
  • Set ISO to 200 (or 400 experiment).
  • Aperture priority (select F5.6 as a start) [Shutter speed will be set by the camera].
  • Flash synchronisation – 200ths or 250ths of a second (if you need to set it check your manual).
  • Flash setting, try the lowest setting or 1/16th or 1/8th power – again, experiment.

This will give you appropriate starting points. Check you shot and then make any changes to the settings. If you click up or down a setting – say aperture or ISO – then the camera will compensate with a different shutter setting for you. Experimentation is good!

OK, now you are ready for action… this part takes a little practice. The idea is to sit next to your camera ready to push the shutter button as soon as the action is where you want it. As you have already lined up your focus the person can now perform and you can press the button as you see fit to capture your shots. Fire away, enjoy yourself.

Two tricks you have learned here

1. The pre-set-up of your shot is important. There are lots of situations where you can do that. So think about it – that is one of the benefits of having a tripod.
2. Flash! The way to capture a good shot like this is to have a very fast shutter speed. That freezes the action. However, I have suggested you hand the shutter speed to the camera by using the “aperture priority” mode. Well, you can in fact control shutter speed another way. By varying the flash duration. “What?”… I hear your cry. “You did not tell us about that control! But I did. Flash intensity is always the same for any given micro-second. It becomes more intense for the sensor if you leave it on longer. When you set the power of the flash to low power you are actually shortening the length of the flash. Hence you are more able to freeze the action. However, to do this you will need to have your ambient light lower. So using natural light rather than bright room lights works better for this technique.

See how its done in a video

In the video you can see all this action in a full process. The photographer, Joel Grimes, starts off by some discussion about how he came to discover this secret and how he used it in a studio context. Then from about six minutes into the video he shows you how to take the shots.

Remember that the settings are important. He mentions about low power and says that it works to freeze the action IF the flash is more intense than the ambient light. Watch out for that.

One other thing worth looking at is the shot progression. He is constantly assuring his model that he has done a good job. Then he is at the same time developing his shot. He is constantly evolving the positions and situations until he gets the shot he wants. This is critical. Make sure you look out for odd lighting effects, hands over face, bits of body out of the frame etc… He works the shot to reach his ideal as he visualised it – then stops. Even great photographers have to practice and perfect a shot. This is quite a helpful lesson about that. Enjoy!
“Special FX, High Speed Action”

Framed show  External link - opens new tab/page

Comments, additions, amendments or ideas on this article? Contact Us
or why not leave a comment at the bottom of the page…

Like this article? Don’t miss the next — sign up for tips by email.

By Damon Guy (author and Photokonnexion editor)

Damon Guy - Netkonnexion

Damon Guy (Netkonnexion)

Damon is a writer-photog and editor of this site. He has run some major websites, a computing department and a digital image library. He started out as a trained teacher and now runs training for digital photographers.
See also: Editors ‘Bio’.

How to prepare for a photo safari and what to take

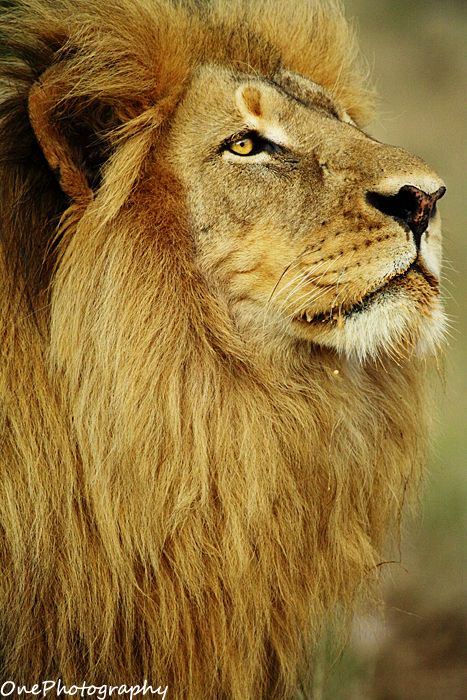
The King

• The King
Image by John de Jager • OnePhotography  External link - opens new tab/page

Going on safari – it’s amazing.

Photographic safaris should be experienced by every photographer at least once in a lifetime. They provide the perfect opportunity to photograph wildlife and nature as they are dedicated tours focusing on photography.

What is on offer on a photo-safari?

Most offer private vehicles allowing the photographers to focus on specific wildlife, spend the needed time with the wildlife to get the shot, and allow for a more flexible approach to the safari. Most importantly, the safari is hosted by an expert wildlife photographer to assist clients with getting the perfect shot and then processing the images.

How should you prepare

• Contact the operator of your chosen photographic safari company and confirm with them what their recommended equipment is. This can vary from area to area, especially with regards to lenses. Some reserves allow vehicles to follow animals off road and one can get away with shorter lenses e.g. 200mm. Other reserves are more restricted and longer lenses are required e.g. 600mm.
• Spend time getting to know your camera and equipment. Wildlife photography is not static. You will see fast moving subjects and shifting light. You should be able to change settings quickly.
• Practice by photographing pets or birds in your local home area. Get a feel for photographing a moving subject. (You can get some more advice on this in our action photography course – Editor).
• Beginners and amateurs, don’t worry! This is exactly why an expert wildlife photographer joins you on safari. The host will assist you with the best camera settings and how to get the best out of your camera.

On a mission

• On a mission •
Click to view large
Image by John de Jager • OnePhotography  External link - opens new tab/page

What you should take

Once you are out in the field it is not easy to get more equipment. Think ahead…
• A camera and lens within your price range (some operators offer equipment rental). Lens wise, it is good to have a wide angle lens for landscapes and a telephoto lens for the animals.
• An external flash with spare batteries is well worth having. If you can also bring a wireless flash transmitter to avoid “red-eye”.
• A shutter release switch for star trails and possibly an (intervalometer).
• Take enough memory cards (high speed). I have shot 8GB in RAW images in less than an hour on safari before, so it is important to have enough backup memory space available. Some form of external storage device to transfer images onto after each safari is advisable too. The reason why I suggest high speed cards is because in wildlife photography you will often shoot in high speed continuous mode. Card speeds affect how many frames you can capture in a burst of shots.
• Take spare batteries. You can be out on a drive for many hours at a time.
• A good laptop powerful enough to process images on Photoshop/lightroom or other post-processing software. Some operators offer monitors to uplink to for editing purposes but if not, bring a laptop with dedicated graphics and an RGB LED screen.
• A memory card reader or method of downloading your images to clear your memory cards each day.
• A good lens cleaning kit is essential. Being out in the field leads to dust collection!
• Insure your equipment! Weather can be unpredictable and I have had a client lose a Canon 600mm lens in a freak wind storm that caused a log to fall on the lens. The lens was not insured…!
• Bean bag or vehicle mount to hold your camera nice and still while shooting.
• Plastic packets, waterproof camera sleeves or waterproof material! Thunderstorms are common in Africa through the summer months. So bring something just to cover up that lens or camera.
• Bring a lot of patience! Wildlife photography is often about waiting for the right moment. Under the guidance of your host and guide, this wait will be more than worth it.
• A willingness to learn and share. It is important on these safaris to be willing to learn, not just about photography but about the creatures you are photographing. The more you learn about animal behaviour. the better. It will allow you to anticipate your next shot. Share with the others on safari too. Everyone has some idea or technique that may just help others in the group.
• An ethical respect for nature is very important. Not only is it unethical to disturb animals to get a shot, but it can at times put you and the rest of the clients in danger.
• Adequate protection against the sun (hats, sun cream etc).

John de Jager (Contributing Author)

John de Jager is the owner of Onephotography, a photographic safari company operating in South Africa. They specialize in luxury photographic safaris focusing on rare and endangered species found in South Africa – as well as all the classic wildlife. See OnePhotography on FaceBook  External link - opens new tab/page for regular updates and stunning imagery.

Comments, additions, amendments or ideas on this article? Contact Us
or why not leave a comment at the bottom of the page…

Can you write? Of course you can!
Write for Photokonnexion...

We would love to have your articles or tips posted on our site.
Find out more…
Write for Photokonnexion.

Simple portrait tips, excellent advice

Simple portrait tips - Excellent Advice

• Portrait by Bambi Cantrell •
Simple portrait tips: seeing the person, seeing the light, seeing simplicity.
(Image from the video)

The best portraits show the person

When photographer and subject gel the magic of portrait photography bursts forth. Bambi Cantrell just bubbles over with enthusiasm about portraiture. And, she gives simple portrait tips and great advice. See the person, see the light – make it simple. In this short video she explains about her portraiture. Really worth watching for the enthusiasm and the advice.

Wedding & Portrait Photography Tips & Advice by Bambi Cantrell

This video is all about simple portrait tips although Bambi also includes wedding photography ideas. But much of wedding work is about portraiture.
Marc Silber – Silber Studios

Simple portrait tips and light

The simplicity in seeing light passes many beginners by when they are starting. These simple portrait tips reveal how light can be used to good effect. But in real terms many of the most important tips about photography are lost if you don’t get great light. So follow up these simple portrait tips with a study of light – especially in your portrait work. Check out these Light and Lighting resources, articles and links

Comments, additions, amendments or ideas on this article? Contact Us

find out more...Photokonnexion tips by email
If you enjoyed this article please sign up for our
Tips by email service.
                                                 Find out more

Damon Guy - Netkonnexion

Damon Guy (Netkonnexion)

Damon is a writer-photographer and editor of this site. He has run some major websites, a computing department and a digital image library. He started out as a trained teacher and now runs training for digital photogs.
See also: Editors ‘Bio’.
By Damon Guy see his profile on Google+.

The Minimalist Guide to Successful Photography

• Being a successful photographer is about doing things that are different •

• Being a successful photographer is about doing things that are different •
Photograph by Joe McNally

Work hard – do things to get noticed.

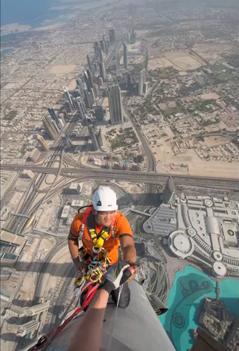
OK, it is not as simple as that. But it is a time-honoured route to success. Famous photographers go for the stunning shot. The video shows a world class photographer going to extraordinary lengths to get the shot. And, he certainly does that. Wow. Stomach churning stuff.

I just had to show you this video for its sheer tenacity. Joe McNally is an exceptional and successful photographer. He is also, after many years in the business, still getting the shots. This is the stuff that impressive photography is about. This personal project is how people like him stay at the top of the photography business… and the top of the world – literally.

Climbing the Burj Khalifa (The World’s Tallest Building)


joemcnallyphoto  External link - opens new tab/page

If you can keep cool under any circumstances, get the quality of shots that capture the eye and run a business you can be like Joe McNally. See… I did say a minimalist guide to success in photography!

find out more...Photokonnexion tips by email
If you enjoyed this article please sign up for our
Tips by email service.
                                                 Find out more