Tag Archives: Action

Low light action shots – tips for getting them right

“Low light action shots” is contributed by Melanie Hyde (Bio) of PaintShopPro.com Low light action shots | External link - opens new tab/page.

Low light action shots need care to get them right.

Low light action shots need care to get them right.

Action photography itself can be extremely challenging. Being in the perfect place at just the right time, capturing that incredible moment. Then, hoping to transport anyone who sees your photo across time and space to take them back to the moment the image was taken. It’s a truly a magical experience, whether you’re taking the picture or the viewer.

Given the challenges that come with action photography, removing most of the light only makes it all the more difficult.

There is good news. The same principles of action photography and proper exposure apply. It’s just a little more challenging to get those low light action shots.

Light sources for your low light action shots

When it comes to taking low light action photos, you’ll need to combine the available light sources. This will help to make the most of the situation. First, take a look around and identify whether the lighting is constant or variable.

Constant Light

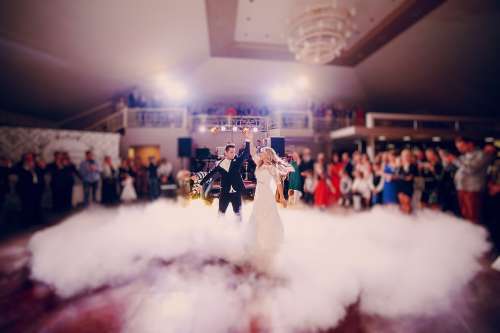
Constant light occurs within your setting when you can isolate out a source for a shot. Framing the shot is important so that the light is consistent for that shot. The next shot may have a different source – you need to isolate the light for that too. For example, if you were shooting a wedding reception, you might capture an image of the bride and groom on the dance floor. Then, you turn around and capture an image of the bride’s parents dancing across the room. Depending on the setting, the lighting may be different between the two subjects but consistent within each shot.

When lighting is consistent, operating your camera becomes much easier. The camera can adjust to meet the needs of the low light action shots. Here are a few points to keep in mind when shooting with constant low light:

  • Shoot in shutter priority mode so the camera can adjust.
  • Use Auto White Balance so the camera can adjust.
  • Manually control your ISO.
Variable light

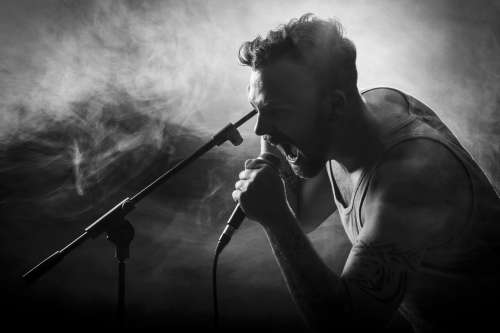
Variable light occurs when light sources are constantly changing and are inconsistent across your field of view. Imagine you’re photographing the lead singer at a rock concert. You may have to deal with strobes, spotlights and pyrotechnics. The constant changes in light sources will cause your camera to struggle to automatically expose the image correctly.

Low light action shots with variable light sources can confuse your camera - go manual.

Low light action shots with variable light sources can confuse your camera – go manual.

When dealing with variable light conditions it’s usually best to go manual. In this situation, remember to:

  • Manually set your aperture and shutter speed.
  • Manually set your White Balance.
  • Manually set your ISO.
Balance aperture, shutter speed, and ISO

You have three ways to control the way your camera exposes an image. Aperture, shutter speed, and ISO. To successfully capture great low light action shots, you must be able to manipulate these elements. Select settings that allow you to capture the highest quality image for the ambient light conditions.

The exposure triangle helps you to keep your shot’s exposure within the capability of the camera and lens. So when going manual your settings should allow these three essentials to balance. Look in your viewfinder to get the needle settled in the centre for a proper exposure. For more detail check out The Exposure Triangle – An aid to thinking about exposure.
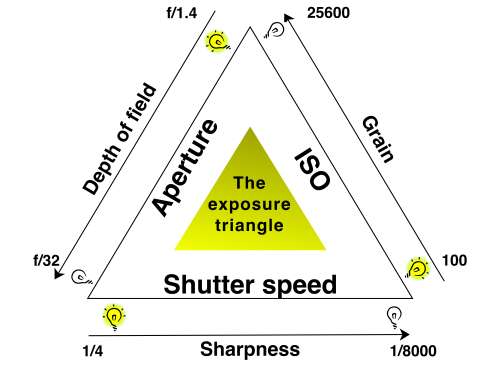
The exposure triangle is an idea that helps you balance aperture, shutter speed and ISO for a good exposure.

The exposure triangle is an idea that helps you balance aperture, shutter speed and ISO for a good exposure.

Start with shutter speed

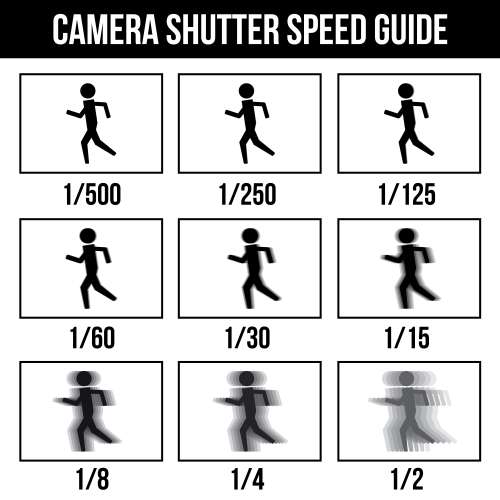
Low light action shots are by definition going to be in difficult light for your camera. Getting your shutter speed right can be tricky. However, it has a huge impact when shooting movement in low light. The following diagram will help you select the right setting.
Camera shutter speed guide.

Camera shutter speed guide :: Low light action shots need the right camera speed. If the shutter speed is too low you get blurring.

You have to select a speed that is fast enough to capture the motion clearly and without blur. The speed should still slow enough to deal with the lack of light. For action shots, it’s always best to use the fastest shutter speed that the light allows. It is a balancing act so you will need to practice.

Select the widest aperture for your low light action shots

In action photography, capturing crisp and clean images is usually the priority. When shooting with low light settings, it’s crucial to get as much light to your sensor in the small amount of time that your shutter is open as possible.
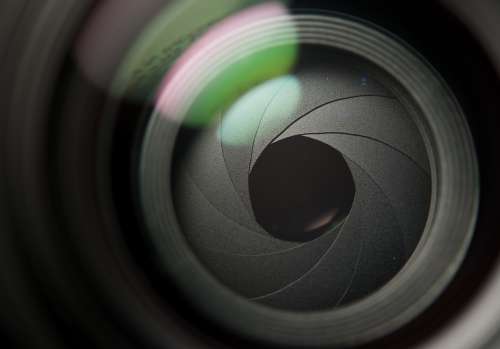
For low light action shots use a wide aperture to increase the incoming light.

The aperture sets the initial amount of light coming into the lens. For low light action shots use a wide aperture to increase the incoming light.

To accomplish this, use the widest aperture that your camera allows. While shooting in shutter priority mode, you allow your camera to do this automatically. Shooting in manual mode however, you’ll need to keep a close eye on your exposure. You need to make sure that your images are not underexposed in the low light.

Using high ISO

Are your images are consistently coming out blurry with your aperture is as wide as can be? Consider stepping up your ISO settings.
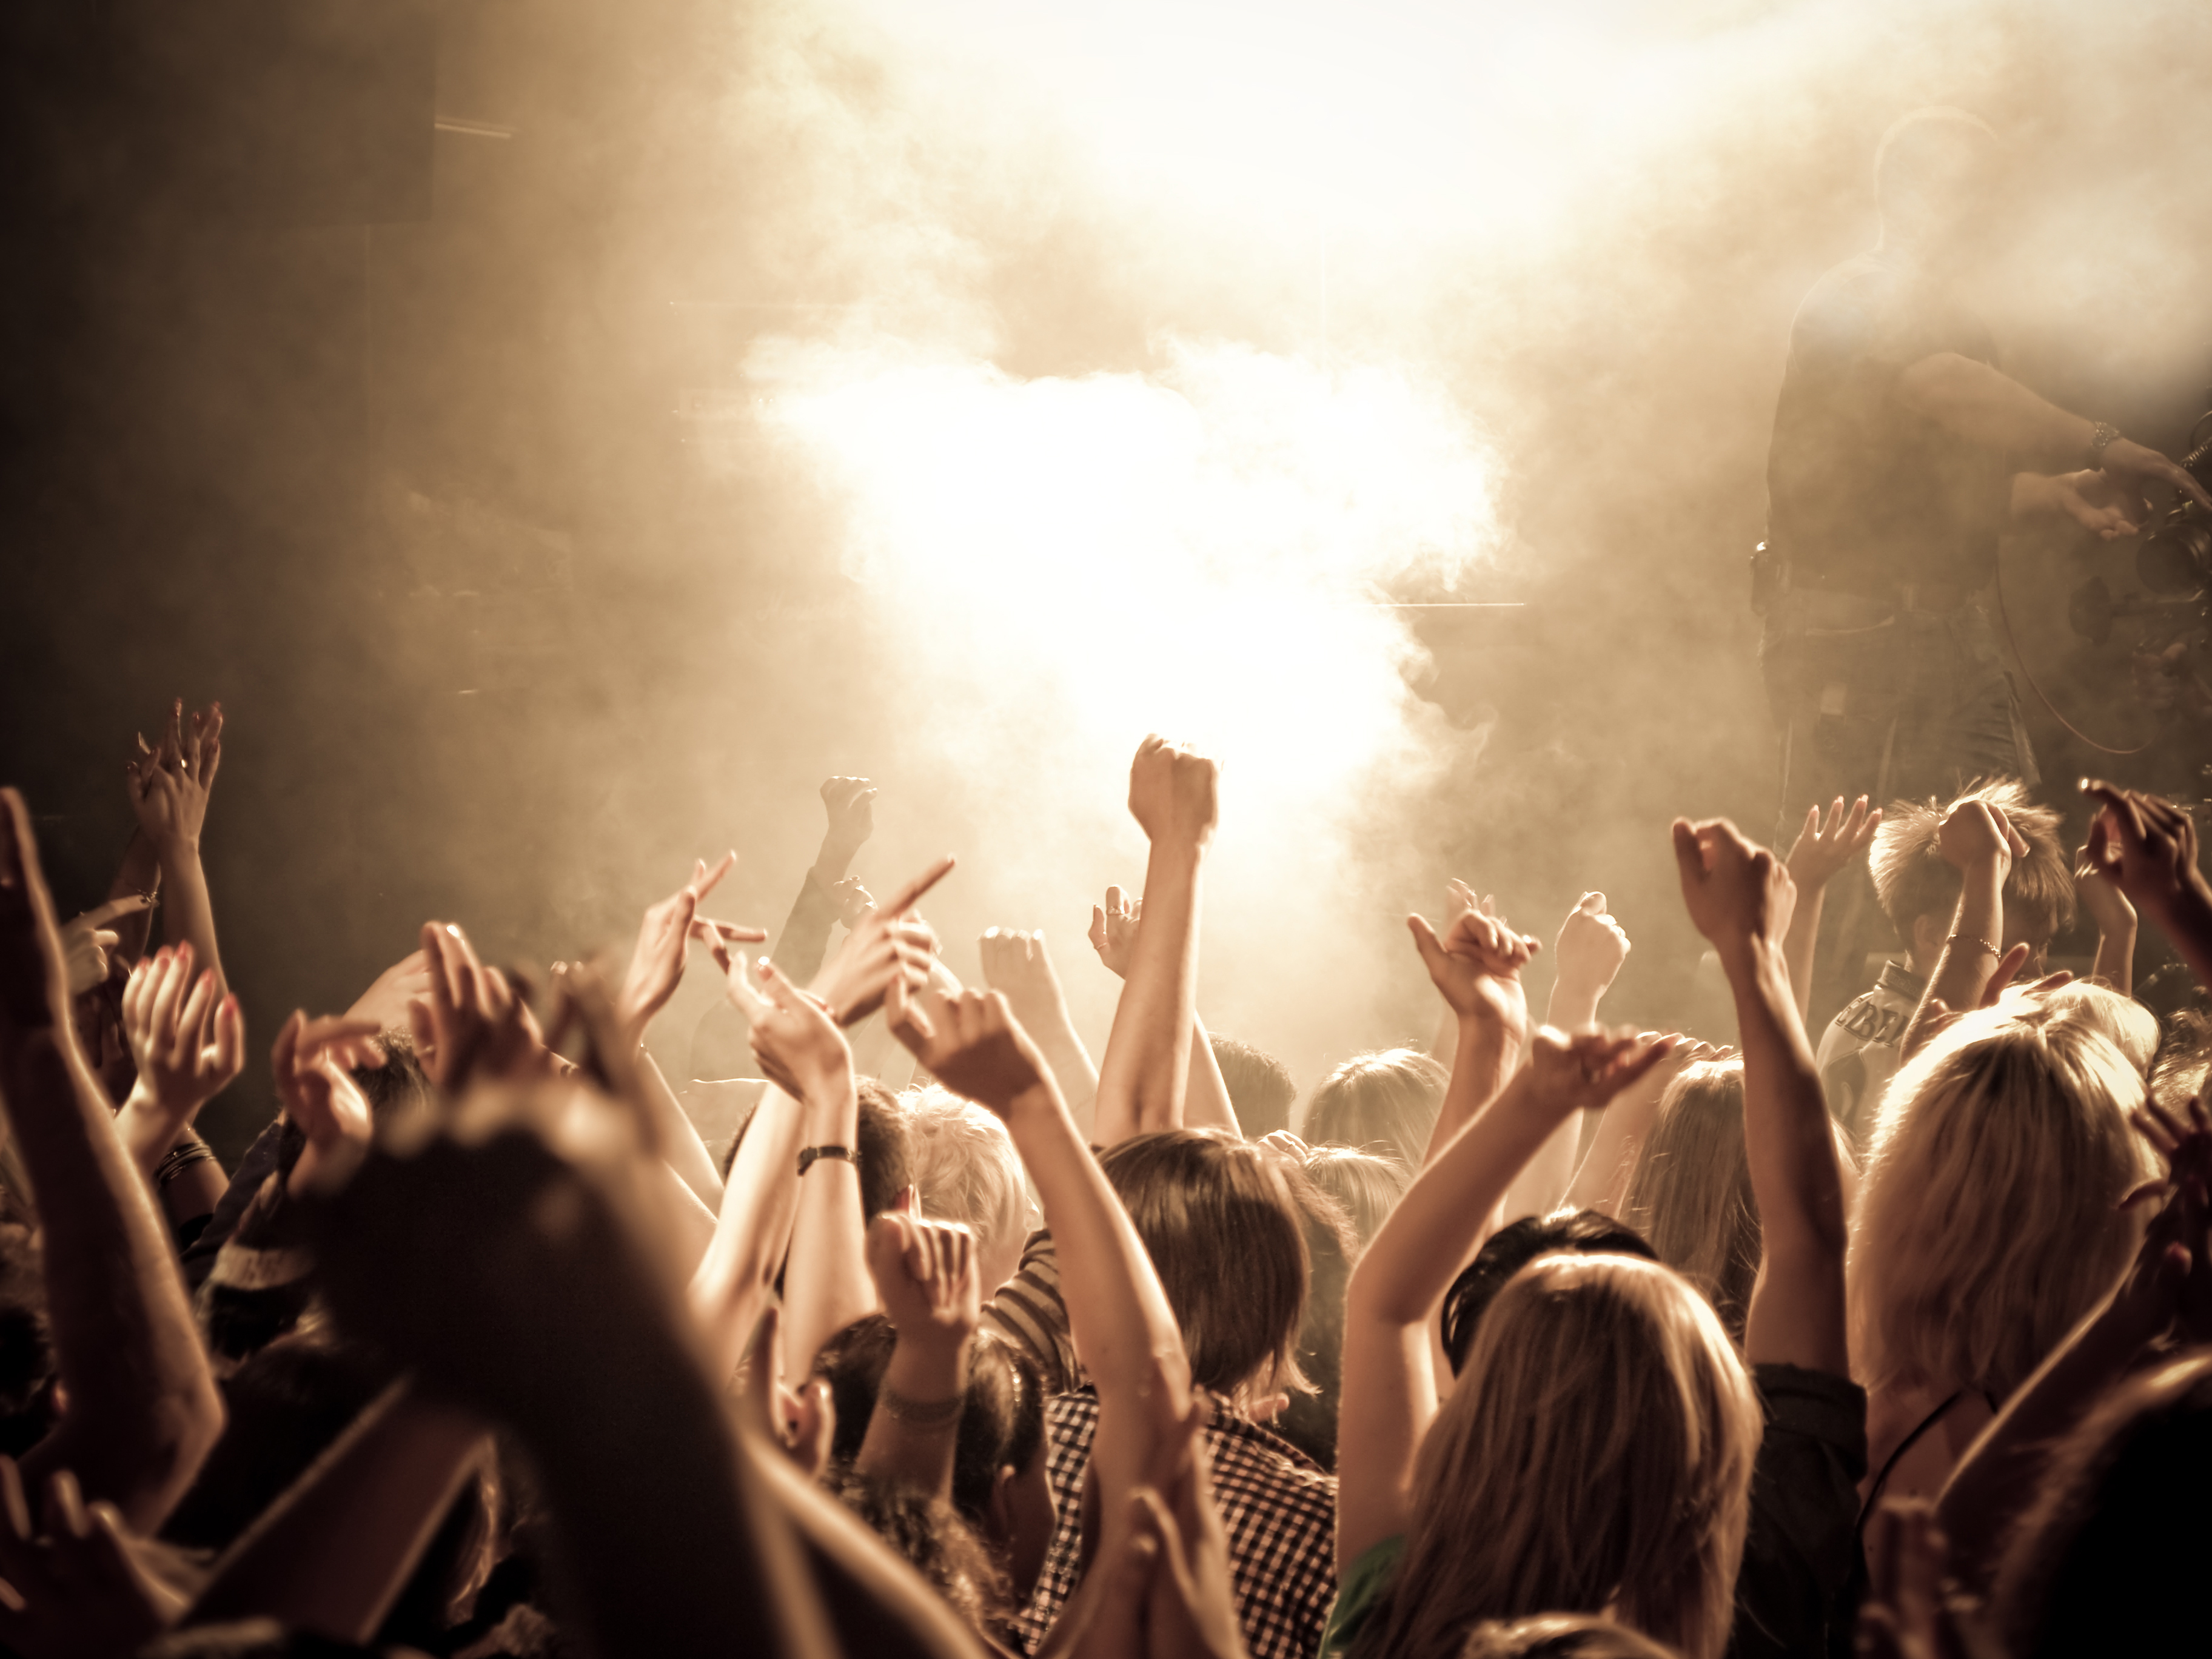
Your low light action shots can really win the day if you get your ISO right.

On the dance floor the light is almost always difficult. Your low light action shots can really win the day if you get your ISO right.

By changing your ISO, you alter your camera’s sensitivity to light. The higher the ISO, the more exposed your image will be. Just be cautious: using a higher ISO may introduce more “noise” to your photos. This noise can often be reduced or corrected in a post-processing software like PaintShop Pro Low light action shots | External link - opens new tab/page or Lightroom Low light action shots | External link - opens new tab/page. (Shooting in RAW is especially helpful with noise reduction).

Check your work as you go

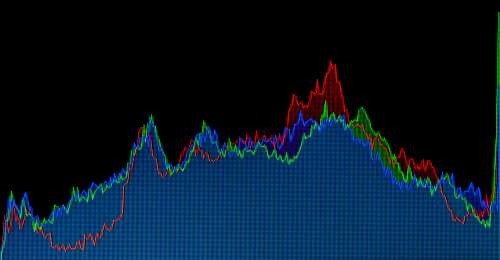
Throughout the shoot, use your histogram. (See: Can you use the histogram on your camera?) It will help to make sure you’re exposing your images correctly. The histogram shows the distribution of the type of light in your shot. It aims to help you capture a consistent amount of light across the full spectrum of your image.
The histogram on your camera helps you ensure effective use of light in your exposure.

The histogram on your camera helps you ensure effective use of light in your exposure.

The histogram on your camera helps you ensure effective use of light in your exposure.

You’ll also want to make sure that your white balance looks good and adjust accordingly. In most cases, your camera is going to be able to set white balance automatically, but you may need to tweak it; especially if your lighting is wildly inconsistent.

Increase your odds

Low light action shots are all about being in the right place at the right time with the right equipment.

Use the fastest lens you can find. The wider the aperture, the more light your lens allows to strike your camera sensor. Anything higher than F2.8 will cause you to struggle with exposure.

Set the camera to continuous drive. This equips your camera to capture a burst of images every time you press the shutter release and gives you a better chance of capturing that perfect picture.

Use a fast memory card. Your camera can only capture images as fast as it can write them to the memory card. If you snap too many images in rapid succession, you’ll have to wait for the card to catch up with your camera and you might miss “the shot.”

Be prepared to shoot…a lot. You’re going to have a lot of images that are no good. So remember to keep tinkering with your settings. The key is shooting lots of images at different settings until you get the perfect mix.

Don’t forget to have fun

Low light action photography can be both challenging and fulfilling. As you refine your skills and your eye for lighting, action, and composition, remember to regularly experiment and try new settings.

Comments, additions, amendments or ideas on this article? Contact Us
or why not leave a comment at the bottom of the page…

Like this article? Don’t miss the next — sign up for tips by email.

Event photography – tips for getting it right

"The Guitarist". You need to make sure that all aspects of your event are covered.

“The Guitarist”.
Good event photography covers all aspects of the event.

Event photography is a responsibility.

It is an important commitment. There is pressure to get it right. However, it gives you an insight into understanding the needs of the viewer. You have to focus on showing the event in the best light.

At some point most photogs are asked to do some event photography. Family party, Church event, wedding, Christmas lunch, engagement… you name it. If you agree, make sure you know what you is expected of you and your camera. Previously, I looked at what you need to do before an event or special occasion. In this post I look at what to do to make your event photography effective.

Cover the story, include everyone

If you have prepared for the event, you should know what you are to shoot and how long you have to do it. Here are some things you can do while doing your event photography…

  1. Tell a story: A little forward thinking can help you to tell a story of the event. As you go through your shoot look for little activities, actions and happenings that will tell the story. You may pick out, say, ten pictures of the event that most people will recognise tell the story. Keep your eye open for the most important points of the event to capture for this purpose.
  2. Entertainment: Make sure you capture any performers. Preferably make images of them performing. If that is a challenge (lighting can be difficult), capture them in the break. If they are reluctant, get their email address and promise to send them some shots. Most performers love that. They always need photos for publicity.
  3. Food: Always capture pictures of the food. When people eat they usually have the best conversation and meet new people. That is one of the memorable parts of the event. Pictures of food are enduring if done well. Read up on food photography a bit to get some ideas. Find out what sort of food there is in advance. Then you’ll know what to expect. If the host(ess) or close family made the food then go into it in some detail. They will love the attention and you will get good feedback.
  4. Presents: It seems a simple thing but it will be important to the hosts. Make sure you get a few pictures of any present table or special gifts or awards. This is an important record for the hosts. It is also a reminder of the purpose of the event. It is worth asking the hosts if they want to arrange the presents. They often want to show some off some more than others. They may also want to arrange them so they can remember the gifts. Otherwise arrange them artistically yourself.
  5. “Formals”: Event photography often involves formal shots. A lot of amateur photographers hate them. But if you have done your sit-down planning with the organizers you will know what you have to do. You will find it is quickly over. In most family or small events they are usually quick anyway. Maybe just the speeches are needed or even just some formal shots of the birthday cake and the lucky recipient. Make sure you get a few shots that show the formality of the situation if necessary. More than anything make sure you get all the photographs the hosts require (close family, birthday girl/boy, dignitary etc.)
  6. Candids and poses: I love to do this. It’s great fun. Wander around the party/event having a little conversation with everyone. Make sure you introduce yourself. Say you are doing the photography for the event. Ask them if they want to pose or if you can just take candid shots of them. If you are allowed to take candids then remember to capture them later when they are chatting, smiling, enjoying. Taking candids at the table with the people sitting and enjoying conversation is great fun. You really capture people as they are in person – rather than who they want to be in a pose. Make sure you engage with everyone. For good event photography the hosts will want to get a good coverage of all the guests. If this is a public event (church event, sports event) its not so easy. So just do some general crowd shots so the flavour of the activities are encapsulated in your story.
  7. Posed sessions and groups: I usually seek out a place at events where I can use a nice background from the location. Sometimes for more certain results in my event photography I set up my own backdrop. Some people love to have group shots with their friends. Others like specially posed shots on their own. The hosts like these posed sessions too. They have something to send on to friends after the event.
  8. Crowd shots: If you are at an event with crowds they can be fun too. Actually crowds are not as chaotic as they look. Spend some time observing. You will see that crowds tend to have three conditions: observers, movers, and actors.
    • Observers watch the event in progress. You can capture them from the front to get faces. You can capture them from the back to use the event activity as a backdrop.
    • Movers are crowds in transit. They tend to move in streams. You can photograph them in ways that show the movement or direction of travel.
    • Actors This is when the group or crowd in question are a self sustaining and self entertaining group. These tend to be smaller groups in among the larger ones. Again, they provide interest for your event photography. They provide a focus in the crowd.
  9. Dance or action: If there is some sort of physical activity going on you have to capture it. Make sure you know what it is going to be in advance so you are prepared. Dance and other fast physical activity is difficult to capture in darkish conditions like party-type events. Remember – high ISO settings to freeze the action. Longer exposures to get motion blur. Both are great at events and both will show your range of skills at event photography. Artfully capturing dance shots takes time and practice. If you have a chance, try it before the event. You can capture sports or physical activity of other kinds more easily because they are often in brighter light. Any dance or action shots are not the reason you are there. Don’t worry if you don’t get the best shots of the evening from these. Work on capturing the atmosphere and the story of the event.
Make sure you shoot the presents. Event photography should include all the angles.

If you are covering all the angles make sure you shoot the presents. The hosts will thank you.

How many shots?

As a guideline, I would aim to take about three different pictures of everyone at a family event. Get maybe 30 to 50 shots of crowds and groups at a public event. It’s common to take several hundred shots over a two to three hour period when doing event photography. Depending on the activities you may take many more. You won’t use them all. The redundancy is there so you can at least provide a great representation of the event, its story, and one picture of all the participants.

Communicate, talk and chat when doing event photography

You will quickly overcome nervousness once you get talking to people. Event photography is about communication. Start introducing yourself straight away. As soon as people arrive get talking and clicking too. And, since you should be there before it starts, get shots of things like the food and other important items before the crowds get there. The most important aspect of doing event photography is to enjoy yourself and mix with others. Get stuck in as soon as you can.

Panning With Motion… Seek A Compelling Background

The final touch to a great panning shot

There is no doubt that the killer shot is not just in the panning. Great panning action is only a part of the job. As in any situation aesthetics plays a big part in the winning image. Continuing our theme on panning and motion blur here is a great video introducing some excellent shots of moving objects filmed sharp, with great backgrounds. The panning and movement shots are wonderful, but the backgrounds make them killer shots. It all goes to show that the composition wins the day in the end… Enjoy!
Video by: www.kevinwinzeler.com External link - opens new tab/page

Practicing and Improving your Panning – Seven Hints

You can improve your panning technique by following the hints below

You can improve your panning technique by following the hints below.

Hints to improve your panning (Action shots Part 5)

In the article Action Panning Shots with Motion Blur we looked at basic panning technique. In this post we look at some things you can do to improve your panning shots.

How to practice

Getting started is easy, just follow this simple plan…

  • Consult some local maps. Find a road with regular, spaced traffic. I find an ‘A’ road is best – it’s not too fast. A road with a green space alongside it is best. You should be able to stand back from the road and see about 200 meters in each direction. Thirty mile an hour traffic is a good practice speed.
  • Take an hour for your first practice. Light weekend traffic is best. Stand on the grass roadside space in the middle of your chosen stretch – about 10 to 20 meters back from the road.
  • Stand facing the road, legs slightly apart, so traffic passes right in front of you. Swivel your body to look sideways down the road. Now, without pushing the release button track a car as it comes toward you, passes and recedes. Follow all the way through, keep control.
  • Your tracking movement should be smooth, level, and based on the speed of the vehicle. Keep the subject vehicle in your viewfinder throughout the pan into the distance. Repeat at least five times without taking a shot. Your aim is to feel the speed of your rotation. Concentrate on the smooth flow of your tracking as you pan. Learn how long the pan takes, judge your button push point. Ensure you follow through.
  • Now you will have a ‘muscle memory’ of your moves. Try your first shots. The camera settings are in this article: Action Panning Shots with Motion Blur. Press the button and keep it pressed.
  • Inspect your first shots on your camera. Pick out the good and bad points. Try to spot where the subject vehicle was sharp and where it was not – where it was in the frame, where it was not. Repeat the shots for practice and analyze it each time. As you get better with practice you will find the ‘memory’ of the practice will help you keep your panning consistent.
  • Practice once a week or more for a few weeks. You will find that it gets easier and easier. You develop a ‘muscle memory’ of how to pan after a while. Then it is easier to adapt your tracking speed and tempo.
More ideas to help

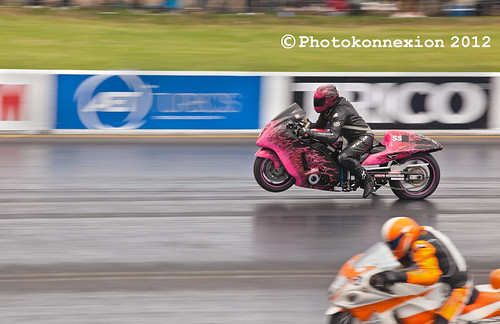
Hint 1. Motion blur of the background of a panned shot is created by the camera movement. As you pan the camera through the shot the background blurs. The idea is to keep your panning motion consistent with the speed of your subject. The subject will then be stationary relative to the camera – so you get a sharp shot. The trick is to pace your shot. Keep your body swivel-movement tracking to keep the subject in the viewfinder.

Hint 2. When doing your practice try to pan with different subjects at different speeds. Bicycles are fun, but the panning is slow. You will find that you may make up/down movements when panning slowly. It takes practice to pan slower and still be level and consistent. Try to gets lots of practice at the same speed as the pans you want to do. I photograph a lot of water sports. At first it was difficult to get it right because the panning speed is slower than a vehicle. After practicing with rowing boats for a few hours and working with a shutter speed of 1/15th of a second I began to return some decent shots.

Hint 3. While panning a subject your body turns slowly at first. It gets faster when the subject is right in front of you. Then your swivel slows down again as the object recedes. You will need to feel that happening and compensate for it as you track the object while panning. Your swivel motion is NOT the same speed throughout your pan. There is a good reason for this. As the subject comes toward you it is in the viewfinder for relatively longer when at a distance. When it is right in front of you it is moving a very short distance across your view at full speed. So you need to be fast tracking there.

Hint 4. If your subject changes speed/direction you must anticipate that and stay with it. Corners and straights (acceleration) are examples where changes occur. So you will need to work the shot a few times before you get the tempo of your new panning motion where the change occurs.

Hint 5. While panning you will find that you are able to hold the camera evenly at the same level if you swivel smoothly through the pan. However, if you go slower or faster than the subject you will introduce blur to the subject – they will no longer be stationary relative to the camera. So you must practice accurate tracking of the speed of the subject while panning.

Hint 6. The vibration control in your lens is important. Canon cameras have ‘image stabilisation’ (IS). Nikon has ‘Vibration Reduction’ (VR). These systems compensate for vertical and horizontal vibration and movement. More expensive lenses allow you to turn off the horizontal component. When panning, if you swivel smoothly from the waist you will find the horizontal movement through the pan is quite consistent. To take advantage of the lens control, turn off the horizontal stabilisation. This will help the sharpness of the shot compensating for any vertical movement. If you leave the horizontal compensation on it will act against your panning movement.

Hint 7. Finally, I have met some people who think you can pan successfully with a monopod or tripod. It is a practically difficult thing to achieve. Think about it. A fixed turning point in front of you will not allow you to track a subject unless it is going in a circle around the tripod centre point. To keep tracking around the centre of turning on the tripod you will need to move or bend yourself off-balance. You may make a few shots, but your record will be inconsistent. Proper panning is a sweep of the body rotating about your centre. That rotation point is right between your legs. Proper rotation takes practice and free-holding of your camera. Your hand-held practice will definitely pay off.

By Damon Guy (author and Photokonnexion editor)

Damon Guy - Netkonnexion

Damon Guy (Netkonnexion)

Damon is a writer-photog and editor of this site. He has run some major websites, a computing department and a digital image library. He started out as a trained teacher and now runs training for digital photographers.
See also: Editors ‘Bio’.

Can you write? Of course you can!
Write for Photokonnexion...

We would love to have your articles or tips posted on our site.
Find out more…
Write for Photokonnexion.