Tag Archives: Light painting

Know how to use a gobo? You have probably used them…

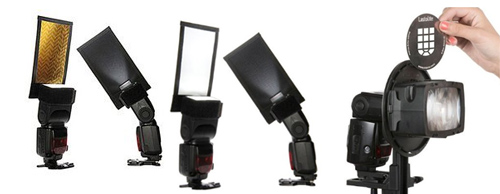
A gobo can be used to fit on off-camera flash units

• A gobo can be used to fit on off-camera flash units •

A simple idea – but so useful!

A gobo is used to block or shape light – normally using black screens of some sort. They’re commonly used in the movie industry, and more recently photography. Find out all about them here…

Of light and shadow

It sounds like a grand and mysterious name. In fact the term gobo is a rather straight forward. Here is what the Oxford English Dictionary (OED) Gobo - Oxford English Dictionary | External link - opens new tab/page says…

gobo, (noun); gobos (plural)
Etymology: Unknown. Originally from the U.S.
1930 – Gobo, portable wall covered with sound-absorbing material.
1936 – A ‘gobo’ is a small black screen used to deflect light.
1970 – A gobo is anything that goes between, e.g., the light and the set.
OED (online) Seen 08/08/2013  External link - opens new tab/page

So, this wonderful little word seems to have been a compound word from “go between”. Hmmm! I would like to see some proof of that. The side entry in the OED says in red “This entry has not yet been fully updated (first published 1972)”. Seems a long time without full qualification.

What is the Gobo really about? Manipulation of light and shadow. Our more technical definition in the Photographic Glossary (gobo) goes into more depth about how it is used in five broad ways in modern photography…

  • To block light or create shapes or patterns of light and shadow together.
  • A mask with a shape cut out of it fixed to the light and used to project a light shape (eg. a logo).
  • Cards/screens to create shaped shadow or deeper shadow in a scene.
  • A jury rigged light modifier on a light to shape or direct the light.
  • A mask placed in the light beam which shapes the light/shadow in the scene.
  • A light modifier allowing some light through and casts a specific shadow or diffusion shape

It is interesting that both the Hollywood studios and the OED use the term to manipulate and absorb sound. Of course in photography sound is less important. You can see however, that gobos are used to shape light and shadow in various ways.

How do gobos affect you?

If you have ever held your hand, a hat or a piece of card up to shade your lens to prevent flare or lens reflection you have used a ‘flag‘. Originally a gobo was the term used for protective devices to keep a lens out of incidental light. Now days the more specialist term, flag, is used for shield or blocking of light especially when it relates to the protection against lens flare. Understandable the two terms are easily mixed up. A flag seems to be used mainly for blocking light out. A gobo more for manipulating light, especially where that involves creating shadows.

Today I was photographing a white van in very bright overhead light. I keep a black blanket in my equipment for this type of situation. My assistant held up the blanket behind me to create a broad shadow across the corner of the van I was photographing to cut out the strong sun light. This is one form of gobo. It was not cutting out the light completely. I was reducing the very bright sunshine to an area of pure white so I could more easily pick out the details.

In a studio you might use a a black screen to intensify the darks in one area of a scene. It is a mood enhancer in this situation.

On another day I was working on business portraits. The office was a bright, but grey colour. We used plants on a trellis with a light behind it to create a shadow-pattern of leaves and diamond shapes onto the wall giving added interest to the background, breaking up the grey. This is a gobo too – being used to enhance the light/shadow ambiance.

More after this…

A solid light of the same colour and intensity across a still life is boring. Use cards or diffusion surfaces to vary the light and create slight shadows or graduate the light. One side of the still life use a black card to darken and block light. On the other side use white card to intensify and diffuse it.

A gobo is often used to shield the camera from light too, but it is not a flag. In A quick shoot using water? Tips to get you started… from yesterdays post a gobo could have been placed in front of a flash unit on the table. This would prevent the light getting directly back to the camera lens, but still project the light onto the back wall. A two in one gobo.

There is one further really fun use of gobos that is growing in photography. The recent growth of interest in light painting has renewed the interest in projecting shapes onto surfaces to be photographed. A black card with a logo or shape cut out of it can be placed directly in front of a light source. The light shining through the shape projects it onto a far surface. Then, in the dark, light painters can photograph the projection. Light painting is the intrepid art of photographing deliberately manipulated bright lights in the dark. It’s great fun!

What have we learned

A gobo is a term that describes the manipulation of the light shadow relationship. We use a range of blocking and masking techniques to manipulate the light and the gobos are the instruments of that manipulation. A flag on the other hand is a pure blocker of light.

Have fun thinking this one over. It is a useful concept and one that has infinite uses for mood, variation of shadow and creating settings.

Comments, additions, amendments or ideas on this article? Contact Us
or why not leave a comment at the bottom of the page…

Like this article? Don’t miss the next — sign up for tips by email.

Night photography – let the sparks fly!

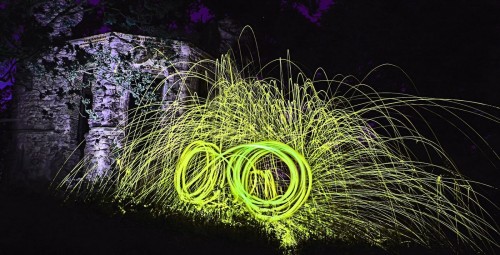
• Steel wool spinning •  by Steve Maidwell

• Steel wool spinning • In the tutorial you will see how to create images like this.
Click image to view large.
[Steel wool spinning • by Steve Maidwell]

Photography at night is an intense experience.

Not only is darkness powerful but the shock of light is even more invigorating. Put the two together and you have a formula for great impact. In this article Steve Maidwell gives us the tools to create incredible light shows.

What you will need
  • Steel wool – Get this get from any DIY store. I bought six bags, you will use a lot. Get Grade 0, 00, 000, or 0000. Don’t get anything at or above Grade 1, it won’t burn properly
  • Steel cable, rope or metal chain – Approx 1.5 M long, DIY store again. You could also use a metal dog lead with a clip at the end of the cable. I used the clip as a handle, but you can do whatever you wish. If you use a chain you won’t need the whisk or rope. Just poke the steel wool around the loops in the chain; it just takes longer to do that.
  • Whisk – I bought mine at a DIY store for £1. Make sure it is all metal, no plastic parts for obvious reasons.
  • Any D-SLR Camera and Tripod
  • A Lighter or 9 Volt battery – Use this to light the wool.
  • LED light or torch
  • Remote release for your camera (desirable, not essential).
  • All your clothes should be black if possible and you will need a hat or hoodie.

Next you need to build your cage to hold the steel wool. I attached the whisk to a steel cable. I looped the cable through the hole at the top of the whisk handle and then securely taped it on with duct tape. This cloth type tape is very strong so will not pull off when whisk is swung. Cut the cable/rope to about 1.5M long. I stripped the plastic covering leaving only the metal cable, again for obvious reasons. Then put two balls of steel wool into the balloon part of the whisk. Tease the steel wool apart to fill the whisk. This creates air pockets that allow more sparks to be generated. Put this to one side then set up the location in which you will take your images.

Out on location – ready to go

Set up the camera with the tripod, then…

  • Set camera dial to Manual (M)
  • Take the LED light or torch (flash light) and place it in the middle of the location you will be spinning your steel wool. Turn it on and point it so your camera will be able to focus on it.
  • Walk back to your camera, focus on the LED, then turn off auto-focus. This prevents the focus from changing when you start to expose the image.
  • Set a medium aperture F8-F11 and ISO at 100.
  • Set shutter at around 15secs. This may vary due to how dark it is when you take these. A good time is when you can just see light still in the sky but dark on the ground.
  • If you do not have a remote release button set the camera timer to give you a few seconds to move to the point of focus. You may need to practice this a few times before you light the wool.
  • Go to the torch (flash light) where you focussed your camera. Turn off the torch.
  • Push the remote shutter button (or wait for the camera to click on with the timer) and quickly ignite the wire wool with a lighter or battery terminals.
  • Spin the whisk. The faster you spin, the more sparks are generated.

If you have a partner helping out they can set off the camera or spin the whisk.

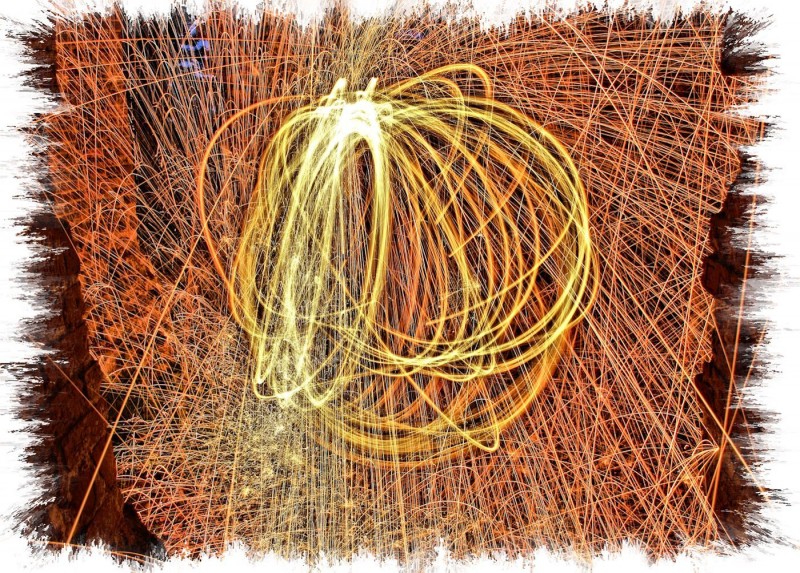
WhizThatWireWool - by Steve Maidwell

• Whiz That Wire Wool • by Steve Maidwell •
Shutter Speed: 16 Seconds
Aperture: F9.5
ISO: 100
White Balance: Auto
Click image to view large

In order to create the orb shape, spin the cable around in a circle. Then, while spinning, start rotating your body around the pivot point.

Spinning the wool in a circle without rotating around the pivot point will make a two dimensional Circle. It does tend to also light up the person doing the spinning. This creates a ghost image of the spinner. These are just as effective as the three dimensional orbs. Trying out different things is what it is all about!

You will need to test, and change, the settings on the camera to get the exposure right. It may take a few shots to get it the way you want it, but it is worth the effort. Don’t expect to get a correct exposure or final shot with the first try. After the first three or four shots you will get the hang of it.

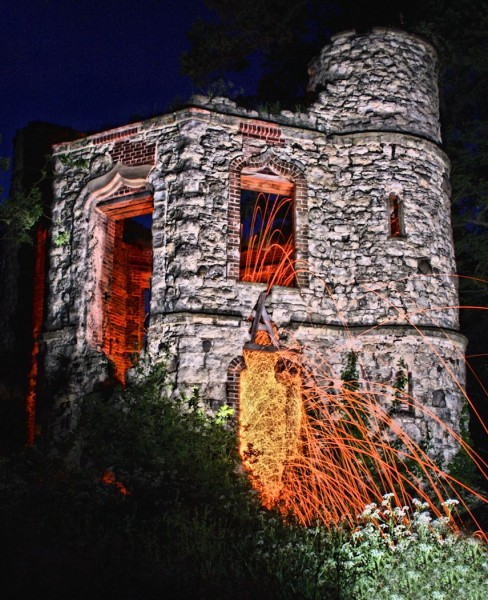
Sparking Tower by Steve Maidwell

• Sparking Tower • by Steve Maidwell •

Camera settings for this image…
Shutter Speed: 30 Seconds
Aperture: F8
ISO: 100
White Balance: Auto
Click image to view large

Safety

Your safety is very important! For safety, wear a hat or hoodie, long sleeves, long trousers, shoes, gloves and goggles. This prevents your hair or clothes catching alight.

Allow the whisk to cool down before touching it, it will be very hot.

Have a fire extinguisher and a jerry can of water near-by, just in case a spark accidentally lands on a patch of dry grass. It can and WILL catch fire, especially if you are doing this in dry conditions. Very wet conditions are much safer.

Spinning wool in remote places helps because it draws less attention to yourself. You could attract unwanted attention from the authorities in public places.

Happy Spinning!

By Steve Maidwell (contributing author)

Steve Maidwell is a keen amateur photographer and active member of Marlow Camera Club. He has some superb images to his name and enjoys working with special effects. His website is imageinnation.com  External link - opens new tab/page. You can also see his images on his 365Project  External link - opens new tab/page

Five easy ways to learn about the light/shadow relationship

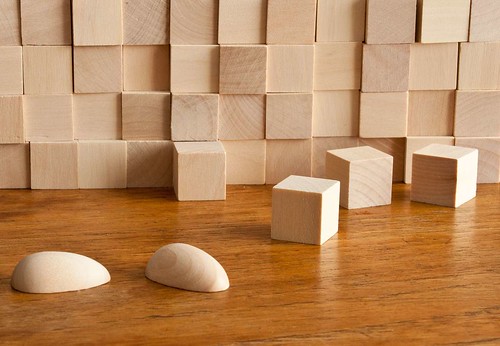
Practice blocks provide a great way to understand light/shadow relationship.

Practice blocks provide a great way to understand light/shadow relationship.
View large About the light/shadow relationship :: External link - opens new tab/page

Our first priority is light – second is shadow.

The relationship between them is one of the great pillars of photography. Learning about them is essential. The key to understanding the use of light is seeing the effect of shadow. In this article I am offering some ways to learn about the light/shadow relationship. If you have not already done so I recommend you read Three little known facts about shadows External link - opens new tab/page first.

The light/shadow relationship – a transition

When looking for a scene the right light and shadows can make or break a shot. We are looking at the light/shadow relationship so we can convey the right message to the viewer. Things with harsh and sharp shadow-lines tend to indicate hard, masculine, tight, dark, angular, tough, solid, artificial, technical. Things with soft shadow-lines showing gradual light-to-dark change are the opposite. They tend to be gentle, mild mannered, lighter, soft, rounded, meek, curved, natural and feminine in appearance. Using the wrong light sends conflicting messages to the viewer. The right light will help your message. The defining aspect of this relationship is the transition from light to dark. The shades between light and shadow are the definition of form. “Form” being the three dimensional shapes we see. The harsh sharp shadows of hard light are great for angular forms. The soft rounded and gradual shadows of a softer light are great for showing rounded three dimensional forms – like faces, eggs and balls.

Creating the right light

Creating light of the right sort is the quickest way to understanding the different types of light and the shadows they create. So, we are looking to bring out the transitional light/shadow relationship through the use of different types of light. This will help us define form in our images and bring out the 3D feel that makes pictures appear to have depth.

You need to be able to create two types of light for these experiments. Hard light – created with an intense beam from a relatively small light source. A torch like this one is excellent for this purpose…

 
The ‘Lenser’ LED Torches

The ‘Lenser’ LED range of torches External link - opens new tab/page is available on Amazon. I personally recommend the excellent LED Lenser 8407 P7 (Black) External link - opens new tab/page torch (advert – left). It is excellent for all types of photography. At night you want a rugged and powerful torch for safety, lighting and to prevent losing equipment. Lenser also sell a coloured filter set for it making this torch great for light painting External link - opens new tab/page too. It’s the top seller (5 star) in the range. Experience has shown it to be an exceptional piece of technology.

You also need soft light – usually generated from a large light source like a window, softbox or photographic umbrella.

Make sure you are using only one light source for your tests. Multiple lights confuse the shadows. The hard and soft lights are best used at the same intensity so you can compare results between them later. If you have one, an off-camera flash with the appropriate modifiers would do the same work. Use a honeycomb or snoot to get the tight beam of a hard light. Use a diffuser or bounce the light off reflectors or walls to create a soft light.

For your first experiments with soft and hard light try out your different light sources. Place a simple object of your choice on a table. For the subject see a small vase, a simple ornament, a small box or something similar. Take a few photographs with both hard and soft light. Then open them on your computer and compare them. What you are looking for is the quality of the shadow. How intense is it – light or dark. How quickly does the light change from light to dark. Is it an abrupt, sharp change? Or, is it a slow, gradual transition? Study your shots to see which you prefer. The light/shadow relationship is best shown in gradual steps. So your shots should show very hard light right through to very soft light.

Experimenting with curves

The use of curved subjects is going to create gradual transitions of light anyway. But curves can also have quite hard shadow-lines if the light is also hard. Using something rounded will show the point. A small ball, an egg or something similar are great for testing the hard or soft light effects. I have several wooden eggs for this purpose. They make test subjects for thinking through individual or group portrait shots. They help in planning shoots and lighting set-ups. They are a very cheap way of making your mistakes before the shoot! Give them a try.

Using a rounded subject, try your hard and soft tests again. This time take shots from at least eight light-positions in a circle round your egg. You must stay in the same position to take each shot. That way you will see all the different angles of the light/shadow relationship as a graduation as you move the light round for each shot.

In your computer ask the same questions about the hard edges and soft graduations of light through shadow. Imagine the eggs are faces. Which will work best on a face – those hard sharp lines or the soft graduations?

Experimenting with lines

For working with more hard-edged objects I have 50 wooden children’s building blocks. I use these in the same way as the eggs. They help me plan lighting and sets/props positions for shoots.

Use one block to start. Repeat the exercise as you did with the eggs. Take eight shots using different light positions around the cube. Keep the camera and cube in the same position from the start. Just move the light to each of the eight positions around the cube. Repeat the exercise for the hard and soft light sources. You will see that the results for a hard edged object is very different to the soft edged eggs in the previous experiment. Concentrate on how the light transitions in the light/shadow relationship shown by each shot.

This time, you are asking the same types of questions… about the quality of the shadow. How intense is it? How quickly does the light/shadow relationship transition, and so on. Again, study your shots to see which you prefer. You will have a different type of result because the edges are much harder than the rounded eggs. The shadow shapes will be very different too.

The wooden blocks are useful. The set I use for this purpose is advertised to the left. It has rounded blocks and a variety of shapes. This gives you the opportunity of trying out a whole range of effects and test lighting set-ups.

Experimenting with specifics

You have experimented with rounded subjects and hard edged ones above. Now it is time to look at the other possibilities.

Try mixing rounded and square edges. Try out a few scenes using the blocks to map out props. If you have other toys around use the blocks to create little still life scenes with the toys or other objects. The idea is to try and creatively use the toys, blocks and egg to make a scene. But you must concentrate on creating sympathetic shadows. Look always for the way you can understand the balance in the light/shadow relationship and make it complement your theme.

Suppose you depict a robot war. Your best light will be hard and very direct. The harsh sharp curves will help create a chaotic and harsh environment. Try depicting a love scene between two figures. You want to use soft, diffused light to carry the romantic mood.

You see my point. You are trying out in miniature what you want to do in the real world to emphasis your message.

I used to use several action figures for testing out scenes with people. But the kids broke them eventually. These days I use cheap wooden artists dummies. They are fun to use and give a very good idea how to set up lighting for poses. The one I use is advertised to the left. It is really great for lighting tests.

The Importance of Eggs

Finally, here is a video which I posted earlier this year. It focuses on the angles of light in the light/shadow relationship. It will show you the point of the eggs exercise. So you can see how it is all done. He shows you the principles. However, you will need to try out for hard and soft light and hard and soft edges – which the video does not show… Enjoy!

The Importance of Eggs (a previous post on Photokonnexion).

Light Painting at Christmas

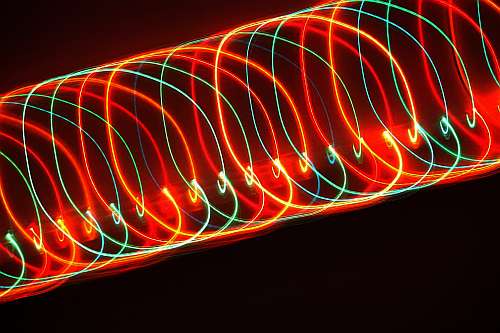
The Time Tunnel

The Time Tunnel

One of the wonderful things about the festive season is the abundance of bright coloured lights. You can do a lot of things with them. This is a simple tip for doing some light painting…

Light Painting with Static Lights

You don’t need to move the lights to paint with them. Simple. This image was created with a strung out set of fairy lights. Here is how it was done.

  • ShutterSpeedValue – 1 seconds
  • ApertureValue – F 5.6
  • Flash – Flash not fired
  • FocalLength – 173 mm
  • ISO Value – 100
  • Exposure mode – Manual
  • Focus mode – Manual Focus

Auto-focus must be off or the lens will keep trying to focus and spoil the line; the lens must be pre-focused to ensure the lines are sharp. Manual exposure is best, because the auto-exposure setting will not allow the right exposure time.

The shot was taken in a daylight lit room. It was overcast outside and the lights were not on – so it was gloomy in there. The fairy lights were strung out in a tight line on string. They were arranged so the light-bulbs were all pointing directly at the camera so that each point source was at its brightest.

In the prevailing light conditions (low light) everything in the room was lost except the bright lights. I could see perfectly well. However, the camera, @ F5.6 and ISO100 could not get enough light in a 1 second exposure to see anything but the brightest light source.

Now, to create the effect. While held to my eye, I rotated the end of the 200mm lens in a tight circle. Point-of-origin around and back to point-of-origin in one second. It took a bit of practice and ‘chimping’ at the results to get a pleasing effect. After about 10 shots it began to look appealing.

There are some simple points to gain from this shot project.

  • You can fix a light and move your camera to do light painting
  • Exposure is more important than the ambient light. If you set your exposure to capture only the brightest point of light everything else will be lost in darkness. This relys on there being about 8 to 10 stops of light difference between the ambient light and the bright point sources of light.
  • You control the movement by moving the camera and not the light – the shapes you produce are limited only by your creativity

Have fun with your camera!

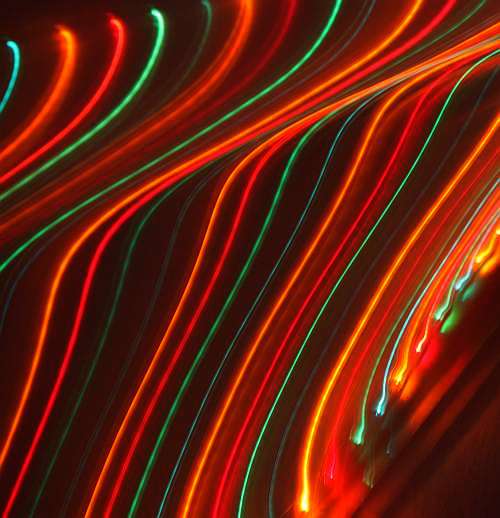
The shapes you make are limited only by your creativity

The shapes you make are limited only by your creativity