Tag Archives: People Shots

Fifty tips to set photography starters on their feet

There are some great things to learn.

When you are starting out and need to learn some things fast, it helps to have some guidance. Here are a few things photographers need to know to get started. And some things I wish I had known when starting photography…

Roller coasters ‘R’ us – Photo-learning list…
  1. If you want to learn fast take lots of pictures.
  2. If your pictures aren’t good enough, you’re not close enough.
  3. Spend more time reviewing your pictures than it took to make them.
  4. There are billions of types of light. Learn to see 10 types to start.
  5. Get obsessed with the quality of light and its properties.
  6. Work on image composition at least as hard as your technical skills.
  7. Use natural light as much as possible. Learn its variations.
  8. Don’t use on-board flash. It will ruin your shots.
  9. Make people a central study of your photography.
  10. Count 1000, 2000 slowly then take your camera from your face.
  11. Think carefully about how to do it well. Then follow a process.
  12. Clean your kit before you go out and when you’re back. Cameras hate dust.
  13. “Learners don’t need a tripod”. My biggest learning mistake.
  14. Sharpness is a habit – work hard to get it right from the start.
  15. Think “Why am I taking this picture?” for every shot you take.
  16. Add another lens to your “kit lens” as soon as you can.
  17. Great lenses are more use than an expensive camera. Spend more on them.
  18. Don’t cheap out on a tripod. Cheap ones will not do the job.
  19. Use your tripod.
  20. Own more than one memory card AND more than one battery.
  21. Learn the meaning of RAW and then shoot with it.
  22. “Your first 10,000 photographs are your worst.” ― H. Cartier-Bresson
  23. A keen digital photog can clear 10,000 shots in 14 days – shoot more.
  24. Make some photography gear. You’ll understand your needs.
  25. Gear lust replaces your photographic vision with a hole in your pocket.

More after this…

find out more...Photokonnexion tips by email
Enjoying this article? Please sign up for our
Tips by email service.
                                                Find out more


  1. Carry your camera with you everywhere.
  2. Look at 50 pictures by other people every day.
  3. Take a clichéd shot – satisfy your curiosity. Store it in a secret place!
  4. The “Rule of thirds” works nearly all the time. Learn it early.
  5. Simplicity is the ultimate sophistication.” Leonardo da Vinci
  6. Read your camera manual. Try something. Read that bit again. Repeat.
  7. Have a go at every setting on your camera lots of times.
  8. A proper stance will provide a steady hand-held camera position.
  9. Amateurs often do better pictures than professionals.
  10. And, Professionals do more good pictures, more often.
  11. If your photos look tired and drab – go manual – learn control.
  12. For every shot you do, look at 50 similar ones. How does yours look?
  13. Don’t panic. Usually there is no problem.
  14. No photo, however good, replicates reality. Cameras distort – get over it.
  15. If you see it one way, most people will see it a different way.
  16. Check all gear before you go. Have a list of what you need.
  17. Know why you are going to a location and plan shots in advance.
  18. Back up your files. If your hard drive crashes you will lose the lot.
  19. Wear the right clothes. You cannot do good photography if you are cold.
  20. Help someone else to learn. You will learn too, and make a friend.
  21. Learn the meaning of “exposure” – practice using manual settings.
  22. Learn “Depth of Field” and practice it with each of your lenses.
  23. Post processing is an art and part of photography. Learn it.
  24. Join a club or class – you learn fast with other photogs.
  25. Use Google Images to research every shot you take.
And one for luck!

Photography is fun. Make sure you go with that!

Comments, additions, amendments or ideas on this article? Contact Us
or why not leave a comment at the bottom of the page…

Like this article? Don’t miss the next — sign up for tips by email.

By Damon Guy (author and Photokonnexion editor)

Damon Guy - Netkonnexion

Damon Guy (Netkonnexion)

Damon is a writer-photog and editor of this site. He has run some major websites, a computing department and a digital image library. He started out as a trained teacher and now runs training for digital photographers.
See also: Editors ‘Bio’.

Just what is it about feet?

Feet are quite expressive, but attractive?

Well, they do say that beauty is in the eye of the beholder. I reserve judgement personally. Feet are not my ‘thing’. Lots of people get excited about feet. There is certainly lots of art about feet and photography is no exception. Lets take a look at the field…

Expressiveness

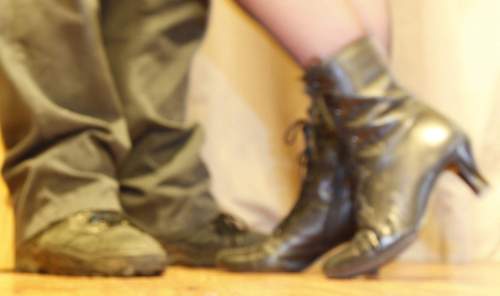
My interest in feet is with the way they can express themselves. One of my own pictures makes the point…

The Kiss

• The Kiss • By Damon Guy

If you look around you will see lots of examples of people using their feet to say things. Legs and feet are a large part of the body. So it is not unreasonable to expect them to express some of the things that the body is saying through body language. Perhaps you cannot expect feet to say it all, but you can certainly read some of what people say. Taking feet into account is an important part of the photograph. What I am saying is, if you want your photograph to tell the full story, look at the whole person, including the feet.

Emotive force

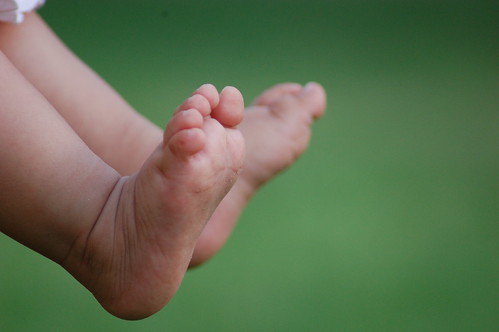
Feet play a part in our emotions too – I frequently hear oohs and ahhhs from people when they see baby feet.

 Two Lill' feet

• Two Lill’ feet •
Click image to view large
• Two Lill’ feet • By Qatar & Me on Flickr External link - opens new tab/page

It is certainly true that tiny feet are cute. Baby feet and vulnerability have close links. In the case of a photo like the baby feet above it moves us because of their cute vulnerability. Vulnerability makes for a great photograph – little feet are only one part of that. There is a great lesson in this. Vulnerability and babies make for great photographic subjects.

Of course vulnerability does not just extend to human babies. Lots of young animals have perfectly formed and cute enough feet to stir emotions. But then some animals seem to just have cute feet – young ones or not. There are a lot of photographs of cats feet out there.

• Our cats foot •

• Our cats foot •
Click image to view large
Our Cat’s Foot by pmeidinger, on FlickrExternal link - opens new tab/page

If you want to get some ideas of what cat feet photos are out there check out these links…
Cat feet search on Flickr  External link - opens new tab/page
Cat feet search on Google Images  External link - opens new tab/page

Humour

I think feet are pretty funny. They certainly can be comical parts of the body. But they can also be included in a photograph in a fun way… I had to laugh at this one on Flickr  External link - opens new tab/page.

The way to make people laugh when it comes to feet is to do something absurd…

Funny feet

• Funny feet •
Click image to view large
Funny Feet by Sarah Alston, on Flickr External link - opens new tab/page
You can probably find lots of ways to make people laugh with feet!

Of course it is not just bear feet that can be fun. I smiled with this too…
Feet

• Feet •
Click image to view large
Feet 🙂 by Neuro74, on FlickrExternal link - opens new tab/page
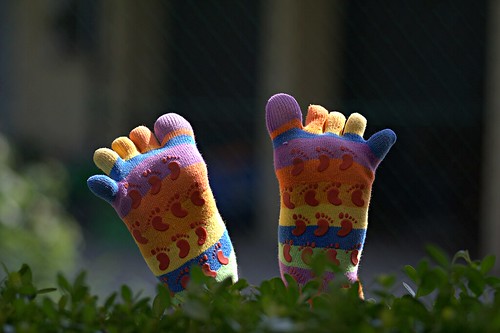
Feet can be funny and expressive… these gave made me smile and give a sigh of relaxation!

. I am sure you can think of some pretty funny ways to show off some feet!

What else

I had a fun couple of hours looking over the possibilities for feet. Some of the other opportunities that came to mind include…

  • Gross – some feet have had a hard life!
  • Love is… I am sure there are thousands of ways to express love.
  • Family feet – your feet can be intimate – a whole family can show together.
  • Animal feet – gotta be plenty of ways to see the world of animals through their feet.
  • Sexy feet – There’s a whole world of seediness and feet to explore!
  • Feet with character – must be a project in that one.
  • And just imagine what you can do with shoes too – wow!

I have introduced a new subject and there is plenty of scope. Feet ideas are worth considering. So have a think and check out this link too…
Feet – a general search on Google images  External link - opens new tab/page

Comments, additions, amendments or ideas on this article? Contact Us
or why not leave a comment at the bottom of the page…

Like this article? Don’t miss the next — sign up for tips by email.

By Damon Guy (author and Photokonnexion editor)

Damon Guy - Netkonnexion

Damon Guy (Netkonnexion)

Damon is a writer-photog and editor of this site. He has run some major websites, a computing department and a digital image library. He started out as a trained teacher and now runs training for digital photographers.
See also: Editors ‘Bio’.

Handshake blur – do your shots suffer?

Handshake Blur Problems?

• Handshake Blur Problems? •
It is so easy to lose sharpness in your shot because your hands make tiny movements. There are simple ways to fix it. Here’s how…

Handshake blur – a cause of blurred shots.

It is not the only cause of blur, but it is more common than most learners think. Handshake blur is a devil in the camera. Or is it?

In auto modes, most of the time, the camera will cope and help keep your shots sharp. When you get more advanced and start to use manual modes then the problems arise. Most people are perplexed – their shots appear to be getting more blurred as they get more advanced. What is causing this handshake blur?

Auto modes limit your photography

Auto modes are set up to average out the conditions you encounter to give you a “reasonable” result every time. The auto mode is set up to compensate for your handshake blur. It will tend toward higher-than-necessary shutter speed for example. That will help you to freeze the shot, cutting the handshake blur. When you encounter more challenging shots the camera cannot produce the results that manual modes produce.

As you advance you want to start doing things that give you more creative control. This is when manual modes help you. However, working the camera appears to become more technical. In fact it is just responding to more sensitive settings – the ones you choose. What you may not realise is that your camera holding, stance and breathing have an impact. You need to be more sensitive to those when you hold the camera. Take everything into account – personal body movement and breathing.

Toward a handshake blur cure…

Handshake blur is quite a technical problem. The camera manufacturers have been working to improve the response to handshake blur for years. Image stabilising mechanisms are built to help reduce handshake blur problems. Good ones can reduce it a right down. And, you need to work on it too. So how do you stop the problem?

There are three basic responses to handshake blur…

  • Increase shutter speed freeze the picture in time. If the shutter is open for a shorter time your hand has less opportunity to move. Then, blur is reduced.
  • Improve the way you hold your camera. The basic hand position is one hand under the lens and one hand holding the body ready to push the shutter button.
  • Improve your stance and breathing. Your body is acting as a tripod. If you are wobbly, so will your shot be! A practiced stance, will help your stability.

You can read my guide to a good stance and breathing techniques in “Simple tips for a good stance”.

There is another response that’s hardly ever mentioned… but it’s extraordinarily important. Most advanced photographers never mention this. They don’t think it is a problem. Working mostly with beginners I know it can be a huge issue. The problem is…
Muscle tone/strength
…even fit people suffer from weakness with a camera at first. I find that disabled people and older people are more sensitive too. Handshake blur can have a big impact on anyone. It is not something to worry about though.

Cameras are quite heavy – especially DSLRs. They are also unbalanced – long lenses make them more-so. People who are not regular camera holders do not develop the fine muscular control and strength needed to hold a camera and use it.

Sure, one or two shots are OK. If you are on a longish shoot, even tough men find they are unaccustomed to the position and control of a DSLR. Your shots slowly lose sharpness as you get tired. Through a whole day handshake blur can be a real issue.

If you are fit, and if you hold a camera a lot you will find your muscle tone and control improves. So will your control over handshake blur. You don’t have to do weights or go to the gym, although that will help. All you have to do is to carry your camera around and use it regularly. Not too much of a problem! The practice will put strength in your arms, shoulders, fingers and hands. Before long you will be steadier with a camera, reduce that handshake blur and improve the sharpness – a lot.

If you are disabled, have problems holding the camera, or suffer from weakness a chest harness can help. Check out DIY Camera Chest Harness for Weak Hands & Arms

Handshake blur… a video

In this video Mike Browne shows us the things I have mentioned above (except the muscle tone part) and how to put them into practical use.

Uploaded by Mike Browne  External link - opens new tab/page

Comments, additions, amendments or ideas on this article? Contact Us
or why not leave a comment at the bottom of the page…

find out more...Photokonnexion tips by email
If you enjoyed this article please sign up for our
Tips by email service.
                                                 Find out more

Damon Guy - Netkonnexion

Damon Guy (Netkonnexion)

Damon is a writer-photographer and editor of this site. He has run some major websites, a computing department and a digital image library. He started out as a trained teacher and now runs training for digital photogs.
See also: Editors ‘Bio’.
By Damon Guy see his profile on Google+.

Everybody Street… a new documentary about street photography

Video

Video

Documentary released for Film Festival.

Released at the “Hot Docs International Film Festival”, Everybody Street is about the street photography art of New York. Focusing on a range of street photogs it opens up the everyday reality of street photography.

The trailer for the documentary has been released and provides an insight to what may be in the documentary. It shows some stunning shots and some powerful insights. However, it also takes a rather voyeuristic and antagonistic view of street photography. While I personally don’t aspire to that approach there are others that do.

I believe that to act as an antagonist on the street is both dangerous and unnecessary. Personally I believe in respect, contact and participation in the street scene. But I do acknowledge that there are some people that take a different view.

I think it is worth seeing this documentary and I hope that one day it will be widely available. For now I leave you with the trailer. See what you think. The video is just over two minutes.

EVERYBODY STREET – New York City

Everybody Street Trailer from ALLDAYEVERYDAY on Vimeo.

Visit the website for the documentary at: http://everybodystreet.com/  External link - opens new tab/page

Comments, additions, amendments or ideas on this article? Contact Us
or why not leave a comment at the bottom of the page…

find out more...Photokonnexion tips by email
If you enjoyed this article please sign up for our
Tips by email service.
                                                 Find out more

By Damon Guy (author and Photokonnexion editor)

Damon Guy - Netkonnexion

Damon Guy (Netkonnexion)

Damon is a writer-photog and editor of this site. He has run some major websites, a computing department and a digital image library. He started out as a trained teacher and now runs training for digital photographers.
See also: Editors ‘Bio’.

A simple way to bring out your subject in environmental portraits

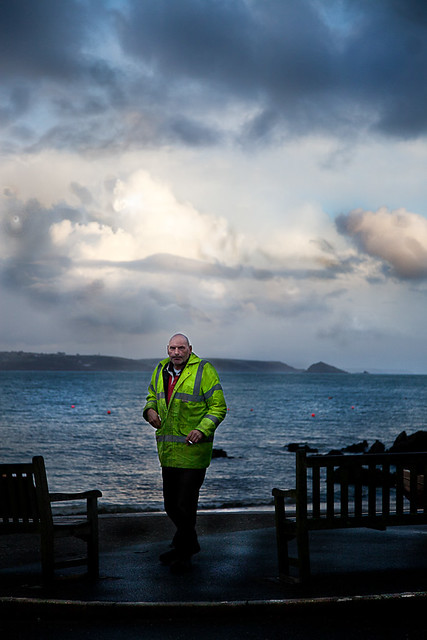
• Early morning worker • Bring out your subject in environmental portraits.

• Early morning worker •
Click image to view large
• Early morning worker • By Netkonnexion on Flickr External link - opens new tab/page :: Environmental portraits
A great way to show off your subject is to find a way to make them brighter than the background. This projects them right out into the viewers eye. Environmental portraits are particularly good subjects for this technique.

Subjects should come first.

Every photograph should have a subject, but sometimes they get lost in the overall picture. If that happens you lose the viewers eye. Make the subject stand right out. In environmental portraits, one of the best ways to do that is to bring out your subject. Find a way of making them brighter than the background.

Environmental portraits

Most people shots, whether street photography, simple portraits, or even an event shot benefit from emphasis. There are lots of forms of emphasis. Here are a few examples…

  • High contrast
  • Big colour variations
  • Placement in the frame
  • Perspective…

Probably one of the most effective forms of emphasis in environmental portraits is subject highlighting. Environmental portraits are where a person is captured in the context of their environment. You can see them as they are in that environment. This helps you see into the person and their character.

If you can use highlighting your emphasis has two impacts. First, it provides an immediate draw for the eye. This is because the eye is drawn to the brightest spots in a picture. Secondly, the scene takes on more depth because of the impact. The very fact that the background is more subdued helps the eye to perceive the depth. The highlight creates a wider contrast between the darkest and lightest parts of the picture. In environmental portraits this has a profound effect on the eye.

How?

During the middle of the day the ambient light is very bright. You have to take care when highlighting to prevent blown out areas or over-exposure. There is one way to do it. Pick out your subject as the focus. Then turn down your exposure to slightly underexpose your background. Then use a manually set flash to illuminate the foreground subject. You will see the background as darker from the slight under-exposure. The subject will be properly exposed by the flash. Be careful not to have your flash too powerful. It will over expose the foreground and leave the background too dark. You might need to practice your technique.

In the photograph above I was lucky enough to capture the subject in bright clothes. The incidental light that did most of the work for me. A little brightening in my post-processing helped bring out the details. The emphasis of the light made the foreground object (the man) stand out. Often, what makes environmental portraits powerful is the understated background lighting.

In environmental portraits, bringing out the subject with highlighting is about taking advantage of natural lighting. Nearly every situation has local lighting variations. So if you take the time to look around your location and find light/shadow situations you are sure to find some place where the natural highlighting will give you an advantage. Most of the time it is down to becoming aware of the light and shade relationships.

Two lessons

What we should be doing when the light is right is highlighting the subject. It gives the picture impact and depth. When doing environmental portraits you will always have local light variations. Take advantage of them where you can. If you need to, use a little flash to emphasis the subject and make them stand out.

Comments, additions, amendments or ideas on this article? Contact Us
or why not leave a comment at the bottom of the page…

find out more...Photokonnexion tips by email
If you enjoyed this article please sign up for our
Tips by email service.
                                                 Find out more

Damon Guy - Netkonnexion

Damon Guy (Netkonnexion)

Damon is a writer-photographer and editor of this site. He has run some major websites, a computing department and a digital image library. He started out as a trained teacher and now runs training for digital photogs.
See also: Editors ‘Bio’.
By Damon Guy see his profile on Google+.

A fast and simple introduction to portrait photography

How to make a digital camera

A rapid but full introduction to portraiture


When I introduce a new idea or a concept in these pages I often provide a video to help put the point across. Well, here is a video that stands up on its own. It is a light and simple introduction to portraiture. It bombs along at a great rate and has plenty to say about good principles in portrait photography. So, without further ado here it is. It’s 4mins 15secs long.

How to take great portrait photos


VideoJug  External link - opens new tab/page
Portraiture – Resources on Photokonnexion.com

Comments, additions, amendments or ideas on this article?
Contact Us
or why not leave a comment at the bottom of the page…

Three great tips for travel and street photography

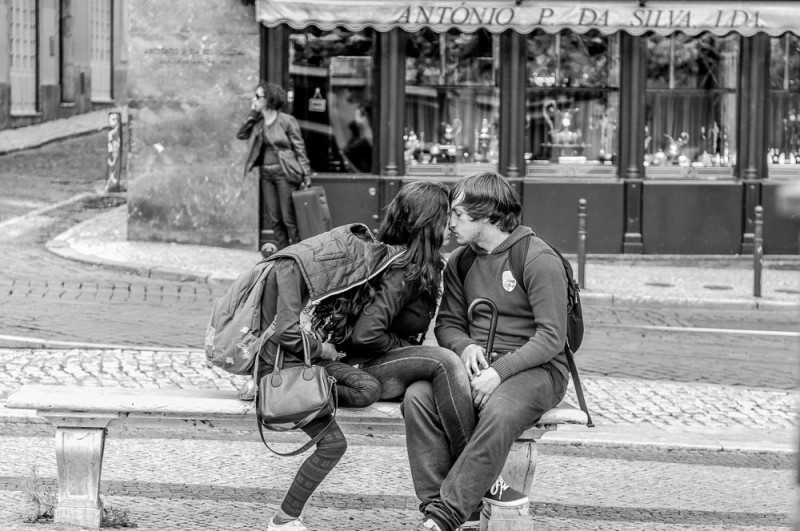
Three 'Ain't a Crowd

Three ‘Ain’t a Crowd – Taken in Lisbon, Portugal
By Paul Donohoe – Street photographer
• Click image to view large •
By Paul Donohoe on Flickr  External link - opens new tab/page

Travel and street photography are a natural fit.

All street photography involves travel. Whether you are travelling round the world, or just across town, this article is for you. It all involves travel. Adventure awaits the traveller and street photographer.

Finding the location

How do you go about finding the best location for street photography in a new place? I am going to cover three tips to help any street photographer, wherever they are traveling, and regardless of the time they have. Each tip will require a little tinkering depending on your needs and preferences, and on the place you’re traveling in.

1. Explore with or without your camera – Play the Tourist

Yes, that’s right: with or without your camera. Surely, you are asking, a good street photographer always carries a camera? Well, sometimes, no. You can carry one as you explore if you insist, but it’ll work better without!

What do people say about tourists? They are so busy trying to get pictures of the things they are looking at that they end up seeing hardly anything at all. Here is tip one: play tourist but without the camera. Just wander around, looking at — and seeing — the sights. Soak up the atmosphere.

If you’re in a new place for a week or so, take more time to wander around. Of course, if you’re visiting for only a day then you might only take an hour.

Following this plan has advantages for the street photographer. Just looking at the sights gets the sightseeing part of the deal out of your system. It’s important for a photographer to spend time without a camera, just using their eyes. In a new place there are always new sights to see. This can be really distracting when you are trying to focus on the lives of the people carrying on amid the other eye candy.

As you explore, you will discover places that appeal to you. You will find where the crowds are, the interesting backdrops – the places you just know you will come back to.

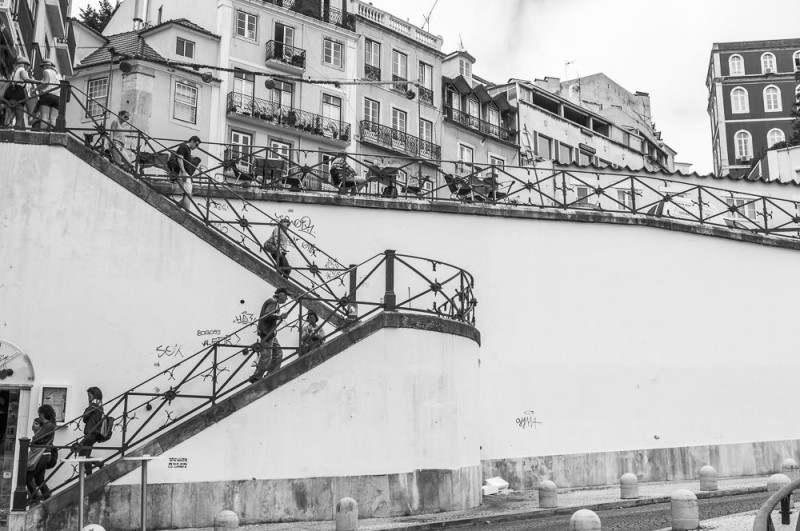
Lisbon Wall

Lisbon Wall • After Escher
By Paul Donohoe – Street photographer
• Click image to view large •
Pauls-Pictures, on Flickr  External link - opens new tab/page

I saw this wall and climbed those stairs once or twice as I explored. I saw this image in my mind’s eye. Then when I came back with my camera, it was there waiting for me!

2. Research: the where, the what, the who and the when

It’s not hard to spend an hour on the internet looking at maps and other information. A lot of people will be content to conduct this research after they arrive at their travel destination, and that’s fine. For me, I like to prepare ahead. The planning, for me, is half the fun!

Are there events, festivals or other activities happening? Where do people gather? What about shopping areas where people stroll? Knowing these things ahead of time, will not only get you excited about your visit, but will start the creative juices flowing.

Check online for the work of other street photographers in the place you’re visiting. Read their blogs, think about their experiences. This isn’t so you can “copy” what they’ve done. You’d be surprised how much you can learn about where and what to photograph — and sometimes where and what not to!

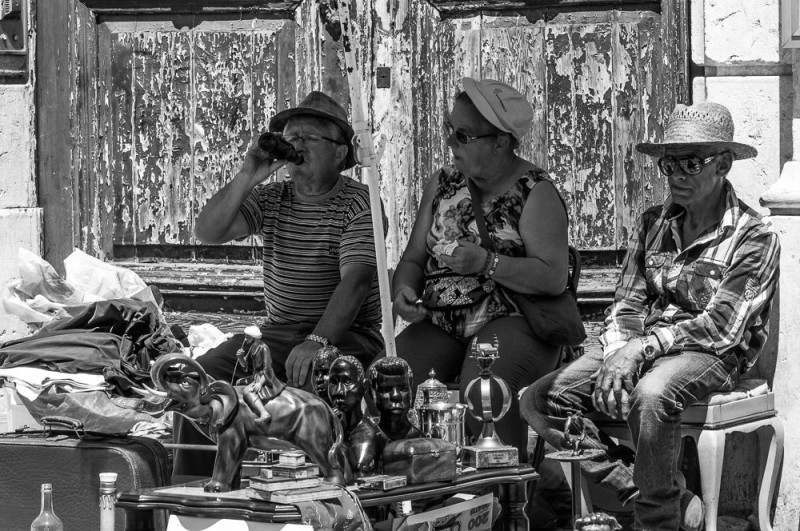
Flea Market Stall Holders

• Flea Market Stall Holders •
By Paul Donohoe – Street photographer
• Click image to view large •
Pauls-Pictures, on Flickr  External link - opens new tab/page

Having heard there was a huge flea market twice a week, I headed there at the first available opportunity. I sometimes think markets were invented for street photography)

3. In street photographer mode…

Keep walking and exploring or focus on a favoured place you’ve found and stay there. You’ve explored and you’ve done your research. Now it’s time to get on with it and get some street photos! The crucial factor in being able to make good street photographs is to be in street photographer mode.

You will read that some people are always in that mode. Perhaps. However, here’s what I mean… To make good street photographs you have to be truly in the space and in the moment. You need to be in tune with the environment and with the people you encounter. In other words, you have to become “of the street” – you belong there, it is your space but it’s also a space you are sharing, even if only temporarily, with other people around you.

Keep walking. Go back to the places you discovered in your exploration and research.

So much of street photography is about feelings, intuition. If, by chance, you come across a space you feel is just right for you, sit awhile and watch the people go by. It might be a park, a town square, or even a train station entrance.

Walking or staying put: there’s no right or wrong. And you can switch between the two; sit for a while till you just feel it’s time to move on.

The picture at the top of the page is one of my all time favourites. It happened after I’d spent an hour just hanging around a small square five minutes from where I’m staying in Lisbon. You really do become invisible if you hang around in one spot long enough.

Three tips… plus!

So, there you have it – three tips for finding the best street photographs when you arrive somewhere new. Actually, there are a couple moew things… Have some fun while you’re at it. Whether you’re there for a day or a couple of months, take your time. There’s no rush – you’ll get the photos you’re meant to!


Paul Donohoe is a Social Documentary and Street Photographer currently traveling to random places as the fancy takes him and his partner. He is passionate about his art and takes his role as a photographer very seriously. He believes that there are no ordinary moments and there are no ordinary people and he has a simple but profound philosophy which informs his work: “Love, Compassion and Empathy are my guides”.


Comments, additions, amendments or ideas on this article? Contact Us