Category Archives: Equipment

equipment, supplies, gear, accessories, accompaniments, accouterments, apparatus, appliances, appurtenances, articles, attachments, baggage, belongings, contraptions, contrivances, devices, equipage, facilities, fittings, fixtures, gadgets, impedimenta, implements, kit, machinery, material, paraphernalia, rig, tools, utensils

Broaden your lens and focal length knowledge

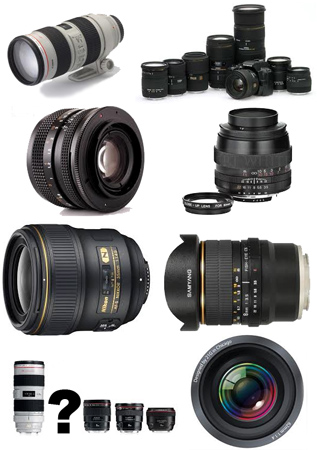
Mixed lens types

Mixed lens types – What do they all do?

There is a range of lens types…

If you know about the lens types you have, that’s good. But talking and thinking about buying others takes a wider knowledge. Here are two videos to give some insights on lens types. There are some interesting facts too.

Think about your lens types

Before you buy lenses, think about what you want. If you are just learning photography this is important. It keeps you in touch with what’s possible with each of the lens types. Also, it helps you to know what you can do with the skills you have. With each video, try to relate your experience with the lens types they are talking about. Then you will be able to extend your skills with kit you own now.

Another point worth thinking about is what you want to photograph. Long lens types, for example, get you closer to objects in the distance. They make things large in the frame, even when it’s far away. But some subjects are more environmental. So you might benefit more from showing a distant subject in its wider environment. Landscapes are a classic example, but there are others. So, think about what other creative views you can achieve with each of the lens types too.

Introduction to Camera Lenses PT1


Mike Browne  External link - opens new tab/page

Introduction to Camera Lenses Part 2


Mike Browne  External link - opens new tab/page

Comments, additions, amendments or ideas on this article? Contact Us
or why not leave a comment at the bottom of the page…

Like this article? Don’t miss the next one — sign up for tips by email.

By Damon Guy (author and Photokonnexion editor)

Damon Guy - Netkonnexion

Damon Guy (Netkonnexion)

Damon is a writer-photog and editor of this site. He has run some major websites, a computing department and a digital image library. He started out as a trained teacher and now runs training for digital photographers.
See also: Editors ‘Bio’.

Get Photokonnexion tips by email!
We send you tips daily – find out more…

Start email subscription now!

How to do DIY diffusion – great light from simple tips

 • DIY Ways to diffuse light •

• DIY Ways to diffuse light •
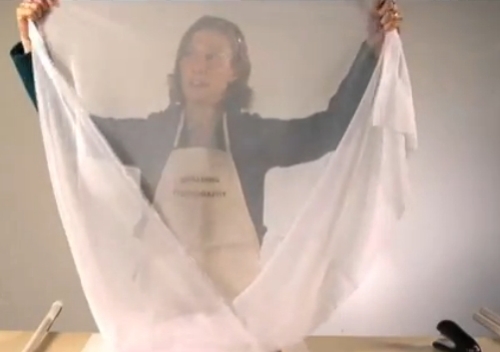
Image taken from the video.

Inexpensive photography equipment!

Following on from the Save money and improve your scene lighting yesterday, we have another video showing how you can provide yourself with an inexpensive light diffuser. It will be quite as good as any professional diffuser and in fact you make it have variable diffusion effects.

Professional and amateur alike use quickly and easily made DIY solutions for their photography. They know they can make things to the specification they require without the equipment costing the earth. In most photographers studios you will find materials and adaptations to be able to do all sorts of ‘quick makes’ with materials, frames and stands. It just makes sense to save money and do it how you need it, rather than spend a mint on something you only use once.

DIY Ways to Diffuse Light


Playgallery  External link - opens new tab/page

Comments, additions, amendments or ideas on this article? Contact Us
or why not leave a comment at the bottom of the page…

By Damon Guy (author and Photokonnexion editor)

Damon Guy - Netkonnexion

Damon Guy (Netkonnexion)

Damon is a writer-photog and editor of this site. He has run some major websites, a computing department and a digital image library. He started out as a trained teacher and now runs training for digital photographers.
See also: Editors ‘Bio’.

Can you write? Of course you can!
Write for Photokonnexion...

We would love to have your articles or tips posted on our site.
Find out more…
Write for Photokonnexion.

The secret to world travel – but staying at home!

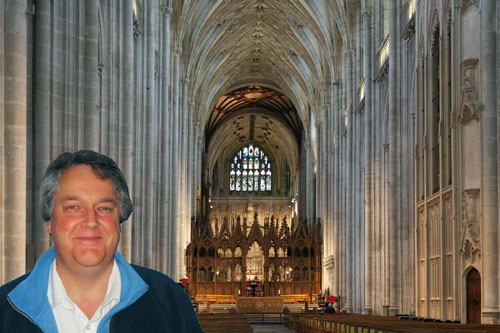
• Winchester Cathedral Chroma key image•

• Winchester Cathedral •
Chroma key work is quite easily done in Adobe PhotoShop and a range of other quality photo-editors.

When you want to be somewhere else…

There are places we would rather be than where we are now. I would like to be on an island paradise …not going to happen! But you can do it photographically. The secret is something called Chroma Key photography or green screening.

Chroma Key Substitution

In chroma key, often known as “green screen” photography, the subject is photographed against a uniformly lit green background. Then, in post production the subject is easily selected out from the green background. The selection can then be pasted into any other photographic background.

Any uniform colour can be used as a backdrop for the chroma key shot. The picture above is selected from a blue background and pasted into a picture of Winchester Cathedral in SE England. The two pictures were taken on different days.

To make the selection of the subject from the background it is important to light the background evenly. When the colour is even the selection is easy and can be completed in one operation. Colour variations from uneven light make it more technical to isolate the subject.

Green is the most frequently used colour in chroma key photography. The colour is very easily separated from human skin tones. Where the subject has green tones, blue is often used as the chroma key alternative. Blue is a common colour for clothing. It is therefore less suitable than a strong bright green which is not so popular as a fashion colour. However, green does have other advantages. The human eye is able to see more shades of green than any other colour. This makes it easy to see variations in the green when setting up the lighting. Green sensitivity is also built into software applications to match the abilities of the eye. This helps us to work with the background when doing awkward selections.

Fun and games

The substitution of a subject into any other photographic background provides great opportunities for doing fun things. Film stars can be placed in your garden. You can apparently travel the world without leaving your front room. Just find the right pictures and substitute yourself into the background of your choice.

Of course there are also opportunities for advertising, graphic art, product photography, still life, portraiture, action shots and many other false situations. Of course we should be careful not to be immoral about such things! Feel free to have fun though. You can really make it look like you have traveled the world.

How is it done?

Basically you need a chroma key background, lighting to illuminate it evenly, a camera and a subject. On a small scale this is easy to do. A lot of people doing chroma key work for the first time start with still life or table-top photography to get the technique right. Probably the most common use of the technique is for portraiture. Take a picture of yourself or your friends and then start playing. For this you need a larger screen…

The video is a complete introduction to the use of chroma key photography. You can take the same techniques and scale them to any size. The video introduces the ideas you need to grasp and shows how to set up the lights and the equipment. It also shows one of the software applications. After the video I will briefly look at that software for you.

How to Green Screen (Chroma Key) with Photography!

markapsolon  External link - opens new tab/page

Software

There is a whole range of software that is capable of doing chroma key. In essence chroma key software has two jobs. The first is to select the subject off the green background (or whichever colour you are using). The second is to successfully blend the abstracted subject with the new background.

The software from the video is called PhotoKey from FXHome  External link - opens new tab/page. It has been produced specifically for chroma key compositing. It is not alone in the market. However, there are not many applications specifically aimed at this work. Instead there are plenty of applications that do chroma key blending as part of a general suite of editing tools. There are also plugins for the same process to go into your favourite image editor.

The actual process for producing the final blended image is relatively quick and easy in most of these chroma key applications. The tools are usually quite self explanatory if you have some editing experience. As with any editor, you normally find the blending tools manage colours, contrasts, edging and so on. Ultimately you are creating a blend of the two images, but the best chroma key tools go further. At the end of working through the blending process you can make further changes in a good software suite or plugin. If you are satisfied with it you should be able to export your image to make a .png, .jpg or .tiff image.

The way to do it in Adobe PhotoShop

The general photographer is most likely to have use of a quality image editor like PhotoShop, Elements, GIMP, PaintShopPro and others. All these are able to do the type of work that PhotoKey can do. Admittedly it takes longer. But for beginners it is better to save your money for more general photography kit. For those who are interested, here is a short video explaining the Photoshop method of doing a chroma key composite. It is a simple technique using standard photoshop tools.

Isolating with a Chroma Key Background

This tutorial is aimed at Photoshop intermediate level users.

Overall…

Chroma key work is fun. There is quite a lot to learn, but it adds flexibility to your photographic work and post processing. The use of up to date quality image editors is probably better than splashing out on expensive specialist applications. Nevertheless specialist applications do a great job, saving time in post processing.

Can you write? Of course you can!
Write for Photokonnexion...

We would love to have your articles or tips posted on our site.
Find out more…
Write for Photokonnexion.

find out more...Photokonnexion tips by email
If you enjoyed this article please sign up for our
daily email service.
                                                 Find out more
#11030#

The secrets of good backgrounds

• Backdrops •

• Backdrops •
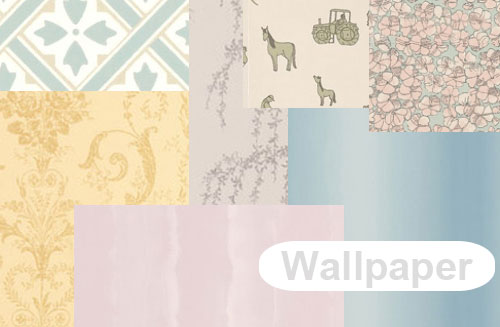
Wallpaper can be used extensively as a backdrop. There is plenty of variation and the material is relatively cheap.

Get more out of less.

One of the central ideas behind photography is to reduce the “clutter” especially in the background. We want to simplify our shots to help focus the viewers attention on the subject we have chosen. Often, by way of controlling the scene we use backdrops. For the modern photographer a backdrop provides a simple uncluttered background that can be used to off-set the colours of the subject, or to complement them or remain neutral.

Backdrop secrets

Modern backdrops have a wide range of finishes. However, strong patterns and fussy details draw the eye off the subject. So most backdrop patterns are designed to reduce the impact on the eye. Rather than regular strong lines or shapes these back drops will tend to have random and subdued variations in the theme. Other backdrop types are solid colours. The best backdrops are minimalist.

Black backdrops are often used for darkening and absorbing the light. White backgrounds are frequently used for high-key photography. Reds, purples and blues are often used for different types of shots, but can also form effective variations for monochrome work (single tone shots or a single colour and white).

Bright green backdrops are called chroma-key (chromakey). They are often used to provide a set colour ready for post processing technique called compositing. This is where new colours or entire images are to swapped into the image. The subject is retained but the green colour is replaced with an entirely new image. This technique is the digital replacement of the old ‘back-projection’ or painted backgrounds techniques used to make it look like there was something solid in the background in the days of film. Actually there was a blank screen behind the subject. This technique is also known as “green screen”.

Backdrops can be used anywhere but are used extensively in two particular branches of photography. Portraiture and fashion photography use backdrops to simplify the scene as much as possible. This allows the person or model to be the strongest element in the scene. The eye is therefore drawn to the person which is where the photographer wants people to look. A fashion or portrait shot where the eye is not on the person is a disaster!

Still life

The other area where backdrops are used extensively is in various types of still life. Again the intention is to create a simple scene so the subject is the centre of interest. However, in still life the relatively close up nature of the work can allow the use of stronger elements in the backdrop.

Heart in hand

Heart in hand • By Damon Guy
In smaller scenes or still life backdrops can be stronger. The diagonal wallpaper pattern here helps the flow of the eye.


In the picture above the hands are the centre of attention. The backdrop is used in this case to provide a dynamic feel (from the strong diagonal) and to direct the eye along the line of the phrase in the heart. Eyes naturally tend to follow lines like that.

Wallpaper

While solid colours and simple patterns are well catered for in the market, specific patterns on backdrops are limited. However, in the picture at the top of this page you can see that I have arranged a variety of different wallpaper samples. Wallpaper is easy to find – it is in every DIY store and great patterns, plain or textured can be found at relatively cheap prices. If you are working at small, still life, sizes one piece of wall paper might be sufficient. However, I have sometimes worked with wallpaper on a full sized portrait backdrop. In this case I use strong tape to stick the wallpaper sheets side by side to make the backdrop wide enough. Then, I staple the wall paper to two light wooden battens, top and bottom. This helps hold the papers together with less damage. It also helps pull the paper out so it hangs flat. Wallpaper has a tendency to curl. Then the top batten is clamped to the backdrop cross bar. Hey presto! You have a cheap but patterned backdrop.

Other patterns, shapes and marks can be used to do other things in a picture. In fact if it is used properly the use of backdrops can be complementary, can be contrasting, can form effective reflections, light dampening, and many more things. Understanding backdrops is a great way to ensure that you can control what is going on behind the main subject.

Decor

Backdrops have rich history in the theatre. Today, in modern still photography they are relatively simple and uncluttered. However, if you have a specific scene in mind you can use wall paper to provide fun and varied backdrops to complement or change your scene. While proper cloth or paper backdrops can be quite expensive; wallpaper is a relatively cheap way to use fun patterns and interesting backdrops.

By Damon Guy (author and Photokonnexion editor)

Damon Guy - Netkonnexion

Damon Guy (Netkonnexion)

Damon is a writer-photog and editor of this site. He has run some major websites, a computing department and a digital image library. He started out as a trained teacher and now runs training for digital photographers.
See also: Editors ‘Bio’.

find out more...Photokonnexion tips by email
If you enjoyed this article please sign up for our
daily email service.
                                                 Find out more
#11030#

How to buy a new camera…

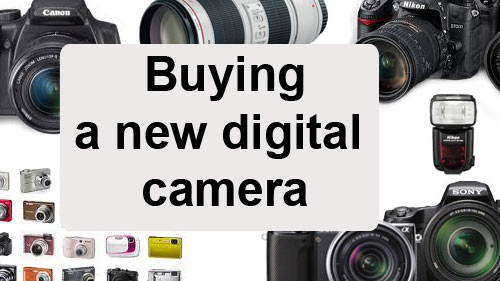
Buying a new digital camera

Buying a new digital camera

Buying is a big decision.

Photographers should be wary of the simple answer. Buying a camera is a deeply personal matter and a big investment. You live with the consequences for a long time. Look carefully at considerations that really matter to you and your performance as a photographer. Impulsive buys may spoil your photography. If you’re comfortable with your buy you will be more likely to get to know it, use it and have fun with it.

1. Work out what you need

Impulsive buying means something will not match your need, then you won’t get the use you want. The points below will help refine your thoughts. Write down your ideas to ease your research later.

Budget: Fix a budget – it may define the type of camera you can buy. So write down what you want to spend before starting. Change your mind later, but start with an idea to guide initial research.

Usage: What type of photography will you do? There are broadly two types of photographer…
The ‘point-and-shooter’:

  • Interested in recording fun, family, events and memories.
  • Love things they do when they have a camera around.
  • Take pictures as reminders. (Holidays, family, fun, action, friendship).
  • The camera is an accessory to the activity.
  • The camera is easy to use, probably in auto mode.
  • Simple controls – lighter, lifestyle-type design.
  • Less interested in the art of photography, more the style of life.

The ‘photographer’:

  • Take pride in every shot.
  • Indulges other passions through photography.
  • Wants more equipment.
  • Interested in “functions” and “controls” – technical cameras/DSLRs.
  • Camera is an essential part of the activity. (Landscapes, macro, action, nature, still-life, fine art…).
  • Loves photography for its art, technology, skills and techniques.
  • Documents passions and communicates interests through photography.
  • Take pride in camera control.
  • Enjoys the technical aspects of the capture as much as the images.

Each has an associated type of camera. A heavy DSLR is not well suited to the carefree life of the point-and-shooter. A compact, colourful, wrist-strap camera is not suited to landscape shots and large prints. Preferences and lifestyle should be shorted out early on. Are you are a point-and-shooter or a committed photographer (DSLR style)?

Conditions: Indoors/outdoors, weather, underwater, holiday, abroad, air travel? The situations in which you use the camera affects what you buy. Consider protection, travel, camera size and special equipment needs.

Experience: Skill level affects purchase – your aspirations for your future photography will too. If you’re just starting out, buying a camera with a bewildering range of functions is daunting. Take simple steps. Entry level DSLRs provide for years of growth into your hobby and produce great images. This allows you to develop skills without confusion.

Features/flexibility: Spending more on a camera means more features and flexibility. However, while this gives more control it increases cost for relatively little increase in picture quality for starters. Don’t waste your money. Focus on what you need, not “feature bloat”.

Physique/fitness: When buying you don’t get a feel for using a camera. Little, disabled, or not very fit people may find big cameras unusable. Fit, but not shooting daily? You might struggle to hold up a big camera for long periods. Buy a camera you can hold steady and use all day (if necessary). I know people who bought great cameras and had to sell them again to buy another great, but lighter, camera. Also ensure you can grip it properly and comfortably. Can you reach all the buttons easily?

Size of prints: More megapixels is NOT a better camera today. Good quality cameras have sensors to produce great images. High megapixels are only necessary for high resolution pictures – mostly for large prints. You pay a lot of money for top-megapixel cameras. Only buy them if you frequently do big prints in high definition. Don’t worry about megapixels in the market mid-range.

Lenses: To a committed photographer lenses are key. Buying the right lenses is more important than a camera body. Lens investment pays you back for a lifetime, or many camera bodies. Spend less on the body than you intended and save money for better quality lenses (not more lenses). Consider retaining at least half your budget for lenses.

Other equipment and accessories: New cameras require other items affecting your budget. Consider…

  • Lenses (Wide angle, Zoom, macro etc)
  • Camera/equipment bag
  • Tripod
  • Spare batteries (two)
  • Light modifiers (diffusers), filters, reflectors
  • Specialist equipment for specific interests
  • Memory cards (at least two – eg. 2×16 Gb not 1×32 Gb – cheaper and more secure)
  • Off-camera flash (pop-up flash is rarely useful)
  • Remote trigger to fire the flash/camera

There may be other things too.

Compatibility: Is your existing equipment compatible? Buying a camera could mean buying those extras again, straining your budget. Consider the camera brand you want to buy. That may affect the other equipment you buy later. Lenses are a particular consideration. Top brands make good lenses, but other brands may not. That could be important for your buying strategy.

Picture quality: Quality digital cameras produce great picture quality. However, large, high resolution images (especially for printing) may need larger digital-sensor size (cropped or full frame?) and type of lens and lens quality. Buy up-market lenses as far as you can. For a point-and-shoot camera consider the quality of zoom. ‘Optical zoom’ is best, the lens does the enlarging. The quality will be better with a good optical zoom. With a large digital zoom component expect lower quality prints. Digital zooms crop the picture in-camera to make the picture appear bigger. You will see more detail, but the picture may be a lower definition/resolution.

More after this…

find out more...Photokonnexion tips by email
Enjoying this article? Please sign up for our
daily email service.
                                                Find out more
#11030#

2. Research

Now look at what is available. examine a range of reviews on different websites. Check out what’s popular around the web and get a “best fit” camera to your specification from above. Talk to experienced photographers. Join a club. Leave questions on Internet forums. Ask in shops.

Be prepared for this stage to take quite a long time. You may be committing to a brand for a quite a few years, or your career. Take it slowly so you can understand all implications. Keep notes and be prepared to check definitions and learn about features.

3. Try it out

Once you have identified your dream machine, see if you can try one out. Beg, borrow or hire. You will be unlikely to try everything but spend a weekend or week with it to really get a feel for it. That will help you to feel confident about your ideas or start new research. Ensure you are on the right track.

4. The purchase

From a shop: Local camera shops often have deals and committed staff. They will have knowledge and experience too. Remember they are on commission and a different focus to you. So go to a shop with a really good knowledge from the above before you buy.

Online: There are some great deals but also a lot of scam artists. Consider…

  • Who you are buying from.
  • Does the site cover losses?
  • Is delivery and packaging good?
  • Delivery times?
  • Are there proper cancellation and returns procedures?
  • Transit/purchase insurance (the company or your credit card)
  • Is the online store reputable and well known?
  • Do not click from email ads to the site – insecure.
  • Check with friends to see which online stores they used.

If it sounds too good to be true, it probably is. A reputable company will have protections built into the purchase and made clear on the site.

When you are ready consider negotiations. Lots of websites will do deals. Shops will too. Make sure you get the right deal, but don’t compromise security or safety.

5. After purchasing

Check your purchase properly – has everything arrived? Retain all paperwork and orders for future reference, returns and insurance. Test to see that it works properly. Get signed receipts and correct paper work for returns, delivery shortages or damage.

Satisfied you have the correct equipment and it works? Put it through its paces in a logical way. In Getting started with a new lens I show how to work through testing and getting to know new lenses. Many of the principles apply to the purchase of a camera and help you get to know your camera properly.

Other ideas?

Please share your other ideas, tips or experiences on buying a camera with us below in the comments…

By Damon Guy (author and Photokonnexion editor)

Damon Guy - Netkonnexion

Damon Guy (Netkonnexion)

Damon is a writer-photog and editor of this site. He has run some major websites, a computing department and a digital image library. He started out as a trained teacher and now runs training for digital photographers.
See also: Editors ‘Bio’.
Inexpensive Close-Up Photography – Tips and Tricks

• Oil and water •

• Oil and water •
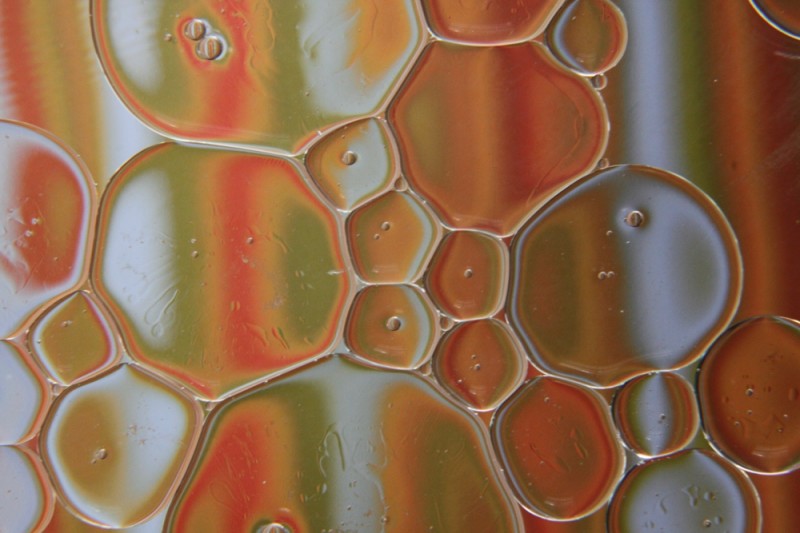
These bubbles of oil in water were shot with a
Canon 50 mm f/1.8 and a +10 close-up filter
Click image to view large
Oil and water • by ArchaeoFrog

Easy, budget macro.

Macro or close-up photography is accessible without investing in a pricey macro lens. The first three articles in this series covered techniques for inexpensive macro-level results: close-up lenses, reverse rings, and extension tubes. In this article, I offer suggestions for achieving great-looking results using any of these three techniques.

Choose Your Depth of Field

Depth of field is a term that refers to the area of the image that is acceptably sharp and in focus. Depth of field is a function of many things. Our interest is in three factors. These are aperture, the distance between the camera and the subject, and the orientation of the subject relative to the camera.

Aperture has a direct influence on the depth of field. A wide aperture (smaller f number, such as f/1.8) creates a shallow depth of field. Areas of the image outside of the zone of sharpness fall out of focus quickly. Wide apertures can be used to create bokeh – unsharp sections of the image.

A narrow aperture (larger f number, such as f/22) creates a deep depth of field. The majority of the image is in focus. Narrow apertures are often used by landscape photographers to capture front-to-back sharpness throughout an image.

The distance between the camera and the subject also influences the depth of field. Generally, the closer that you are to your subject, the narrower the depth of the field becomes. This is particularly important when using macro and close-up photography techniques where you need to be physically close to the photographic subject.

• Bokeh penny •

• Bokeh penny •
By ArchaeoFrog
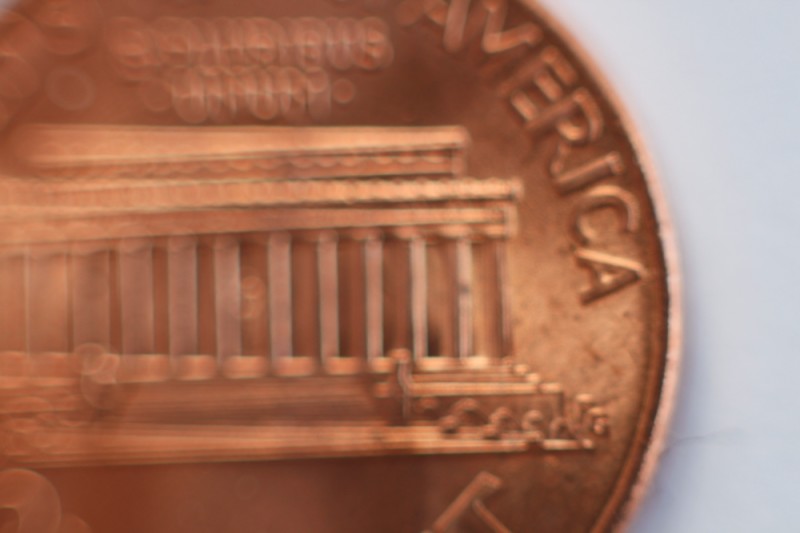
Penny shot with a Canon 50 mm f/1.8 lens and a full set of three, generic extension tubes (7, 14, and 28 mm). The plane of sharpness lies parallel to the flat of the lens. If the plane is not parallel the focus is quickly lost.
Click image to view large

It is also important to consider the orientation of the subject relative to the camera. The depth of field can be thought of as a plane that is parallel to the camera lens. If you can orient yourself so that the subject is parallel to the flat of camera lens, more of your subject will be in focus than if it is at an angle to the camera. In the penny shot above, I tilted the camera lens slightly away from the parallel position. The loss of focus from right to left is obvious.

• Flowers and Depth of Focus •

• Flowers and Depth of Focus •
Click image to view large

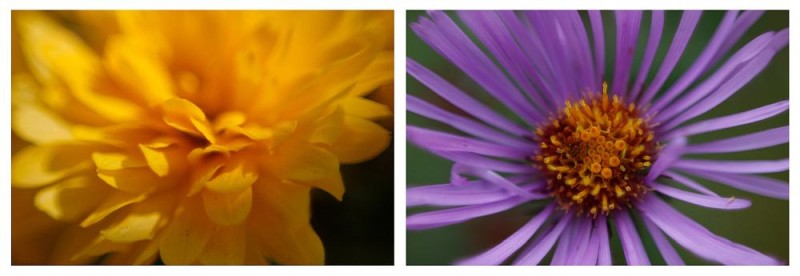
The flower photographs show how depth of field influences an image. Both were taken with the same lens (Canon 50 mm f/1.8), the same aperture (f/1.8), and the same technique (reverse ring). Both images have a shallow depth of field (wide aperture) and are close to the subject. The appearance of the depth of field is very different. The yellow flower (left) is sideways to the camera. Only the closest edges of the petals are within the depth of field and are in focus. The purple flowers center is shot parallel to the camera. The entire center of the flower is within the depth of field and appears in focus.

If you want more of your subject in focus use a narrower aperture. Increase the distance between yourself and the subject, and set the camera (and thus the depth of field) parallel to the subject. If you want less of your subject in focus, you can use a shallow aperture, get in closer to your subject, and orient the camera and depth of field perpendicular to the subject. Try it many different ways and see what works best for what you envision!

The Tripod: With and Without

It is possible to achieve acceptably sharp macro results hand-holding the camera. The majority of images in these articles were shot hand-held. If you have a stationary subject using a tripod will greatly improve the sharpness of your image. A tripod allows you to use longer shutter speeds. This helps you get crisper images in lower light. It also allows a narrower aperture to gain a deeper depth of field. The steadiness of the tripod will significantly reduce hand movement.

If available, also use the Live-View function on your camera to fine-tune your focus. Live-View lets you use your display screen rather than the viewfinder. Many cameras allow you to zoom in on a portion of the image to check the focus.

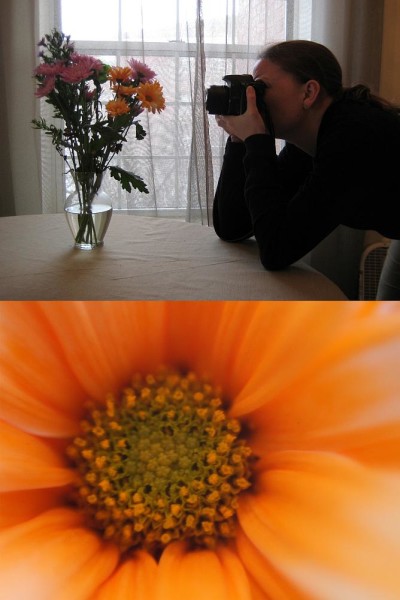
Without a tripod a good stance improves stability while hand-holding. Create your own tripod with your body by bracing yourself or your camera. In the diptych image below, I am using my elbows for support. The elbows in combination with my feet create a similar a three-point stability like a tripod. In the extension tube article, I demonstrated a similar human-tripod by bracing my elbows on my knees while shooting.

• Simultaneous diptych •

• Simultaneous diptych •
These two images were taken at the same time and show my hand-holding position as well as the image captured. The flower was shot with a reverse-mounted Canon 50 mm f/1.8 lens.
Click image to view large

This three-point position allows me to lean in and out very slightly with the camera. I can manually find the exact focus that I want in the photograph. Focusing with body movement allows me to place the depth of focus exactly where I want it relative to the subject.

More after this…

find out more...Photokonnexion tips by email
Enjoying this article? Please sign up for our
daily email service.
                                                Find out more
#11030#

When you are hand-holding practice breathing slowly and pushing the camera shutter button gently, without imparting additional motion to the camera. (More tips on stance)

Play, Combine, and Find What Works for You

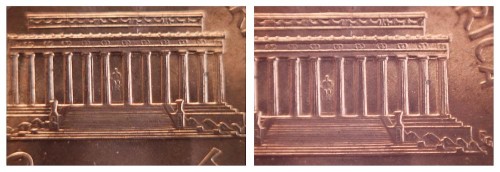
You can use extension tubes in combination with either a reverse ring or close-up lens for even more detailed images. However, the working distance between the lens and the subject is narrow and the depth of field is incredibly shallow. With the pennies below, I found it impossible to keep both Mr. Lincoln and the columns of his memorial in focus together, as the columns are slightly raised relative to the surface of the penny.

• Penny diptych •

• Penny diptych •
These pennies were both taken with a Canon 50 mm f/.18 lens and a set of three, generic extension tubes (7, 14, and 28mm). In the left-hand image a +10 close-up lens was added, and in the right-hand image the lens was instead reverse mounted.
Click image to view large

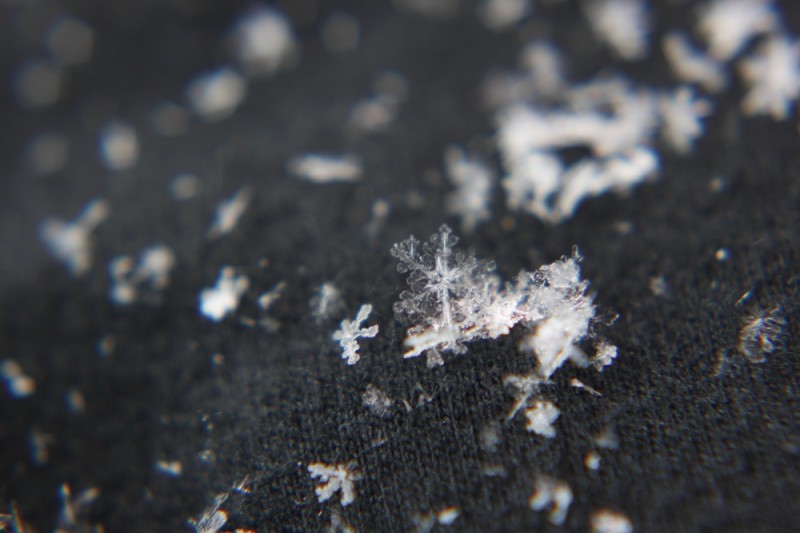
Close-up lenses can also be screwed in to each other for greater magnification. I used both a +4 and +10 close-up lens for the snowflake image below. There is some distortion visible in the image particularly around the edges. I also found it more difficult to focus when looking through both lenses.

• Macro snowflake •

• Macro snowflake • By ArchaeoFrog •
This snowflake was shot with a Canon 50 mm f/1.8 lens
and a +4 and +10 close-up lens.
Click image to view large

The final curtain

The varieties of subjects for macro and close-up photography are endless. I have tried to highlight a variety of them during this series. Flowers, insects, and falling water are perennial favourites, as are coins, Lego figures, and other small objects. Your imagination and creativity are your only limitations. Enjoy!

• Macro snowflake •

• Lego water crown •
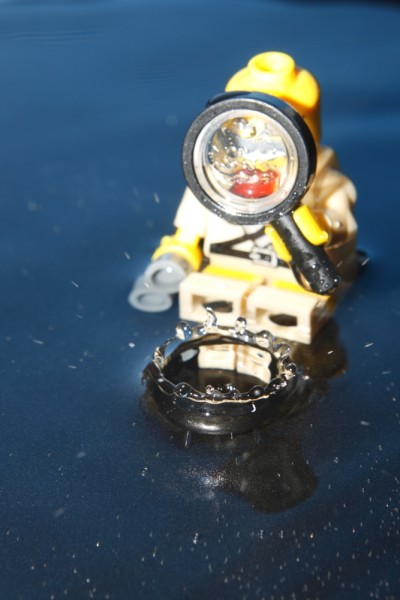
This Lego mini-figure and falling water crown were shot using a
Canon 50 mm f/1.8 lens and a +4 close-up lens.
Click image to view large

Articles on Close-Up and Macro Photography
by Katie McEnaney

Part 1 of this series focused on using close-up lens, Part 2 covered reverse rings, and Part 3 explained extension tubes.

Inexpensive Close-Up Photography – close-up rings
Inexpensive Close-Up Photography – Reverse Rings
Inexpensive Close-Up Photography – Extension Tubes
Inexpensive Close-Up Photography – Tips and Tricks (this article)

By Katie McEnaney (contributing author)

Katie is an elementary school teacher in Wisconsin, USA. She is an avid photographer with wide interests. She is always interested in learning more and growing in her photography.
By Katie McEnaney (Archaeofrog)

Can you write? Of course you can!
Write for Photokonnexion...

We would love to have your articles or tips posted on our site.
Find out more…
Write for Photokonnexion.

A simple introduction to backlight

• Introduction to backlight •

• Introduction to backlight •
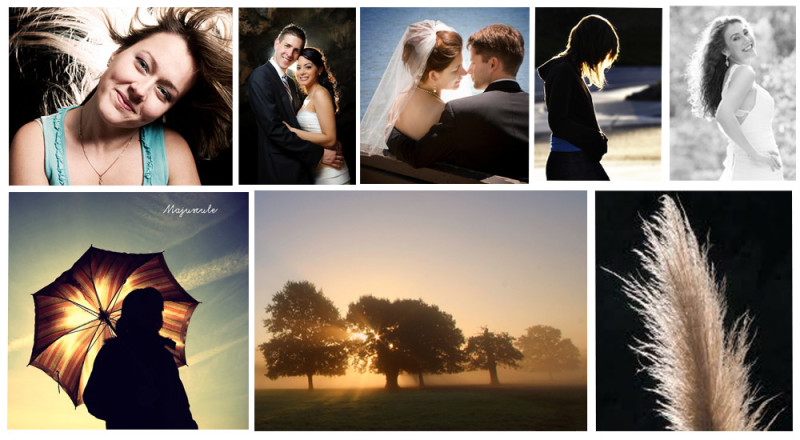
Various images showing backlight scenarios in the studio and outside.
Images from various artists – displayed on Google Images.

Backlight is a versatile light with great potential.

The term backlight refers to the use of a light which is projected from the back of the scene/studio onto the subject from behind. The camera is placed facing the subject. It captures the effect of the light as a highlighted rim or halo around the back edges of the subject.

The use of a backlight creates very distinct effects. The most important is the rim light around the edges of the subject. This highlighting effectively isolates the subject from the background. So it is a useful technique when the subject and background share similar colours or tones. The rim effect around the edges of the subject is especially useful for bringing out highlights and style in hair. Sometimes it is also used to imply purity or goodness after the manner of a religious halo.

Backlight can be produced either with artificial light, natural light or a combination. The sun is normally the most important light for back lighting and so in cases where sunlight is strong artificial light is often used to bring the foreground or the subjects front side out of shadow. This is fill light and provides sufficient light for a good shot of the subject without blowing out the effects of the back light.

In photographic scenes the backlight is often used to create an emphasis on the three dimensionality of the subject. Lights coming directly from the position of the camera tend to make a subject look flat because all the shadows are removed. Backlight has the opposite effect. The light halo effect at the back of the subject emphasises the depth of the subject. It can also be used to emphasis depth in the picture. By strongly highlighting the back of the subject the distance to the scenery behind the subject is revealed giving the image some depth.

Setting up an effective backlight requires some care. If the source of the light shines directly into the camera lens it will blow out and create a strong distraction for the picture viewer. Also a strong backlight can make the front side of the subject look very dark or even silhouetted. To prevent this it is normal practice to use a front light as well so the subject is bright enough to capture. Setting up a good backlight often requires getting the foreground light correct first, then putting in the backlight at around 2 to 3 stops brighter to create the emphasis.

The angle at which a backlight hits the subject can be critical. If the backlight is directly toward the camera the subject can be strongly blown out by and direct light passing around the subject. Normally backlight is applied at an angle. That way the lighting will provide a little texture on the subject and not be directed into the camera lens. It can also be used to more effectively show fashion elements like hair styles by picking out highlights, curls etc.

“Backlight” should not be confused with background lighting. The latter is where a light is used to light the background, the scenery or backdrop. Background lighting typically faces away from the camera. Backlights face toward the camera.

Backlights are used in such a large variety of ways that some practice and experimentation is needed to be able to work out the best way to use them. However, because of the intensity of the light from the back the foreground lighting is often important too. It is not unusual for multiple artificial lights to be needed in order to get the best out of backlights and to keep the balance of lighting good all around the subject.

Examples of “Studio backlighting” on Google  External link - opens new tab/page
Examples of general “backlight photography” on Google  External link - opens new tab/page

Backlight techniques are very important in photography as they have so many effective outcomes. It is certainly worth practising with your lights or even natural light to try out some of the effects.

By Damon Guy (author and Photokonnexion editor)

Damon Guy - Netkonnexion

Damon Guy (Netkonnexion)

Damon is a writer-photog and editor of this site. He has run some major websites, a computing department and a digital image library. He started out as a trained teacher and now runs training for digital photographers.
See also: Editors ‘Bio’.

Contribute A Definition?

Send us a definition of a photographic word or phrase...

Send us a definition for our list of photographic words and phrases. Simply write a clear definition and send it in. Include an original picture if you wish. Give us your name and a link to your website and we will credit your work.