Tag Archives: Posing

Directing and Posing: Do you know the relationship?

Directing and posing seem to be two opposite ends of the photographic spectrum. Yet, they share a very close relationship. Successful images usually break the barriers because of both directing and posing. At least, more so than the rest of the day-to-day fluff that floats on the photographic wind.
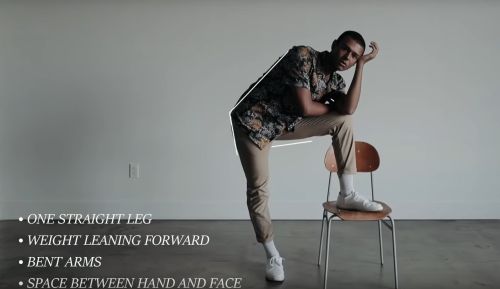
In successful images directing and posing must share an intimate relationship.

In successful images directing and posing must share an intimate relationship.
Image taken from the video below.

Directing and posing – the meanings

It is interesting that the meaning of posing rests more on misrepresentation than action. Here is what I mean…

Posing; posed; verb – to pose…

  1. To assume a particular attitude or stance, especially with the hope of impressing others: “He likes to pose as an authority on literature”.
  2. Presenting oneself insincerely: He seems to be posing in all his behavior.
  3. To assume or hold a physical attitude, as for an artistic purpose: to pose for a painter.

Dictionary.com :: Seen: 03/10/2018

These definitions of posing are mostly about how the subject represents themselves.

On the other hand, directing is more about the power behind the action…

Directing; verb – To direct.

  1. To manage or guide by advice, helpful information, instruction, etc.: He directed the company through a difficult time.
  2. Regulating the course of; control: History is directed by a small number of great men and women.
  3. To administer; manage; supervise: She directs the affairs of the estate.

https://www.dictionary.com/ :: Seen: 03/10/2018

In this definition we are in no doubt where the driving force comes from.

So, is the rift between these terms a real one for a photographer? Yes! And, the division often separates the successful photographer from the rest.

A common mistake…

When I teach portraiture classes, the most obvious gap in knowledge is not about the photography. It is about the connection between the people involved. Amateur photographers, and some professionals, rely on the subject to come up with the posing strategy. They take the passive and weak attitude that the posing person knows how to present themselves for the photo the photographer has in mind. This approach leaves the directing in the hands of the subject of the portrait. Worse, the subject is posing to meet your goals, but they probably don’t know what they are! Regardless, the subject is probably the least qualified person to steer the outcome of the photograph. So, do not let your subject misrepresent your vision of the image.

Have a goal before you start

It pays to have at least an idea of what you want to photograph. Too many photogs put themselves in front of a subject (person or object) and hope that they have the right photographic technique to capture it. Success relies mostly on luck with this approach.

On the other hand, the stronger approach is with the photographer that has a concept to depict. They research it and set it up. Success becomes a matter of visualisation and fulfillment. There are two steps there that the passive photog misses. First, they don’t do any visualisation and research before starting. Secondly, they just react to the scene, not direct it or manage it to ensure photographic success.

why do photographers often fail to direct?

In short, I think there are several reasons…
• Practice: The successful photographer has had enough practice to know that the passive point-and-shoot method is too haphazard and error-prone. The passive photog does not drive for a result.
• Fright: Most self-taught and developing photographers have not learned to direct and, so, do not recognise its value. They are frightened to “take control” of someone else (the subject). Directing requires them to drive for the result and be the instigator of the outcome. This is an extrovert approach. However, it is a big step to take for the unpracticed – or at least they think so. Actually, it is the path to success.
• Lack of knowledge: The reluctant, passive photog is an example of a great educational irony. They think they should not do it because they don’t know how to go about it. However, they won’t even begin to know about it unless they experience it. In fact, the way to get past the problem is to simply push past it – have a go! Just do it! You will learn by your mistakes and feedback.

Directing and posing have a dynamic connection

To step outside of the meanings quoted above, we should be more bullish, more participatory, more inclusive, more descriptive. Directing drives the subject and the poses. However, it is only through co-operation and joint understanding can the posing be effective. Success depends on you, the photographer, breaching the divide between the traditional meanings of directing and posing.

Directing is an extrovert activity. That does not necessarily mean that its for bullies. Instead, to succeed, we need to grasp the bull by the horns. To direct is to articulate an outcome. Make it clear that the poses you work with are the ones that fit the goal you are trying to achieve. Work with the sitter to jointly get the posing outcome that will make the best shot.

Directing and posing flows from participation and inclusion

Be more participatory. As photographers we need to interact with our subject – not just react to them. Talk to them, know them, live a part of their lives for a few minutes. Listen to them, but know what you want to achieve. Then work with your subject bringing out the advantages they have just told you about. The best poses are those that show the character of the person. They have the character, you do the interpretation through your direction. Directing and posing come together through the cooperation and participation of both photographer and subject.

Be more inclusive. Once we are involved and communicating with our sitter or subject we can cooperate with them to achieve our goal. That is the previsualised goal we set ourselves before the shoot. Often what we want out of the shoot is a reflection of what your subject wants too. Include them in your vision. They will understand and perform the pose better if they are included in the discussion leading to it.

You will not succeed in a shoot where you alienate, annoy, ignore or destroy your subject. Generally, your shoot stands a greater chance of success when you view the whole process as one of teamwork between the photographer and the person you are framing.

Directing and posing – the moral of the story

Be the driving force. See the goals, articulate your vision. Always bring your subject along with you. The dynamic connection between you will enable you to bring out the character of your sitter, open up the subject and pick the best approach possible.

From feedback, I have found that learning to engage through directing and posing gives students a big boost in their development. If my students come away from a portraiture session thinking, “I must try directing, I must try directing!”, then I know they will be on the way to making great images. Remember, not all your shots will be a success. Nevertheless, you stand more of a chance of some good hits if you push for what you want to achieve but also involve your subject.

A quick video

Directing and posing often does need a degree of knowledge and understanding or practice and experience on the part of the director. In this video short, you can see some of the issues that the photographer has considered prior to the shoot. The lines and captions show the previsualisation in the shot. The photog works with the subject to produce an outcome that is both unique and empathizes with the character of the subject. It is a quick video, but worth thinking about on several levels. While watching, think of the directing aspect, the posing aspect and the actual poses that are being struck.

Comments, additions, amendments or ideas on this article?
Contact Us or leave a comment at the bottom of the page…

Like this article? Don’t miss the next — sign up for tips by email.

Damon Guy - Netkonnexion

Damon Guy (Netkonnexion)

Damon is a writer-photog and editor of this site. He has run some major websites, a computing department and a digital image library. He started out as a trained teacher and now runs training for digital photographers.
See also: Editors ‘Bio’.
See also: Profile on Google+.

Heads together – the more intimate pose

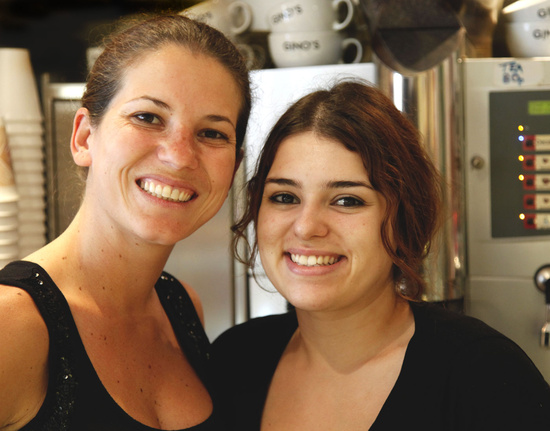
Coffee Girls on 365 Project

• Heads together pose – an intimate feeling in your pictures •
This pose really increases the intimacy of your shot.
Image by Netkonnexion  External link - opens new tab/page

Emotion is powerful in a photo.

Every photograph has hidden messages. Everything you look at tells you about the picture. The more you are able to express emotion the better. When that emotion shows itself to the viewer you have a powerful impact.

The heads together pose

It is a pose with a long history. Putting heads together has shown trust, love and intimacy for centuries. Today the trust that goes with the pose is still felt. We all inwardly recognise it even if we could not point it out.

That is the point. Many emotional and trust elements in relations with others are not spoken. We only see them as visual clues. But, they carry a strong message.

Another message we often miss is a true smile. When someone fakes a smile they don’t smile with their eyes. We only wrinkle our eyes at the corner when we do a true smile.

The girls above worked together for a long time. They had become good friends. I asked them to put their heads together. They recognised the trust and both did true smiles. What a happy picture.

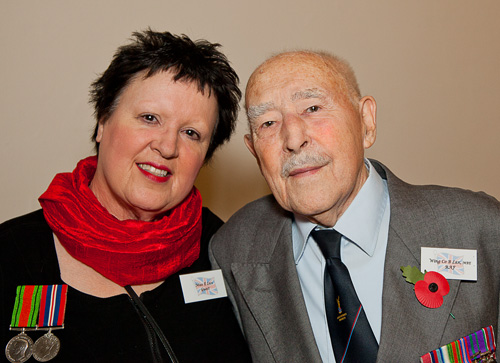
We are family – heads together show intimacy

The depth of intimacy goes beyond smiles. At weddings and funerals people often have a very formal pose. Ask them to bring their heads together and you make it less formal. It brings their character out too. In the next picture we see quite a formal father-daughter portrait. The formal feel is broken by the heads together pose. It makes the ‘family feel’ obvious. Wedding parties and groups of friends can all have that feeling with even a slight inclination of their heads.

We are family • The heads together pose even works in formal shots

• We are family •
Family closeness is shown by the heads together pose even in formal shots.

There are other hidden messages in poses

There are many poses that show our emotional and relationship status. These can be positive and negative. Have you noticed people who tend to cross their hands over their waist? This is a classic “I look over weight” pose. Another is when someone crosses their arms in front of them. This is a defense pose. They may not feel comfortable in front of the camera. People who look away from each other are often showing they are not close or intimate. I could go on.

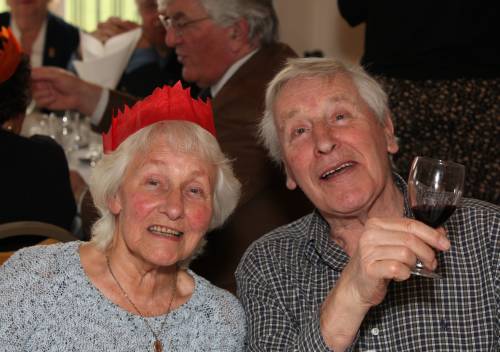
The heads together pose is a code for having fun.

• Having fun •
The heads together pose is a code for people having shared fun!.

Looking for how people stand and pose

Sometimes the hidden clues are not easy to work out. They are always there though. How people stand, sit, look and express themselves is a code. Look out for the little things. The heads together pose, and others, show you how people really feel. Pick up the positive signs. Then you can get people to pose in positive ways. It will improve your images every time.

Comments, additions, amendments or ideas on this article? Contact Us
or why not leave a comment at the bottom of the page…

Like this article? Don’t miss the next — sign up for tips by email.

Netkonnexion

Damon Guy (Netkonnexion)

Damon is editor of Photokonnexion. He has professional experience in photography, writing, image libraries, and computing. He is an experienced web master and a trained teacher. Damon also trains digital photographers.
See also: Editors ‘Bio’
By Damon Guy :: Profile on Google+.

Seven easy tips to improve your group photography

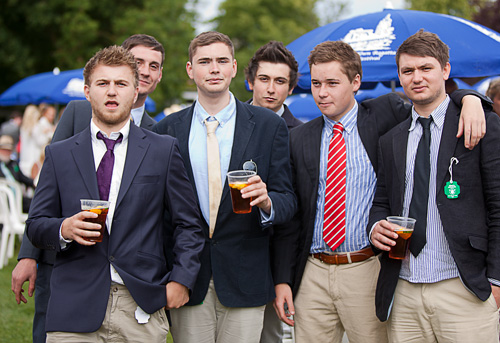
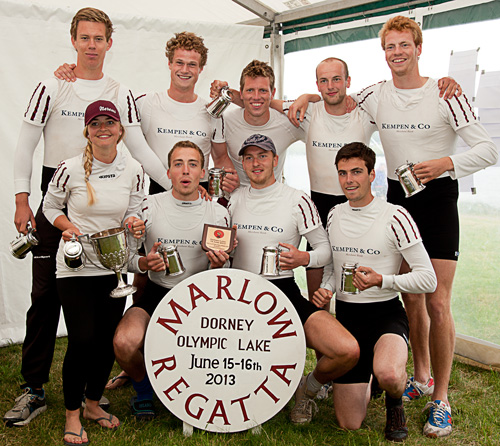
• Boys Group •

• Boys Group •
The humble group photograph can be much improved by a few simple steps.

Simple steps lead to great shots…

With groups you must go a little further than with straight portraits. Getting people coordinated, a range of different settings, beating the dreaded ‘blinks’, great sharpness… Check these out, go the extra mile.

Planning

When doing group shots a few ideas up front helps. Some simple ideas about cohesion, commonality and framing can make your shots more compelling. Clear ideas about how you want this particular group arranged will enable you to get them quickly into place. Groups, by their nature become impatient quickly. Preparation moves things along keeps people on the ball. Have your location scouted and know where you are going to place your group. Have a good, simple background ready. Make sure you have adequate light to work with. Location is everything.

Settings

Remember, groups require a wide view and you need some depth too. Set your aperture too large and you risk the back row being out of the zone of sharpness. Most groups are best photographed at f8 or even better f11. To get the sharpness work with your shutter speed up reasonably high. 1/125th minimum – better 200ths of a second. Go higher if you don’t need flash.

Bigger groups always have a certain amount of movement. Higher shutter speeds help to freeze the action. The problem is, high shutter speed and small aperture leave you needing flash or extra lighting. There is always a trade-off. To compensate you may need to raise your ISO.

Sharp shooting

Shooting at high speed will help freeze the action. It will not steady your hand. If shooting a big group, especially for formal shots, it’s best to use other sharpening techniques. Consider these sharpness…

  • Using a tripod
  • Use mirror lock-up function
  • Image stabilisation off (not needed on tripods – it creates vibration)
  • Auto-focus off on a tripod after the group is focused (it creates vibration)
  • Operate with a remote shutter button or use the on-camera timer

A tripod saves time. You can arrange the group and smooth the shot through. If you have more than one group, your camera is always set up when it is on a tripod. It helps smooth the flow.

Light and shade

Overall light in the scene is important, so is the shade. When taking pictures of groups you are taking a wide angle view. The group is often spread out. It’s easy to miss that one or two of the group are in the shade. Or, with a camera mounted flash, the shadows from the flash fall harshly onto the people behind. Trees, buildings, other people, towers, street lights – any number of objects can cast unexpected shadows which are difficult to notice. Flash casts shadows you don’t see until you open the picture on a computer later. Look carefully at your group. Arrange them to be in clear, consistent light. Make sure any lights or flash you are using treats all the members of the group evenly and fairly.

Clothing

So often with groups you have no control over clothing. If the event is formal the clothes often have a stiff and upright feel. People don’t relax so well in this situation so you will have to set the scene and pose them accordingly. It is not easy, especially with family conventions or a preset plan. Where possible let them arrange themselves with your help. People will be most comfortable next to the people they like and know.

When a group is coming together informally the clothes may be wildly variable in character. What matters when working with a candid group is the fun arrangement of the group. Try to get the group to look dynamic and together. This will offset a strong clothing variation.

The prize giving

• The prize giving •
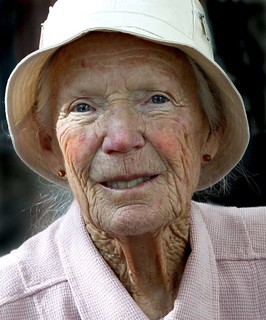
If the group feels comfortable and you work with them they’ll help make a great picture.

Organisation

Groups, especially close up, look odd if the faces are at different distances from the camera. They are close enough to us to look fine. However, the lens plays tricks on our eyes. If they are out of line – at different distances, but close together – they will appear to have different head sizes. Try to make people in each line of a group stand evenly down the line.

Sometimes the classic, short in front taller to the back works fine. Other times it is better to actually mix up short and tall – especially with different generations. It is much more natural for grandchildren to be arranged with grandparents than stuck on the end of the line because they are small. Putting children between adults also provides an opportunity to have a shorter person behind so as to break up a line up – to make it less formally arranged.

Close family groups, and friends, often look good leaning together, or heads together. It is very intimate to touch heads.

The dreaded ‘blinkies’ strike every group shot if you are not careful. The bigger the group the more likely that someone will blink. Overcome it with a little group control. Ready to shoot? Tell them you are going to help stop them blinking in the shot. Tell every one to shut their eyes. Count to two, tell everyone to open. Count to two. Press the shutter. Everyone will have open eyes. Explain it first so they know what is coming. It will make sure they all have eyes open long enough for you to get the shot.

So, with all these different ways of organising the group make sure that what you have is comfortable, natural – never forced.

Posing

Organising the group is about positioning and location. Posing is about personal stance and comfort. You, as the photographer, need to direct the group. But on the other hand you have to work with the people you have before you. Try to make it fun. Get them to relate to one another. If you have time, especially with candids or informal group, get them to experiment. Handshakes, greetings, hugs, arms around each other, standing in groups – the idea is to make ‘that’ group look good. Another group might not look good with the same poses. You should work with them, discuss ideas with them, respect their thoughts. They probably know each other better than you know them and will make the best suggestions. It is your job as a director to pick up on the most effective shots from their ideas. Consider what you know about them, consider their ideas for their poses – then work together to make the shot just right.

Getting the right feeling…

Working with groups is more than just lining them up. You have to consider the time, place, light, shade, the settings and the technique. But the best shots still come from the group itself. If the members of the group are comfortable, having fun and feel natural about their poses they will make sure you get a good shot. Work with them, help them make your picture work.

Comments, additions, amendments or ideas on this article? Contact Us

find out more...Photokonnexion tips by email
If you enjoyed this article please sign up for our
Tips by email service.
                                                 Find out more

By Damon Guy (author and Photokonnexion editor)

Damon Guy - Netkonnexion

Damon Guy (Netkonnexion)

Damon is a writer-photog and editor of this site. He has run some major websites, a computing department and a digital image library. He started out as a trained teacher and now runs training for digital photographers.
See also: Editors ‘Bio’.

Six things to consider for starting portraiture

A dear friend

• A dear friend •
Click image to view large
• A dear friend • By Netkonnexion on Flickr External link - opens new tab/page

Portraiture – the photographers passion.

Starting in portraiture can be daunting. We are going to look at the important things to consider when getting started with photographing portraits. There are also links to some of the portraiture resources available on Photokonnexion.

This post is aimed at introducing the portraiture resources found here…

Location

Choice of location can make or break a portrait. If you choose an outdoor location you have to consider a range of issues like the weather, how to pose your subject and exactly what you will be putting in the background. The problem with outdoor portraits is that there is potentially a huge number of composition decisions to make. Taking the shot can be quick. Deciding on what background is right can take a lot of effort and research.

If you are just starting out with portraits it might be better to focus on indoor shots. The environment and light is potentially simpler and the lighting more controllable. The essence of good indoor shots is to reduce the composition to a very simple background and lighting and to focus your attention on the subject. This gives you time to practice the posing, including expressions, and the lighting set up.

Lighting

Light and Lighting can be as simple or complicated as you make it. My advice is to make it as simple as possible. Most great portraits are done with one simple source light. Working with one light gives you the ability to try out shadow casts and hard light vs. soft light. Practice with simple ideas will help develop your skills more than working with confusing multiple light sources.

Background

This is not the same as the location (which is really more about the surroundings). When you are considering the background this could be as simple as a blanket suspended behind your subject. It could also be as complicated as a workbench that your subject works at. What you have to do is decide how to set it up, how to light it and how to place your subject in front of the background. You have to make a decision as to whether you are taking an environmental portrait (a large amount of the background is visible) or a simple portrait where the background is a minimalist setting, where you show very little of the environment and make it as simple as possible.

It is better to start simple. Placing your subject in front of a coloured, white or black background is a great way to get started. You will be able to focus on posing your subject and spend less time worrying about what to include or exclude in more complex backgrounds.

Posing

The best advice for starters is to work with your subject. He or she will be comfortable with certain poses. Get them to start the posing. Then, when you see how they like to pose, you can ask them to vary it to get your light right and get them showing their best side (the left side of the face is best).

Remember that that definition of the features of the face are defined by light and dark. Your poses should be aimed at using the shadow/light relationship to bring out your subjects facial and body features.

find out more...Photokonnexion tips by email
Enjoying this article? Please sign up for our
daily email service.
                                                Find out more…
#11030#

Props

It is difficult to provide resources about props. There are as many props as there are things people can hold, wear, sit on, stand next or or play with. Yes, props can be pretty much anything you want. However, one thing is certain. Your portrait subject will suddenly come alive when they have a prop to distract them from the daunting prospect of the camera. Try to get them to work with a prop they are familiar with – get them to tell you about it or show you how they use it while you photograph. These things will make the comfortable and help them to relax. It will also show you the character of the person they are.

Camera settings and lenses

Some people will tell you this is the most important point. Others will say the posing, still others will focus on the other things above. How you set up your camera, and how you place your subject are very closely related. But there is a lot to learn here. Start simple so you can feel in control. If you are not yet working with manual controls then be comfortable with auto mode – try to become aware of the types of settings that seem to work.

Exposure settings are an important study. There are some exposure links in the link box below. However, you should be concentrating on natural colours. The type of light you use is important to your exposure. I have one piece of adice on this. Beginners at portraiture almost always over-light. Keep your lighting soft and your exposure moderate and not over-bright to start. If you are using flash, turn it down. Bright flash always washes out flesh colours and sometimes causes nasty highlights on the face. It is worth reading up about how you can ruin your shots with flash.

I hope that this article has provided you with some options for getting started in portraiture. Please spend some time going through the links on the portraiture resources page to get more detailed information.

By Damon Guy (author and Photokonnexion editor)

Damon Guy - Netkonnexion

Damon Guy (Netkonnexion)

Damon is a writer-photog and editor of this site. He has run some major websites, a computing department and a digital image library. He started out as a trained teacher and now runs training for digital photographers.
See also: Editors ‘Bio’.