Tag Archives: Lenses

Why pro-photographers insist on using lens hoods

Lenses

Lenses

Lens hoods are all about control.

The control of your lens, control of difficult light and control over lens damage. Yes, believe it or not even pros make mistakes with flare and break or damage lenses. Lens hoods provide cover for you and perform a specific and important control function over the light that can create ugly flare or the sheen of overexposure.

In the video Phil Steele looks at the way that lens hoods help your shots get properly exposed. Remember, the best shots are taken by the photographer finalising every last detail in the chain of events that lead to releasing the shutter. Knowing about lens hoods is one of those shot makers-or-breakers. Get it right and the blacks in your picture will show just that little extra saturation and contrast that intensifies the shot bringing out depth and realism.

Lens Hoods – Why, When, and How to Use Them

SteeleTraining

By Damon Guy (author and Photokonnexion editor)

Damon Guy - Netkonnexion

Damon Guy (Netkonnexion)

Damon is a writer-photog and editor of this site. He has run some major websites, a computing department and a digital image library. He started out as a trained teacher and now runs training for digital photographers.
See also: Editors ‘Bio’.

Can you write? Of course you can!
Write for Photokonnexion...

We would love to have your articles or tips posted on our site.
Find out more…
Write for Photokonnexion.

Finding lenses and buying to suit your needs

Finding lenses | A wide range of lenses makes choice difficult

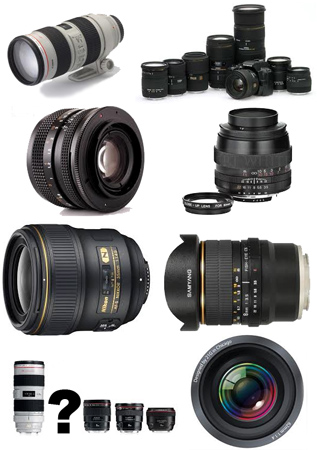
The choice is wide. Finding lenses requires careful thought.

Finding lenses that are right for you can be hard

Knowing what lens to buy is a challenge. It can be made simple if you have a few ideas. It is all about understanding your needs and making sure you fit the lens to a budget. First, some general advice about buying lenses.

Are you happy with the camera brand you own?

After a line of different cameras SLRs and different brands, my first digital camera was a Canon. It was my first Canon too. I was impressed. Well, they told me that Canon lenses were the best in the world! So I stayed with Canon.

I know, I know… you don’t agree with me on the best lenses. Whatever the outcome of that argument, I am not going there. That’s the whole point. Buying lenses is a personal decision. It relates to a range of needs and understandings you have about your photography.

You need to be completely happy with your camera brand before you buy lenses. Otherwise you will be stuck with a camera brand you don’t like and lots of money invested in lenses. Love the brand first. Then look for the ‘glass’.

Finding lenses… Things to consider

Usually the budget is fairly clear. However, I have one word of advice. Make sure you look at the upper range of your budget where the quality will be better. Don’t cut corners. Quality lenses don’t come cheap. There are lots of cheap lenses around, but you get what you pay for with lenses. They are expensive, but they are also high precision instruments. If the lens is cheap it probably will not be very robust and the quality of the optics will tend to be low.

After budget the next most important thing is to define your needs. It may be lovely to have a 500mm behemoth of a lens weighing two kilos and costing thousands. But if you are only in a position to use it once a year then it will not be worth investing. Far better to buy a more general purpose lens of higher quality to benefit your general photography and will use often. Focus on your regular photography action and expand your lenses around those activities. If you need that behemoth one weekend, hire or borrow one.

Defining your ‘needs’ is often confused with defining your ‘wishes’. Try to be realistic. Finding lenses is about knowing what you need. Only go for a lens that will be of regular, practical use. Do not define your needs based on your wish to pursue a dream. Most types of photography can be performed with a non-specialist set of lenses. Get good with those. Only buy good quality lenses to replace them. Only buy lenses when you can afford it. And, when you have the mega-once-in-a-lifetime trip actually planned, then factor in the specialist lens (if you really need it for most of the trip). Finding lenses suited to your needs is about being realistic about what you can achieve and how you will use them.

Of course the focal length and how ‘fast’ the lens is are both important. Also important is the type of lens – zoom, telephoto, prime, normal, wide angle and so on… However, most of these will come out in your decision around why you need the lens.

There are other things that are a little less obvious when finding lenses…

  • Weight – Some people simply cannot hold up a big camera and a big lens. Be realistic about what you can handle.
  • Size – especially for travel purposes, big lenses are a complication and a problem.
  • Image stabilisation – Modern lenses usually have stabilisation – consider its weight, availability, cost and if you need it or not (large lenses are normally where there is an option).
  • Glass quality – with professional grade lenses the glass is usually of very high optical quality. However, it is also expensive. So consider the importance of glass quality and overall lens quality for your budget and use.
  • Brand name – Are you paying for a manufacturers reputation, or is the lens equalled by a third party manufacture – check the review websites. Ask around to see what other photographers think.
  • Suitability for purpose – does the lens you want to buy actually suit your intended use. Check on the manufactures website, review sites or on discussion forums to get more information about the best type of lens for your use.
  • Consider the insurance implications and cost. Covering several thousand pounds of lens for a foreign holiday is a significant extra cost.
Buying your lens

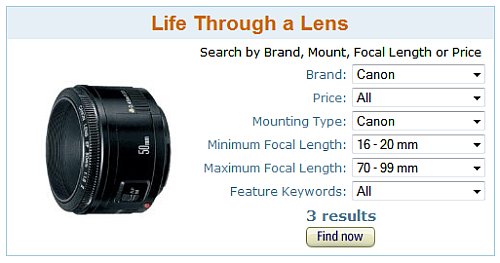
The sheer number of lenses available is bewildering. Finding lenses is best done with a finder tool. This tool for finding lenses on Amazon has made lens searches much easier.


The tool for finding lenses allows you to enter the factors that you consider important. It will return you a list of the available lenses to suit that purpose. After years of buying lenses I find this tool invaluable for helping to me to find a range of lenses from which to choose my ideal purchase.

If you want advice on what to do once your new lens arrives, check out this post: Getting started with a new lens.

find out more...Photokonnexion tips by email
If you enjoyed this article please sign up for our
daily email service.
                                                 Find out more
#11030#

Damon Guy - Netkonnexion

Damon Guy (Netkonnexion)

Damon is a writer-photographer and editor of this site. He has run some major websites, a computing department and a digital image library. He started out as a trained teacher and now runs training for digital photogs.
See also: Editors ‘Bio’.
By Damon Guy see his profile on Google+.

Twelve Simple tips for atmospheric candlelight shots

Candles put out a wonderful light…

Everyone feels the atmospheric impact of candlelight. The colour and the low light seems to draw you in. Capturing that light is easy with a few simple hints. Lets look at what is needed…

Tripod…

There is nearly always low light associated with candle photography. That means working with longer exposures. A tripod is excellent for that. Indoors, beware of a wooden floor, any move you make can be transferred to the tripod. Floor vibrations can ruin a shot or make it soft. For sharpness remember to use the camera timer for the shot or a remote shutter release.

Lighting…

The best way to view candles is by their own light. Because they don’t use a tripod many people are tempted to use flash. Unfortunately flash will over-power the candlelight. It will take out the colour from the light and tend to create hard, sharp shadows. It will ruin the atmosphere of the candlelight. Make sure you switch off your flash. If you need more light the you can use as many candles as you need to raise light levels. They don’t need to be in the shot, but they will keep the light the same throughout the shot.

Composition…

First decide if your candle or candles are the subject or are props. This decision will affect your focus and how you lay out your scene. Candles can create a strong bright spot in the scene. If it is too bright the flame will form a burnt out white spot. Once you have arranged your scene, ensure that the candle will only draw the eye a small amount unless it is the subject. You should consider the placement of the candle in a way that might minimise the impact of the bright flame spot.

Positioning…

If all your candles are close together the light will tend to act as one light source. This will tend to act as a hard light creating more defined shadows. If you want the light to be softer and the shadows with less well defined edges set your candles further apart. If the light is to be cast on a face then soft light will be more flattering.

Movement…

One of the peculiarities of working with candles is that the flames are subject to the slightest air movement. Unfortunately candle flicker is attractive to the eye in real-time; but looks like a loss of sharpness in a still image. It is quite useful in close focus shots with a candle to use an air break of some kind nearby to stop air movement. In a table-top study use a large sheet of card to one side out of shot. That will help prevent air movements. If not, keep an eye on the flames when shooting. Try to capture the flame upright or, if using more than one flame, make sure they are all going the same way. They look more natural that way.

Since candle light is low intensity, make sure you also prevent other sources of movement in the shot. They will inevitably be blurred as the shot will be using a long exposure. This will look like a distraction against still flames.

Can you write? Of course you can!
Write for Photokonnexion...

We would love to have your articles or tips posted on our site.
Find out more…
Write for Photokonnexion.

Light intensity…

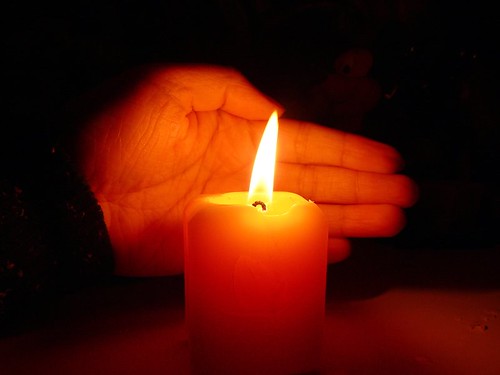
The light from a candle can be made much more intense if you use something to catch the light from the candle. A face, hand or other objects bring alive the picture and complements the candle. The presence of the object acts to reflect the candlelight. Light flesh tones are particularly good in this respect since the flesh colour is tonally close to the candlelight hues and they act as a reflector to bring out the light.

From

From “Candle Series” by Spicedfish
From “Candle Series” by Spicedfish on Flickr External link - opens new tab/page

Using reflectors in a candle scene is a great way to raise the light intensity. You can find other types of surface than the one in this picture in most scenes. Walls, ceilings and even off-shot reflectors are all good. Be careful to use neutral colours. Colour reflectors will affect the colour of the scene. If you are using a big card out-of-shot make it white. This will reflect the same colour light back into the scene, filling in the light.

Shadows…

The other side of light intensity is the shadows. The darker tones and strong contrasts of candle shots create most of the atmosphere. Spend time studying the shadows created in your scene. Strong contrasts are great subjects. If you create shadows that fall badly across your scene it will impact on the overall effect. The best use of shadows is often to the edges of the shot. If the light fades out to edges this holds the scene into the shot – naturally focusing the eye. Work with shadows to ensure the mood is harmonious.

Additional lights…

If you want to use fill light in the scene try to match the quality of light from your candles. Use soft light sources and natural light with hues matching the candles. Natural light will fill the scene well but tend to neutralise the colour of the candle light. The warm glow of candles is a great mix with evening, low-intensity light.

Some people use light with gels to give a warm glow. Warming gels can also be used with a flash. However, beware the power of flash. The candles will lose their soothing effect if all the shadows are taken away around the base of the candle and harsh shadows are introduced from one side. Typically use a diffused flash on the lowest setting – it also helps to be a distance away from the candles as well.

Multiple candles…

When working with one candle as subject the main focus of the shot is clear. However, there is a lot of scope for creativity. Consider two main issues. How to layout your candles and how to use the overall light with the layout. Using candles for making patterns is great fun and can produce excellent shots.
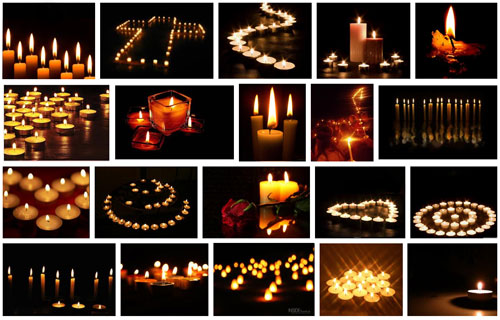
Patterns with candles

Making patterns with candles
Click to view Google Images “Candle Light” search

Try to keep the scene simple. Overlapping candles or indistinct objects in the pattern are confusing. Work with the sharp contrasts and keep your pattern well defined.

Exposure…

How long should you make your exposure? This depends, like any scene, on your light levels. To get more light in the exposure a long shutter speed is suitable for most candle shots. A range of 1/15 second down to 2 seconds is a good starting range with an ISO of 100. Camera settings vary significantly with reflectors, multiple candles or fill lights. Experiment to get it right. Aim to make the shot moody or atmospheric while providing detail for the eye to look at around the candle flame(s).

The main exposure concern with dark or shadowy shots is digital noise. If ISO is too high you will get more noise. It is better to use a low ISO, say 100 and have longer shutter opening. This reduces noise and means more detail is visible.

Lenses…

A fast lens allows a wider aperture. Faster lenses will allow a quicker exposure than a smaller aperture. Nevertheless, when experimenting check the depth of field. With big candle patterns, or larger subjects, a very wide aperture will give a very shallow depth of field. Too shallow and you will lose a lot of detail. On the other hand, lots of candles in the background with a shallow depth of field will produce pleasing bokeh. For choosing your lens, more than other aspects of your set-up, you need to have a clear vision of what you want your final shot to look like. Then do some “Chimping” to check results.

Prime lenses, especially the 50mm, will give an approximation to the human eyes. To capture the mood of a scene a 50mm will help. A wide angle lens close-up can provide great exaggerations of candle tallness or broadness – depending on lens orientation. There is great scope for artistic interpretation. Also remember that zoom lenses tend to foreshorten, reducing the apparent depth of the shot. With a zoom lens place your candles to give an impression of depth.

White balance…

The warm glow of candles is attractive. If you change the white balance you will change the characteristics of the warm glow. Candlelight shots are about moodiness and atmosphere. It is worth playing with the white balance to influence the shot and increase moodiness, but be careful you don’t remove it. You only need to adjust white balance when shooting in *.jpg as it will be fixed once the shot is taken. If you are shooting in RAW you have more flexibility with settings in post processing to control colours and the final exposure. If you cannot shoot in RAW then, again, make sure you do some “chimping” to get the colours right.

Being safe…

Although fun, candles are naked flames. It is all too easy in low light to leave something close to the candle. Fires start quickly and spread fast too. Feel free to experiment but make sure you don’t accidentally knock over candles, touch wall paper with one or do something else to set off a fire. Never leave candles alight and unattended. Always blow them out and wait for the smoke stop raising before leaving.

find out more...Photokonnexion tips by email
If you enjoyed this article please sign up for our
daily email service.
                                                 Find out more
#11030#

By Damon Guy (author and Photokonnexion editor)

Damon Guy - Netkonnexion

Damon Guy (Netkonnexion)

Damon is a writer-photog and editor of this site. He has run some major websites, a computing department and a digital image library. He started out as a trained teacher and now runs training for digital photographers.
See also: Editors ‘Bio’.
How to make a digital camera

How to make a digital camera

How to make a digital camera

A lot goes into making a digital camera.

Canon have made this video to explain the key processes and ideas that lie behind camera design and production. The video is Canon focussed, but the concepts apply to any digital camera.

All the key processes are mentioned in the video. It is particularly interesting to see the considerable technology that backs the manufacturing itself. Camera production is very high tech and the degree of precision involved is considerable.

Despte the complexity of the actual technology the video is a simple and easy watch. The ideas are explained in easy steps and the diagrams make it easy to see what is going on. No mad scientists were involved in making this video! Simple clear ideas and demonstrations are used throughout.

I found this a very useful video to watch. I am sure you will find it interesting and eye opening. Enjoy!

Are your pictures distorted? Considered a 50mm?

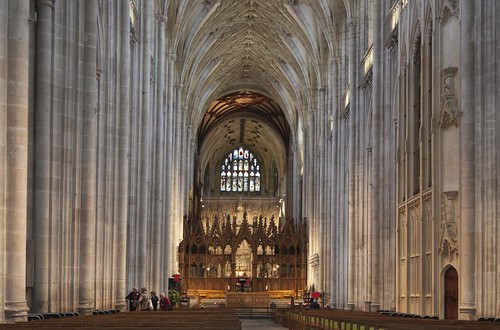
Patterns - Winchester Cathedral taken with a 50mm lens

Patterns – Winchester Cathedral taken with a 50mm lens. The lens sees a very close approximation to the way the human eye sees the world.
Best viewed large. Click image to view large.
“Patterns” By Netkonnexion on Flickr External link - opens new tab/page

There is a very good reason why the 50mm is so popular.

The 50mm may seem a plain and simple lens. Believe me it is actually a great addition to any camera bag. When you need to see with clarity – it’s the best.

As lenses go the very best of them are found in your eye. The human eye is an incredible organic machine. It does more than any mechanical device can do in terms of seeing. But then, the eye has been in development for the last 350 million years (give or take). Humans have been making quality lenses for about 350 years. So there is a little way to catch up. However, jokes aside, the 50mm comes close to the best that we can do with lenses. Not because of the quality, but because the 50mm represents most closely what the human eye sees.

All lenses have their own unique signature in terms of what they actually display. A wide angle lens distorts the image sideways. A long-telephoto takes you into a scene and flattens the depth of the shot. A fish-eye exaggerates the importance of the centre ground and elongates the scene around it. All these things and more affect the way any particular lens sees a scene.

The 50mm lens is special. Its signature view of the world is about as close to that of the human eye as any standard lens. The distortion that the lens creates approximates the same view as our eye. This makes it a very special vessel for conveying human perspective.

Of course, you argue. You have a lens with 50mm in its range. True I answer. But the telephoto plane will foreshorten the shot. It is not a true foreshortening. It is a metaphysical one. You have to get the shot – but you don’t get it like the eye does. Instead of walking to take the 50mm position, you will take the shot where you stand on one of an infinite range of shot positions. Lets say, between 24 and 200mm. In addition, a lens is made to cope with a range of conditions across all its focal lengths. Inevitably some of the purity of the fixed, or prime, 50mm lens is lost in that accommodation. Your telephoto makes you see differently and it actually sees differently too.

Experienced photographers will tell you that the 50mm prime (fixed focal length) lens is unique in its vision. If you want to make sure you get the shot the way the eye would see it then there is no substitute for using one. You do a lot more walking to get the shot. But you also get much more realism. Prime lenses like the 50mm often have a very wide aperture. They are therefore very fast lenses. The wide aperture also gives wonderful control of ‘depth of field’ too. 50mm lenses are much prized by wedding photographers because they often have a very wide aperture compared to many other lenses. The shot above was taken using a Canon EF 50mm f/1.2L USM Lens. It was hand-held in the early evening with no flash – brilliant. Wedding photographers love the wide aperture because the lens is perfect in churches and the party afterwards – both are low-light situations.

You can buy 50mm lenses quite cheaply without compromising quality. They are so popular that the manufacturers can keep the prices low. The majority of photographers will want to go for this flexible and reasonably priced 50mm lens. Lenses in this range are certainly among the most popular available.

The Canon EF 50mm – f/1.4 USM Lens

The fast Canon 50mm F1.4 lens is photographically versatile and technically excellent. It is at a very reasonable price too. It is a top quality lens. Great for portrait work, great with landscapes and excellent for urban candid shots it is a wonderful all-round lens. As an EF lens, it’s compatible with a full-frame camera and it’s on special offer at present [Oct 2012]. It is a very fast lens with excellent control of depth of field. This is definitely the most flexible and reasonably priced 50mm on the market for Canon cameras. It has top reviews all over the internet.

The very fast 50mm that comes for the Nikon range is equally versatile. A stunning lens in an affordable price range…

Nikon AF-S NIKKOR 50mm f/1.4G Lens

The Nikon F1.4 50mm is an excellent performer. It provides the fast, wide aperture, and exhibits has superb control of focus. The sharpness of this lens is outstanding and, as expected, the low-light performance nothing short of excellent. As another great all-rounder this lens is well reviewed and the price is reasonable. A great buy for Nikon owners. Not to be missed!

It is possible to get a very fast professional level Canon EF50mm. And what a wonderful piece of equipment it is….

Canon EF 50mm f/1.2L USM Lens

As one reviewer on Amazon says, this lens is “A very special piece of optics”. I agree. The control, depth of field and colour reproduction is excellent and the sharpness is brilliant. It is a professional lens and is premium priced, but you cannot beat its quality. There is nothing on the market to beat it in low light situations.

By Damon Guy (author and Photokonnexion editor)

Damon Guy - Netkonnexion

Damon Guy (Netkonnexion)

Damon is a writer-photog and editor of this site. He has run some major websites, a computing department and a digital image library. He started out as a trained teacher and now runs training for digital photographers.
See also: Editors ‘Bio’.

How good is your exposure?

There is no such thing as the perfect exposure.

The manufacturers might have you believe there is a perfect exposure for every shot. They invest a lot in their cameras and the programming. What should you look for when trying to produce a great shot? Is it about relying on camera auto-settings or is there something else?

The three pillars of exposure

You are probably aware of the three main controls for exposure

  1. ISO – Controls how sensitive your camera image sensor is to light.
  2. Shutter speed – Controls how long your sensor is exposed to light.
  3. Aperture – controls how much light is allowed to reach the sensor.

These essential elements in exposure are inter-related. Each has an impact on the others. They relate to each other in two ways. As each varies it has an impact on the amount of light which reaches the sensor. And, as each varies, they have a special impact on the quality of the photograph…

  1. Low ISO gives a high quality result. High ISO introduces digital noise.
  2. Shutter speed – movement blur introduced at long exposure; movement frozen at short shutter speeds.
  3. Aperture – Wide aperture, shallow depth of field; small aperture gives a deep depth of field.
Control

Controlling these elements to get a final exposure is essential. Highest ISO, widest aperture and a long shutter speed all together is likely to allow too much light into the camera in daylight. The shot will be over-exposed. The opposite is also true. A low ISO, tiny aperture and very fast shutter speed will allow very little light to enter the camera; result underexposure.

Exposure is about a balance. We must work at getting the three pillars to create the right light for the scene we envision. This is the key – creating the right light in the camera to make the scene come out the way we want. Yes, make the scene come out as we want. A photographer makes the picture that they want by controlling the exposure. A snapper captures the scene they see by relying on the camera to make the exposure for them. The difference between the photographer and the snapper is learning to control the camera.

Genius at work

By way of example I want to show you a short documentary video. Stanley Kubric made a period film, released in 1975, called Barry Lyndon. “Lyndon” was set in the 1750’s. It was a ground breaking work.

Kubric envisioned a cinematic experience which was as close to the way the eye would see life by the light of the time. He procured special lenses for his cameras and had them modified to work together. These lenses were F/0.7 Zeiss lenses made for NASA. They allowed the aperture to be open very wide – much wider than most modern lenses will go. As a result Kubric was able to use these fast lenses to film entire scenes only by candle light. This created an atmosphere which paralleled indoor light in the 1750’s. The costumes and set pieces were also of high quality. The overall effect is one of extreme authenticity.

A lot of pictures as dark as shots in this movie would be considered as under-exposed in the eyes of many photographers. Yet the gloom is the essence of the success of the shots. The exposure is correct for these scenes. Kubric went to extreme lengths to get the exposure he wanted. With the proper approach and control you can do the same in your photography.

The one consequence of shooting at such wide apertures is an extremely shallow depth of field. When you see the candlelit scenes you will see how much bokeh there is behind the heads of those in focus. What a gorgeous result.

This video is actually a commentary on “Barry Lyndon” the movie. I have started the video at the scene where the exposure and special lens set up is discussed. Despite this being a movie, the same internal camera conditions apply as in a DSLR. ISO, Shutter speed and aperture still have the same effect on each frame taken. Kubric showed true genius in marrying the camera and the lens into a unique synthesis that recreated the prevailing light conditions of the time. He literally controlled the exposure to emulate life in the 1750s. That is the genius of the man. It is also the supreme insight in photography.

Simple tips to save you from disaster on your photoshoot!

Am I preaching to the converted?

Ever gone on a shoot and forgotten something? I have. If you’re like me you will have a bag packed ready. But, check the night before. Things may have changed. Here is some help.

Checking

The night before you go is the first time you should check your equipment. That’s the time to realise you need to charge your batteries. Yes, always have more than one – you don’t want to run out. Charge both. If you have an off-camera flash, check they are up to power too. I use rechargeable batteries in my flashes. So I charge them. But you may have standard disposable ones. Have fresh ones on hand.

Check you have a memory card in the camera and at least one spare. A corrupt card is as good as stopping your shoot if you have no spare. Oh, and make sure you downloaded the previous shoot. I turned up to a shoot once with a card nearly full of my previous shoot. I had not had time to post process them. OK, no problem. Ah! Had I downloaded them? Er… I could not remember. Then, eeek! I had no spare card. One full, no spare. It cost me an hour to find a shop for a new card – I was not impressed with the card either, but no choice. How stupid did I feel when I got back and found out I had downloaded the previous shoot. I could have used the card I had. Better safe than sorry.

Lenses

Choose your lenses if you have more than one. Also check they are clean, properly packed and have lens caps. Camera bags are generally made of very harsh material. If the glass rubs against the material it will rub off the coating and may scratch the glass. Look after your lenses and they will last for years. Got clean lens cloths? Make sure you do… you may need to clean up while out. Oh, I have an extender for my 70-200mm. It takes the lens up to 280mm – enough for most long shots. Don’t forget lens accessories. And, if you think you are going to need them, what about filters?

Camera straps?

Check your camera straps for damage. The little slits the straps go through gradually wear the strap. If a strap breaks your pride and joy will crash to the ground! Check the straps and zips on your camera bag are good too.

Got your tripod? Ah, but have you got the quick release plate? I forgot one once and had a day of really hard shots and poor results.

I normally carry three different light modifiers. They are a little honeycomb for focussed, hard light and a strap on diffuser which directs the light in one direction for soft wide focussed light. Finally, a plastic diffuser for popping on top of the flash for all-round bounce light to give wide-spread light. So, check your modifiers. If you don’t have any get some. Flash is too harsh for most shots.

Camera?

Ha ha! I am not joking actually. I once went on a shoot with a great friend. He had a new Canon 7D – proud as punch. He turned up on our shoot with a wonderful camera bag. In it was everything he needed for the shoot – except the camera body. He had left it on the table at home. Fortunately I was able to lend him one of my spares.

Sundry other items may be important too… Torch? Large plastic sack to cover everything in a sudden shower? Map? Tablets? Sandwiches, drinks, money? Well you get the idea. Everyone’s list is personal, so work out what is meaningful for you.

Going on a shoot for a day or more is a complex business. Your day can be ruined or shortened if you are not prepared. So why not make check lists. One for the night before, one for the morning before you go. Go through everything you have an then put it on the list. Then, check it all in complete confidence that you will have a great day.