Tag Archives: soft light

How to work with reflectors… essential!

Every photographer likes natural light – reflectors give you more.

Using a reflector you can use ambient natural light and modify it to suit your needs. The 5-in-one reflector is probably one of the best buys you can make to extend your lighting.

The five-in-one reflector is a system of reflectors in one package. The system includes a white ring (42inch) with white translucent material filling the ring. The translucent ring is accompanied by reversible covers. The set provide the following properties…

  • Translucent white: creates a strong light diffuser It creates a soft light so it has a vibrant wrap-around quality. Ideal for softening hard light sources, direct sunlight and effectively creating soft shadow edges particularly on the face for portraits.
  • Silver cover: reflects silver-light for increasing specular highlights and high-contrast light reflectance.
  • Gold cover: reflects a warm golden colour for gold colour fill light which is ideal for sunsets, portraits indoors and out, and for special work like fashion highlights, jewellery and back reflection on other surfaces.
  • White cover: produces an even and neutral reflection which will be an effective fill-light for still-life, portraits, product shots and many other situations where light is needed at an angle to the main source of light.
  • Black cover: used to absorb light increasing the shadow on the side used and to dampen the softer lights in the area. Effectively applies definition to glass on the edges of illuminated glass pieces. It will also stop-down sun light and bright hard lights.

In the video the guys from ImprovePhotography go through the different reflectors and how they can be used… more information after the video.
Published on May 23, 2012 by ImprovePhotography External link - opens new tab/page

The use of reflectors is the best way to create a second light-source to produce fill-light for your shots. Reflection or diffusion softens light and reduces its intensity. This is great news because it means that the reflected light looks natural and in proportion to the main light source. It even exhibits similar tonal quality to the main source unless the reflector colours it as gold or silver for example. One side of the shot will be illuminated with ambient light from a natural source or from a flash or other light. The other side is filled by the reflected light. Reflectors are a great way to extend your lighting equipment cheaply and to create great light that is controllably in proportion to the other light in the area. Excellent!

You can buy a five-in-one reflector set on Amazon now…

By Damon Guy (author and Photokonnexion editor)

Damon Guy - Netkonnexion

Damon Guy (Netkonnexion)

Damon is a writer-photog and editor of this site. He has run some major websites, a computing department and a digital image library. He started out as a trained teacher and now runs training for digital photographers.
See also: Editors ‘Bio’.

Can you write? Of course you can!
Write for Photokonnexion...

We would love to have your articles or tips posted on our site.
Find out more…
Write for Photokonnexion.

Use window light for portraits

You don’t have to have strobes or flash for great light.

The quality of your shot is not proportional to how much equipment you have. You can create great shots with simple equipment and great light. Got a camera and window? You are nearly there.

In the video below you can see simple steps to create great shots often come from simple set-ups. It is the simplicity that often makes these shots work well. A great portrait shows off the subject and if the environment is understated they become the main focus. Simple light and simple props are the key.

The photographer, JP Morgan, uses lighting contrasts, hard and soft light with reflectors to manipulate the light in this portrait session. The use of the light is constantly aimed at creating shadows that flatter the face and colours that bring out the skin tones.

Although he does not mention it, look out for highlights on the skin of the subjects. Did you see any? Well, he used the light at a natural level to control the highlights. Flash often creates nasty bleached highlights on prominent features of the face. That distracts from the overall view of the face and destroys the balance. Natural light, especially soft light helps to minimise highlights and that brings out the character of the face more.

Notice that he explored the different potentials of the two girls to suit them. Skin tone, hair colour, clothes and posture were all considerations. Notice too that most of the poses were ones that suited the girls individual character. They probably had a lot of input to those positions. Remember to involve your portrait subject, they will respond better and photograph better if you work with them and make it about them.
More after this…

He worked the scene continuously. He used reflected light a lot to prevent the camera creating a silhouette against the window light. The reflector brought the natural light to the front of the shot, but toned it down. This meant there was a difference between the intensity of the window light and the subject lighting.

The creative use of shadows is great. They are endlessly fascinating to work with and they make a scene look deeper and more natural. The window frame on this shoot also made the shadows more dramatic which complemented the girls own shadow.

This video is an interesting insight to shooting with natural window light. There is also a lot about how to work with a model there too. Watch out for the way the girls seem to be enjoying themselves.

50 ways to do it at the weekend!

Inspiration – just when you need it

When it comes to photography the inspiration seems to be there until you actually pick up the camera. I must admit I have ‘idea’ days and I have brain-dead days. So sometimes it helps to get a few ideas from somewhere else when it comes to brain dead days.

I have added below a short video with lots of interesting photos to set you thinking. The fun thing is that most of these pictures give you ideas for doing shots with stuff lying around the house. That is great because it does not require much activity to get going and do something with your camera. That’s just right for the weekend.

Here are three tips to help you when doing still life or shoots with things from around the house…

  • Make sure everything is absolutely clean. It is so easy to ruin a shot because it is dirty or dusty. When it is opened up in full size you will see dirt all over if you do not clean it properly before the shot.
  • Use soft lighting. It is very difficult to make hard light look atmospheric or effective unless you are doing a murder scene!
  • Use longer exposures than if you were taking shots outside and a use a tripod too.

Light – the essential component

There is one thing in photography that is more important than anything else – light. Funny thing that, many photographers don’t get it until quite late on. Maybe that sounds daft to you. Maybe it does not. If it does sound daft you need to look carefully at what it is you are photographing. Light is the defining factor of EVERY shot.

The knowledge that light is so important makes it almost essential that any equipment photographers use either controls the light or captures it. Try these for size…

Diffusers:
Anything that causes light to be diffused has to be an important aspect of photography. Flash, bright lights and direct strong lights as well as hard light needs to be diffused. Hard light is very unflattering, particularly in portraits. So think of ways to diffuse and soften the light. Here is a detailed entry in the Photographic Glossary, published today, looking at diffusers…
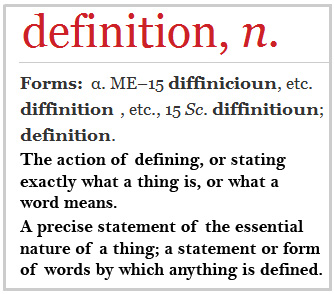
Definition: Diffuser; Diffusion; Diffusion Filter

Photographic Umbrella:
One of the great pieces of equipment that any photographer can have is an umbrella. It is used with a flash to diffuse the light in one of main ways. Here is a new article about the umbrella in the Photographic Glossary…
Definition: Photographic Umbrella


Ring flash:
If it is not about light modifiers like the diffusers and the umbrella, then it is about light sources. Off-camera flash is the most flexible type of flash for working from the camera direct. However, flash is often a harsh and very hard light. A ring flash is also a hard light but can be used close to the subject. It gives off a ring of light. Here is more detail about the Ring Flash in a new article today…
Definition: Ring Flash
 
Open faced light:
The harshest light is a hard light. An open faced light tends to be the harshest artificial source of light since the face of the light is exposed directly to the subject with no diffusion screen in the way. There may even be a focusing lens to make it even more concentrated. Here is a definition for this light…
Definition: Open Face Light; Undiffused Light; Open Light


Contribute A Definition?

Send us a definition of a photographic word or phrase...

Send us a definition for our list of photographic words and phrases. Simply write a clear definition and send it in. Include an original picture if you wish. Give us your name and a link to your website and we will credit your work.

By Damon Guy (author and Photokonnexion editor)

Damon Guy - Netkonnexion

Damon Guy (Netkonnexion)

Damon is a writer-photog and editor of this site. He has run some major websites, a computing department and a digital image library. He started out as a trained teacher and now runs training for digital photographers.
See also: Editors ‘Bio’.

Some Quick Portrait Tips

It goes without saying that every photographer has to do portraits at some time. I remember that I took some great portraits back in the day… or did I? Well, I laugh at myself now because when I look back at my early portraits I made all the classic mistakes! I cut off bits, I got the lighting wrong, I fluffed the focus. Well I guess we all did those things at least once.

In this video are some very quick tips to improve your portraits. I expect that you have got past the mistakes I made above! So these quick points are nice easy ways to move forward with your portrait shots without too much effort. Small changes make for big improvements in the shots. So have a look at this…

Can you write? Of course you can!
Write for Photokonnexion...

We would love to have your articles or tips posted on our site.
Find out more…
Write for Photokonnexion.

Time – 5 Essential Tips For Photographers

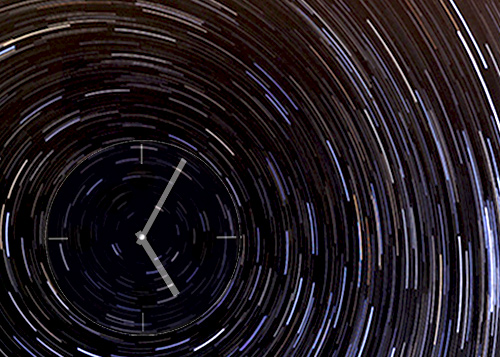
The cosmic clock is ticking... photographers should be aware of time

The cosmic clock is ticking... photographers should be aware of time

Time is an imperative for photographers

An essential element of photography, time impacts on us photographers in many ways. Here are some of the issues you should be thinking about.

The Obvious
Of course… shutter speed, the time the shutter is open. We all know that it is one of the most important aspects of taking a photograph. Tip number one: is to know the impact of shutter speed on the other two important aspects of exposure. I am talking about ISO and Aperture. Without a clear understanding of how these three components interact photographers are doomed to live with auto-settings.

Shutter speed, ISO and aperture all work together to produce your exposure. Between the three of them there is a balance. Raise/lower one of these and one or both of the others have to be adjusted to compensate. Your exposure is a dynamic balance between these three elements. Shutter speed is inseparable from the other two. Read up on the three components of exposure so you understand the impact of shutter speed.

Less Obvious

Composition is a time related activity. We all think about the best way to take a shot. What do we included or exclude? How do we frame? What angle is best? The questions are endless… the compositional variations are too. Actually, the important issue is getting the shot. Some people walk up to a scene snap and go. Have they considered the composition fully? There is a balance to be had. Time is important. I find that as my students develop the shot consideration-time shortens. They spend less time thinking about ‘the’ shot and more time working on variations… hunting for the right shot; working the scene. Tip number two is learn the settings on your camera and practice thinking about compositional elements but remember the time. Get in a number of shots, different angles, perspectives and so on. As you practice these skills try to work to time. Don’t machine-gun your shots. Work the scene – quickly, efficiently.

Being there

Timing is everything: If you don’t turn up you will miss the shot. In photography getting to the right place at the right time is everything. If you are late you will miss something… I am certain that quite often it will be the importing ‘thing’. Tip number three… leave on time, know where you are going and leave enough time to set up before you are going to take the shots. It sounds an obvious tip. However, there is a hidden component. The most important part of getting the shot is being in the right place at the right time. That will need some work. Work the scene before the event; the day before, the hour before. Which ever is right. Know where you will be taking the shots. Know what are the best places to stand. Know in advance what shots you want to take. This planning is essential if you want to make the right moves when you are doing your shoot.

Knowing the time: A lot of activities in photography are about time of day. The Golden Hour at the beginning and end of the day is quite a precise time. Knowing when it starts and ends is something you should think about if you are to make the best use of your time. Precise timings for the Golden Hour are calculated as are the angle of the sun to a particular location. It is therefore possible for you to know what time you need to be at a place to catch the golden glow of this great time of day. And, you can find out what direction to look in if the sun is not apparent when you arrive. If you don’t know the terrain you could turn up at a location and find that your times are out because the hills prevent you seeing the sun at that time.

Tip number four… know the time, and direction of your shot in advance and make sure the light is right! Consult a map to work out if you will be in hills. Ordnance Survey maps  External link - opens new tab/page have contours to indicate the lie of lines of hills and their height.

You can find out the times of the Golden Hour on The Photographer’s Ephemeris (Desktop computer version) The Photographer's Ephemeris | External link - opens new tab/page – the site helps you plan outdoor photography in natural light. The website will show you how the light will fall on the land, day or night, for any location around the earth. There are phone apps available too. Details available on the site.

You can also find the position of the sun  External link - opens new tab/page at any time of the day.

Tip five… Other important times of day you should know about:
Dawn and Dusk times: dawn is the start of the morning golden hour; Dusk is the end of the evening golden hour. However, having a knowledge of exactly what time the sun rises and sets lets you know how much time you have left on your shoot (or when it is about to start).
Mid-day: this is the time the sun is likely to be harsh, producing hard light. Mid-day is not a good time for photography. Colours may be washed out and the overhead sun reduces those all-important shadows. Remember, local DST (Daylight Saving Time) may may affect the time the sun is overhead.
Moon phases and times: The moon is a great addition to night shots. Knowing when it is up and what phase it is at is important. There are several websites with Moon tables and times.
Astronomy: The astronomical side of photography is great fun and very rewarding. You will need to have precise timings of astronomical events starting and finishing as well as knowing where to look.

Contribute A Definition?

Send us a definition of a photographic word or phrase...

Send us a definition for our list of photographic words and phrases. Simply write a clear definition and send it in. Include an original picture if you wish. Give us your name and a link to your website and we will credit your work.

By Damon Guy (author and Photokonnexion editor)

Damon Guy - Netkonnexion

Damon Guy (Netkonnexion)

Damon is a writer-photog and editor of this site. He has run some major websites, a computing department and a digital image library. He started out as a trained teacher and now runs training for digital photographers.
See also: Editors ‘Bio’.

The Importance of Eggs

A lesson in seeing the light

Photographer Joe Edelman had one of those “Ah Ha!” moments when he was at school. It was a defining moment for him. He suddenly he became aware of the light as an important variable in his photography. In this video he shares his passion and explains how a simple egg changed his photography…Was there a defining moment in your photographic development? What was it? Share your insight, leave a comment below.

Can you write? Of course you can!
Write for Photokonnexion...

We would love to have your articles or tips posted on our site.
Find out more…
Write for Photokonnexion.