Tag Archives: hard light

Time – 5 Essential Tips For Photographers

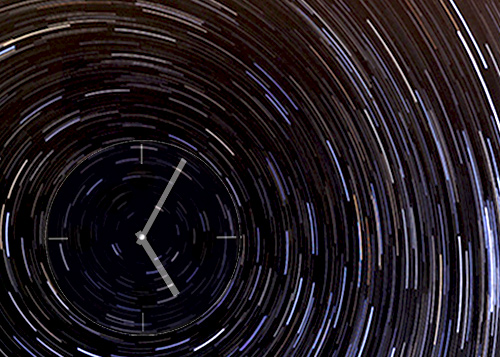
The cosmic clock is ticking... photographers should be aware of time

The cosmic clock is ticking... photographers should be aware of time

Time is an imperative for photographers

An essential element of photography, time impacts on us photographers in many ways. Here are some of the issues you should be thinking about.

The Obvious
Of course… shutter speed, the time the shutter is open. We all know that it is one of the most important aspects of taking a photograph. Tip number one: is to know the impact of shutter speed on the other two important aspects of exposure. I am talking about ISO and Aperture. Without a clear understanding of how these three components interact photographers are doomed to live with auto-settings.

Shutter speed, ISO and aperture all work together to produce your exposure. Between the three of them there is a balance. Raise/lower one of these and one or both of the others have to be adjusted to compensate. Your exposure is a dynamic balance between these three elements. Shutter speed is inseparable from the other two. Read up on the three components of exposure so you understand the impact of shutter speed.

Less Obvious

Composition is a time related activity. We all think about the best way to take a shot. What do we included or exclude? How do we frame? What angle is best? The questions are endless… the compositional variations are too. Actually, the important issue is getting the shot. Some people walk up to a scene snap and go. Have they considered the composition fully? There is a balance to be had. Time is important. I find that as my students develop the shot consideration-time shortens. They spend less time thinking about ‘the’ shot and more time working on variations… hunting for the right shot; working the scene. Tip number two is learn the settings on your camera and practice thinking about compositional elements but remember the time. Get in a number of shots, different angles, perspectives and so on. As you practice these skills try to work to time. Don’t machine-gun your shots. Work the scene – quickly, efficiently.

Being there

Timing is everything: If you don’t turn up you will miss the shot. In photography getting to the right place at the right time is everything. If you are late you will miss something… I am certain that quite often it will be the importing ‘thing’. Tip number three… leave on time, know where you are going and leave enough time to set up before you are going to take the shots. It sounds an obvious tip. However, there is a hidden component. The most important part of getting the shot is being in the right place at the right time. That will need some work. Work the scene before the event; the day before, the hour before. Which ever is right. Know where you will be taking the shots. Know what are the best places to stand. Know in advance what shots you want to take. This planning is essential if you want to make the right moves when you are doing your shoot.

Knowing the time: A lot of activities in photography are about time of day. The Golden Hour at the beginning and end of the day is quite a precise time. Knowing when it starts and ends is something you should think about if you are to make the best use of your time. Precise timings for the Golden Hour are calculated as are the angle of the sun to a particular location. It is therefore possible for you to know what time you need to be at a place to catch the golden glow of this great time of day. And, you can find out what direction to look in if the sun is not apparent when you arrive. If you don’t know the terrain you could turn up at a location and find that your times are out because the hills prevent you seeing the sun at that time.

Tip number four… know the time, and direction of your shot in advance and make sure the light is right! Consult a map to work out if you will be in hills. Ordnance Survey maps  External link - opens new tab/page have contours to indicate the lie of lines of hills and their height.

You can find out the times of the Golden Hour on The Photographer’s Ephemeris (Desktop computer version) The Photographer's Ephemeris | External link - opens new tab/page – the site helps you plan outdoor photography in natural light. The website will show you how the light will fall on the land, day or night, for any location around the earth. There are phone apps available too. Details available on the site.

You can also find the position of the sun  External link - opens new tab/page at any time of the day.

Tip five… Other important times of day you should know about:
Dawn and Dusk times: dawn is the start of the morning golden hour; Dusk is the end of the evening golden hour. However, having a knowledge of exactly what time the sun rises and sets lets you know how much time you have left on your shoot (or when it is about to start).
Mid-day: this is the time the sun is likely to be harsh, producing hard light. Mid-day is not a good time for photography. Colours may be washed out and the overhead sun reduces those all-important shadows. Remember, local DST (Daylight Saving Time) may may affect the time the sun is overhead.
Moon phases and times: The moon is a great addition to night shots. Knowing when it is up and what phase it is at is important. There are several websites with Moon tables and times.
Astronomy: The astronomical side of photography is great fun and very rewarding. You will need to have precise timings of astronomical events starting and finishing as well as knowing where to look.

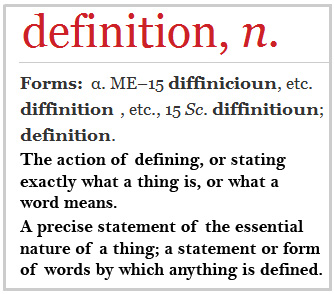
Contribute A Definition?

Send us a definition of a photographic word or phrase...

Send us a definition for our list of photographic words and phrases. Simply write a clear definition and send it in. Include an original picture if you wish. Give us your name and a link to your website and we will credit your work.

By Damon Guy (author and Photokonnexion editor)

Damon Guy - Netkonnexion

Damon Guy (Netkonnexion)

Damon is a writer-photog and editor of this site. He has run some major websites, a computing department and a digital image library. He started out as a trained teacher and now runs training for digital photographers.
See also: Editors ‘Bio’.

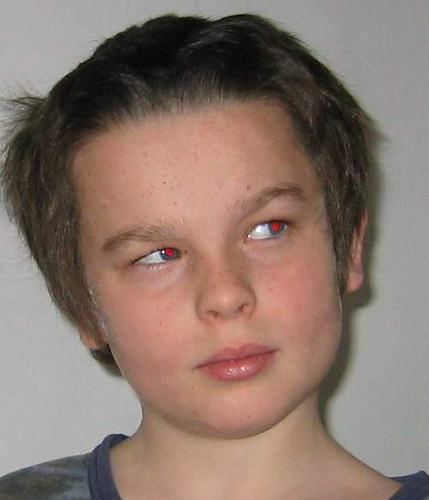
The red eye effect

The 'red eye' effect gives the subject an unfortunate bright red colour in the pupils.

The 'red eye' effect gives the subject an unfortunate bright red colour in the pupils.

Red-Eye And How To Stop It

Just occasionally photographers are presented with an image showing the ‘red-eye’ effect. This strange effect introduces a new dimension into the photograph, often ruining it. It’s caused by a beam of light from a flash being directed into the eye and reflected out, directly into the camera lens. You can find out more about how it is caused in our glossary entry, Red eye Effect (definition).

The reflected light off the back of the eye (called the retina) is red because of the blood rich tissue found there. The strong red tones colour the reflected light. This lights up the pupil and makes the eye glow red.

The root cause of the red eye effect is the flash being too close to the lens. Red eye is a common problem in studios and portraiture photography. It is under these conditions that the effect is most likely to show up. Smaller point-and-shoot cameras are much more likely to cause the effect because the flash is so close to the lens. Using a DSLR may help. However, pop-up flash on DSLRs is also a cause of the problem.

The Remedy

Many recent cameras including point-and-shoot cameras and DSLRs have red eye correction facilities built in. Some cameras generate a diffused but direct light before the flash goes off. This causes the pupil to reduce in size unconsciously before the shot is taken. It is an effective remedy, but may cause people with sensitive eyes to blink or squint which can affect the shot. Some cameras ‘recognise’ an incidence of red eye and auto-correct the redness in-camera processing of the image after the shutter has closed.

Experienced photographers prefer real-world methods of red eye reduction. In-camera processing systems don’t always prevent red eye. Furthermore, small pupils look unnatural and harsh. Also, direct lighting from flash close to the lens is unflattering. See Does pop-up flash ruin your shots.

The most effective prevention of the red eye effect is to move the flash further from the lens. It is common for professional photographers to use off-camera flash, or flash brackets to move the flash away from the lens. This increases the angle between the flash beam to the eye and the reflection from the back of the eye. The wider angle stops the red eye effect since the reflection is not directly back out of the eye.

The red-eye effect is found more frequently in low light conditions as the eye opens the pupil to let in more light. It is more likely to occur in these conditions because there can be a wider angle of light and still get a viable reflection out of the wide pupil. One way to reduce red eye is therefore to increase the ambient light. The eye will react so the pupil closes to a smaller hole. This reduces the possibility of a reflection.

Often red eye is less detectable if you move further away. Close use of a hard light source or close-up use of the camera can both make the effect brighter. If you take the shot further away the camera may not even see red eye if it occurs.

Another way to reduce red eye is to bounce the flash light off a wall, ceiling or reflector so there is no direct flash beam entering the eye. This is more effective since the light is even and less directed.

The best way to prevent red eye is not to use flash or bright directed lights at all. In this case, lower light conditions may require the use of a tripod for a longer exposure. However, I accept that longer exposures or a tripod may not be practical or helpful.

The only other practical way to prevent red eye is to ask the subject to look away from the flash and lens slightly. Again, that my spoil the pose. And, as you can see from the picture above may not work anyway.

Software removal

Usually, one or a combination of the above, are sufficient to stop the problem in-camera. However, as a last resort many software editors can be used to remove the effect in post-processing. Adobe Photoshop has several ways to remove red-eye. Adobe Elements has a tool as well. Gimp External link - opens new tab/page, the open-source image editing suite has a red-eye tool which is included in the core system in more recent versions. Irfanview is a respected and free download image viewer. The application has gained some editing tools over the last few years. It has a basic red eye tool too. Other software suites provide various options as well. The actual methods of using these tools vary according to the software, but in most cases the process is simple.

If you don’t have your own software suite to do your red eye processing there are a number of online solutions. Google provided this page of ‘Red Eye Correction External link - opens new tab/page‘ links.

Animals

The red eye effect is also found in most animals aside from humans, although the red colour can vary in intensity and tone according species. The red eye effect should not be confused with the ‘eyeshine effect‘ found in some nocturnal hunting animals. Although the cause is the same, the reflecting membrane in the eye is different. The colours vary and are usually silvery, not red. Animals like dogs and cats can exhibit both the red-eye effect and eyeshine at different times and various light conditions. Eyeshine is prevented in much the same way as red eye.

By Damon Guy (author and Photokonnexion editor)

Damon Guy - Netkonnexion

Damon Guy (Netkonnexion)

Damon is a writer-photog and editor of this site. He has run some major websites, a computing department and a digital image library. He started out as a trained teacher and now runs training for digital photographers.
See also: Editors ‘Bio’.

The Importance of Eggs

A lesson in seeing the light

Photographer Joe Edelman had one of those “Ah Ha!” moments when he was at school. It was a defining moment for him. He suddenly he became aware of the light as an important variable in his photography. In this video he shares his passion and explains how a simple egg changed his photography…Was there a defining moment in your photographic development? What was it? Share your insight, leave a comment below.

Can you write? Of course you can!
Write for Photokonnexion...

We would love to have your articles or tips posted on our site.
Find out more…
Write for Photokonnexion.

Abstract photography – what it is and how to do it

Abstract photography - great pictures and lots of fun!

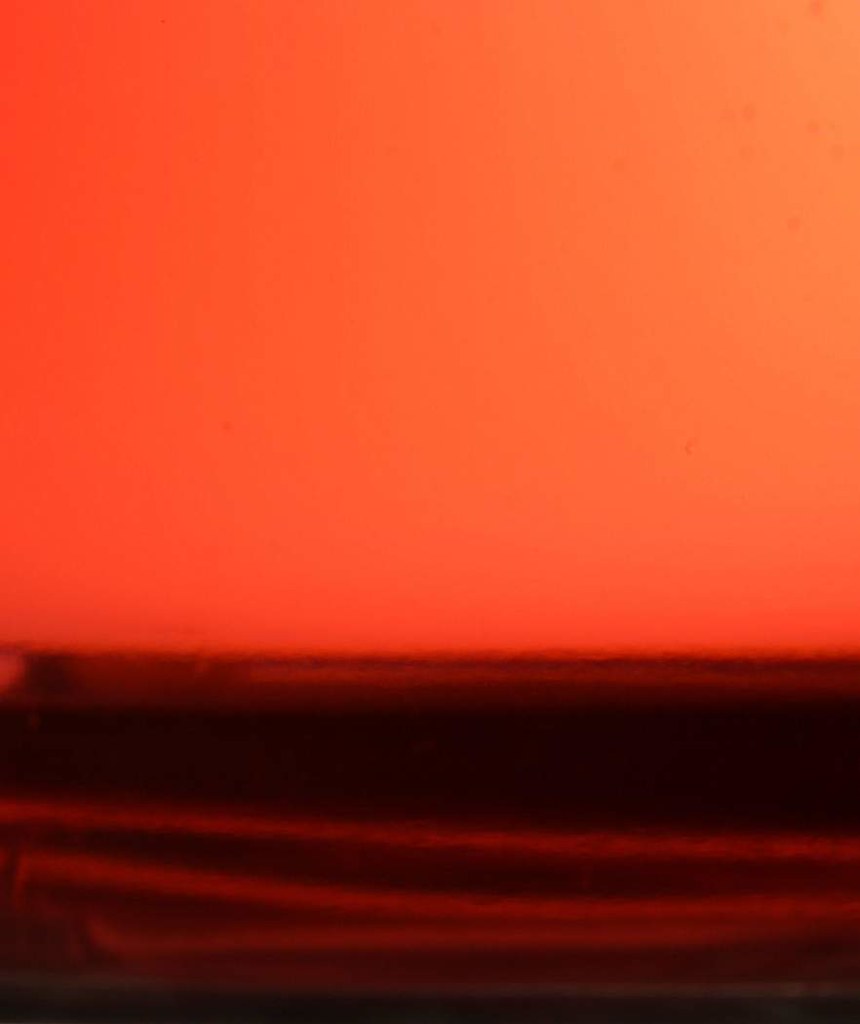
'Red' - In the style of Rothko
Abstract photography can produce great pictures and be lots of fun!
Concentrate on colour, form, shape and focus for best effect.
Click to view large.

What is Abstract Photography?

“Abstraction forces you to reach the highest level of the basics.”

Alan Soffer

Abstract photography concentrates on the very simplest of components in a piece of art. Those are are known as the “Elements of Art”. They are…

  • Line;
  • Two dimensional shape (2d);
  • Three dimensional (3d) form;
  • Colour;
  • Space;
  • Tone, and
  • Texture.
Extra dimensions in abstract photography

Two extra dimensions are often found in abstract photography. One is the use of ‘movement’ – mostly through movement-blur. Perhaps, used more often is the use of focus, especially by controlling the depth of field. In addition, abstracts often incorporate “pattern”, which is a more complex structure from the “Principles of Art”.

Photo abstracts take the viewer away from knowing or recognizing the subject. Instead they invite the viewer to almost ‘feel’ the textures, forms and other elements of the subject. Often abstract photography makes the object unrecognisable as an object in its own right. Instead it directs attention to the look and feel – the essence of the object.

For a more detailed definition of Abstract Photography check this page in our Glossary…
Abstract Photography – a Definition

How to Shoot Abstracts

Abstracts are about our creativity and not about the object. The simple shot above, with its rich emotional orange, is a glass of water coloured with red dye and slightly backlit with a desk lamp. Many abstracts are created using the simplest things – often they are found around the home. Abstract photography is all about simplicity. Getting down to the basics is often the best route to a good abstract.

Using the “Elements of Art”

The list above is perhaps difficult to think about in terms of actually creating an image. However, think carefully about what you see in the frame for your shot. Often you can see these simple elements in your subject. Try to simplify your shot so that you see only one, two, or at most three of those elements. If you manage to get the image to remain simple, you will make the shot more understandable. If you also manage, through that simplicity, to capture the readers eye, you will excite the viewer. Simple components, simple connections, simple insight to a subject – all these give you effective abstract material.

Study the Elements of Art, at length. Try to see the simplicity within your frame. That is the key to developing your insight into abstraction.

Other techniques…

To help you shoot a few abstracts I have put a list of things you can try below. Try one, or a few at a time. Compare them to some of the examples in the links below the list. Reduce or remove clutter. Keep your shot as simple as possible.

  • Look for patterns – especially very close up.
  • Textures – show the ‘feel’ of surfaces and faces of an object.
  • Try unusual or unique angles.
  • Use a macro lens, macro tubes, or get really close.
  • Crop very tight to an interesting/unrecognisable part.
  • Concentrate on multiple colour variations without showing the whole object.
  • Concentrate on tonal variation – minimise colours.
  • Use long, low light exposure to bring out subtle shadow variations.
  • Use soft or hard light variations on close-ups.
  • Emphasis the ‘shape’ (2d) of an object – keep it from being recognised.
  • Exaggerate the ‘form’ (3d) of something – keep it from being recognised.
  • Concentrate on curves and rounded shapes or forms.
  • Concentrate on angular and geometric shapes or forms.

Many of these can be applied to everyday objects or common items. Once you become aware of the shapes, forms, patterns and textures in the things around you a new world opens up. So try to take one of the above and spend a few days looking at everything around you for ways to see that item. Then move on to others. Before long you will be an abstract photographer!

Damon Guy - Netkonnexion

Damon Guy (Netkonnexion)

Damon is a writer-photographer and editor of this site. He has run some major websites, a computing department and a digital image library. He started out as a trained teacher and now runs training for digital photogs.
See also: Editors ‘Bio’.
By Damon Guy see his profile on Google+.

Classic Portrait Lighting

Classic portraiture positions and how to light them

In the video below photographer Jay P. Morgan looks at the classic lighting set-ups for portraiture. This is an excellent introduction to the way that different lights affect the features of the face. He spends time on these important lighting techniques…

  • Rembrant Light
  • Split Light
  • Broad Light
  • Butterfly Light
  • Loop Light

Jay uses some expensive studio lights in his video. However, it is only light! You can reproduce the basic set-up using speedlights or even static, always-on lights. You can easily practice with ordinary house lights. Directional lights are best like desk lamps. You can adjust the colours by diffusing them with panels of material or white reflectors. Don’t forget that the average house-light has some strong colour casts so you will need to adjust your colours using white balance. The other alternative is to adjust the colours afterwards in your editing software if you are shooting in RAW (the native format for files made by your camera).

Can you write? Of course you can!
Write for Photokonnexion...

We would love to have your articles or tips posted on our site.
Find out more…
Write for Photokonnexion.

Light, a Little Difference Makes a Big Impact

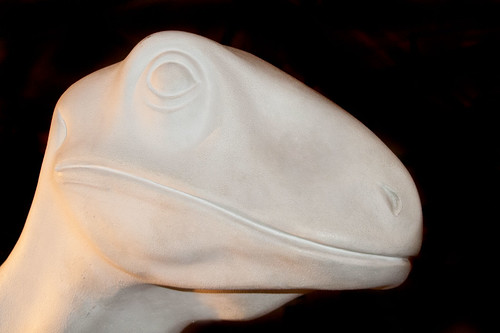
Dinosaur Portrait - a study in hard and soft light.

Dinosaur Portrait - a study in hard and soft light.

This is an interesting shot because you can see the difference between ‘hard light’ and ‘soft light’. The tonal changes in the sculpting of the face show subtle and graduated shadows to bring out the features – the effect of soft light. Under the jaw line is one very sharp, harsh shadow caused by a hard light from above. See the harsh sharp shadow? The difference between these two light sources is astonishing. They create such different effects.