Author Archives: Damon (Editor)

Low light action shots – tips for getting them right

“Low light action shots” is contributed by Melanie Hyde (Bio) of PaintShopPro.com Low light action shots | External link - opens new tab/page.

Low light action shots need care to get them right.

Low light action shots need care to get them right.

Action photography itself can be extremely challenging. Being in the perfect place at just the right time, capturing that incredible moment. Then, hoping to transport anyone who sees your photo across time and space to take them back to the moment the image was taken. It’s a truly a magical experience, whether you’re taking the picture or the viewer.

Given the challenges that come with action photography, removing most of the light only makes it all the more difficult.

There is good news. The same principles of action photography and proper exposure apply. It’s just a little more challenging to get those low light action shots.

Light sources for your low light action shots

When it comes to taking low light action photos, you’ll need to combine the available light sources. This will help to make the most of the situation. First, take a look around and identify whether the lighting is constant or variable.

Constant Light

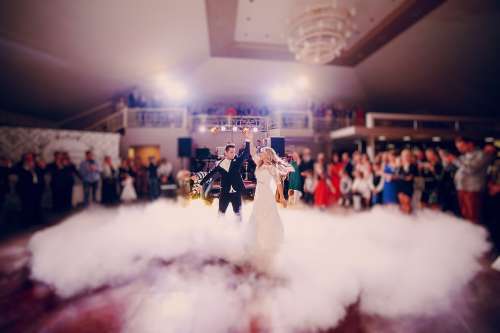
Constant light occurs within your setting when you can isolate out a source for a shot. Framing the shot is important so that the light is consistent for that shot. The next shot may have a different source – you need to isolate the light for that too. For example, if you were shooting a wedding reception, you might capture an image of the bride and groom on the dance floor. Then, you turn around and capture an image of the bride’s parents dancing across the room. Depending on the setting, the lighting may be different between the two subjects but consistent within each shot.

When lighting is consistent, operating your camera becomes much easier. The camera can adjust to meet the needs of the low light action shots. Here are a few points to keep in mind when shooting with constant low light:

  • Shoot in shutter priority mode so the camera can adjust.
  • Use Auto White Balance so the camera can adjust.
  • Manually control your ISO.
Variable light

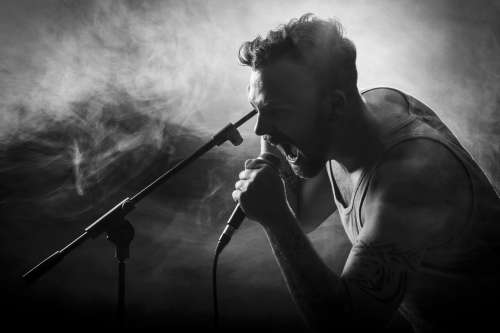
Variable light occurs when light sources are constantly changing and are inconsistent across your field of view. Imagine you’re photographing the lead singer at a rock concert. You may have to deal with strobes, spotlights and pyrotechnics. The constant changes in light sources will cause your camera to struggle to automatically expose the image correctly.

Low light action shots with variable light sources can confuse your camera - go manual.

Low light action shots with variable light sources can confuse your camera – go manual.

When dealing with variable light conditions it’s usually best to go manual. In this situation, remember to:

  • Manually set your aperture and shutter speed.
  • Manually set your White Balance.
  • Manually set your ISO.
Balance aperture, shutter speed, and ISO

You have three ways to control the way your camera exposes an image. Aperture, shutter speed, and ISO. To successfully capture great low light action shots, you must be able to manipulate these elements. Select settings that allow you to capture the highest quality image for the ambient light conditions.

The exposure triangle helps you to keep your shot’s exposure within the capability of the camera and lens. So when going manual your settings should allow these three essentials to balance. Look in your viewfinder to get the needle settled in the centre for a proper exposure. For more detail check out The Exposure Triangle – An aid to thinking about exposure.
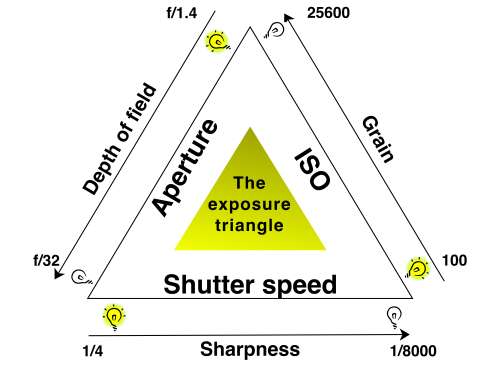
The exposure triangle is an idea that helps you balance aperture, shutter speed and ISO for a good exposure.

The exposure triangle is an idea that helps you balance aperture, shutter speed and ISO for a good exposure.

Start with shutter speed

Low light action shots are by definition going to be in difficult light for your camera. Getting your shutter speed right can be tricky. However, it has a huge impact when shooting movement in low light. The following diagram will help you select the right setting.
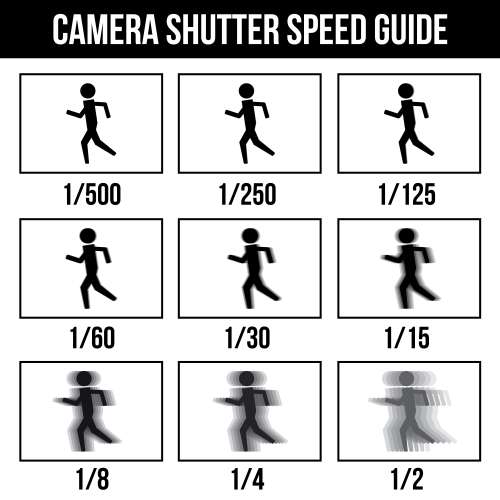
Camera shutter speed guide.

Camera shutter speed guide :: Low light action shots need the right camera speed. If the shutter speed is too low you get blurring.

You have to select a speed that is fast enough to capture the motion clearly and without blur. The speed should still slow enough to deal with the lack of light. For action shots, it’s always best to use the fastest shutter speed that the light allows. It is a balancing act so you will need to practice.

Select the widest aperture for your low light action shots

In action photography, capturing crisp and clean images is usually the priority. When shooting with low light settings, it’s crucial to get as much light to your sensor in the small amount of time that your shutter is open as possible.
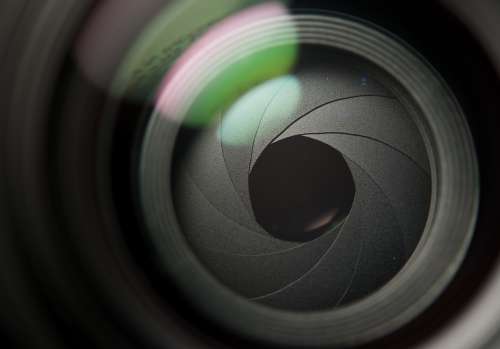
For low light action shots use a wide aperture to increase the incoming light.

The aperture sets the initial amount of light coming into the lens. For low light action shots use a wide aperture to increase the incoming light.

To accomplish this, use the widest aperture that your camera allows. While shooting in shutter priority mode, you allow your camera to do this automatically. Shooting in manual mode however, you’ll need to keep a close eye on your exposure. You need to make sure that your images are not underexposed in the low light.

Using high ISO

Are your images are consistently coming out blurry with your aperture is as wide as can be? Consider stepping up your ISO settings.
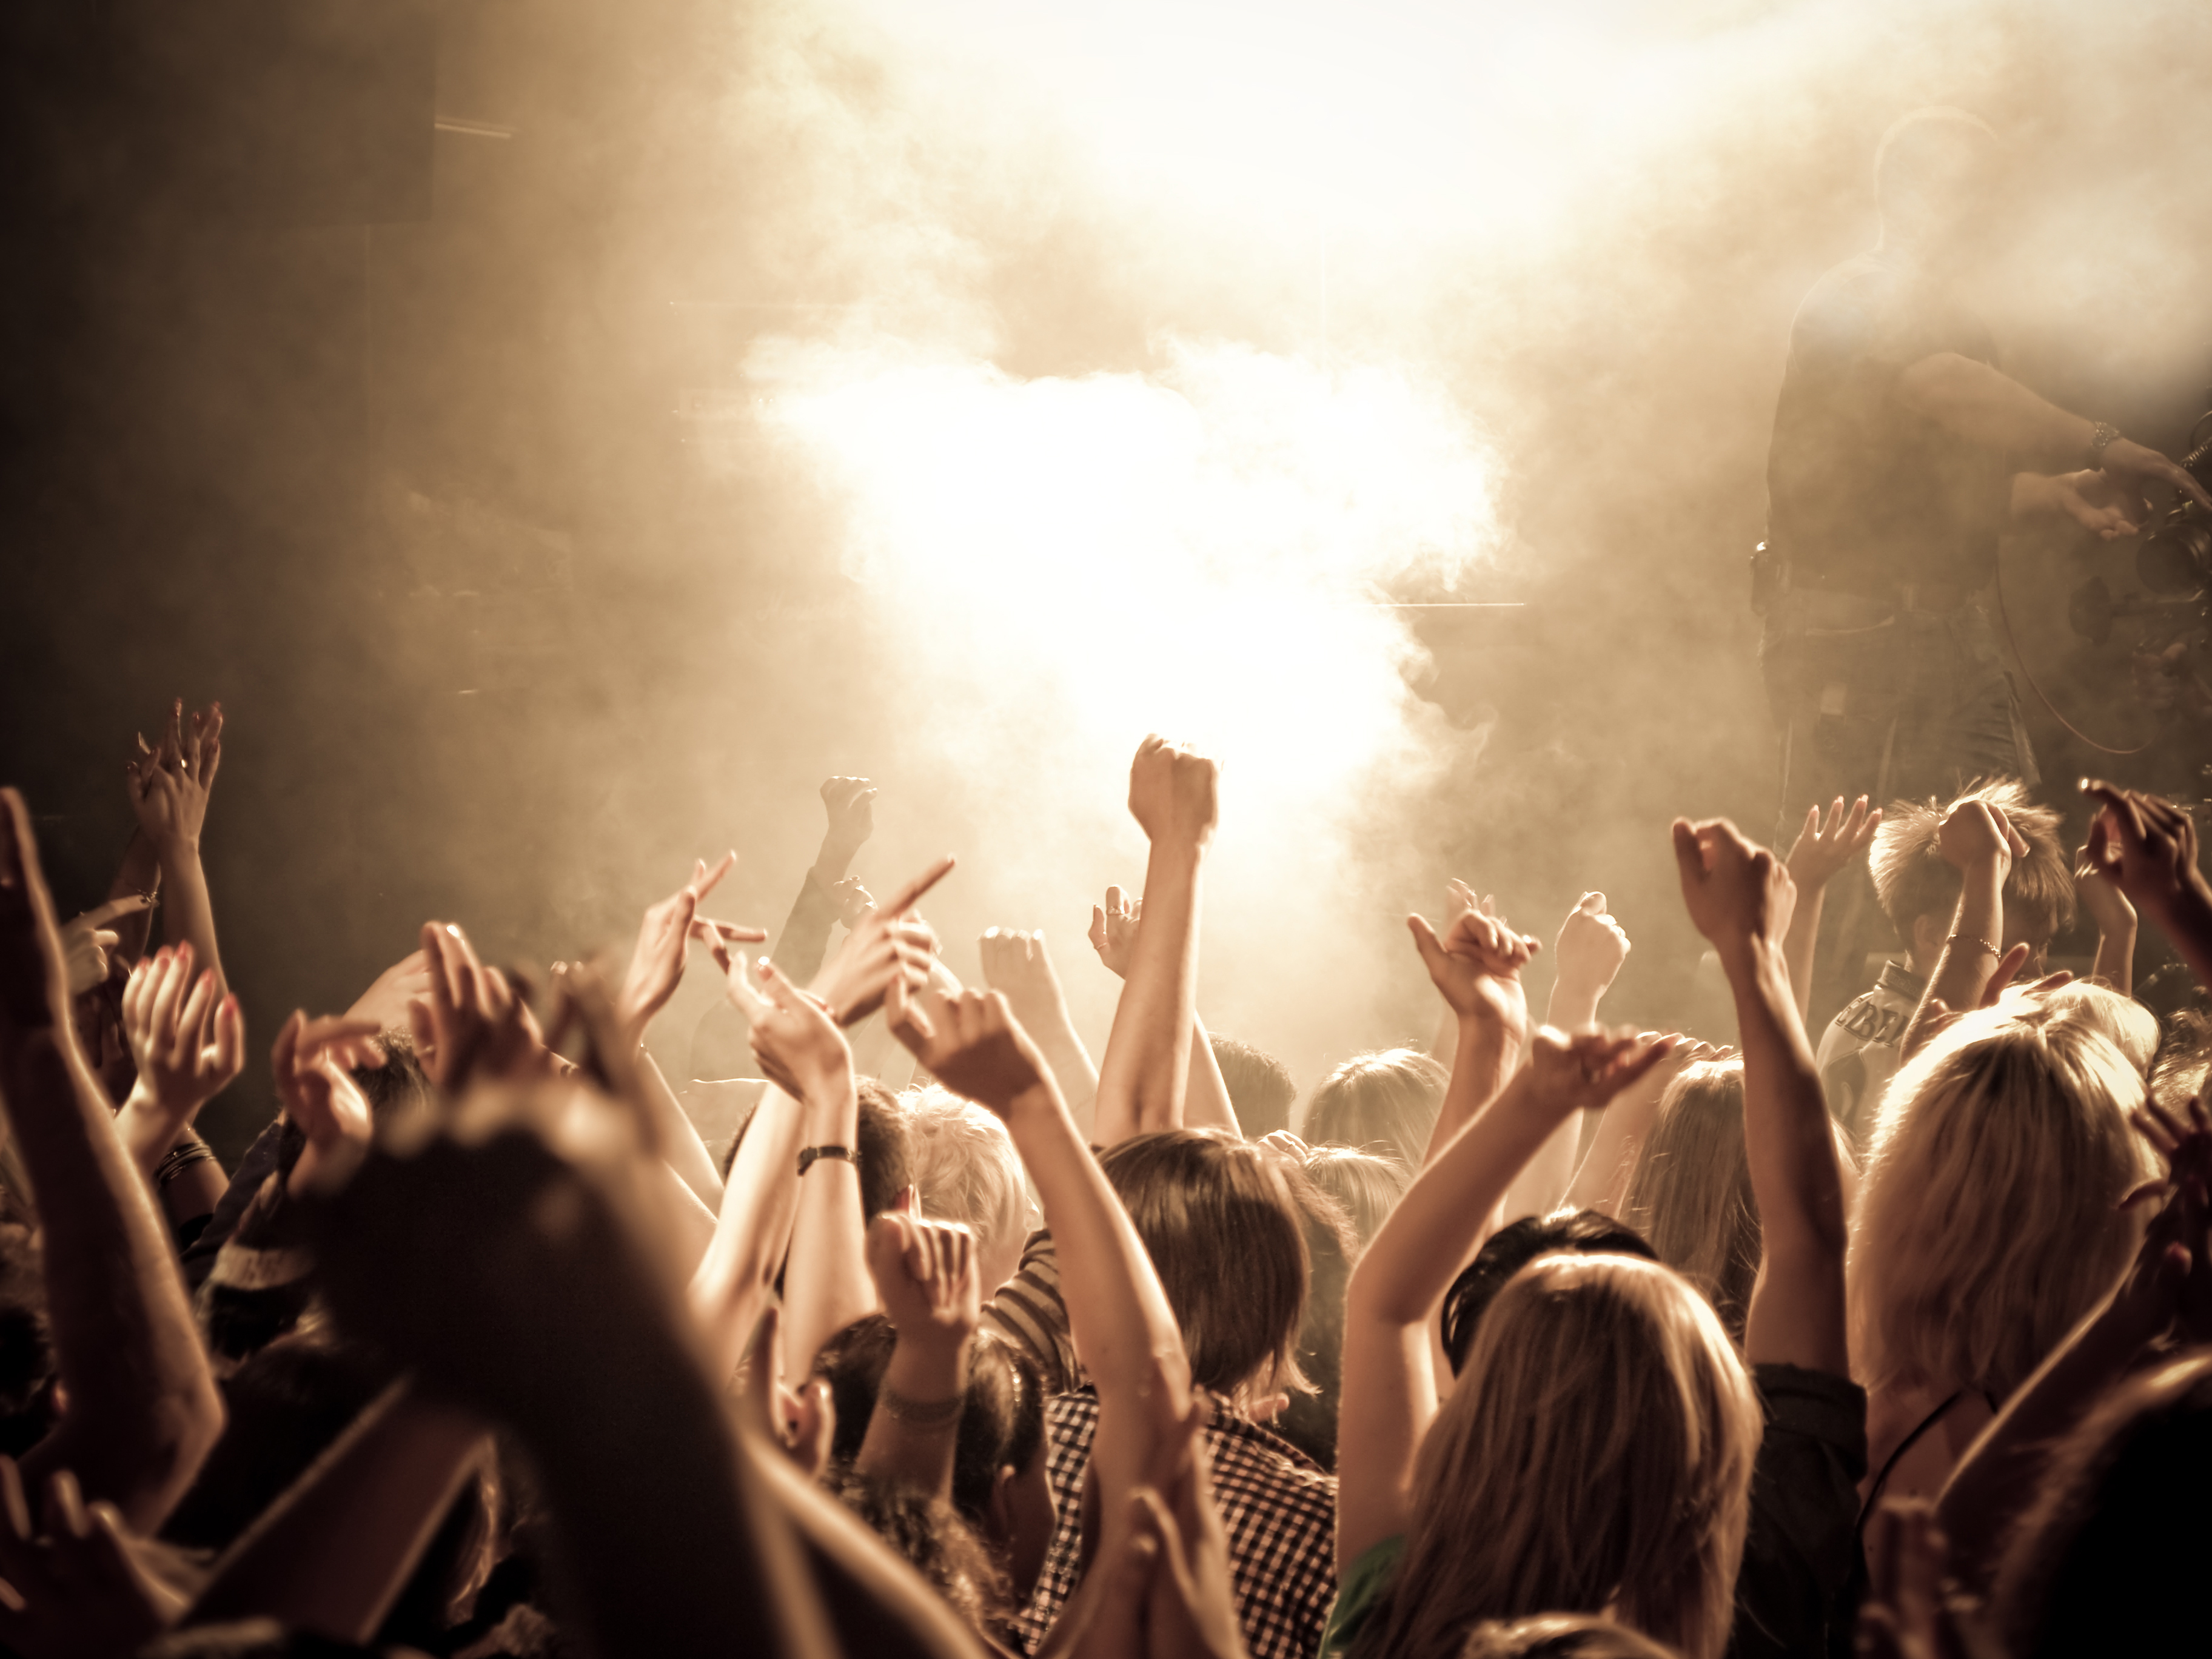
Your low light action shots can really win the day if you get your ISO right.

On the dance floor the light is almost always difficult. Your low light action shots can really win the day if you get your ISO right.

By changing your ISO, you alter your camera’s sensitivity to light. The higher the ISO, the more exposed your image will be. Just be cautious: using a higher ISO may introduce more “noise” to your photos. This noise can often be reduced or corrected in a post-processing software like PaintShop Pro Low light action shots | External link - opens new tab/page or Lightroom Low light action shots | External link - opens new tab/page. (Shooting in RAW is especially helpful with noise reduction).

Check your work as you go

Throughout the shoot, use your histogram. (See: Can you use the histogram on your camera?) It will help to make sure you’re exposing your images correctly. The histogram shows the distribution of the type of light in your shot. It aims to help you capture a consistent amount of light across the full spectrum of your image.
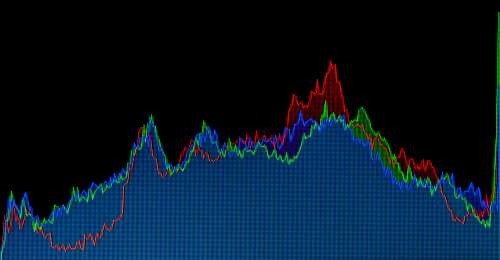
The histogram on your camera helps you ensure effective use of light in your exposure.

The histogram on your camera helps you ensure effective use of light in your exposure.

The histogram on your camera helps you ensure effective use of light in your exposure.

You’ll also want to make sure that your white balance looks good and adjust accordingly. In most cases, your camera is going to be able to set white balance automatically, but you may need to tweak it; especially if your lighting is wildly inconsistent.

Increase your odds

Low light action shots are all about being in the right place at the right time with the right equipment.

Use the fastest lens you can find. The wider the aperture, the more light your lens allows to strike your camera sensor. Anything higher than F2.8 will cause you to struggle with exposure.

Set the camera to continuous drive. This equips your camera to capture a burst of images every time you press the shutter release and gives you a better chance of capturing that perfect picture.

Use a fast memory card. Your camera can only capture images as fast as it can write them to the memory card. If you snap too many images in rapid succession, you’ll have to wait for the card to catch up with your camera and you might miss “the shot.”

Be prepared to shoot…a lot. You’re going to have a lot of images that are no good. So remember to keep tinkering with your settings. The key is shooting lots of images at different settings until you get the perfect mix.

Don’t forget to have fun

Low light action photography can be both challenging and fulfilling. As you refine your skills and your eye for lighting, action, and composition, remember to regularly experiment and try new settings.

Comments, additions, amendments or ideas on this article? Contact Us
or why not leave a comment at the bottom of the page…

Like this article? Don’t miss the next — sign up for tips by email.

Famous Failures – how you can equal the greatest

Famous failures - How to equal the greatest - it's simple! A video and how to succeed ideas.

Famous failures – How to equal the greatest – it’s simple! A video and how to succeed ideas.

Famous Failures – Some surprises

The main reason that we become successful at something is that we work at it. In history there have been many famous failures. They failed at their chosen goal early on. Then they went on to be successful at the very thing they failed at first-off.

In this video you can see who some of these famous failures are. I think you will be surprised. For us as photographers, we need to think about what these fails mean for us. More after the video (3 mins).

Uploaded by: MotivatingSuccess Video :: Famous failures - How to equal the greatest | External link - opens new tab/page

Famous Failures :: What they did about it

We know most of these famous people. We know them, perhaps, as some of the most successful people of all time. So why did they fail?

The answer is simple. Everyone needs to start somewhere. We all start from a basic position of no knowledge and no skill. We may have a talent or aptitude. Without development they will never be realised. If we do have them is not the main issue. The point is, these famous people saw that they could get past the failures. They made the effort to go to the next step; then to the next level.

Photographers, like everyone else, have to start somewhere. Inevitably starting out is difficult. So, we must expect our own fair share of failed attempts.

What takes you past failure?

Famous failures usually have two key attributes. First, they pick themselves up, dust themselves off, and start again. Studies of successful people frequently show that they were prepared to fail. Not just once either, but many times.

The second key to success is the ability to be persistent. Famous failures will keep on doing, learning, trying, developing, improving and moving forward – regardless of what others say or do. They will, through adversity, keep their eye on the goal and do everything they can to succeed.

How do ‘famous failures’ help photographers?

Photography, like all pursuits has its difficulties. For us, the famous failures model is important. Many times I have been asked by my students what does it take to be a successful photographer? My answer is, “Don’t be afraid to fail and keep trying”. If you can do that you will learn all the things you need to learn. That is as true for each individual shot as it is for whole shoots and career moves.

In his book, best-selling author and world-renowned photographer and teacher Bruce Barnbaum, explores draws upon personal experience and observations from more than 40 years of photography and teaching. See the book: The Essence of Photography The Essence of Photography | External link - opens new tab/page. So, ignore failure, and with persistent effort, you will surpass those with talent and creativity who do not apply themselves. And, if you start out without as much talent and creativity as others, you will develop them along the way.

I am reminded of this quote:

Your attitude, not your aptitude, will determine your altitude.
Zig Ziglar

This is equally true of the start-up photographer as it is for the keen hobbyist. You set your goals. You go for them.

Enjoy your photography!

Comments, additions, amendments or ideas on this article? Contact Us
or why not leave a comment at the bottom of the page…

Like this article? Don’t miss the next — sign up for tips by email.

Damon Guy - Netkonnexion

Damon Guy (Netkonnexion)

Damon is a writer-photographer and editor of this site. He has run some major websites, a computing department and a digital image library. He started out as a trained teacher and now runs training courses in digital photography.
See also: Editors ‘Bio’.
By Damon Guy see his profile on Google+.

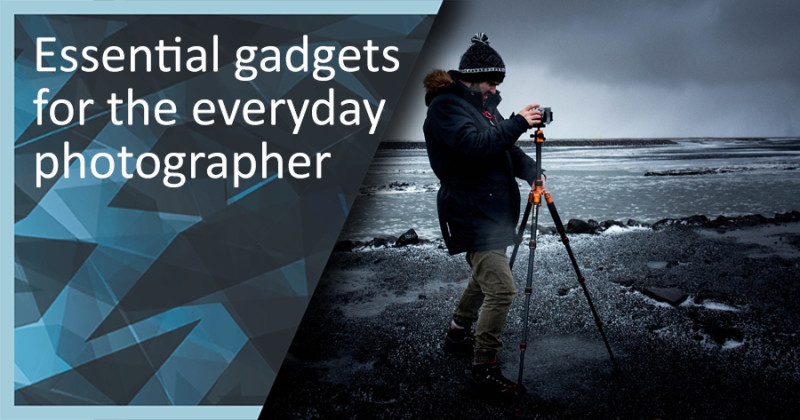
Essential gadgets for the everyday photographer

Essential gadgets for the photographer

A look at some essential gadgets for the photog…

Today’s article comes from: Jane Grates (Bio) from Sleeklens.com.

It is essential, and fun, to keep up-to-date with the latest trends. Gadgets occupy an important niche in our world of photography. In this article I look at the essential gadgets that are must-haves for the serious photographer.

essential gadgets for the photog

Look out for those essential gadgets…

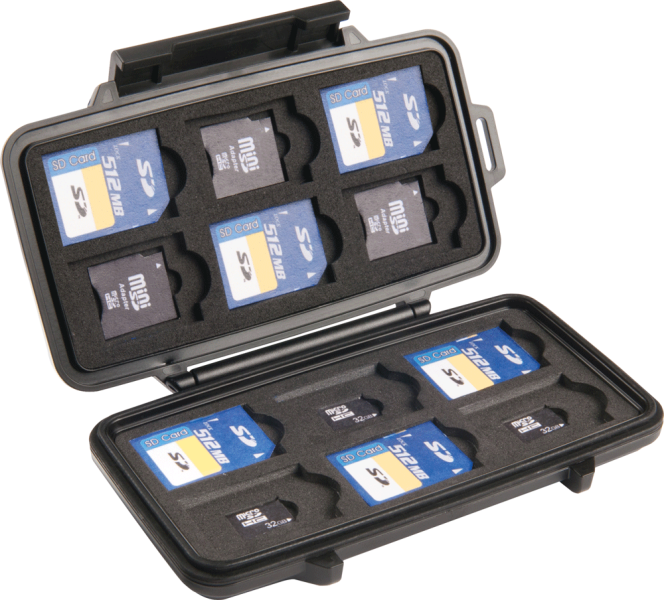
SD Card holder

First, the basics. Lots of hardware to improve your performance as a photographer is wasted if you do not have enough space to store pictures. The storage issue can become a nuisance. Beat the problem and have many SD cards in order to prevent lack of drive space. This is particularly important for photographers who travel a lot.

Essential gadgets - The SD card holder.

Essential gadgets – The SD card holder.

Buying an SD card holder is a smart solution to the space problem. You can split your work over different SD cards to create a well organized library. Not only are you placing your work in a safe place, you are creating smart categories too.

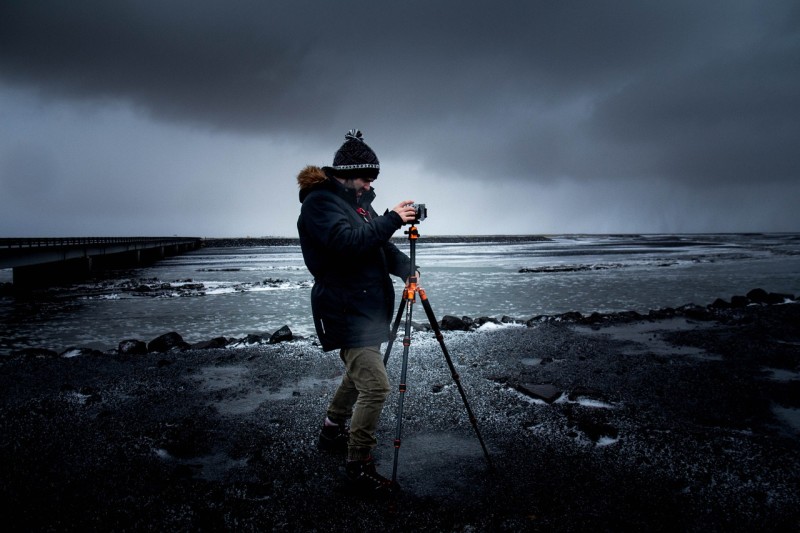
A Tripod

A classic, the tripod is vital when dealing with heavy lenses or long exposure times. Night time photography is almost impossible without a tripod. The longer exposures are needed to capture low light levels.

A quality tripod is one of those essential gadgets we should all have. Look for one that suits the needs of your photo interests and for height and transportability. Higher quality tripods tend to be heavier, but this means they are less likely to blow over or vibrate in windy conditions.

xxx

A quality tripod is one of those essential gadgets we should all have.

Think how you will use your tripod. This will determine the price range. If you do your work mainly in a studio, or you are just starting your business, you can buy a simple model. If, on the other hand, you are a skilled photographer, you will want to buy a pricier, more adaptable one to last longer and endure the diverse conditions you may come across.

Lens Filters

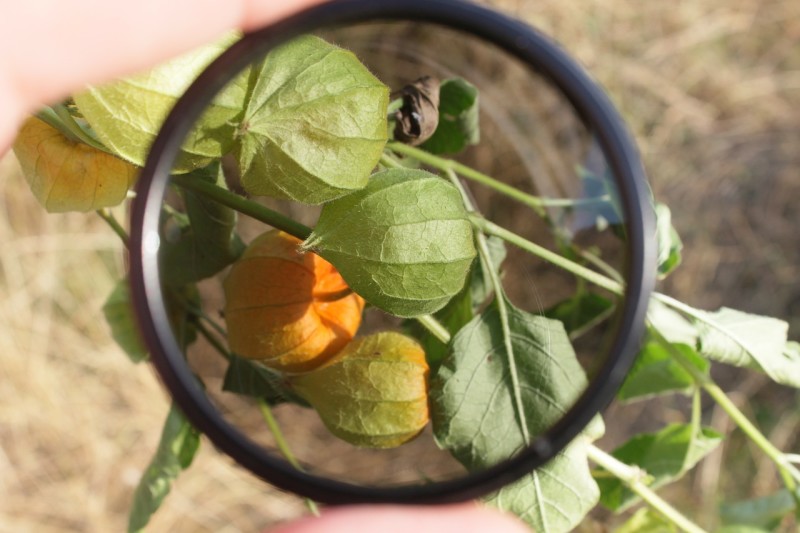
You can create “filter effects” with post-production ‘presets’ in editing software. But you can skip a step by using on-camera filters. This will save incredible amounts of time in processing. Filters can help you avoid burned out images from strong sun if you use Polarized filters. The camera lens will react the way your eyes do when you use polarized sunglasses.

Polorising filter - one of the more essential gadgets.

Polarising filters help you deal with strong sunlight – one of the more essential gadgets.

Remember to buy a lens filter that fits your lens size. There are companion gadgets for filters. Step-up/down rings serve to create a perfect fit on lenses with non-standard formats or sizes. The latter are commonly seen on bridge cameras.

Remote shutter release

For long exposure times, or for portrait pictures including the photographer in the scene, remote shutter devices are handy tools. Simply grab your remote shutter release, place your camera on the tripod and let the action flow.

Remote shutter release - one of the essential gadgets.

Remote shutter release – one of the essential gadgets.

You can choose a remote shutter release from wired or wireless devices. I recommend buying a wired model, at times interference can be frustrating. Although, there are some very good models on the market recently. It is worth

Another remote shutter choice is a phone app. Not all camera models are supported. Some Canon and Nikon models are compatible with this feature. The apps are cheap, or free, saving some of your money. In fairness the latest remote shutters are not really expensive. Still, having a phone app will certainly guarantee that you won’t forget your remote shutter release wherever you go!

Weather cases

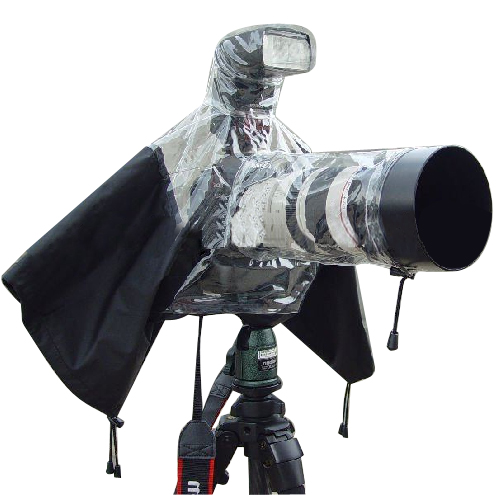
A common problem, as a photographer, is the sudden appearance of bad weather. It’s not good for using your camera! Don’t risk the investment you made in quality kit. Consider carrying a weather-safe case that fits your camera model, lenses and other accessories. Not only are you going to protect your beloved camera, but you can continue your shoot regardless of the conditions.

Protect your beloved camera from bad weather - use a camera case.

Protect your beloved camera from bad weather – use a camera case.

Weather sealed cameras can benefit from this protection too. Water seals deteriorate over time. Other attached accessories are not all water proof as well. Don’t risk your device without even thinking about it.

Smart phone lenses

If you are a photographer on the go, you probably own a smartphone. Up to date models have a good camera. It can be a limitless source of creativity. However, smartphones are limited compared to modern DSLR cameras. They rarely have full and true manual controls. They lack the proper control of ISO, Aperture and Shutter speed settings.

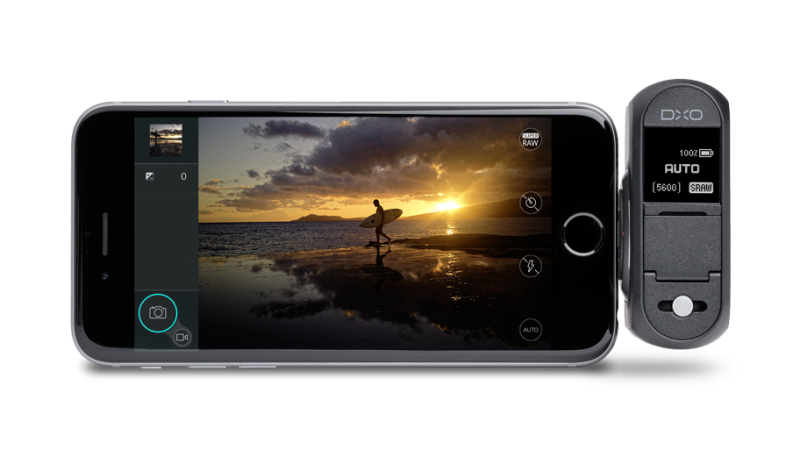
Smartphone add-on lenses open a new dimension for the photographer on the go.

Smartphone add-on lenses open a new dimension for the photographer on the go.

A cool way to fix this issue is smartphone lenses. They come in a wide range of prices and with various features. Common base models of add-on smartphone lenses can do things that smartphone camera lenses can’t do. For example, fish-eye effect, macro or telephoto and other effects. More complex models, like the latest Sony QX-10, completely reinvents the smartphone lens concept. It boosts the smartphone with a professional quality sensor packed with manual controls. Even if it seems to be pricey, the result won’t disappoint.

Remember, the smartphone is a useful addition to the camera bag in its own right. Check out this post: Using tablets in photography.

Essential gadgets – more than just the camera… Photographer’s backpack

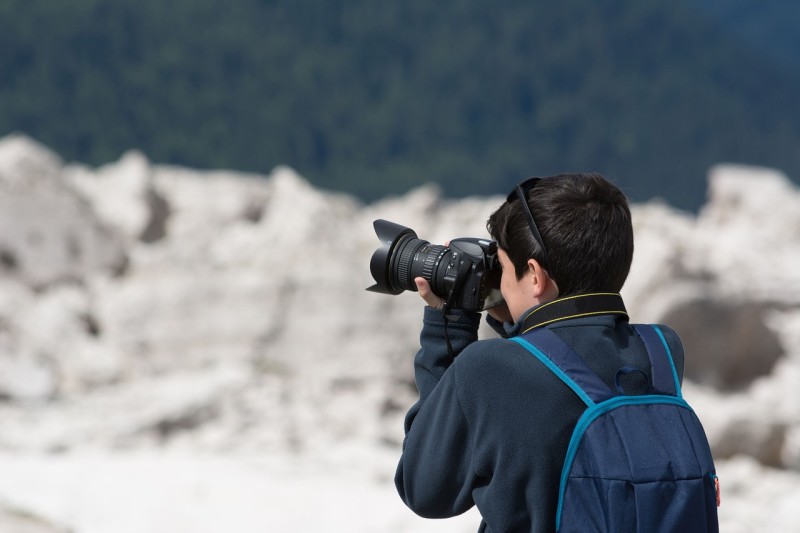
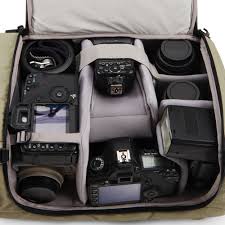
Like the tripod, photographers backpacks are a common classic. They provide storage for the camera, different lenses, as well as leaving room for other important items. Some are also designed to carry laptops, batteries, and much more. Avoid back packs that are not designed for photography. They can cause equipment damage. Specially designed packs let you carry equipment safely and help you pack efficiently.

Buy a good quality photographers bag to protect your equipment.

Buy a good quality photographers bag to protect your equipment.

Consider buying a weatherproof backpack regardless of price. Protecting your working equipment is a top priority. Photographic equipment is highly sensitive to poor climate conditions. Most good quality packs come with slip-over water protection.

Also, be aware of the maximum weight supported by the backpack. Don’t over load it (or you). Avoid misuse, which will shorten the life expectancy of the product. Protect it from wear, chemicals and dust.

Essential gadgets are those that suit your needs

You can find countless options for complimenting your photography and workflow. Most will depend on the kinds of photography you decide to focus on. In the end, it is up to you to find the best equipment that will enhance your day-to-day photography. Everyone has their own special “essential gadgets”… What are yours?

Feed your imagination…

Here are some more essential gadgets for photographers on Amazon.
Check out this Google search on essential gadgets for photographers!

Comments, additions, amendments or ideas on this article? Contact Us
or why not leave a comment at the bottom of the page…

Like this article? Don’t miss the next — sign up for tips by email.

find out more...Photokonnexion tips by email
If you enjoyed this article please sign up for our
daily email service.
                                                 Find out more

Still life – building the atmosphere

Lights and subject need to be arranged

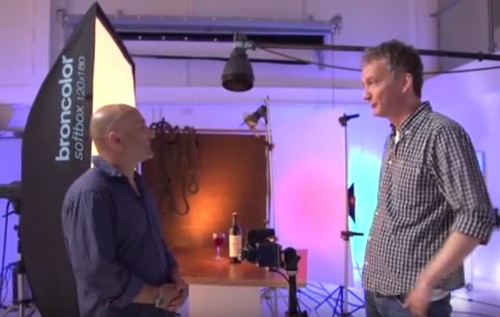
Building the shot is about both the set up of the still life and the set up of lights to bring out the best in the final image.
(Image from the video)

There is more to still life than meets the eye…

Doing a still life is not just about getting your subject set up. Your subject should satisfy your creative goal, create an attractive feast for the eye and look natural. Making your work both artistic and natural is essential. Otherwise you will not convince the viewer.

So what is needed beyond a convincing subject?

When you are building an artistic shot the central place is occupied by something you have put together to make a point – your subject. It is a point that’s either artistic or interesting to the eye. Around the subject you will need to build an atmosphere to make it convincing.

Still life – the atmosphere

When you have your subject set up right set it in the right atmosphere.

Making the atmosphere right brings it all together. More often than not it is all about complementary lighting. Get the lighting right and the atmosphere of the subject and setting (background) come together.

Some of the issues you might consider are…

  • Light sources.
  • Colour of the lights.
  • Tonality of the shadow/light relationship.
  • Where the light points.
  • How intense to make the light(s).
  • should you use soft light or hard light.
  • If you want highlights or not.
  • If you want spot lights or not.
  • How diffused to make the light.
  • How tightly focussed to make the light.
  • Alternative combinations of light.
Still life lighting experimentation

There is little doubt. The only way to success with light is by experiment. But, have an idea in your head first.

Consider your subject and think about the ways it can be offset by the use of light. Colours should not clash. Highlights should be complementary. Avoid big highlights so as not to blow out large areas of white in the image. (Here is a link that can help with dealing with blown highlights). Make your light pick out the important parts of your set. Let shadow subdue the less important parts.

Many people forget about colour setting. Bring out the colour of your subject. Try to make your still life look lifelike. However, use your light to bring the colours out in the surrounding area of the set too. This will help your subject to look like it is influencing the surroundings of the set. In other words, remember, light onto the subject is often reflected off it too.

Putting it all together

Lighting is a skill that comes only with practice. The way to be successful is to build it up bit by bit. First get your photographic subject right. Then start the lighting. Work on both the subject and the surrounding background. Try to see ways to blend the light. Use light as if solving a puzzle. Work to fit everything together into an aesthetic outcome.

It is your eye for aesthetics that will tell you when you have got it right. Learning how to do that comes by studying different lighting situations. Try to find as many ways to combine light to bring out your subject as possible. Study other still life photos for the way the light is set up. Try to analyse the light and find ways to reproduce it in your own situation. Work toward building an expertise with light.
Here are some still life images to help. Google search: Still life photography images xxxx | External link - opens new tab/page.

Still life ‘How To’ – Shoot red wine

The video helps us get our ideas in place. Practice and analysis go together. The presenters help us see how this simple still life is lit using a complex of lights. What is interesting about this video is the way that so much emphasis is placed on lighting not directly on the subject. Much of the atmosphere here is about complementing the subject with the right colours too. Watch for the different uses of hard and soft light as well.

Karl Taylor Still life: 'How To' shoot red wine | External link - opens new tab/page

Comments, additions, amendments or ideas on this article? Contact Us
or why not leave a comment at the bottom of the page…

Like this article? Don’t miss the next — sign up for tips by email.

Damon Guy - Netkonnexion

Damon Guy (Netkonnexion)

Damon is a writer-photographer and editor of this site. He has run some major websites, a computing department and a digital image library. He started out as a trained teacher and now runs training courses ing digital photography.
See also: Editors ‘Bio’.
By Damon Guy see his profile on Google+.

Using tablets in photography

[Todays article comes from contributing author, Honest Blossom]

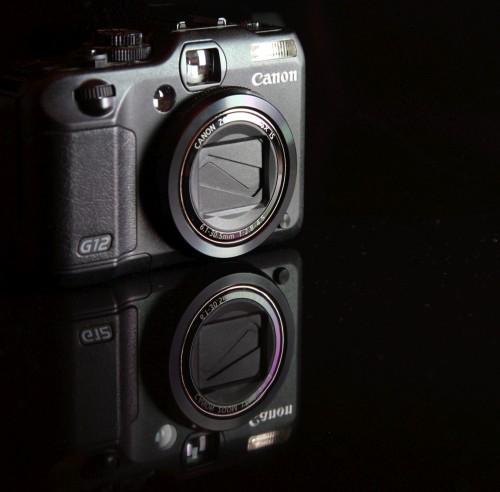
Photo of a camera taken with a tablet as a light source.

Taking shots in soft light is so easy with a soft light source. A tablet can provide just that.
{Image by Damon Guy}

Mobile devices give us new tools

Mobile photography is on the rise. Yet despite high usage of smart phones and tablets many believe nothing beats photos produced on a DSLR.

Mobile devices do have a place in the photogs bag. Many pros use mobiles Tablets in photography | External link - opens new tab/page effectively. Photographer-author Anne Hamersky used her iPhone 5 to take photos for her book, “Farm Together Now Tablets in photography: Link to Amazon | External link - opens new tab/page (jointly authored with Amy Franceschini and Daniel Tucker)”.

Apart from being used as cameras, smart phones and tablets in photography have huge potential. They can assist with simple lighting, easy viewing of images, and controlling cameras.

1. Simple Lighting

You don’t need professional lighting equipment to create a soft light. Your tablet can create shadow graduations on your subject. How? Use a bright-white image on your screen (Download white-screen image here). Point the display toward your subject. It will create soft light and shadows. You can also use your smart phone to light smaller objects. The screen illumination produces white light. It’s a source of localized soft light in your image.

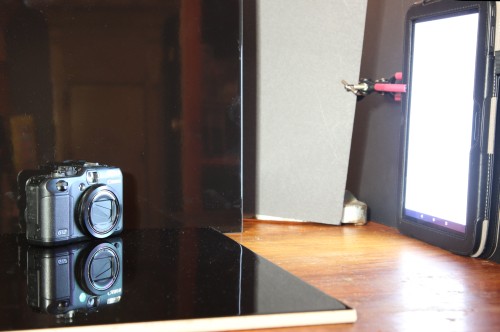
Table-top studio photo showing how to use a tablet as a soft light source.

The camera image at the top of this article was taken using the table-top studio set up in this image. Simple to do and simple to set up.

Use tablets in photography to create direct light too. Devices with built-in flash can be used as a photographic light. Use a flashlight (torch) app. There are also some LED light apps. that you can use on your tablet to create coloured light sources.

2. Camera Controller

Want to control your camera functions via your tablet? Try the Chainfire app for Android devices. You can use your tablet as a Canon EOS camera controller. Here is how to do it:

  1. Install the Chainfire app Tablets in photography: Chainfire app. | External link - opens new tab/page.
  2. Connect your DSLR to the tablet via a USB OTG connector line and a mini USB cable for the camera. {Tip: It’s best to get a longer USB cable}.
  3. Turn on the camera and the app to view the subject.

Navigating through the app is easy, as it uses the controls of your camera. Photos taken using the camera can also be saved to the memory card of the tablet. I suggest downloading photos to your computer later. Photos take a lot of space and are safer on a PC.

View a guide on how to use the Chainfire app Tablets in photography: Chainfire app guide. | External link - opens new tab/page. Also read more details on the Chainfire website Tablets in photography: Chainfire website | External link - opens new tab/page.

3. Field or Preview monitor

It’s advisable to opt for a tablet with at least a 9-inch display. The main purpose of using a tablet is as an extended monitor. You will get a better preview of the subject than the small display on your DSLR. According to O2, tablets such as the Apple’s iPad Air (9.7-inch screen) and ‘Samsung Galaxy Tab S’ (10.5-inch screen) are the best preview monitors you can use on a photo shoot Tablets in photography | External link - opens new tab/page. They allow more space to view and work with the images. You are less likely to strain your eyes with decent sized screens.

Using tablets in photography to control the camera uses the same procedure as any shoot. Taking the shot is set up and released from the mobile. You will need a USB OTG connector to use the tablet as a preview monitor. Applications such as the DSLR Controller, GoPro, CamCap, Helicon Remote, and DslrDashboard are the advisable software to use.

Tablets in photography – top devices

What are the top tablets for photographers? There are various devices to choose from. They offer many features and functions. Choosing one can be quite confusing when picking the best to help your shoots.

To make it easier, consider the other reasons you’re buying the tablet. Email and editing photos or other uses are also important. This will help narrow down your list of choices, as most devices have their own strengths. It will also help to opt for a tablet that has been recommended by other photographers. Here are some examples:

  1. Apple iPad with Retina Display
  2. Samsung Galaxy Note Pro 12.2
  3. Sony Xperia Z2 Tablet
  4. Microsoft Surface 2
  5. Lenovo Yoga Tab

Mobile devices have found their way into DSLR photography because of powerful camera lenses and relevant apps. These assist professional and amateur alike. The changes have come about because using tablets in photography helps and simplifies our work.

Comments, additions, amendments or ideas on this article? Contact Us
or why not leave a comment at the bottom of the page…

Like this article? Don’t miss the next — sign up for tips by email.


Contributing author: Honest Blossom

Honest Blossom is a seasoned blogger and practising photographer from the UK. She has written various articles ranging from the latest technology and innovation, travelling spots, mobile and digital photography and more.

Under exposure – get the shot, gain atmosphere

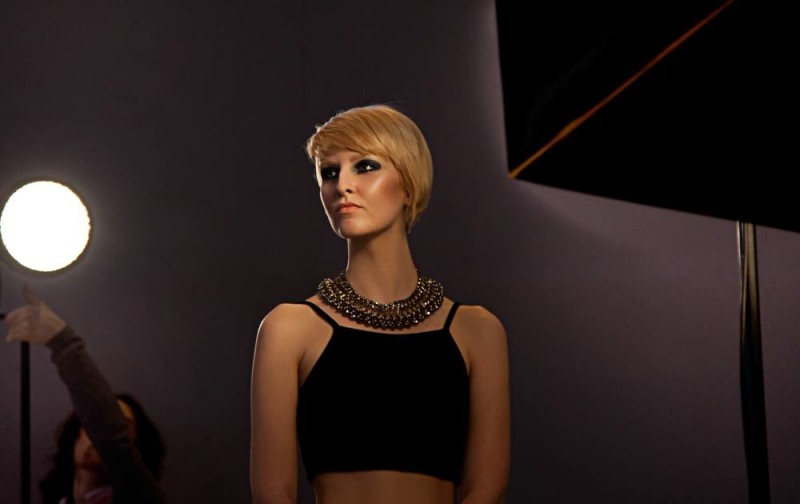
Under exposure can help you to get the shot and to build atmosphere

Dialling down the exposure serves two purposes. Under exposure can add atmosphere. It can also make it easier to capture an image in difficult light.
[Click image to view large].

Auto-capture is not the only way.

There are more ways to capture an image than to just push the shutter button in auto mode. Under exposure is the key. Learning about exposure and the exposure triangle is time well spent. Why you would learn them is something that beginners often do not realise. Well, you can gain two things. You can add a great deal of atmosphere to an image through under exposure. You can also get an image in difficult light.

Under exposure in difficult light

The image above was taken in quite difficult light. The studio was lit to capture the model. But I wanted to capture the scene including the lights. The bright contrasts from the lights and the sharpness of the lighting on the model made for awkward, contrasting conditions. Raising the ISO would of course make the shot possible. However, working with under exposure is more effective. It made the strong light sources appear less bright, leaving them as visible features of the image. At the same time they did not create out of place highlights. One way to even out the light in these conditions is to bring the contrasts down. Under exposure achieves that.

Adding atmosphere

My image gains a little atmosphere by virtue of its under exposure. Some images with difficult light sources gain a lot more. Dance floors, discos, parties and many other multiple light venues can benefit. That is especially true if the background light is bright. Bringing the apparent ambient light levels down by under exposure will even out the contrasts. It will also introduce the more atmospheric feel of a darker room.

Two ways to achieve under exposure

Exploring the wonderful world of the “exposure triangle”? One way to achieve under exposure is simple. First you balance your exposure using the full manual setting. Look through your viewfinder. Select your settings so the upright needle balances in the middle of the viewfinder. Then simply dial down the exposure setting. Use the time value or aperture setting to reduce the total light entering the camera. A good guide is to work with under exposure of one or two stops. That will bring bright lights down to manageable levels. Try it, especially in difficult light conditions.

The other way to achieve this under exposure is to use your exposure compensation dial. This is for those readers who are using the creative program settings, like ‘A’ (aperture setting), or Tv (time value or shutter speed setting). You will find the precise instructions for how to do this in the instruction manual for your camera. The basics are as follows…

  1. Set your camera to the setting of choice.
  2. Point the camera at your subject.
  3. The camera will make a judgement about the correct exposure balance.

At this point you will find that a picture will probably over expose bright lights in the image. So this is where you implement the under exposure.

  1. Set your “exposure compensation dial” to create an under exposure of one or two stops.

It really is as simple as that. You may have to check out what the exposure compensation dial is. However, it is worth the small effort involved. Your images will be affected by your creative decision. You will have truly made an image in your intended style. You will not have just taken a picture.

Playing with under exposure

Yes, like most things, if you have a play you will discover the richness of the tools you have. The camera is a wonderfully flexible tool. Under exposure, and indeed over exposure, are great fun. If you practice and play you will gain a lot. If you just forget the technique you will lose the benefit. So have a go and at least practice enough so you will remember it for the future.

Comments, additions, amendments or ideas on this article? Contact Us
or why not leave a comment at the bottom of the page…

Like this article? Don’t miss the next — sign up for tips by email.

Damon Guy - Netkonnexion

Damon Guy (Netkonnexion)

Damon is a writer-photographer and editor of this site. He has run some major websites, a computing department and a digital image library. He started out as a trained teacher and now runs training for digital photogs.
See also: Editors ‘Bio’.
By Damon Guy see his profile on Google+.

Artwork images – record or new art?

Artwork images are not as easy to photograph as they seem.

Artwork images are not as easy to photograph as they seem.
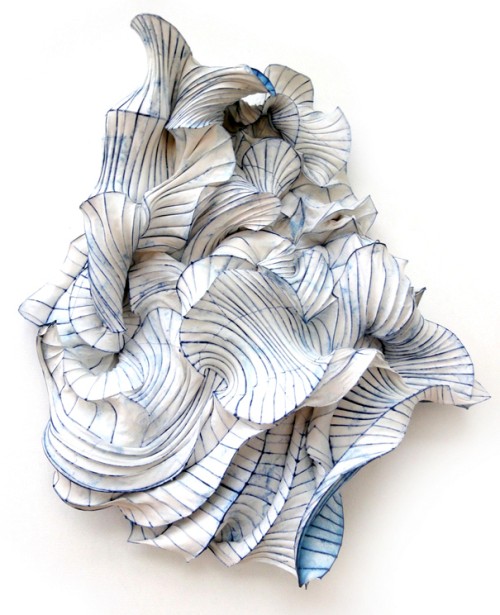
Image of paper art by Peter Gentenaar
More from this artist on: http://www.gentenaar-torley.nl/  Artwork images: Link to Peter Gentenaar | External link - opens new tab/page

Artwork images are sometimes questionable as art

Most photographers look at work by an artist they like and feel compelled to take a picture. Of course it serves to remind them of the art they saw. That is reasonable. The keen photographer thinks differently. They like to see the artwork. They also like to produce photographic art of their own. But more often than not the picture they take is actually a record shot.

It is often said by judges in photographic competition that a sculpture photograph is a record shot. I have said it myself when judging. A pure record is not a piece of art by the photographer. Just exactly what do we mean by that?

Artwork images: Record verses interpretation

An example of a record shot is the photo at the top of this article. This work is by the wonderful paper artist Peter Gentenaar. His work is stimulating and interesting to the eye. Photos of his work bring out the splendour of his art. That is the point. They are less about the photographers interpretation of the art. Instead, they are about repeating the work in its fullness to show the work itself. It is a record. As such, it will show off the skill of the original artist.

Record shots are a legitimate photographic form. But they are often a record of the exhibit - not new photographic artwork images in their own right.

Record shots are a legitimate photographic form. But they are a record of the exhibit – not new photographic artwork in their own right.

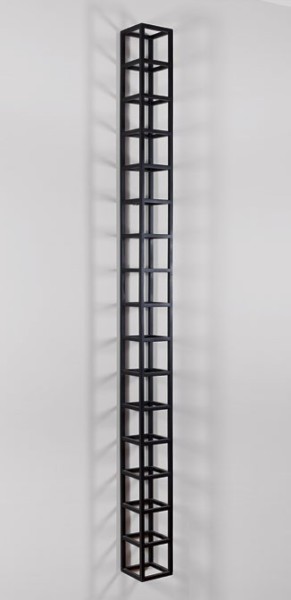
[Seen on www.starr-art.com/ on 30/05/2015
Sol LeWittWall Piece,
1988 Painted wood,
76 x 5 x 5 inches
Published by Edition Schellmann,
Munich and New York.]


Reproduction of artworks in a record style is a proper photographic form. For remembrance, or sales purposes, it is fine. For those seeking to make their own art there is something more needed than simply snapping someone else’s work.

That something extra is a new re-interpretation of the work. The photographer has to invest something of their own into the picture. They have to make more of the original artwork than is presented solely by the work itself. There are a number of ways to do this.

A new interpretation may not be a complete image of the work. It may include the full work, or only be a part of it. The environment of the image, how it is presented, or its framing are all important. Overall there will be something in the new artwork images that the photog makes their own.


How can you make new artwork images from an art piece?

Abstract from a piece of art

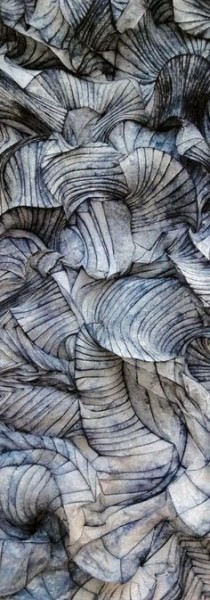
In this abstract of another piece by Peter Gentenaar the photographer has not shown the whole piece of work. They have taken a piece of the work that shows the wonderful lines and curves, but as a whole it creates a taste for seeing more.
See: Peter Gentenaar–Paper Magician Artwork images:  | External link - opens new tab/page.

• Abstract artwork images: One way to get something new out of a piece of art is to create an abstract of some sort. Abstract photos can be deeply satisfying to create and provide an interesting image for the viewer to consider. Most of the time abstracts are about making an image of a part of the artwork. An example is shown on the left. There can be a lot more to creating abstract photos than simply framing a bit of the total. The power of abstract is to create the essence of the total.

Abstracts require an eye for what works when the whole is not seen. For more on abstracts see our Abstracts Resources Page.

• Creating an new environment: The environment where sculptures are displayed is often important to the sculpture. Sometimes images are still record shots even if they are not on a simple white background. This link is an example of a Henry Moore sculpture record shot (Author unknown).. The author has displayed the sculpture just as it is with little enhancement. In fact it is almost devoid of its environment. The sky serves only as a backdrop.

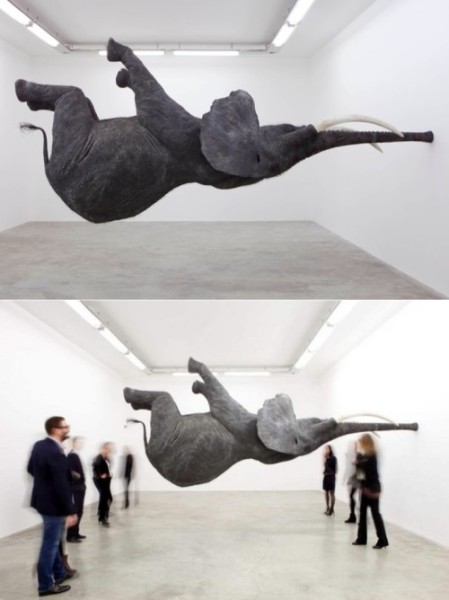
The same could be said of this picture of an elephant sculpture (below). The artist has created a superb piece which mimics the body of an elephant defying gravity. The first shot is a pure record shot. But, the second is a superb interpretation of the sculpture in it entirety with an audience, depersonalised by movement blur. Very clever. Both images are taken by the sculptor himself, Daniel Firman. A simple but excellent reinterpretation. Such re-inventions are in themselves artistic. As such they are creating artwork images in their own right.

Gravity-Defying Elephant Sculpture

Gravity-Defying Elephant Sculpture by Daniel Firman.
Images by Daniel Firman.

Published in: Gravity-Defying Elephant Sculpture.
(Seen on WordlessTech Artwork Images: Gravity-Defying Elephant Sculpture by Daniel Firman | External link - opens new tab/page 29/05/2015).


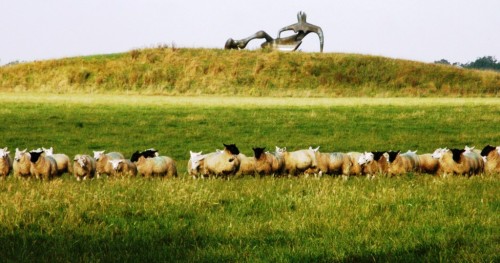
Another Henry Moore Sculpture is shown below. This image makes as much of the environment as the sculpture. The artist has created a great panoramic picture using a letter-box crop. The length of the principle subject (the sculpture) is complemented by the almost central position. But, it is highlighted by the mundane, but important line of sheep. The latter gives the eye an excellent weighted contrast to the sculpture in the background. Clever compositional devices like this often create great great artwork images. There is no way this is a record shot.
Artwork images: The compositional devices in this image make it an interesting example.

The compositional devices in this image make it an interesting example of artwork images – definitely not a record shot.
(Seen on: Backstrap Weaving Artwork Images: Henry Moore sculpture on Backstrap Images blog. | External link - opens new tab/page.
(Click the image to see full size).

• Adding something: Another way to make something new of a piece of art is to put something new into, or onto, the piece. I leave the artwork images to your imagination here.

I have often heard judges say about record shots, of say a sculpture, “this needs your hat on it”. Alternatively they might say something like, “a cat just here would make the image something different”. What the judge is saying is, the author has created a shot that does not have anything from the photographer in the image. Whereas, with a little thought, or a little prop, or even a person – the picture could be transformed. Instead of the simple (and boring) representation, the author could have added that little extra that makes the image into a reinterpretation – something different. It would be something created uniquely by the photographer.

Works by you are artwork images

The uniqueness of a photograph is something that makes photography interesting. But, make the main subject a simple representation of somebody else’s work, then the uniqueness is lost. A simple record is created. But with simple compositional thoughts, re-frameing, or the addition of some new aspect, you create a new synthesis. One that is unique to you. One that is a real contribution to the body of artwork images. That is what makes photography so special.

The main point to take from this is simple. Think, plan and consider the composition when taking pictures of other peoples art. A subtle treatment of the art piece can transform it into an image only you could make.

Artwork images – further thinking

Which of these are record shots of Henry Moore Sculptures and which are artwork images by the author…
Henry Moore sculpture on Google Images Artwork images - further thinking | External link - opens new tab/page

Comments, additions, amendments or ideas on this article? Contact Us
or why not leave a comment at the bottom of the page…

Like this article? Don’t miss the next — sign up for tips by email.

Damon Guy - Netkonnexion

Damon Guy (Netkonnexion)

Damon is a writer-photographer and editor of this site. He has run some major websites, a computing department and a digital image library. He started out as a trained teacher and now runs training for digital photogs.
See also: Editors ‘Bio’.
By Damon Guy see his profile on Google+.