Author Archives: Damon (Editor)

Backdrops – make them yourself

Create your own backdrops.

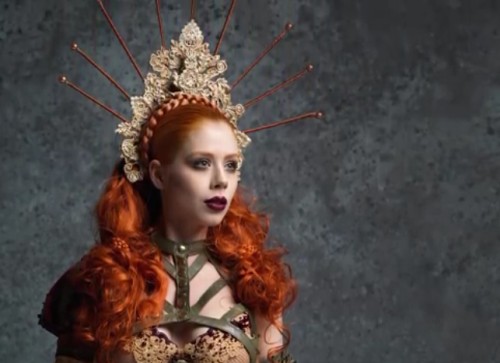
Here is a quick and simple way to create a great backdrop. You can produce your own great designs with a little creativity.
Image from the video below.

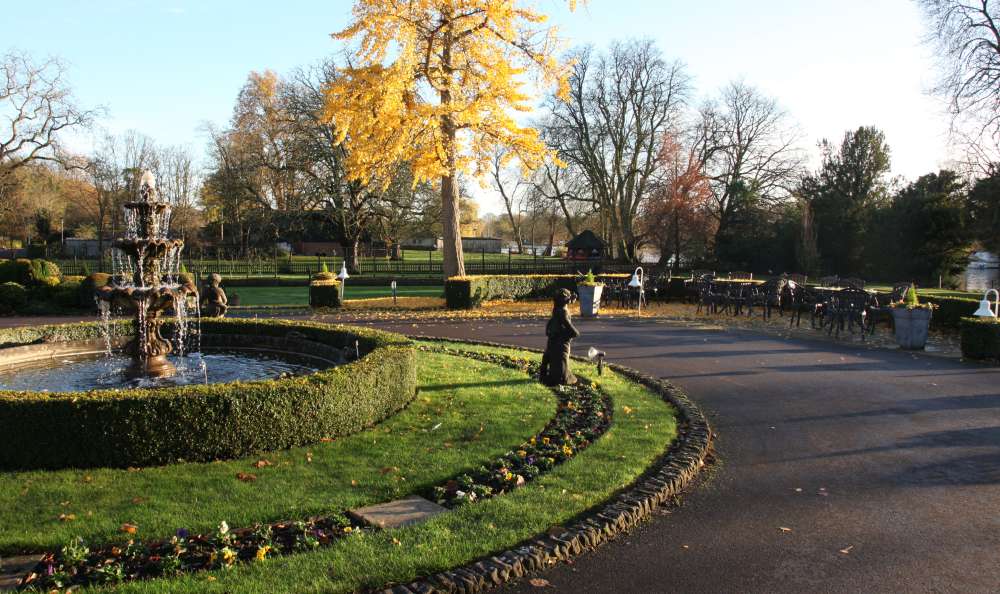
The shots and the props can be creative

Great backdrops often make a picture. The simple ones are the best. They do not pull the viewers eye from the subject of the shot. Instead they focus your viewer on your subject. A backdrop should create an environment for the shot that both completes the scene and brings out the best in the subject.

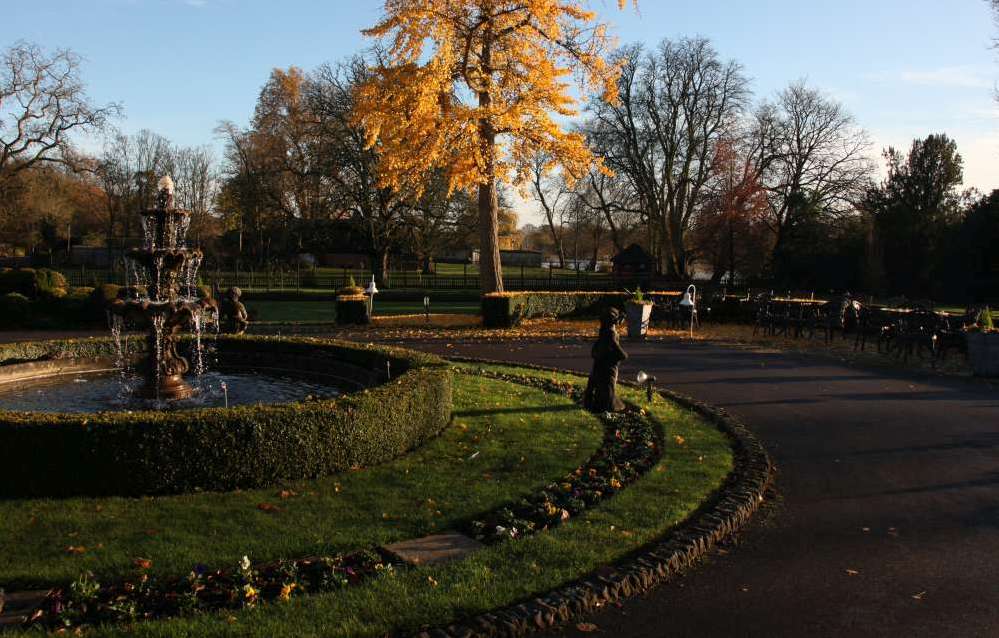
Photography is creative and the backdrops should be too

There are a million creative things you can do with your pictures. Making backdrops can be equally as creative. In addition they add a new spin and level of creativity to your shots.

You can make backdrops out of wood, canvas, sheets, paper, metal… well millions of things. Be careful they are not too heavy. If they fall and hit someone they might be injured. Don’t make backdrops too flimsy. They might fall apart during the shoot. Apart from that the sky is the limit!

Here are some ideas I have seen used to good effect.

  • Autumnal leaves densely stuck to an old sheet.
  • Spaghetti stuck to an old sheet.
  • Chinese lettering enlarged in a copier and stuck on white wall paper liner.
  • Wallpaper of many designs.
  • Hundreds of pieces of string hanging down.
  • Dozens of electric lights hanging down.
  • Hundreds of Wooden scraps nailed to five planks in a random fashion.
  • White back drop paper with lightly pencilled circles drawn all over it.
  • A white sheet “tie and dyed” with various patterns.

I am sure you can think of many more creative ways to enhance your shoot with DIY backdrops. Just take a little time to think over what you need for your shoot.

Here is a Google search for “Creative backdrops images“. Plenty of ideas there to stimulate your thinking!

Some simple principles for good backdrops

Some backdrops are simply not right for the shot. Of course there are those artists who seem to make anything work. For those of us who need a little guidance, here are some principles to help you design your backdrop:

  • Do not make the backdrop stronger or brighter than the subject.
  • Choose colours that bring out the colours in your subject.
  • Use colours and designs that almost fade into obscurity allowing the subject to blossom.
  • Allow your backdrops to complement the subject – not clash with it.
  • Use texture, tonality and hue to vary the background so it appears to be slightly 3D.
  • Be careful that patterns do not emerge unless they are deliberate.

These are not rules. They are guidelines to get you started. Of course as your skill as a photographer and backdrop-maker develop you can make or break these principles. Have fun. Make great shots!

How to make your own studio photography backdrop – video

In the video below there is a quick and simple method of setting up a canvas backdrop. It can be done in a few hours. If you don’t have much space you can make it out of doors. Enjoy this video short and let it help your mind be creative.

Comments, additions, amendments or ideas on this article? Contact Us
or why not leave a comment at the bottom of the page…

Like this article? Don’t miss the next — sign up for tips by email.

Damon Guy - Netkonnexion

Damon Guy (Netkonnexion)

Damon is a writer-photographer and editor of this site. He has run some major websites, a computing department and a digital image library. He started out as a trained teacher and now runs training for digital photogs.
See also: Editors ‘Bio’.
By Damon Guy see his profile on Google+.

Buying Lenses – a quick guide…

Buying lenses

Buying lenses is not as straight forward as it seems. There is a lot to consider.

Critical features to consider when buying lenses

The key to buying lenses is knowing what you want to achieve with your purchase. It is also important to have a clear idea of your budget. However, there are a whole range of other things that have an impact too.

There are a wide range of photographic lenses to buy for most cameras. Each has their own characteristics. A lens can easily cost more than your camera. Take care with your choice. The wrong decision can leave you with a lens that is not suitable to your interest.

Getting started on buying lenses

First of all sit down and write down all the reasons you want a lens. Also, write down all the possible things against buying lenses (of any sort) at this time. Try to convince yourself you really don’t need to buy. In most cases of purchase-fever the buyer gets things they don’t want. So, when spending lots of money you should be careful. Buying lenses is a big investment. If you make the right choice then your purchase may last you through a number of camera bodies. So think carefully and make the right decision up front. That way your money will not be wasted.

I have purchased about thirty lenses over the years. Of those, five were bad purchases. Four were impulse buys – not suited to my needs. In another case, a hasty decision meant I bought a poor quality lens. From this experience I have compiled the list below to help you when buying lenses in future.

Some of the basics for buying lenses

1. Focal Length:

  • a. Measured in millimeters.
  • b. Smaller Focal lengths provide wider angles of view.
  • c. Longer focal lengths show less of the scene and tend to magnify the view.
  • d. Distortion may be found at the extremes of focal length.

2. Aperture:

  • a. Measured in f stops (eg.f2.8 [wide open] f5.6 [medium], f16 [small aperture]).
  • b. Wide aperture lets in most light – faster shutter speeds possible (eg. F2.8).
  • c. Small aperture lets in less light – requires longer shutter opening (eg. F22).
  • d. Wide aperture provides short depth of field.
  • e. Smaller apertures gives sharpness throughout the depth of the picture.
  • f. Zooms – Aperture size gets smaller with increase in focal length.

3. Stabilisation:

  • a. Slow shutter speeds mean more chance of camera movement, which makes blur.
  • b. Stabilised lenses typically give one or two f stops smaller aperture without more blur; the stabilisation compensates for movement.
  • c. Cost is higher if the lens is stabilised.
  • d. Canon = IS (image stabilisation); Nikon = VR (vibration reduction); Sigma = OS (optical
    stabilisation); etc…
  • e. Stabilisation may be in the camera rather than the lens.
General considerations when buying lenses

1. Optical characteristics

  • a. Glass optical quality varies with the production process and ingredients.
  • b. More lens elements/groups reduces light able to pass through the lens.
  • c. High quality optical glass does not reduce light as much as cheap glass.
  • d. Each manufacturer has a specific type of glass for higher quality lenses.
  • e. Optical aberrations come from low quality optical glass.
  • f. Lens optical coatings reduce aberrations and flare.
  • g. Distortions are caused by specific groupings of lenses.

2. Motors/drives:

  • a. Used to drive the aperture control; stabilisation and auto-focus.
  • b. Sometimes noisy – not desirable for wildlife shots.
  • c. Adds a lot of weight to the lens.
  • d. Not necessary on manual-focus prime lenses.
  • e. Some cameras have them only for auto-focus.
  • f. Older lens models have slower, sometimes heavier, often noisier motors.

3. Weight:

  • a. Often forgotten attribute. If you can’t carry it, then it’s no good for you!
  • b. Weight often increases with wider apertures – fast lenses may be too heavy for you.
  • c. Weight will tend to increase the amount of hand-shake movement.
  • d. Stabilisation motors put a lot of weight on the lens too.

4. Sensor optimisation

  • a. Lens focal lengths are usually stated for full-frame cameras (quoted for 35mm sensors).
    But…
  • b. A cropped sensor will still have the same focal length lenses as a full-frame, but image size will multiply it by the crop factor. (See: crop factor).
    So,
  • c. Cropped sensors increase the lenses’ magnification. Eg. Canon APS-C lenses are optimised for the Canon cropped sensor. The crop factor is 1.6. So a 100mm lens on a Canon 450D is actually equivalent to a 160mm focal length on a canon full frame camera like the 5D.
  • d. Different crop factors apply to different manufacturers and cameras.
  • e. Some optimised lenses will not fit different sensor sized cameras – APS-C – check the fit and crop size in the specification for the lens.
More specific issues affecting you when buying lenses

1. Zoom vs. Prime

  • a. Zoom lenses give you a variable focal length; you control magnification.
  • b. Prime lenses have fixed focal length. Move nearer/further to change the angle of view.
  • c. Zooms give you focal control over the framed view.
  • d. Primes tend to be higher quality lenses, sharper, faster (wider apertures).
  • e. Primes more compositionally challenging.
  • f. Primes – colours and exposure control more realistic.

2. Why you want this lens…
Make sure you know why you are buying lenses. Consider these points below:

Fisheye lenses (8 – 18mm on cropped sensor; 14 – 18 mm on full frame)

  • Introduces central focus with peripheral distortion.
  • Highly creative focus provides extreme visual views drawing the eye to the centre.
  • Used primarily for highlighting specific subjects or attributes of the scene.
  • Ideal (according to some) for full-frame sensor work for portraits.

Zoom lenses (long focal lengths 50 to 600mm)

  • Sometimes dubious quality in some parts of the zoom.
  • Flexible for many purposes, but especially wildlife photography at longer focal lengths.
  • Ideal for getting ‘into’ the shot.
  • Creativity related to the placement of the subject in the frame; angle of view variable.
  • Extreme zooms (350 – 800mm zoom ranges)(Very long range lenses greater than 800mm available).
  • Extreme expense – (expect cost around £5,000 for the 800mm sort of focal length).
  • Excellent for specialist wildlife and long range work.
  • Angle of view very limited at extreme end.
  • Very heavy – absolutely requires tripod for longest ranges.
  • Really only supportable for specialist work (professional wildlife photographer).
  • Cheaper to hire for the odd trip.
  • Macro (from around 35mm to 200 mm) (sometimes achieved using extension tubes).
  • Used to get close-up shots of very small subjects.
  • Focal length is artificially extended to magnify for close-up work – aim to get 1:1 or larger result.
  • Can be used for longer views; tends to be at restricted apertures for non-macro work.
  • Great for magnification shots.
  • Great creativity scope.
  • Tilt and Shift.
  • Specialist – for control of where to place sharpness in the depth of field OR how to deal with
    converging parallels (lines in the road or converging verticals in buildings).

Wide angle lenses (16 – 24 mm on cropped sensor) (24 – 35 mm on full frame sensor)

  • Used for getting wide views of the subject; sweeping view across a scene.
  • Some optical distortion at the very wide end accentuates central subjects.
  • Tend to be used by landscapers; often capable of very small apertures (f22 – f36).
  • Standard zoom lenses (35mm to 200mm of varying focal lengths).
  • Provide great flexibility because can change from wide angle to magnification.
  • Quality often highly price dependent.
  • Optical quality variable with change in focal length.
  • Very long focal lengths often have high f-stops (eg. F5.6).

Standard prime lens (50mm)

  • Sees approximately what the human eye sees (full-frame sensor cameras).
  • Slightly wide angle for cropped sensors.
  • Usually good low light performance because of aperture size is usually wide.
  • Approx.. 80mm for cropped sensors – good for portraits.
  • Creativity allows for the same flexibility that the eye sees.
  • Controlled angle of view is determined by photographers position (no zoom control).
  • Standard prime lens (80mm).
Ultimately it is about image quality

When you are buying lenses consider what you are going to get. If you buy a cheap lens you will get a poor picture.

Most modern camera bodies are going to produce pretty good pictures. But if you stick a poor quality, budget lens on a camera it will give you a poor result. A top quality lens will serve you for many years. It will swap between bodies of the same manufacturer. It will produce quality pictures from your body.

On the other hand a poor quality cheap lens will degrade the ability of the camera body. Which will devalue your overall investment. It is pointless upgrading a body to a higher specifications if your lenses are not up to the same performance standard. Buying lenses is about setting your aspirations. Buying lenses of poor quality is about limiting your potential, for now and for years to come.

Buying lenses – checking the various options

The sheer number of lenses available is daunting. Try starting with a lens finder. This great Lens finder on Amazon.co.uk makes buying easier.
Note:
USA users may not be able to get the above “Lens finder on Amazon.co.uk” link. See below…
Link version for USA users: Amazon.com Lens Finder
Please report problems with these links.


If you are buying lenses enter the important factors for your lens choice. It returns a list of the lenses to suit that purpose. I find this an invaluable tool for helping to me to find a range of lenses from which to make my ideal purchase.

Comments, additions, amendments or ideas on this article? Contact Us
or why not leave a comment at the bottom of the page…

Like this article about Buying Lenses? Don’t miss the next article — sign up for tips by email.

Damon Guy (Netkonnexion) - Author of Buying Lenses

Damon Guy (Netkonnexion)

Damon is a writer-photographer and editor of this site. He has run some major websites, a computing department and a digital image library. He started out as a trained teacher and now runs training for digital photogs.
See also: Editors ‘Bio’.
By Damon Guy see his profile on Google+.

Gentle soul, complex character – Ansel Adams

Ansel Adams – a gentle soul – also the greatest landscaper of all?

He is one of my favourite photographers. He is probably one of the best known image-makers in the world. Widely known among both photogs, and the man in the street, he was probably photography’s greatest ambassador. Yet, apart from the images, many people know surprisingly little of him.

His gentle soul, made him ideally dedicated to nature photography. However, he was also a great portrait artist. His many achievements included a full portfolio of industrial photography too. As an accomplished musician he also performed great works of music. His many photographic works were backed up by a sensitive, but powerful commitment to environmental campaigning. His dedication to the American National Parks lead to a range of incredible images. It also lead to the creation of several new National Parks. One was even named in his honour. Find out more about how this gentle soul affected the National Parks… Read this article on the Parks’ service website about him Gentle soul, complex character - Ansel Adams | External link - opens new tab/page.

As photographers we have much to learn

Adams was one of the worlds best known photographers. As such, he had much to teach us. Not only did he invent the “Zone System” but he was also a pioneer in the development of many landscape imaging techniques and ideas. What is astonishing is his tenacity. Despite his primitive equipment, his works surpass some of today’s top images. He used an original large format camera with plates. He would sometimes take several hours to make a small number of photos. The equipment was large, cumbersome and tripod-mounted. He made meticulous light readings, calculations and records of every shot. With these he was able to do precise developing according to the Zone System. The chemical processing took hours of work back in the dark room. To do all this he had a large amount of heavy duty equipment. By today’s standards it is also a miracle that he managed to get his shots. Yet, his work still provides a corpus of extraordinary work. A portfolio that still leads the world today.

There are some things we can learn from Adams.

Using a tripod and setting up his heavy equipment was a slow job. His work was almost always the result of a long process. Careful thought, consideration and assessment of the landscape formed his pre-image visualisation. Nothing Adams did was about rapidly snapping shots. And, don’t his images show it?

Lesson one is: Take things slowly. Our gentle soul teaches a great lesson about taking time. To do things properly and ensure you get the right results you need a procedure. It needs to cover all the bases. It needs to be precise. It should be done with time, care and attention.

Adams, the gentle soul of landscaping, was the consummate observer. All photographers should be observant of light. It is the basic material of our passion. Observation of aesthetics is another pillar of our trade. However, he went well beyond these ideals in his quest for precise detail. His use of the Zone system gave him accuracy. His eye for tonal quality in an image came together through the precision he adopted. The quality of his prints are legendary as a result.

There are three important things in photography: Quality, content and aesthetics. If you tie these together then you can gain an huge lead on others. Adams had all three. He made time to ensure that he did it right. He looked for the most eye-catching locations. He looked for great light and contrasts to bring out the best in his scene.

A rare video (until recently)

Many videos have been made about Ansel Adams. In all of them I have notices his considered approach to photography, his precise control of his work and his wide knowledge of art and nature. I have called him a gentle soul because that is how he comes over to me. It is certainly displayed in his work. But he is also a complex character. In this video, dating back to 1958, some of the complexities of his character come out. They complement his approach to life and the problems of photography at the time he was doing his work.

When you watch this video think of the lessons to be learned from Adams. If you are interested in landscape photography, also consider cultivating the ‘gentle soul’ approach. But be rigorous in applying it. Only the most precise work will get you the top quality images.
Ansel Adams 1958 HD Documentary

Uploaded by: O P H E L I A Gentle soul, complex character - Ansel Adams | External link - opens new tab/page

Comments, additions, amendments or ideas on this article? Contact Us
or why not leave a comment at the bottom of the page…

Like this article? Don’t miss the next — sign up for tips by email.

Damon Guy - Netkonnexion

Damon Guy (Netkonnexion)

Damon is a writer-photographer and editor of this site. He has run some major websites, a computing department and a digital image library. He started out as a trained teacher and now runs training for digital photogs.
See also: Editors ‘Bio’.
By Damon Guy see his profile on Google+.

Photography horror – resolve three personal issues

Photography horrors :: The pressure is on to get the images right on a wedding shoot!

The pressure is on to get the images right!
Photography horror will get you if you let it.

These three horrors can help you

“Photography horror” is not necessarily bad news. If you are truly horrified over your work, you have been given a unique gift. Learning to recognise the issues is important. It is a sign. It points at future goals. Your photography horror is a way to see a problem you can fix.

Photography horror 1: This is awful. I know I can do better

Great. You have seen your mistake. Now you will try to avoid it next time. Or, you have seen there is a mistake. You are not really sure of the problem. However, further analysis will help you improve your shots.

Both of these are really good news. Of course you are disappointed. But think about it. You either know the problem, or have a subject for research. Once you have found the problem then you can fix it.

Making images is like any other pursuit. You only get better if you put in time to improve. If you can quickly spot the mistake, kick yourself and move on. If you don’t, start to look for ways to resolve it. You might need to do some reading. Look at similar images and ask, “why are they better”? Try discussing with a friend. Consult with an artist. Join a photography club. Read a book… All of these options help you understand this photography horror.

What’s the most important thing? It’s that pit-of-the-stomach feeling you felt. This is your senses telling you that you can do better. Learn to recognise it. Your “photography horror” is a new found friend. Use it to improve.

Photography horror 2: All my work is terrible!

Wow – big statement! But, we have all been there. This photography horror just flattens our ego. It might apply to all the shots in a shoot. It could be a whole day of negative shots. Worse still, it might reflect weeks of bad outcomes. You feel like you are in trouble. And, photography horror seems to ooze out of everything you do.

What is going on? Why is this feeling so crushing? Again, this is your inner sense of “photography horror” helping you out. However, this one has the scope to stop you dead. You cannot see a way out of it. You are trapped. It is the ultimate photographers block. Recognising it is easy. You just don’t want to pick up your camera. You want to walk away from making images and forget the whole thing.

OK, do it! Yes, take a break from your image making. But, the way out of this particular photography horror is planning. Plan to take the break for a specific time. Set goals for start-date and start-activity. Work out specific things to try and get right for your return date. Then, forget the whole thing. Just sit back and take a deserved rest.

You have reached a fill-up point. Your ideas, creative juices, skills and knowledge have simply saturated you. The result is a jumble of ideas, concepts and knowledge. You need time to sort this lot out.

This feeling of photography horror is all about being over-whelmed. Given time, and a little subconscious thinking you will begin to put it all together. Plan for a week off. Or, maybe take two. But don’t take more than a month. You risk losing it all if you take too long.

While you are on your break the feeling of impending doom will lessen. Instead, you will find yourself thinking of the things you can do when you get back to your goals. Take the time. Relax. Then, when the planned date is here – get back to your task with new enthusiasm.

Photography horror 3: These images are terrible!

The chips are down. You have to produce something. A family party perhaps? Or maybe you are doing a wedding for the first time. Whatever, the pressure is on. You open the images in the editor and… Oh no! Doomed!

This photography horror strikes us all at some time. It seems like what you have done is the worst ever.

It is about fear. The unknown, coupled with pressure, gets to you. When we have to do things for other people it piles on the pressure. This is a familiar worry for wedding photographers. It’s a worry for most professional photographers at some time in their career. Amateur photogs are equally likely to suffer. It all hinges on the need for good results. When taking pictures for yourself you don’t have that pressure. When the pressure is on, worrying about it gnaws at your soul. By the time you get to the editing screen you are nearly screaming with anticipation. With that tension almost anything appears disappointing. You will hate your work. And, you will feel devastated.

The problem is gaining perspective. With this photography horror your expectations exceed the possible. It is time to be realistic.

Start processing straight away. When you begin to do something practical things get easier. You will quickly see that you can actually use the images. Work with them. Process them. Do the things you know are possible. Use all your processing skills, work with the images. Express yourself. Before long you’ll see this photography horror is about focus. Editing out the bad. Selecting the good. Working with the images to bring out the best in them.

Behind all photography horror…

More often than not, photography horror is about personal confidence. Doing practical things to move forward helps build that confidence. It gets you past the terror, the nerves and mixed up feelings. Always have a plan for improvement. Make sure you have enough free time to break the bonds of your commitment. Give yourself time to think.

You will find that your feelings of “photography horror” are really useful. They tell you when things are not right. They guide you to make improvements and move forward. They are the way to become a great photographer.

Comments, additions, amendments or ideas on this article? Contact Us
or why not leave a comment at the bottom ñof the page…

Like this article? Don’t miss the next — sign up for tips by email.

Damon Guy - Netkonnexion

Damon Guy (Netkonnexion)

Damon is a writer-photographer and editor of this site. He has run some major websites, a computing department and a digital image library. He started out as a trained teacher and now runs training for digital photogs.
See also: Editors ‘Bio’.
By Damon Guy see his profile on Google+.

Happy New Year 2015…

Have a Happy New Year 2015

Have a Happy New Year 2015

Make 2015 an exceptional year of photography

A happy new year 2015 to you and all our readers! This is a quick message to wish all our readers a happy, prosperous and highly photographic year.

Make this a great photography year – learn new techniques and skills. Every photog spends most of their photography time learning and developing. Photography is an art. Each shot is a creative opportunity to develop our artistic skills. And, we also need to develop our technical skills.

Happy New Year 2015… how we can help you

On Photokonnexion we help you with both creative and technical skills. There are over 1000 pages of photographic wisdom here. Each article has ideas and techniques to help you develop your photography. Make good use of them. They can help you be a learning photographer – a better photographer.

We love to post solutions to your problems. Email us from the Contact Us page. Let us know what could help you. We will be happy to find ideas to move your photography forward.

We want your Happy New Year 2015 to be a top photography year for you. So think about requesting articles too. We will be happy to write posts to help you develop. If you have a subject of interest to you and our readers, let us know. We will write something to help all our readers.

Follow us on Twitter too

Don’t forget we have an active Twitter account: @Photokonnexion. Every day we post twenty to thirty quick motivational tweets and great tips for photogs. We answer questions and provide help. With more than 16,000 followers we have an active community there. So feel free to join in the fun. Learn something too. Just click the button below.


Happy New Year 2015

We hope Photokonnexion will make a difference to your photography this year. Have a happy new year 2015.

Damon Guy
Photokonnexion Editor

Comments, additions, amendments or ideas on this article? Contact Us
or why not leave a comment at the bottom of the page…

Like this article? Don’t miss the next — sign up for tips by email.

Damon Guy - Netkonnexion

Damon Guy (Netkonnexion)

Damon is a writer-photographer and editor of this site. He has run some major websites, a computing department and a digital image library. He started out as a trained teacher and now runs training for digital photogs.
See also: Editors ‘Bio’.
By Damon Guy see his profile on Google+.

A Fun Filled Photography-Festive-Season

Festive Season Photography

Festive Season Photography.

Happy Christmas – 2014

This is the Quickest post! It is just to say, thank you to all our readers for your continued following and interest in this blog. Festive Season Photography is about enjoying yourself. Have fun doing that with your family.

We wish you, and all your family, the best and Happiest Christmas!

I look forward to 2015 with great excitement… We have several projects and some new ideas to engage you in the coming year! So, keep watching this space. We are moving forward.

Enjoy the festive season, have fun. Most of all, do lots of photography!

Festive Season Photography should be fun! Enjoy!
Damon and the staff at Photokonnexion.com

Comments, additions, amendments or ideas on this article? Contact Us
or why not leave a comment at the bottom of the page…

Like this article? Don’t miss the next — sign up for tips by email.

Damon Guy - Netkonnexion

Damon Guy (Netkonnexion)

Damon is a writer-photographer and editor of this site. He has run some major websites, a computing department and a digital image library. He started out as a trained teacher and now runs training for digital photogs.
See also: Editors ‘Bio’.
By Damon Guy see his profile on Google+.

Exposure changes the mood of your image

Exposure changes can affect many aspects of an image.

Exposure changes can affect many aspects of an image. Colour, mood, visual impact, contrast and others. The second image below show the differences.
Image better seen large. Click image to view large.

There is no such thing as a perfect exposure

The main goal of starter photographers is to control the exposure. The Exposure Triangle, or other models of balancing light, lead learners to pursue ‘perfection’. Once they grasp the concept of balancing ISO, Aperture and Shutter speed, the needle in the camera viewfinder is their guide.

In manual mode, that central needle is important. It shows that the three elements are balanced. The unwary learner is soon overwhelmed by that needle. They have learned how to keep it central. Now they are going to keep it there despite everything. They have learned that, if the exposure changes, the needle drifts off the middle position. When that happens it is no longer “perfect”.

That mid-position needle is useful. However, it is not ‘perfection’. It is just a guide. Modern camera manufacturers have made things easy for the camera user. The technology, sensors and controls on a modern camera mislead the unwary into a false position. Complex technology and controls give the user confidence that the camera must be right. They assume the central needle creates the perfect capture. That is simply not true.

The balance of light controls the quality of outcome you want. Your final image is created by that quality of light. The creative photographer uses exposure changes to to conjure up the result they want. A good photographer commands the camera to create the picture. The camera does not create the perfect exposure for the user. The user makes exposure changes to create the desired image. Deliberate under or overexposure is an important part of creating your image.

Exposure changes allow you to command the camera

In the image below we see (almost) the same picture as above…

A different quality of exposure changes the whole experience of the picture.

This second image shows same scene as above. But the different quality of exposure changes the experience of the picture. This outcome is no more correct than the top picture. However, when it was taken this one was 1 and 1/3 stops underexposed on the camera viewfinder scale. It was taken within seven seconds of the first image.
Image better seen large. Click image to view large.

Exposure changes allow the user to create the mood of the shot. This is clearly shown by the deeper contrasts, more saturated blues in the sky and reds in the Autumnal leaves. The low sunlight brings out the shadows and colours more. It all adds up. Together they create a very different view of this fountain scene. A twilight feel perhaps.

I was trying to create an Autumn evening view and the deliberate underexposure gave me the key. Yes, I deliberately underexposed to create the effect. I was commanding the camera to create my “perfect” scene for what I wanted.

Experienced photogs make exposure changes regularly

For me, the darker version was right for the reasons I needed that photograph. The control of the intensity of shadows, colours, contrasts, and so on, can be done many ways.

For example, High key shots often use exposure changes. They are created by deliberate overexposure. That brings out the intense whites in a high key image.

Many portraits are lit very brightly to the eye, but a very small aperture or fast shutter speed limits the light entering the camera. This will create an underexposure bringing out the facial features. This gives shadows a depth, without harshness, as can be seen in the next image. This use of exposure changes is a great mood enhancer.

Portrait shot in bright light but underexposed in-camera.

Portrait underexposed in-camera creates a tonally controlled result.

Create the exposure changes you want

How do you create this effect of under or overexposure? Simple. There is a control that can do it in auto or semi-auto modes. While in an auto-mode use the “exposure compensation” dial. You can add or subtract one or two stops of light. You can find out how to use the dial in your manual.

For the learner going fully manual it is even easier. That central needle position is your guide to what the camera calculates as an optimum light level for the shot. To create a manual over or underexposure simply dial the exposure-meter back or forward. Move the needle away from the central position. Shocking I know. You actually create exposure changes by deviating from the central needle position.

Exposure changes of one stop halves or doubles the light entering the camera. So be careful. Take several test shots. Dial one third of a stop or more at a time. Look at the result and check if you have created the right effect.

Create your image in mind – then make exposure changes to suit

The way you want your image is a creative decision. The camera should not be allowed to dictate the outcome.

You have two choices. If you go with the settings the camera gives you, the result is an optimum of the balance of the settings. If you can foresee what you want to achieve, then create your own result. In this case, make the balance of settings so the exposure changes to your choice. Your choice will be different to the result the camera would give you. But with care and practice it will be what you intend for your shot. You have taken control.

So next time you are taking a photo consider this. If you think your picture would be more effective as a darker or lighter representation, then make the exposure changes you need. Do it – create. Really make your images – don’t just capture what is there.

Comments, additions, amendments or ideas on this article? Contact Us
or why not leave a comment at the bottom of the page…

Like this article? Don’t miss the next — sign up for tips by email.

Damon Guy - Netkonnexion

Damon Guy (Netkonnexion)

Damon is a writer-photographer and editor of this site. He has run some major websites, a computing department and a digital image library. He started out as a trained teacher and now runs training for digital photogs.
See also: Editors ‘Bio’.
By Damon Guy see his profile on Google+.