Tag Archives: exposure

Learn to shoot while controlling the depth of field…

Depth of Field

• Depth of Field •
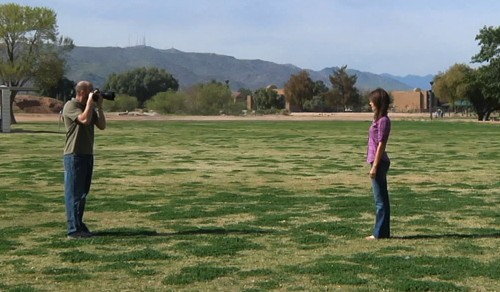
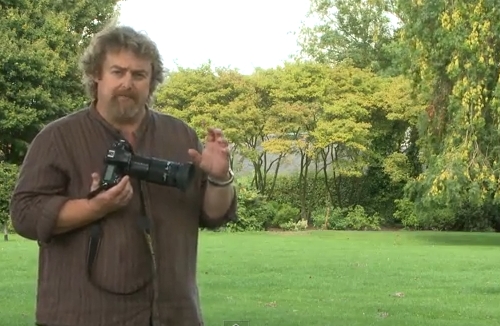
Work with Depth of Field in mind. It will help you to control the blur that provides soft and un-distracting backgrounds.
(Image taken from the video.)

Shooting with Depth of Field

The controlled use of Depth of Field (DoF), when done skilfully, is a central pillar of artistic success in photography. To learn how to properly control its use will help you to master many challenging situations.

Getting the measure of Depth of Field

Following the great response from “Understanding depth of field” yesterday, here is another video. In this one Mark Wallace shows how the three basic controls of DoF actually affect the clarity and blur in fields where depth of field is visible. It is important to watch the settings as he takes the pictures. Follow how the blur changes as the settings change.

SnapFactory  External link - opens new tab/page

Comments, additions, amendments or ideas on this article? Contact Us
or why not leave a comment at the bottom of the page…

Like this article? Don’t miss the next — sign up for tips by email.

By Damon Guy (author and Photokonnexion editor)

Damon Guy - Netkonnexion

Damon Guy (Netkonnexion)

Damon is a writer-photog and editor of this site. He has run some major websites, a computing department and a digital image library. He started out as a trained teacher and now runs training for digital photographers.
See also: Editors ‘Bio’.

A quick shoot making water splashes? Tips to get started…

Water splashes :: Have a go at water from a bottle

• Have a go at water from a bottle •
Water splashes :: Great fun, easy to do at home.
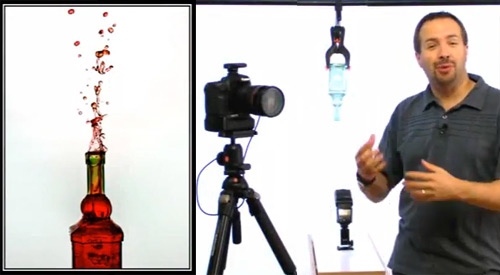
Picture taken from the video.

Photographing water splashes is great fun!

Every photographer has to have a go at water splashes some time. It is fun, can be done at home, and produces some creative. exciting and visually interesting shots. To get started you need very little kit. Here’s how you can have a go…

Water splashes :: Fine art water droplets

Everyone wants to do water droplets splashing up. Typical fine-art water droplets shots produce brilliant shapes and forms that we don’t see every day. I am sure you have seen them… if not here is a page of examples ::
Fine art water droplet images on Google  External link - opens new tab/page

Water splashes :: Working with water to get started

Fine art water splash shots need quite a bit of practice and precise measurements. It is better to get some practice working with water first. Then you will learn about the equipment and working with water. You will also get some great shots.

Start off with an easy exercise. The video is going to show you how you can do photos of water tumbling out of a bottle. You get some great results and there is a twist to add a little pizazz. You can show the bottle with the water splashes going upwards!

The video will show you how to set up the water splashes shot with a bottle. Here are a few things you need to do for this exercise. In the video Gavin Hoey has some expensive equipment. We can do it using only household items.

What you need…
  • A water tray – to collect the water splashes coming out. Use a baking tray or large bowl.
  • Use a broom stick or pole to hang the bottle. Put two chairs on a table with the the pole between them Use the backs to hang the bottle. This gives you enough height for the shot at a comfortable level.
  • Use a smallish, thin-necked bottle. Large bottle necks let the water out too quickly. Start looking for the right bottle now. You will have found what you want by the weekend!
  • To suspend a bottle without a studio clamp, tie the bottle around with a length of string long enough to hang it from your pole. Then use some packing tape, or electrical tape to stick down the string tied around the bottle. This stops the bottle from slipping out of the string. This method actually does a better job than shown in the video because the bottle hangs slightly to one side – a pleasing composition. Tape the string onto the bottle near the end of the bottle so your shot captures the top part of the bottle without seeing the tape.
  • If your bottle swings too much while the water is coming out, tie it up using two strings affixed to the bottle. Tie them to the pole wider apart than the width of the bottle and this will stop the swing.
  • In the video Gavin suggests using an off-camera flash. OK, lots of you do not have these. Use the pop-up flash flash on your camera. The problem is that the on-board flash may create a bottle shadow on your background. This is because the flash is in-line with the shot. Notice how the flash is below the bottle in the video. Pull your working table away from the background. Then, well away from the water, point one or two bright domestic lamps at the wall. These will stop shadows and make sure that you have a perfect white background. I usually stand them on the floor behind the table and point them at the wall from there.

Apart from these tips the rest of the equipment is much as shown in the video.

One trick not in the video…

Cleaning! Don’t we all hate it? Yes, but it can really make a difference to your shots. Make sure you clean your bottle really carefully. Did I mention carefully? One thumb mark, dirty trace or blotch and the beautiful clarity of your shot will be ruined. Wash it in detergent and make sure it is dry (free of drips) before you start. It really makes a difference.

Please remember safety…

This is a safe exercise if you remember a few tips…

  • Make sure any electrical appliances are well away from any water splashes.
  • Ensure there are no trailing electrical wires near any water or equipment.
  • Have a towel on hand. Mop and dry wet patches on the table and floor as soon as they spill to prevent slipping.
  • Keep your camera and especially any flash equipment away from the water splashes. You don’t want to break your camera or get it wet.
  • Flash guns, even ones with batteries, release very high power jolts of electricity and can be dangerous if wet.
  • With chairs on the table make sure they are safe from falling.
  • This may seem a fun environment for kids… it’s not. Keep them clear. Have fun with the pictures later.
  • Remember, food dye can mark certain clothes, table tops and carpet materials. Keep it clear from these things, wear old clothes.
How to create amazing photos with water and a bottle


PhotoGavin  External link - opens new tab/page

A fun extension activity…

I have found that this bottle exercise can be huge fun. However, it’s also fun to experiment. I have on occasion placed various items under the falling water. Place them within the range of your shot frame. It takes a little lining up. Fun things like brightly coloured objects work well. Try grapefruit, lemon, bright colour balloons a bath duck and so on… Make sure you have something large enough to catch the water splashes. This makes way-more mess over a larger area!

If you want to make it really fun you can do the water splashes falling on someone’s head. Yeeha!

Have fun with your water splashes. With only a few tries you can get some great results and have some excellent shots to show your friends.

Comments, additions, amendments or ideas on this article? Contact Us
or why not leave a comment at the bottom of the page…

Like this article? Don’t miss the next — sign up for tips by email.

find out more...Photokonnexion tips by email
If you enjoyed this article please sign up for our
Tips by email service.
                                                 Find out more…

Broaden your lens and focal length knowledge

Mixed lens types

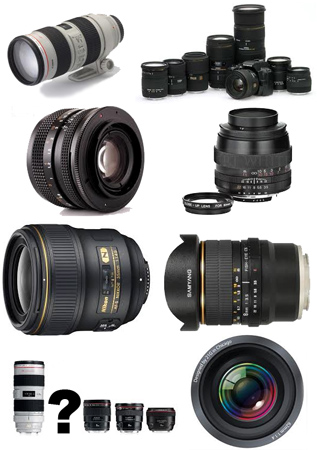
Mixed lens types – What do they all do?

There is a range of lens types…

If you know about the lens types you have, that’s good. But talking and thinking about buying others takes a wider knowledge. Here are two videos to give some insights on lens types. There are some interesting facts too.

Think about your lens types

Before you buy lenses, think about what you want. If you are just learning photography this is important. It keeps you in touch with what’s possible with each of the lens types. Also, it helps you to know what you can do with the skills you have. With each video, try to relate your experience with the lens types they are talking about. Then you will be able to extend your skills with kit you own now.

Another point worth thinking about is what you want to photograph. Long lens types, for example, get you closer to objects in the distance. They make things large in the frame, even when it’s far away. But some subjects are more environmental. So you might benefit more from showing a distant subject in its wider environment. Landscapes are a classic example, but there are others. So, think about what other creative views you can achieve with each of the lens types too.

Introduction to Camera Lenses PT1


Mike Browne  External link - opens new tab/page

Introduction to Camera Lenses Part 2


Mike Browne  External link - opens new tab/page

Comments, additions, amendments or ideas on this article? Contact Us
or why not leave a comment at the bottom of the page…

Like this article? Don’t miss the next one — sign up for tips by email.

By Damon Guy (author and Photokonnexion editor)

Damon Guy - Netkonnexion

Damon Guy (Netkonnexion)

Damon is a writer-photog and editor of this site. He has run some major websites, a computing department and a digital image library. He started out as a trained teacher and now runs training for digital photographers.
See also: Editors ‘Bio’.

Get Photokonnexion tips by email!
We send you tips daily – find out more…

Start email subscription now!

A quiz about lenses… what do you know?

• Lenses • Lens quiz

• Lenses •

Lenses are a wide ranging subject…

and there is a lot to know. It is very easy to make mistakes. So finding out the basics is important. In this lens quiz I will give you the links to resources so can find the simple answers which is also essential information… have fun!

Lens Quiz Questions…
  • Q1. Why do you use a lens hood?
  • Q2. Name the phenomenon that causes light to bend when it hits a lens surface?
  • Q3. How does the optical path differ from the optical axis?
  • Q4. What is another name for an individual glass lens inside a photographic lens?
  • Q5. Is the focal length of an optical lens the same as the focal length of a photographic lens?
  • Q6. How many lenses in a lens group?
  • Q7. Describe what “chromatic aberration” looks like in a picture.
  • Q8. What is projected onto the sensor plane from the lens?
  • Q9. What is the diaphragm in a photographic lens?
  • Q10. Can the focal length be greater than the measured length of the lens body?
  • Q11. What would you normally use a macro lens to do?
  • Q12. Does a wide aperture have a low ‘f’ number or a high ‘f’ number?
  • Q13. Is the shutter in the lens or the camera?
  • Q14. Which is the fastest lens an f1.2, f5.6 or f4.0?
  • Q15. What controls the depth of field?
Where to find the answers…
Answer sheet

You can download a copy of an answer sheet so you can write the answers while looking at web pages.

Our answers…

We will give you our answers on Monday 05th August 2013. In the meantime, have fun!

Comments, additions, amendments or ideas on this article? Contact Us
or why not leave a comment at the bottom of the page…

Like this article? Don’t miss the next one — sign up here.

Damon Guy - Netkonnexion

Damon Guy (Netkonnexion)

Damon is a writer-photographer and editor of this site. He has run some major websites, a computing department and a digital image library. He started out as a trained teacher and now runs training for digital photogs.
See also: Editors ‘Bio’.
By Damon Guy see his profile on Google+.

find out more...Photokonnexion tips by email
If you enjoyed this article please sign up for our
Tips by email service.
                                                 Find out more…

Handshake blur – do your shots suffer?

Handshake Blur Problems?

• Handshake Blur Problems? •
It is so easy to lose sharpness in your shot because your hands make tiny movements. There are simple ways to fix it. Here’s how…

Handshake blur – a cause of blurred shots.

It is not the only cause of blur, but it is more common than most learners think. Handshake blur is a devil in the camera. Or is it?

In auto modes, most of the time, the camera will cope and help keep your shots sharp. When you get more advanced and start to use manual modes then the problems arise. Most people are perplexed – their shots appear to be getting more blurred as they get more advanced. What is causing this handshake blur?

Auto modes limit your photography

Auto modes are set up to average out the conditions you encounter to give you a “reasonable” result every time. The auto mode is set up to compensate for your handshake blur. It will tend toward higher-than-necessary shutter speed for example. That will help you to freeze the shot, cutting the handshake blur. When you encounter more challenging shots the camera cannot produce the results that manual modes produce.

As you advance you want to start doing things that give you more creative control. This is when manual modes help you. However, working the camera appears to become more technical. In fact it is just responding to more sensitive settings – the ones you choose. What you may not realise is that your camera holding, stance and breathing have an impact. You need to be more sensitive to those when you hold the camera. Take everything into account – personal body movement and breathing.

Toward a handshake blur cure…

Handshake blur is quite a technical problem. The camera manufacturers have been working to improve the response to handshake blur for years. Image stabilising mechanisms are built to help reduce handshake blur problems. Good ones can reduce it a right down. And, you need to work on it too. So how do you stop the problem?

There are three basic responses to handshake blur…

  • Increase shutter speed freeze the picture in time. If the shutter is open for a shorter time your hand has less opportunity to move. Then, blur is reduced.
  • Improve the way you hold your camera. The basic hand position is one hand under the lens and one hand holding the body ready to push the shutter button.
  • Improve your stance and breathing. Your body is acting as a tripod. If you are wobbly, so will your shot be! A practiced stance, will help your stability.

You can read my guide to a good stance and breathing techniques in “Simple tips for a good stance”.

There is another response that’s hardly ever mentioned… but it’s extraordinarily important. Most advanced photographers never mention this. They don’t think it is a problem. Working mostly with beginners I know it can be a huge issue. The problem is…
Muscle tone/strength
…even fit people suffer from weakness with a camera at first. I find that disabled people and older people are more sensitive too. Handshake blur can have a big impact on anyone. It is not something to worry about though.

Cameras are quite heavy – especially DSLRs. They are also unbalanced – long lenses make them more-so. People who are not regular camera holders do not develop the fine muscular control and strength needed to hold a camera and use it.

Sure, one or two shots are OK. If you are on a longish shoot, even tough men find they are unaccustomed to the position and control of a DSLR. Your shots slowly lose sharpness as you get tired. Through a whole day handshake blur can be a real issue.

If you are fit, and if you hold a camera a lot you will find your muscle tone and control improves. So will your control over handshake blur. You don’t have to do weights or go to the gym, although that will help. All you have to do is to carry your camera around and use it regularly. Not too much of a problem! The practice will put strength in your arms, shoulders, fingers and hands. Before long you will be steadier with a camera, reduce that handshake blur and improve the sharpness – a lot.

If you are disabled, have problems holding the camera, or suffer from weakness a chest harness can help. Check out DIY Camera Chest Harness for Weak Hands & Arms

Handshake blur… a video

In this video Mike Browne shows us the things I have mentioned above (except the muscle tone part) and how to put them into practical use.

Uploaded by Mike Browne  External link - opens new tab/page

Comments, additions, amendments or ideas on this article? Contact Us
or why not leave a comment at the bottom of the page…

find out more...Photokonnexion tips by email
If you enjoyed this article please sign up for our
Tips by email service.
                                                 Find out more…

Damon Guy - Netkonnexion

Damon Guy (Netkonnexion)

Damon is a writer-photographer and editor of this site. He has run some major websites, a computing department and a digital image library. He started out as a trained teacher and now runs training for digital photogs.
See also: Editors ‘Bio’.
By Damon Guy see his profile on Google+.

Everybody Street… a new documentary about street photography

Video

Video

Documentary released for Film Festival.

Released at the “Hot Docs International Film Festival”, Everybody Street is about the street photography art of New York. Focusing on a range of street photogs it opens up the everyday reality of street photography.

The trailer for the documentary has been released and provides an insight to what may be in the documentary. It shows some stunning shots and some powerful insights. However, it also takes a rather voyeuristic and antagonistic view of street photography. While I personally don’t aspire to that approach there are others that do.

I believe that to act as an antagonist on the street is both dangerous and unnecessary. Personally I believe in respect, contact and participation in the street scene. But I do acknowledge that there are some people that take a different view.

I think it is worth seeing this documentary and I hope that one day it will be widely available. For now I leave you with the trailer. See what you think. The video is just over two minutes.

EVERYBODY STREET – New York City

Everybody Street Trailer from ALLDAYEVERYDAY on Vimeo.

Visit the website for the documentary at: http://everybodystreet.com/  External link - opens new tab/page

Comments, additions, amendments or ideas on this article? Contact Us
or why not leave a comment at the bottom of the page…

find out more...Photokonnexion tips by email
If you enjoyed this article please sign up for our
Tips by email service.
                                                 Find out more…

By Damon Guy (author and Photokonnexion editor)

Damon Guy - Netkonnexion

Damon Guy (Netkonnexion)

Damon is a writer-photog and editor of this site. He has run some major websites, a computing department and a digital image library. He started out as a trained teacher and now runs training for digital photographers.
See also: Editors ‘Bio’.

A simple way to bring out your subject in environmental portraits

• Early morning worker • Bring out your subject in environmental portraits.

• Early morning worker •
Click image to view large
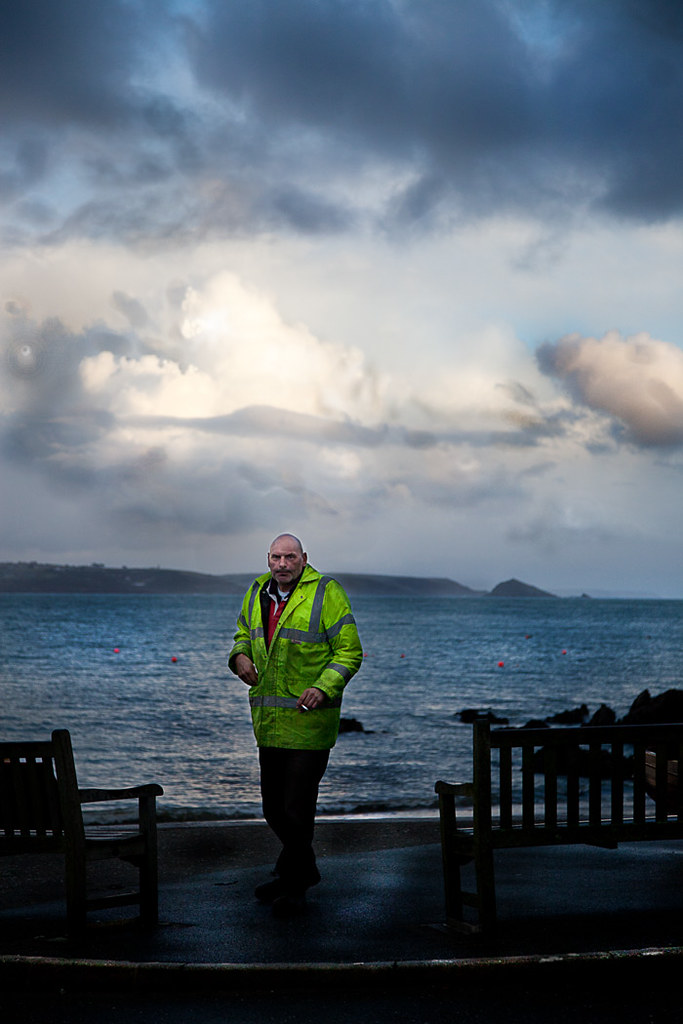
• Early morning worker • By Netkonnexion on Flickr External link - opens new tab/page :: Environmental portraits
A great way to show off your subject is to find a way to make them brighter than the background. This projects them right out into the viewers eye. Environmental portraits are particularly good subjects for this technique.

Subjects should come first.

Every photograph should have a subject, but sometimes they get lost in the overall picture. If that happens you lose the viewers eye. Make the subject stand right out. In environmental portraits, one of the best ways to do that is to bring out your subject. Find a way of making them brighter than the background.

Environmental portraits

Most people shots, whether street photography, simple portraits, or even an event shot benefit from emphasis. There are lots of forms of emphasis. Here are a few examples…

  • High contrast
  • Big colour variations
  • Placement in the frame
  • Perspective…

Probably one of the most effective forms of emphasis in environmental portraits is subject highlighting. Environmental portraits are where a person is captured in the context of their environment. You can see them as they are in that environment. This helps you see into the person and their character.

If you can use highlighting your emphasis has two impacts. First, it provides an immediate draw for the eye. This is because the eye is drawn to the brightest spots in a picture. Secondly, the scene takes on more depth because of the impact. The very fact that the background is more subdued helps the eye to perceive the depth. The highlight creates a wider contrast between the darkest and lightest parts of the picture. In environmental portraits this has a profound effect on the eye.

How?

During the middle of the day the ambient light is very bright. You have to take care when highlighting to prevent blown out areas or over-exposure. There is one way to do it. Pick out your subject as the focus. Then turn down your exposure to slightly underexpose your background. Then use a manually set flash to illuminate the foreground subject. You will see the background as darker from the slight under-exposure. The subject will be properly exposed by the flash. Be careful not to have your flash too powerful. It will over expose the foreground and leave the background too dark. You might need to practice your technique.

In the photograph above I was lucky enough to capture the subject in bright clothes. The incidental light that did most of the work for me. A little brightening in my post-processing helped bring out the details. The emphasis of the light made the foreground object (the man) stand out. Often, what makes environmental portraits powerful is the understated background lighting.

In environmental portraits, bringing out the subject with highlighting is about taking advantage of natural lighting. Nearly every situation has local lighting variations. So if you take the time to look around your location and find light/shadow situations you are sure to find some place where the natural highlighting will give you an advantage. Most of the time it is down to becoming aware of the light and shade relationships.

Two lessons

What we should be doing when the light is right is highlighting the subject. It gives the picture impact and depth. When doing environmental portraits you will always have local light variations. Take advantage of them where you can. If you need to, use a little flash to emphasis the subject and make them stand out.

Comments, additions, amendments or ideas on this article? Contact Us
or why not leave a comment at the bottom of the page…

find out more...Photokonnexion tips by email
If you enjoyed this article please sign up for our
Tips by email service.
                                                 Find out more…

Damon Guy - Netkonnexion

Damon Guy (Netkonnexion)

Damon is a writer-photographer and editor of this site. He has run some major websites, a computing department and a digital image library. He started out as a trained teacher and now runs training for digital photogs.
See also: Editors ‘Bio’.
By Damon Guy see his profile on Google+.