Category Archives: Composition

composition: aesthetics, arrangement, balance, beauty, combination, concord, configuration, consonance, constitution, content, design, distribution, form, formation, harmony, layout, make-up, placing, proportion, relation, rhythm, shape, spacing, structure, style, symmetry, weave

Beach views – ideas for a seaside photoshoot

Beach views are really worth planning out.

• Cornish Afternoon •
The great British beach experience is based on our long history of holidays by the sea. The beach views that come with it are worth pursuing too.
(Click image to view large).

Work up a great coastal vista shot.

Beach views can be magnificent and there is always something worth photographing. Sea makes a magical subject in almost any weather. In the right place the views can be magnificent. Here are a few ideas for you to help you get a great photo from your visit to the seaside.

Beach views :: great vista shots

Photographers should be aware of the opportunities for great vista shots. Here are three tips to help you get the shot and the right light…
1. Spotting a rugged coast: Scout out the maps near your destination. Most good maps will show contours and the coastal shape. If you are looking for interesting coastline check out the height of the land beside the sea. Cliffs and hills indicate harder, more resistant rocks. This helps build up a range of rugged landscapes. Also, the more jagged edges the map shows along the sea/beach line the more likely the coast will have an interesting viewpoint.

If you are looking for a place to try out, Google Maps is useful. The Google maps are not very good at showing contours or heights. But the jaggedness of a coast line is shown. If you convert the map to the Google “Earth” view you can get a satellite view of the coast. From that you can get quite a good idea of the terrain.
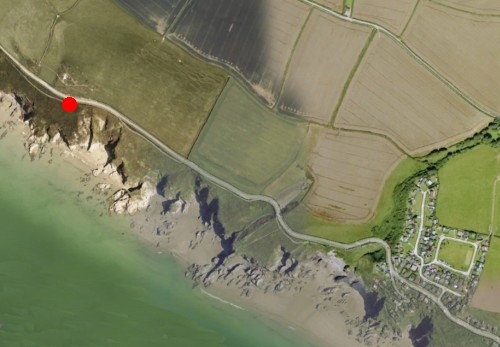
Google Earth - the satellite view provides a good idea of the type of coast.

• Whitsand Bay Cornwall •
The photo at the top of the page was taken from the position of the red dot. The view was taken along the rugged coast there. You can see from the Google Satellite view how rugged the coast is along there. It’s ideal for lots of different Beach views.


2. Beach views :: Checking out the light:
There are two times a day when the light is best for landscapes and vista shots. These are the Golden Hour just before sundown and the hour around sunrise. There is great light and low sun position at these times of the day. Why is low-sun position good? Because that causes long shadows to be cast off the rocks. Strong contrasts between the dark and light help define edges, shapes and form of the rocks and features. Shadows provide the defining depth in a picture too. Well defined shadows help the eye to see objects as more three dimensional.
• The Okta • The symbol for cloud cover on good weather maps.

• The Okta •
The symbol for cloud cover on good weather maps. A useful symbol to tell you the light conditions when checking for good beach views.
(Attribution: Wikipedia.org Beach views :: Oktas - cloud cover symbols | External link - opens new tab/page)


Of course we are not always able to take our photos at the best times of the day. So how do you check to see what the light will be like when you are there? Of course the starting point is the weather. Most good weather forecast web sites will tell you the amount of cloud cover. You can usually tell how much cloud cover is expected by the number of Oktas (or Octas) shown. The more cloud cover the more diffused the light will be. The actual types of clouds make a difference too – if they are dark and ominous they will make a great backdrop to your beach views. Seascapes really look great with heavy storm clouds. Make sure you have a tripod to hand. Dark clouds mean longer exposures.

3. Sun position: If it is a sunny day you might find the sun position is important. If the sun is up high, cliffs can still be in shadow. It depends exactly where in the sky the sun is at the time you want to take photos. There are websites to help with that too. Check out The Photographers Ephemeris Beach views :: Get the light right with . This really useful website “is a map-centric sun and moon calculator: see how the light will fall on the land, be it day or night, for almost anywhere on earth”. There is a web-based version. But usefully, there are versions for your mobile phone too. You will be able to work out where the sun will be at any time of the day. This will help you work out how to fit your beach view shot into your day.

Putting depth into your beach views shot

The shadows you are able to capture will help your beach views appear to have depth. But a longer distance view, especially in mid-day daylight, will need to have other perspectives. Here are a few ideas for you to introduce a feeling of depth into your shots…

  • Overlaps: When you are looking down a long beach you often find features of the beach itself will overlap in your sight. Mounds of beach stones; sand dunes; different rock layers at beach level; cliff top undulations; variations in the cliff face itself and even local vegetation all help. The ways that these features relate to one-another in the scene give you clues to depth in the photo.
  • Contrasts in colour: The colour of the beach stones, rock, sand and even vegetation can often be used to show variation. As you shoot down the length of the beach these can help to show depth to the eye.
  • Texture variation: The cliffs, dunes, rocks and any seaweed revealed by a low tide provide great variations in texture. Look for ways to bring all these into the shot. Textures often come out by slightly underexposing the shot. That may make the scene look darker than it actually is, but it will bring out the light and dark aspects effectively.
  • Lines of perspective: Strong lines are not often associated with beach views. However there are some strong ones that people often miss. The sea line itself is a strong line. You can look down the length of the beach and use the surf or water line where it meets the beach. Looking down on the beach from cliffs you can use wave lines (see below). If you are on the beach itself you beach views are often enhanced by cliff top lines. Although they often undulate they perspective is still distinct against the sky. On the beach itself, fences and other man-made features (groynes, buildings, paths, roads, beach walls etc.) provide lots of points of perspective you can use.
  • Distant points: If you have something in the distance that your viewer knows to be large they have a distance perspective. In the picture at the top of the page you can see a cloud line. These tiny clouds in the distance give a perspective for the viewer. Other things can be large shops towns on the coast, and even buildings.
• Cornish beach view •

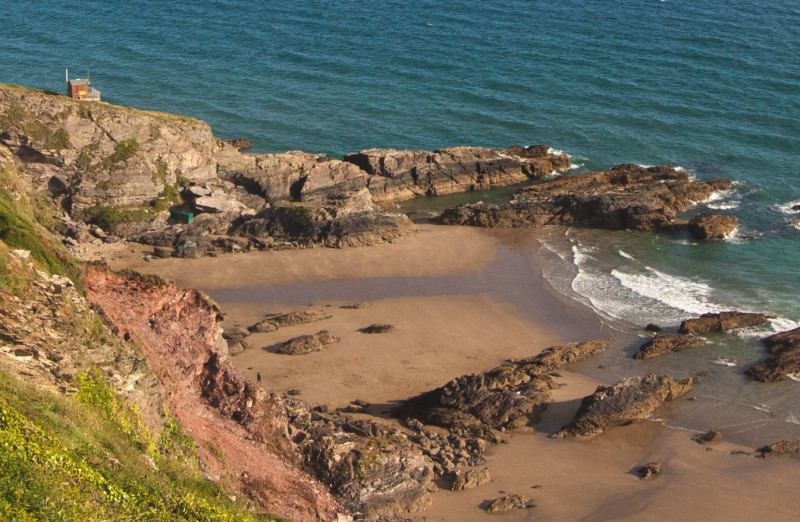
• Cornish beach view •
This view of the beach shown at the top of the page loses some perspective because the distances are reduced. The wave lines in the sea and the rock protruding from the cliffs gives back some of the perspective. The nearness of the grass close-up and smallness of the person and buildings also give depth to the shot.
(Click image to view large).

Check out other pictures of the location for your beach view

The most effective way to plan for your picture is to look up your destination and look for pictures done by other photographers. Try putting your intended location into Google Images. You will be able to pick out features in advance to help you give depth and perspective. You will also be able to see some good places to take shots. Here is the page for the bay where my pictures above were taken. You can see my shots are quite different from the others shown there. There is lots of scope to help you pick out some ideas.
Google Images: Beach views Whitsands Bay Cornwall Google Images: Beach views Whitsands Bay Cornwall | External link - opens new tab/page.

Comments, additions, amendments or ideas on this article? Contact Us
or why not leave a comment at the bottom of the page…

Like this article? Don’t miss the next — sign up for tips by email.

Damon Guy - Netkonnexion

Damon Guy (Netkonnexion)

Damon is a writer-photographer and editor of this site. He has run some major websites, a computing department and a digital image library. He started out as a trained teacher and now runs training for digital photogs.
See also: Editors ‘Bio’.
By Damon Guy see his profile on Google+.

What you can learn from candid photography

Groom • Candid photography :: getting the shot is a pressure.

• Groom •
Candid photography – getting the shot is a pressure. Weddings are times when you need to work particularly fast and accurately. •

Responding is a skill.

When starting on the path to disciplined photography we’re told to slow down. Take careful, measured and pre-visualised shots. We are told to stop trying to frantically pepper the scene with shots. Take time. Take stock. Think everything through. The aim is to get the shot under control.

A good photographer often needs to respond rapidly. The careful, measured approach still applies. They still have to get the picture. However, the pace of a situation demands swift shots. The practised photog can respond with speed and accuracy. Practice at candid photography is a great way to realise those skills for yourself.

Candid photography and practice

The aim is to make a clean, sharp, well composed image. The nature of a candid shot makes that difficult. While trying to make a success of your candid photography some conditions may apply. Some of those may contradict each other…

  • The subject may not know you are going to take a picture.
  • The subject could know you are going to take a picture.
  • The subject may be unpredictable.
  • You will need to be very quick.
  • You will need to be able to get a sharp image despite speedy working.
  • You may have to take several shots (eg. not dozens).
  • Your subject should be in an interesting position.
  • The subject needs to to be in an interesting context in the scene.
  • You should anticipate the shot (rather than getting lucky).
  • You will have your camera ready and settings correct for the shot.
  • You will have only a microsecond to compose the shot.

You just do not know what you are going to encounter until you have to deal with it.

Dealing with all that may seem a tall order. Especially if you are told not to machine-gun the scene with shots. Haste and frantic bursts rarely lead to good luck. Actually, it is not about doing all that at super speed. Like everything you do in photography, candid photography requires preparation, practice and control.

Equipment – knowing what you can do

NO! Do not go out and buy yourself a micro-weight, super-camera. Up-to-date bells and whistles are not the point. Instead, look for simplicity. Sometimes the best camera is an old and familiar one. What we want for this exercise is knowledge.

The best possible way to get fast with a camera is to know what it can do. The lens too. If you are familiar and well versed in using your equipment you will automatically respond to the scene. Here is an example.

In candid photography control of depth of field is essential

• Impish grin •
Keep the subject in focus but the background is frosted out.
In candid photography control of depth of field is essential
(Click to view large)

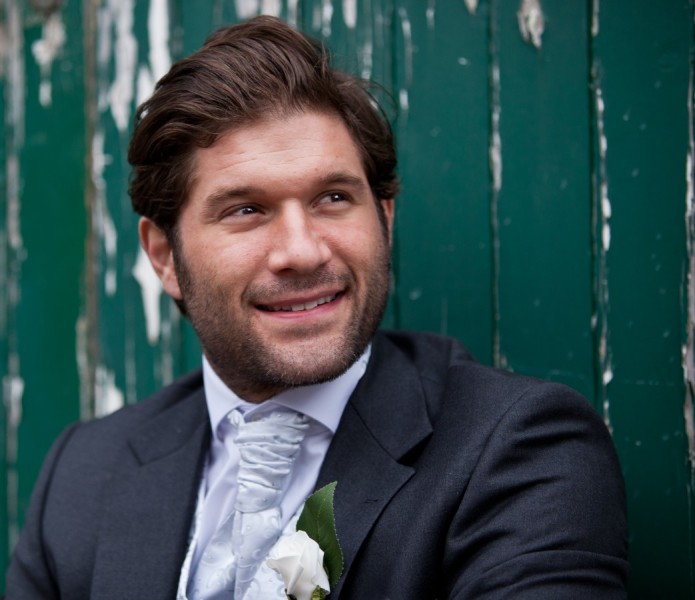
This shot was captured as this lovely man turned from a conversation. He was talking to someone on his right. I was ready for his turn toward me. His impish grin as he saw me really made the shot.

I wanted a depth of field that had his head and face sharp. I also wanted the background indistinct. Notice the sharpness is lost just on the far shoulder. My lens was set up to have a depth of field of about 400mm (about 15in to 16in). But there was no measurement involved. This was an estimate. It involved knowing the depth of field at my distance from the man, and using the right aperture. This capture is the result of knowing the lens and camera combo really well. It was a practised shot using very familiar equipment. The successful candid photography came out of the practice and familiarity.

Equally, it is easy to get the shot wrong. Depth of field, especially at close range, is fickle. It is easy to get the tip of the nose out of focus, the eyes and face in focus, and the hair out of focus. It is important to look at the variables involved. The aperture size and distance-from-subject control the depth of field. So, try the exercise below using manual settings.

Take a bright coloured builders tape measure. Place a small object beside a mid-point on the measure. Take a photo of the object down the measures’ length. Use a wide aperture. Check out the depth of field by looking at the measurements that are sharp. Now by varying your distance from the object see how much you change the depth of field. Do this for a wide range of apertures. With experience you will get a feel for controlling the depth of field. With twenty or thirty variations you should get a feel for the depth of field.

Settings

Aperture is one setting. ISO and shutter speed are important too. Getting a feel for your equipment means getting familiar with how these settings work.

Candid photography often involves working in darker lighting. Parties and indoor sessions, weddings in churches and in evening light all require wide apertures. You might use flash. But in a lot of situations that may not be practical or desirable. So using a high ISO setting (more sensitive sensor) will allow you to work effectively in lower light. So, lower the light where you are working with the tape measure. Raise the ISO and repeat the exercises. Get a feel for how you can vary the exposure by changing the ISO.

Needless to say you can vary the shutter speed in similar ways. Try the exercise again. This time keep the aperture and ISO fixed and change the shutter speed up and down through a range of shots. [More on varying shutter speed].

Learning to use your settings manually takes more than one session. That is important. You can gain a lot by training yourself to be sensitive to the settings. Working toward good quality candid photography can really help you gain that sensitivity. Poor photographs of faces and people are immediately obvious! You get great feedback from the experience of poor shots.

Composition – seizing the moment

Candid photography is about seizing the moment. You need to use good settings. You also need some understanding of composition. This means working to get your subject in the right environment. They will have an appropriate pose and possibly the right context or behaviour too. Without all these coming together the moment is lost. Setting it all up takes some thought.

Normally people do candid photography with some idea of what they want to achieve. Random wanderings are normally unproductive. Luck follows more often from preparation and forethought than stumbling upon a notable event.

So, have a good think about your scene composition….

  • Set yourself up in a viable position ahead of the shot.
  • Think about how the light is placed in the scene overall.
  • Place yourself for the right background on the far side of the shot.
  • Fix the camera settings for the composition ahead of the shot.

In other words be prepared. Then, when the right moment comes along, you will have the minimum to do. A little composition, framing the shot, is essential. A tweak of the focus possibly… But essentially – you should be ready.

Now you stand the best possible chance of getting the shot.

Candid photography is successful when it all comes together

All this preparation and practice is about getting you to the moment when you take the shot. Making a success of your candid photography is about three things…

  • Knowing your settings.
  • Practice with and knowing your equipment.
  • Forethought about the scene.

Having everything ready is the key. Then when all the elements of the scene come together all you do is frame it and capture. If you succeed in that, you will also make a swift shot. Because, in fact, you have little to do. Speed and accuracy is about being ready with everything and having the minimum to do when the right events pull the shot together.

Comments, additions, amendments or ideas on this article? Contact Us
or why not leave a comment at the bottom of the page…

Like this article? Don’t miss the next — sign up for tips by email.

Damon Guy - Netkonnexion

Damon Guy (Netkonnexion)

Damon is a writer-photographer and editor of this site. He has run some major websites, a computing department and a digital image library. He started out as a trained teacher and now runs training for digital photogs.
See also: Editors ‘Bio’.
By Damon Guy see his profile on Google+.
Using polarising filters

The polarising filter helps reduce glare in the photograph| Photokonnexion.com

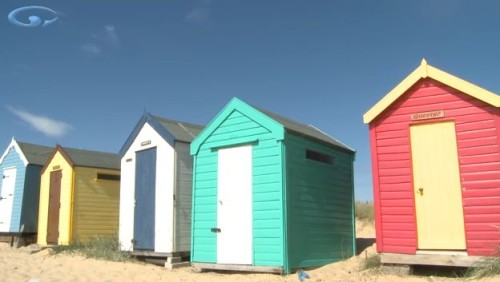
• Beach Huts •
Using polarising filters reduce glare, reflection and colour fade in your photograph. These filters are easy to use and produce great results.
[Image from the video]

Filter with a hidden impact

Photographic filters are light modifiers. They have a variety of different effects. Polarising filters are just one type of photographic filter. When you look at one it appears dark. It looks as if it would have no effect except to reduce the light in your image.

What does using polarising filters do for your photo? Light from the sun tends to be scattered by the atmosphere. The waves of light are out of alignment. When the light is very bright the glare causes a bright haze of light. This over-brightness can act to overwhelm a photograph. It especially tends to wash the colour out of the sky, whitening it. Using polarising filters helps reduce the glare. It filters out some of the light that is not aligned. Only the polarised light passes through the filter. This aligned light has reduced glare allowing the colours to come out. Skies are darkened. Reflections are reduced.

The results of using polarising filters

The result of darkened skies, reduced reflections and better colours can be dramatic. Here are a whole range of images on Google using polarising filters Images on Google using polarising filters | External link - opens new tab/page.

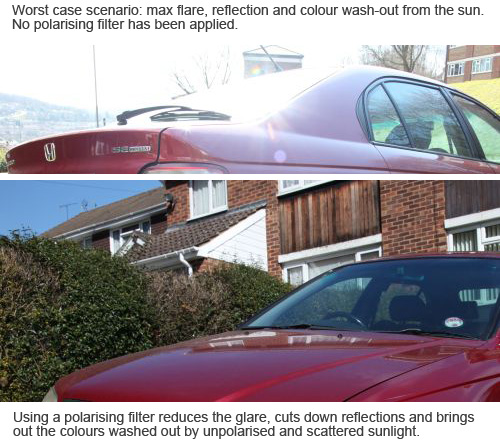
Worst and best case scenario for using polarising filters | Photokonnexion.com

• Worst and best case scenario for using polarised filters •
Careful positioning and using polarising filters dramatically affects the outcome.

Using polarising filters can have a dramatic effects on your image. The top picture shows the worst case scenario. Light is almost directly into the lens. It is bouncing off glass and polished surfaces into the lens too. The sky is very bright with scattered light from direct, harsh sunlight. There is a hazy glare from brightness. There is also flare and very bright spots from reflections. This photo was taken without using a polarising filter.

In the second (lower) photo the position is different. The direct sunlight is not directly entering the lens. Even so, without using a polarising filter there would be problems. Notice the bright blue sky. This would have been a very washed-out blue on this very sunny day. Notice the windscreen is almost transparent? The polarising filter has reduced the bright reflections and specular highlights. The reflections on the bonnet are also pleasant and not over-white. The car paintwork has a quality colour-depth. The whole quality of the lower photo seems better. All this despite the harsh direct light.

Actually using polarising filters

In the video Mike Browne shows how to use these useful filters. In particular you need to remember three things of particular interest…

  1. Using polarising filters is most effective when the light is coming at the lens from about 45° off the optical axis.
  2. While using polarising filters you will need to rotate the filter to find the most effective polarising position. You need to re-adjust it every shot. Each shot will have a different angle of light to the lens.
  3. Using polarising filters reduces the light able to enter the lens. Your light may be reduced by over two stops with a poor quality version.


Mike Browne

Quality

High quality Polarisers are more expensive. They are time consuming and expensive to make. They also use expensive materials. However, the better ones maintain photographic quality. So it is worth spending the extra money. Poor quality polorisers may increase the digital noise from light scatter in the filter. They may also create aberrations and distort the image.

All photographic filters reduce the light entering the lens. A quality polariser will also reduce the light. But, they will affect the light much less than a poor quality polariser. Using polarising filters of a low quality may reduce the incoming light by as much as three stops. A quality polariser will tend to reduce light by only two stops (or less). So think carefully about what you purchase.

Buy now…

When buying a circular polarising filter make sure you get one that is the right size. The filter size of your lens is normally written on the inside of the front of the lens.

Recommended!

Circular polarising filters  A range of circular polarisers on Amazon | External link - opens new tab/page

When using polarising filters buy the size that fits your lens. Also remember that the quality of the filter can affect the photo. High quality polarisers reduce aberrations. A higher quality filter will not reduce the light as much as a poor quality one.

Review a range of different filters here…
Circular polarising filters  A range of circular polarisers on Amazon | External link - opens new tab/page


Comments, additions, amendments or ideas on this article? Contact Us
or why not leave a comment at the bottom of the page…

Like this article? Don’t miss the next — sign up for tips by email.

Damon Guy - Netkonnexion

Damon Guy (Netkonnexion)

Damon is a writer-photographer and editor of this site. He has run some major websites, a computing department and a digital image library. He started out as a trained teacher and now runs training for digital photogs.
See also: Editors ‘Bio’.
By Damon Guy see his profile on Google+.

Picture titles prompt your viewer

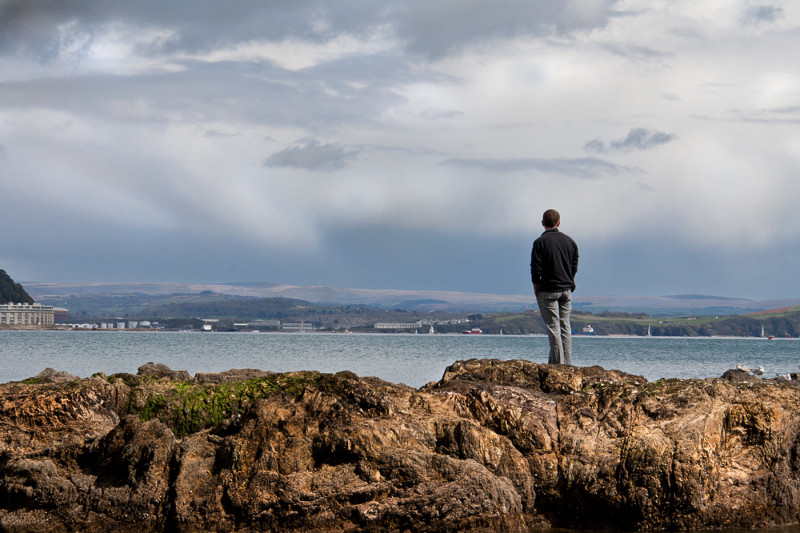
Picture titles - Quiet contemplation

• Quiet contemplation •

It’s all about communication.

It’s a great feeling when your point is understood. This is true with pictures too. When we show people our picture we want them to understand what it is about.

Sadly, pictures are often shown out of context. Then the meaning can be misinterpreted. For example, social networks and art sites show pictures. When posted with lots of other pictures the viewer sometimes needs some idea of the picture’s meaning. That is where picture titles come into their own.

Picture titles give context

A pro-photog tries to make sure their images have a point. They work to make their point from the moment they approach a scene. The final image is the result of a composition that pulls the essential elements together. It crystallises the point for the viewer.

In completing the composition the photog has a clear idea of what he wanted to achieve. It is that ‘idea’ that can be used to make picture titles. For the viewer it is the idea they need to explain the point of a picture when it is out of context on a gallery wall or where-ever.

How do you use picture titles?

The most important thing about a picture tile is brevity. To be effective you need to say it all in a few words. If the viewer has to read a long text about the point of a picture the meaning will be lost. A picture is worth a thousand words. It should express the point. The title is a sign post, a clue.

Your title will achieve two things. It will express the point of the picture. It will also give the viewer an insight into how your thinking went while making the image.

Think carefully. Leave out your brief clue to the meaning of the picture and you may leave the viewer clueless. I am sure you would not want them to miss the point of your lovely picture. Would you?

Comments, additions, amendments or ideas on this article? Contact Us
or why not leave a comment at the bottom of the page…

Like this article? Don’t miss the next — sign up for tips by email.

Damon Guy - Netkonnexion

Damon Guy (Netkonnexion)

Damon is a writer-photographer and editor of this site. He has run some major websites, a computing department and a digital image library. He started out as a trained teacher and now runs training for digital photogs.
See also: Editors ‘Bio’.
By Damon Guy see his profile on Google+.
Get some new ideas for your photography – a quick tip!

Get some new ideas for developing your photography

Here is a great book External link - opens new tab/page you can learn some new ideas about photography without paying…

New ideas to develop your photography…

Here is an interesting and easy way to find some new ideas. At the same time you can do some reading at no cost. A great way to grow your knowledge and find out more about photography.

How to get new ideas

I am sure you know Amazon, that great book-shop on the web. It is not all about book sales (and more). It is also a source of actual reading too. There are ways to use the website for new ideas and information. More to the point it’s free.

Let’s take an example to see how you can get these new ideas. The Collins Complete Photography Course External link - opens new tab/page is an excellent book. Well produced and researched. It’s a top seller and well reviewed. When you go to the Amazon page for it the book also has a readable section. That’s right. While on Amazon you can read several chapters. If the book has a “click to read” tag, like the picture above, you can read some of the text. The chapters you can read in this book are…

  • The story of photography
  • Camera types
  • Getting to grips with your DSLR camera
  • About various exposure modes

…and at the back of the book you can read a great little glossary of terms used in the book.

OK, so maybe you are not going to learn the whole of photography with this method. But, it is one way to pick up some new ideas and information. Other books are of interest too. This extends to books about art and composition ideas as well as other information. You could find yourself in a world of new ideas, facts and know-how.

One more new idea

If you are looking for projects or new ideas for a photograph try this. Go to the index at the back, or sometimes the contents at the front. Both of these areas of a book are packed with concepts. If you are in a book about art or composition in photography, these can start you thinking. Inspiration is all about the idea right? Use this resource just to get the new ideas flowing. Then follow your thoughts…

Comments, additions, amendments or ideas on this article? Contact Us
or why not leave a comment at the bottom of the page…

Like this article? Don’t miss the next — sign up for tips by email.

Damon Guy - Netkonnexion

Damon Guy (Netkonnexion)

Damon is a writer-photographer and editor of this site. He has run some major websites, a computing department and a digital image library. He started out as a trained teacher and now runs training for digital photogs.
See also: Editors ‘Bio’.
By Damon Guy see his profile on Google+.
Make a new image – create a synthesis

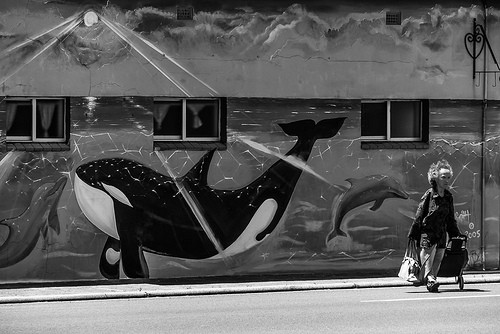
Seaside Lady • A new synthesis on the streetart

• Seaside Lady By Paul Donohoe •
A picture from my Friend and fellow blogger Paul Donohoe  External link - opens new tab/page. He has hit the nail on the head. The added context really makes the scene. Look for ways to add to the image. Make the scene your own by creating a new synthesis.

Thinking about artworks.

A piece of work by someone else makes a great photo, or does it? Maybe, but in a way it is just a record, not a true expression of your view. Anyway, often a photo of an artwork loses something in the translation to a photo. Maybe you should be thinking of adding something to it.

Creating a synthesis

The person who created the original artwork or scene has gone to the same or more trouble you have. When you take a picture of their work you need to think about who is creating the work. A straight picture of another’s work is a sort of theft. However, in the context of the picture you can really make something of the scene – a new synthesis.

In the picture above you can see that Paul Donohoe  External link - opens new tab/page has waited to capture the lady. She is not obscuring the art work. On the other hand the slightly odd pace gives it a new feeling. It is as if she is fleeing the scene. The whole picture, art work and lady, are something new. A synthesis of the original art work and the new aspect to the scene.

A judges view of the synthesis

I have often seen great pictures of sculptures really marked down in photo competitions. They are really a record of the art work. Not the expression of the authors thought on the art. Judges don’t know what to make of that. Who are they judging the sculptor or the photog?

I once heard a judge make a great comment about how a new synthesis matters. In the North of the UK there is a beach with random statues of standing men. Each day the tide comes in and out. The men stand on the sand, stoically staring out to sea. Submerged, or not, they present a simple but powerful image of man watching the world go by. One photographer had taken a picture of one of the men. Boring. The judges comment was illuminating. He said, “When you see them standing there in the cold and wet like that you just want to warm them up. What this picture needed was a bright red scarf around the statues neck”.

On that cold and dreary morning the bright scarf would have made the picture outstanding. The addition would have make it both the expression and the art of the photographer. Yet the new synthesis would have left the statue as impressive as before.

Look to make the scene yours

No matter what you see you always present something of yourself. You cannot help but interpret the scene. When looking at the artwork of others the attention is lost from your picture to the art you are capturing. So, make the scene yours. Find a way to add something or change the scene so you are putting your stamp on the situation.

Comments, additions, amendments or ideas on this article? Contact Us
or why not leave a comment at the bottom of the page…

Like this article? Don’t miss the next — sign up for tips by email.

Damon Guy - Netkonnexion

Damon Guy (Netkonnexion)

Damon is a writer-photographer and editor of this site. He has run some major websites, a computing department and a digital image library. He started out as a trained teacher and now runs training for digital photogs.
See also: Editors ‘Bio’.
By Damon Guy see his profile on Google+.
Portrait context is about the artist as well as the subject

Portrait context is important in photography

• Portrait context is important in photography •
[Image taken from the video].

Art in a portrait…

…includes much more than meets the eye. Photographers taking their first steps with portraits often see only the person in front of them. But the portrait context also includes the scene, the artist and their culture.

Portrait context – a historical boundary

Portrait art historically reflected the fashions and ideas of the time. For example early civilisations tended to depict people in profile. These flat two dimensional portraits were a mark of early Egyptian art. Much later, in the 14th century, the Renaissance masters did portraits as a three dimensional rendering on the canvas. They used artistic tools the Egyptians did not have.

Today the portrait context is still related to the knowledge and experience of the artist. And, they are partly bound by the conventions of their time, culture and so on. You can never fully be divorced from your context. But, we are free to take a wider, more context-free view of portraits. Artists and photographers are trained to take a broad, imaginative outlook. Art and photography schools give the imaginative freedom of students a wide scope. Breaking the bounds of traditional portraiture is a part of that freedom.

Breaking the bounds of portrait context takes careful thought

Portraiture starters often only see their subject through “everyday” eyes. Most of us are not trained in the ways of imaginative scene setting. So we tend to take portraits that represent our every day view of people. There is nothing wrong with that. Family, friends and others make a fun photograph. The images can be pleasing and satisfying.

Great portraiture goes deeper than that day-to-day view. To push the boundaries of your portraits, think in a different way. The portrait photog should consider their own vision and experience. They also need to think of the environment, cultural context, story and location of the shot. The photographer should understand who they are as well as knowing something of the portrait subject.

Of course knowing these things does not produce a great image. What makes a great portrait is pre-vision. It is how you bring out something in the subject, the scene or the portrait context that is remarkable. This takes a unique perspective.

The art of portrait photography

A strong portrait steps out of the everyday view. In the video we get the perspective of a number of portrait photogs. Each has looked into the portrait context in which they are working. With forethought and insight they have constructed artful portraits. They have also made driven and powerful images of their subjects. Each has a clear understanding of the portrait context. Each has a clear view of what they want to say.

The lesson is, look for a point to make. Understand both what you are working with and what you are working to express.
PBSoffbook  External link - opens new tab/page

Comments, additions, amendments or ideas on this article? Contact Us
or why not leave a comment at the bottom of the page…

Like this article? Don’t miss the next — sign up for tips by email.

Damon Guy - Netkonnexion

Damon Guy (Netkonnexion)

Damon is a writer-photographer and editor of this site. He has also run some major websites, a computing department and a digital image library. He started out as a trained teacher and now runs training for digital photogs.
See also: Editors ‘Bio’.
By Damon Guy see his profile on Google+.