Tag Archives: Water

Three minutes of peace and tranquility and endless fun later!

Ink Drops

• Ink Drops •
The feeling of peace and tranquillity can come with many aspects of photography. This is something you can think about and possibly do yourself.
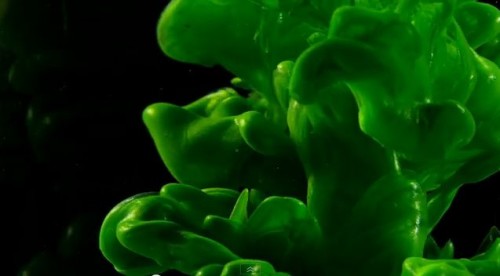
Image from the video.

Seeing and capturing

Every interest has its peaceful side. Photography is no different. For a change here is a video which delivers three minutes of peace and tranquillity. It is possibly something you can have a go at yourself…

Whats going on – can I do it?

What you see in the video is very simply drops of ink into water. The water is sometimes still and sometimes moving very gently. It is simple to do but infinitely complex in the outcomes. Anyone can do it.

There are literally hundreds of different inks on the market. Have a look at this…

Drawing Inks Assortment Set of 12  External link - opens new tab/page
A great set of varied colours. Can be used to create coloured water and for droplet mixes. Great for experimentation.

Here are a few other types of ink you can choose.  External link - opens new tab/page

I have a range of colours I use for water work. You can also use food colourings. Basically the technique is like this…

  • Set up a glass jug, vase or small tank (flat sided is best).
  • Make sure it is very, very clean.
  • Have a dry cloth available to wipe the glass dry if you spill.
  • Use a remote flash or domestic lamp set to the side.
  • Place a black or white card behind your glass vase.
  • Mount your camera on something solid. A tripod is best.
  • Set your camera to auto-white balance.
  • Set the ISO to 100.
  • Use Shutter Value [Sv, Tv etc.] as your shooting mode
  • Use f11 as your setting to shoot right through the water.

You will need to have the light on from the side of the shot. An on-board flash will cause the ink to appear very flat with the light coming from the front. This will ruin the effect.

If you want added brightness from behind you can add a light shining onto the background card. This will lift the internal colours.

Then, as with everything in photography you will need to experiment with the light and conditions you are working with to get the best shots.

The technique

Your water should ideally be about six inches deep. Drop the ink into the water and start clicking your shutter button. You can do it quite a few times as the ink forms up the shots. Once you are satisfied there is no more shots to be had then replace the water and start again.

People spend literally years working with this sort of effect. It is not only great fun for everyone from beginners onward, it is also great art. There are many fine art photographers who work on this sort of image for a living. There is also endless amusement, beauty and some wonderful images. The technique works for both still photography and videography.

INK DROPS

And now for your three minutes of peace and tranquility – enjoy!

Jacob + Katie Schwarz  External link - opens new tab/page

Comments, additions, amendments or ideas on this article? Contact Us
or why not leave a comment at the bottom of the page…

Like this article? Don’t miss the next — sign up for tips by email.

By Damon Guy (author and Photokonnexion editor)

Damon Guy - Netkonnexion

Damon Guy (Netkonnexion)

Damon is a writer-photog and editor of this site. He has run some major websites, a computing department and a digital image library. He started out as a trained teacher and now runs training for digital photographers.
See also: Editors ‘Bio’.

A quick shoot making water splashes? Tips to get started…

Water splashes :: Have a go at water from a bottle

• Have a go at water from a bottle •
Water splashes :: Great fun, easy to do at home.
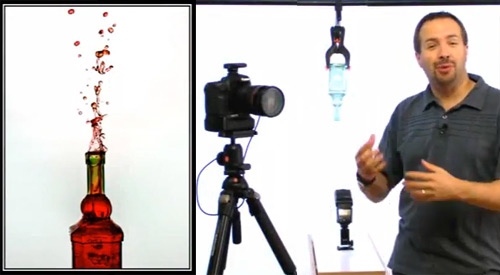
Picture taken from the video.

Photographing water splashes is great fun!

Every photographer has to have a go at water splashes some time. It is fun, can be done at home, and produces some creative. exciting and visually interesting shots. To get started you need very little kit. Here’s how you can have a go…

Water splashes :: Fine art water droplets

Everyone wants to do water droplets splashing up. Typical fine-art water droplets shots produce brilliant shapes and forms that we don’t see every day. I am sure you have seen them… if not here is a page of examples ::
Fine art water droplet images on Google  External link - opens new tab/page

Water splashes :: Working with water to get started

Fine art water splash shots need quite a bit of practice and precise measurements. It is better to get some practice working with water first. Then you will learn about the equipment and working with water. You will also get some great shots.

Start off with an easy exercise. The video is going to show you how you can do photos of water tumbling out of a bottle. You get some great results and there is a twist to add a little pizazz. You can show the bottle with the water splashes going upwards!

The video will show you how to set up the water splashes shot with a bottle. Here are a few things you need to do for this exercise. In the video Gavin Hoey has some expensive equipment. We can do it using only household items.

What you need…
  • A water tray – to collect the water splashes coming out. Use a baking tray or large bowl.
  • Use a broom stick or pole to hang the bottle. Put two chairs on a table with the the pole between them Use the backs to hang the bottle. This gives you enough height for the shot at a comfortable level.
  • Use a smallish, thin-necked bottle. Large bottle necks let the water out too quickly. Start looking for the right bottle now. You will have found what you want by the weekend!
  • To suspend a bottle without a studio clamp, tie the bottle around with a length of string long enough to hang it from your pole. Then use some packing tape, or electrical tape to stick down the string tied around the bottle. This stops the bottle from slipping out of the string. This method actually does a better job than shown in the video because the bottle hangs slightly to one side – a pleasing composition. Tape the string onto the bottle near the end of the bottle so your shot captures the top part of the bottle without seeing the tape.
  • If your bottle swings too much while the water is coming out, tie it up using two strings affixed to the bottle. Tie them to the pole wider apart than the width of the bottle and this will stop the swing.
  • In the video Gavin suggests using an off-camera flash. OK, lots of you do not have these. Use the pop-up flash flash on your camera. The problem is that the on-board flash may create a bottle shadow on your background. This is because the flash is in-line with the shot. Notice how the flash is below the bottle in the video. Pull your working table away from the background. Then, well away from the water, point one or two bright domestic lamps at the wall. These will stop shadows and make sure that you have a perfect white background. I usually stand them on the floor behind the table and point them at the wall from there.

Apart from these tips the rest of the equipment is much as shown in the video.

One trick not in the video…

Cleaning! Don’t we all hate it? Yes, but it can really make a difference to your shots. Make sure you clean your bottle really carefully. Did I mention carefully? One thumb mark, dirty trace or blotch and the beautiful clarity of your shot will be ruined. Wash it in detergent and make sure it is dry (free of drips) before you start. It really makes a difference.

Please remember safety…

This is a safe exercise if you remember a few tips…

  • Make sure any electrical appliances are well away from any water splashes.
  • Ensure there are no trailing electrical wires near any water or equipment.
  • Have a towel on hand. Mop and dry wet patches on the table and floor as soon as they spill to prevent slipping.
  • Keep your camera and especially any flash equipment away from the water splashes. You don’t want to break your camera or get it wet.
  • Flash guns, even ones with batteries, release very high power jolts of electricity and can be dangerous if wet.
  • With chairs on the table make sure they are safe from falling.
  • This may seem a fun environment for kids… it’s not. Keep them clear. Have fun with the pictures later.
  • Remember, food dye can mark certain clothes, table tops and carpet materials. Keep it clear from these things, wear old clothes.
How to create amazing photos with water and a bottle


PhotoGavin  External link - opens new tab/page

A fun extension activity…

I have found that this bottle exercise can be huge fun. However, it’s also fun to experiment. I have on occasion placed various items under the falling water. Place them within the range of your shot frame. It takes a little lining up. Fun things like brightly coloured objects work well. Try grapefruit, lemon, bright colour balloons a bath duck and so on… Make sure you have something large enough to catch the water splashes. This makes way-more mess over a larger area!

If you want to make it really fun you can do the water splashes falling on someone’s head. Yeeha!

Have fun with your water splashes. With only a few tries you can get some great results and have some excellent shots to show your friends.

Comments, additions, amendments or ideas on this article? Contact Us
or why not leave a comment at the bottom of the page…

Like this article? Don’t miss the next — sign up for tips by email.

find out more...Photokonnexion tips by email
If you enjoyed this article please sign up for our
Tips by email service.
                                                 Find out more

Long exposures are easy… here’s how

Milky water shots produce fine art results

The effect of a long exposure on a moving object is to blur it. The classic long exposure photo taken with water produces a blurred milky effect on the moving water. Here is how it is done.

What will these long exposures produce?

First, here are three examples of the type of shots this technique will achieve…

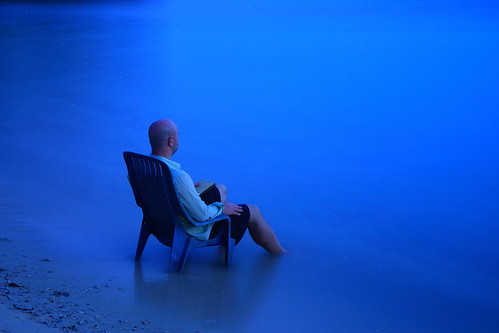
Here is one that is a bit different…

76 - Milky Water by Bob Lawlor, on Flickr

76 – Milky Water by Bob Lawlor, on Flickr
76 – Milky Water by Bob Lawlor, on FlickrExternal link - opens new tab/page

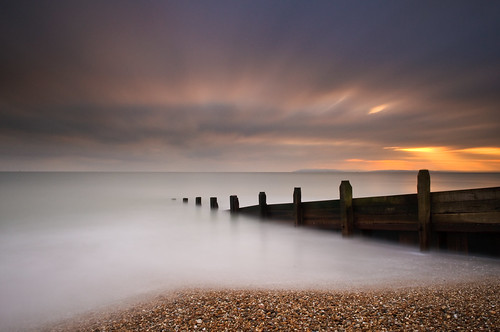
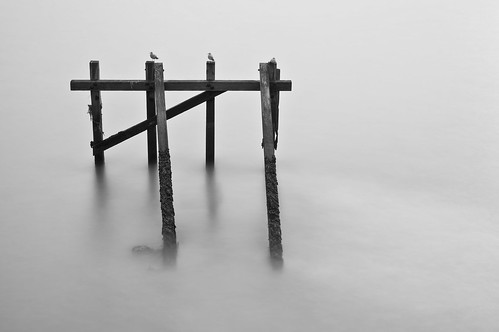
Here is a long exposure more in the traditional format. The water is photographed against non-moving subjects they come out in clear detail while the water becomes frosty/smooth…

Minimalist tidal Long Exposure or just a Seagull perch by Bus_ter, on Flickr

Minimalist tidal Long Exposure or just a Seagull perch by Bus_ter, on Flickr
Minimalist tidal Long Exposure or just a Seagull perch by Bus_ter, on FlickrExternal link - opens new tab/page

What you will need

You will need a dense ND filter. This will be what will enable you to keep the shutter open for a long period to blur the water surface. You will also need a camera that can be operated in full manual mode. You need to also have a “bulb” setting available. Other than that you will need all your normal photographic equipment.

Long exposure tutorial with Scott Kelby

To explain the technique here is a video from Scott Kelby which show you how to do the actual shots…

Long exposure tutorial with Scott Kelby
Weekly Photo Tips’s Video Channel

By Damon Guy (author and Photokonnexion editor)

Damon Guy - Netkonnexion

Damon Guy (Netkonnexion)

Damon is a writer-photog and editor of this site. He has run some major websites, a computing department and a digital image library. He started out as a trained teacher and now runs training for digital photographers.
See also: Editors ‘Bio’.

An easy way to gain photographic confidence

What do you know?

The way to find out what you know is do it! Some feel clueless when they’re not.

How do you assess your own knowledge?

Many beginners know more than they can recite. Physically doing photography helps. That way you get in a habit of doing photographic procedures to help you remember. Here are some other ideas to help you gain confidence with your knowledge.

Twenty photographic facts you Know

It’s simple really. Take one page of lined paper, or use one word processor page. Put down twenty photographic facts you know. You might say you don’t know twenty facts. That’s not true. If you have read this page you will have some facts to get you started. Also, if you have read any of my other pages you will have plenty of facts. So, aim to write twenty facts. Simple.

There are some rules…

  • Do not use more than one line for a fact, even if it is about how water can damage a camera.
  • Make sure there is only one fact, not several facts, per line.
  • Your photographic facts must be simple. (eg. “A tripod has a ‘head’ to mount the camera”).
  • Any fact that is too complicated to write in one line is more than one fact.
  • The next fact will be the simplest one you know (eg. black and white is technically ‘monochrome’).
  • Each fact must be one you already know… like, “A shadow is dimmer light than the surrounding light“.
  • Do the twenty facts in one session.

There, see how easy it is? Drat, and double drat! I have already given you five facts. (Actually I have! See if you can find the fifth one somewhere above. Answer at the end of this article).

Yes, you guessed it

If you can write twenty facts you can probably write more. So do as many as you can. Then, keep the paper/page on hand. Every time you get a new fact write it down. Remember the rules. Aim for one hundred facts.

Sharing

Photography is a great way to make friends. Like any hobby sharing is caring and fun. Get yourself a buddy, even if they are online. Then share your facts with them. Better still, get them to read this and do the same exercise as you. That way you will learn each other’s facts.

More important, sharing facts with people is fun and you both learn. Get into the habit of doing this and soon you will be a mine of information. Your buddy will help and they too will overflow with photographic facts.

Here are three sorts of things to get you started learning more
  1. Find your camera manual. Do these: (a) learn the names of two parts of your camera; (b) Follow/learn two instructions from the manual; (c) Name one accessory for your camera.
  2. Look up: Composition resources on Photokonnexion. Learn one rule of composition.
  3. Look up the Photographic Glossary which provides definitions, articles and resources. Read one article.
Feedback for everyone!

Paste your twenty facts into a comment box. We can all learn from them.

And the fifth fact?

At the beginning I gave you five facts. Four were obvious. If you want to know the fifth fact click here.


How to photograph bubbles from the side – water photography

Bubbles are fun to photograph and there is infinite variation

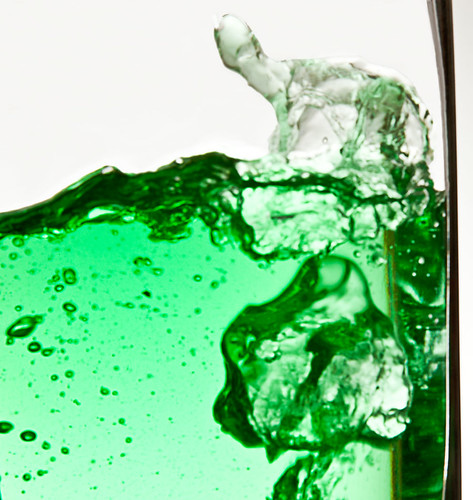
Bubbles photography is fun with infinite variation – plenty of scope for creativity.

Water and its properties are endlessly fascinating.

It is quite easy to get started with water projects. Some simple household items are all that’s needed. In this tutorial we will look at how to create bubble shots like the image shown.

What you need

All you need are some simple items. A square, clear-glass container is the most important, for holding the water. Some people use a small fish tank. I used a square glass vase. It helps to have a flat side – the focus is easier. However, with some experiments you can make most glass items work. The other items are:

  • A thin flexible tube for blowing the bubbles (1 meter).
  • Food colouring.
  • Some dish washing detergent.
  • A clothes peg (clothes pin).
  • A sheet of white card, paper, or a white wall.
  • One bright lamp.
  • A tripod or firm platform to place your camera.
How its done

We are aiming to create some pretty surface bubbles. So fill the container to about half full with fresh tap water. Then…

  1. Add a few drops (3 or 4) of food colouring of your colour choice.
  2. Place the container on a table so you can photograph through it.
  3. Behind the container place the card to provide a solid white surface as a backdrop for the shot. You will need a gap between the water container and card of about 500mm to a meter (18inches to a yard).
  4. Place the lamp to the side, but pointing at the white backdrop, between the container and the backdrop itself. The idea is to create a bright background for the shot. The card acts as a white reflector to create a high key effect.
  5. Place the tube in the water and push it to the bottom of the container. Fix it to the side of the container with the clothes peg so it stays in place.
  6. Now, add the drops of detergent. Too much and the bubbles will fill the container. Too little and they will not form. So you may need to experiment. You create the bubbles by blowing down the tube. As air passes up through the water it creates the bubbles.
  7. Position your camera on the tripod, pointing at the flat side of the container. Blow some bubbles. Focus the camera and take a test shot. View the shot. Your focus is critical. If you focus too far into the container you will get a lot of bubbles. So try to focus just on the bubbles on the side of the glass. It is best to work with only a few bubbles rather than a lot. So try with less detergent if you find you have too many.
  8. Adjust the settings to get the light right. Use the flash on your camera if you need to make the shot brighter. However, make sure the lamp behind the container makes the backdrop very bright white too. Getting a bright backdrop is more important than the flash from the front. In fact if you use the flash it may need to be turned to minimum power. Read your manual to find out how.
  9. I shoot with full manual settings. So it is easy for me to adjust the brightness of the shot for the background. You can work with the aperture at something like: f5.6 or f4.0. This prevents the back of the container coming into the focus. However, it does give a frosted effect in the water as the container is out of focus inside. A shallow depth of field makes the foreground focused in the shot. Then the bubbles against the glass come out well. If you can arrange the bubbles so they are at the front against the glass and not at the back you can use a deeper depth of field. In this case apertures of up to f22 will work. You get more clarity in the shot and more of a glow from the water. However, you may need to clone droplets and marks off the glass in post processing – from the front and back of the container.
  10. Shooting with a longer exposure will help your background brightness if your lamp is dim, but try out different lighting and shutter speeds to get it right.
  11. Experiment! The key to all water shots is trying out lots of different things. Different depths of water, different containers, various amounts of liquid detergent, different light levels… all can be varied.
Things to watch out for…

Splashes! The water from the bubbles splash onto the side of the container leaving droplets and these get into the shot. I keep a small cloth to wipe them off after blowing the bubbles, but before I take a shot.

Too much detergent can be a problem, you really do need only a tiny amount. Very few bubbles look better in the shot than thousands. I have found that the shot is improved if you wait for the bubbles to subside a bit after your blowing. Then take the shot.

You want the background to look very bright to give the water a glow. So concentrate light on the white background to bring up the brightness from behind.

You will probably want to take a picture of the whole width of the container. However, in post processing you will probably not keep it all. Be prepared to crop the shot down to the better looking bubbles like I have above.

You do not need to use a macro lens although that can produce great results too. The shot above was taken at around 80mm focal length. It was not a macro shot.

I find that variation in bubble sizes gives more interest. So I have tried to make the bubbles uneven in their shape and size. This helps balance the shot.

You can try out different colour backdrops. I have found that using a gel to colour the light works well. Make sure the light is projected onto the background and does not change the water colour. In the shot above the background is white. In that picture I replaced white with the colour variations above the green water later in post processing.

As a bonus, you can also take pictures of the bubbles rising in the container. To do this blow and shoot at the same time. Make sure you have lots of light from behind and a fast shutter speed to freeze the action. Here is an image showing the water movement from the bubbles.

The bubbles and water movement can be great fun too.

The bubbles and water movement can be great fun too. This image shows the water exploding above the surface when the air is blown through the tube.

10 Tips for Saving Your Camera

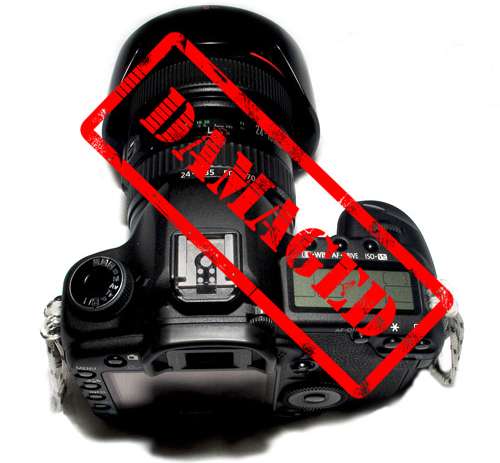
It is so easy to kill your camera... do your best to protect it

It is so easy to kill your camera… do your best to protect it

Camera damage is devastating!

If you are like me you go everywhere with a camera. I would be lost without it. The one time I did damage a camera it cost me a lot of money and I was without it for nearly three months. Now I take precautions. Here is my spin on protecting and maintaining your camera.

1. Keep it clean

Surprising, but many people do not do this. I regularly wipe my camera all over on the outside with a dry but very clean cloth. Invisible dust and dirt lurk on your camera. If you have been out for a day on a shoot it will collect lots of dirt. Before you put it in the camera bag wipe it down. It keeps the dirt out of your bag and ensures that all the equipment stays free of camera-killing dust.

2. Changing lenses, opening doors

Keep your camera clean inside too. If you open any part of your camera do it in a dust, moisture and liquid-free place. If dust gets inside it will stick to everything, especially the sensor, mirror and any glass. You will gradually get spots and marks on your shots. As this builds up it becomes a big problem. When changing lenses hold the open camera lens-hole pointing downward. Dead skin, hair and dirt will fall into it from you as you change the lens if it is pointing upward.

3. Cleaning lens glass

Use a blower to blow the lens clean first. Do not use your breath. You will exhale a mist of biological vapour with grease and all sorts of other bio-chemicals onto the lens. This will not clean it and WILL make it attract more dust. Do not put lens cleaner fluid directly onto a lens. Instead, put a tiny drop onto the cloth and wipe that around the lens. Get into the habit of wiping your lens regularly and renew your lens cloth/cleaner regularly too. They soon accumulate dirt and then become more damaging than cleaning. Always keep your lens cloth in a bag to keep dust off it. Keep a lens cap on when you are not using the lens to keep it clean and safe from knocks.

4. Temperature

Extremes of hot or cold can damage your camera. So where possible protect it from heat sources or extreme cold. Most cameras have a working temperature range and you should try to work within that (usually stated in the manual). However, if your camera does get hot or cold never open it until it has returned to room temperature. The atmosphere inside a camera is quite well sealed even if it is not waterproof. If you open it the sudden change of air temperature and moisture can cause condensation or in-draughts of air. This will get moisture and dust deep into the body. Simply leave your camera in its bag for about 12 hours at room temperature for everything to equalize if you are unsure.

5. Moisture, water, chemicals and salt

Unless your camera is waterproof avoid getting it wet. Many cameras are “weatherproof”. Actually this means that a bit of damp in the air is OK. Any more than that and you risk serious damage to your camera. So, if you must go out in a boat, the rain, or near open water keep it under cover or in its bag. I have a roll of black trash bags in my car boot. In the event of rain I push a fist-sized hole through one corner of the bag and stick out the lens hood. Then I work inside the bag. Simple, quick and dry.

Always keep your camera away from exotic chemicals. Vapours, dry chemical dust and gases may damage your camera permanently. Keep clear of spills and ensure anything that is accidentally deposited on your camera is removed/neutralized quickly.

If working near salt water wipe your camera clean with a very slightly damp cloth to remove salt after use. Salt is corrosive and will cause all sorts of problems. If it penetrates your camera it attracts moisture and corrodes electrical parts. Salt also dries and leaves thin deposits on your lenses. Do NOT wipe with a dry lens cloth. Dry salt can damage the lens coating or even the lens itself. One of my waterproof cameras was completely destroyed by salt corrosion once. I did not clean it before storing it. Very costly! If your camera is waterproof wash it in clean fresh water and dry it in a warm place for several days before storage.

6. Wind-blown dust and sand

EEEEEK! Deadly stuff for cameras! If you work on beaches a lot, as I do, just don’t bother if it is windy. Or, if you must go on the beach, make sure your camera is enclosed in a sealed bag. Dust gets everywhere when it is windblown. If your lenses get dust or sand under the focus rings you can say good-bye to your lens soon after that. Wipe the camera down after coming off the beach. Never open it in dusty, sandy environments. That includes not opening the battery chamber or any other orifice or cover.

7. Straps

Straps are surprisingly vulnerable. They often have plastic buckles that get stepped on, knocked or caught in things. Believe me, although they are robust, fittings do break. Inspect all fittings on your straps regularly for wear and damage. Especially check the straps where they are attached to the camera. The little slots for the straps are quite sharp and they gradually saw through the strap. Do not use any chemical cleaners on your straps as they can break down. Wipe them clean regularly with a damp cloth to keep dust from impregnating the material. Use straps all the time when carrying your camera. Remove them if you can when using a tripod. They move or blow around and cause vibration and may catch on clothing etc and pull over your camera.

8. Drops, shocks and knocks

Most modern cameras are built to take the knocks of day to day use. Some people have taken extreme measures to test this. However, if your pride and joy is worth anything to you take care not to drop, knock or shock it. This means constant vigilance. Keep it in a good, padded bag. Don’t let kids or pets near it. Make sure it is strapped, tied, or otherwise fixed to something so it is secure if knocked or dropped. Over the years I have dropped a very expensive pro-lens, two cameras, a cheap lens and a range of other equipment. Of those, the cheap lens broke. The others were all secured or in great bags. Believe me you will drop or knock your equipment. If you have taken adequate precautions you will be OK. Otherwise you will be out of pocket.

9. Handle with care

If you have to push it, pull it, turn it or lever it with any force – something is wrong. Everything on your camera should be easy to open, close, turn, twiddle or use. If something does not work easily it may be jammed or broken. Don’t make matters worse. Check the instructions in your manual first to see if you have done it right. If it is not right, or you cannot see a reason for the problem take it to a camera shop. They may help you immediately if it is a simple problem. If it is more complex then get an expert to fix it. Better to be safe than sorry as they say!

10. Power, cables and sockets

I have never broken a cable socket in a camera. I know people who have. Sockets are expensive to fix. Keep cables clean, undamaged and untwisted. If someone trips over your cable they may be hurt – your camera will be destroyed! Damaged sockets and suddenly-tugged cables cause all sorts of problems. When you have cables plugged into your camera make sure you have them secured or away from places where they can get caught. Before connection/disconnection of any cable turn off your camera. Sudden electrical surges may damage internal components. The same applies to memory cards and connections to computers or radio-triggers etc. To avoid undue wear and tear on cable sockets in your camera make sure cables do not carry weight. If they tug constantly on the socket eventually it will not fit the cable any more. So find a way to keep the weight off the socket.

Oh! And, remember these…
  1. Clean everything and remove batteries before storage.
  2. Replace memory cards and batteries every two to four years before they wear out.
  3. As my old Dad used to say, “…and if all else fails read the manual!”

There, three extra tips for free!

By Damon Guy (author and Photokonnexion editor)

Damon Guy - Netkonnexion

Damon Guy (Netkonnexion)

Damon is a writer-photog and editor of this site. He has run some major websites, a computing department and a digital image library. He started out as a trained teacher and now runs training for digital photographers.
See also: Editors ‘Bio’.