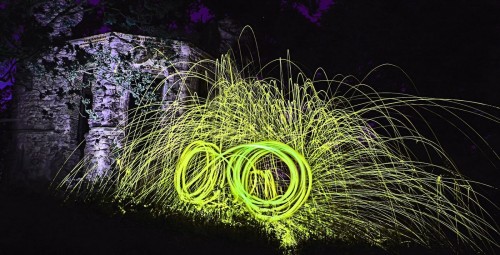
• Steel wool spinning • In the tutorial you will see how to create images like this.
Click image to view large.
[Steel wool spinning • by Steve Maidwell]
Photography at night is an intense experience.
Not only is darkness powerful but the shock of light is even more invigorating. Put the two together and you have a formula for great impact. In this article Steve Maidwell gives us the tools to create incredible light shows.
What you will need
- Steel wool – Get this get from any DIY store. I bought six bags, you will use a lot. Get Grade 0, 00, 000, or 0000. Don’t get anything at or above Grade 1, it won’t burn properly
- Steel cable, rope or metal chain – Approx 1.5 M long, DIY store again. You could also use a metal dog lead with a clip at the end of the cable. I used the clip as a handle, but you can do whatever you wish. If you use a chain you won’t need the whisk or rope. Just poke the steel wool around the loops in the chain; it just takes longer to do that.
- Whisk – I bought mine at a DIY store for £1. Make sure it is all metal, no plastic parts for obvious reasons.
- Any D-SLR Camera and Tripod
- A Lighter or 9 Volt battery – Use this to light the wool.
- LED light or torch
- Remote release for your camera (desirable, not essential).
- All your clothes should be black if possible and you will need a hat or hoodie.
Next you need to build your cage to hold the steel wool. I attached the whisk to a steel cable. I looped the cable through the hole at the top of the whisk handle and then securely taped it on with duct tape. This cloth type tape is very strong so will not pull off when whisk is swung. Cut the cable/rope to about 1.5M long. I stripped the plastic covering leaving only the metal cable, again for obvious reasons. Then put two balls of steel wool into the balloon part of the whisk. Tease the steel wool apart to fill the whisk. This creates air pockets that allow more sparks to be generated. Put this to one side then set up the location in which you will take your images.
Out on location – ready to go
Set up the camera with the tripod, then…
- Set camera dial to Manual (M)
- Take the LED light or torch (flash light) and place it in the middle of the location you will be spinning your steel wool. Turn it on and point it so your camera will be able to focus on it.
- Walk back to your camera, focus on the LED, then turn off auto-focus. This prevents the focus from changing when you start to expose the image.
- Set a medium aperture F8-F11 and ISO at 100.
- Set shutter at around 15secs. This may vary due to how dark it is when you take these. A good time is when you can just see light still in the sky but dark on the ground.
- If you do not have a remote release button set the camera timer to give you a few seconds to move to the point of focus. You may need to practice this a few times before you light the wool.
- Go to the torch (flash light) where you focussed your camera. Turn off the torch.
- Push the remote shutter button (or wait for the camera to click on with the timer) and quickly ignite the wire wool with a lighter or battery terminals.
- Spin the whisk. The faster you spin, the more sparks are generated.
If you have a partner helping out they can set off the camera or spin the whisk.
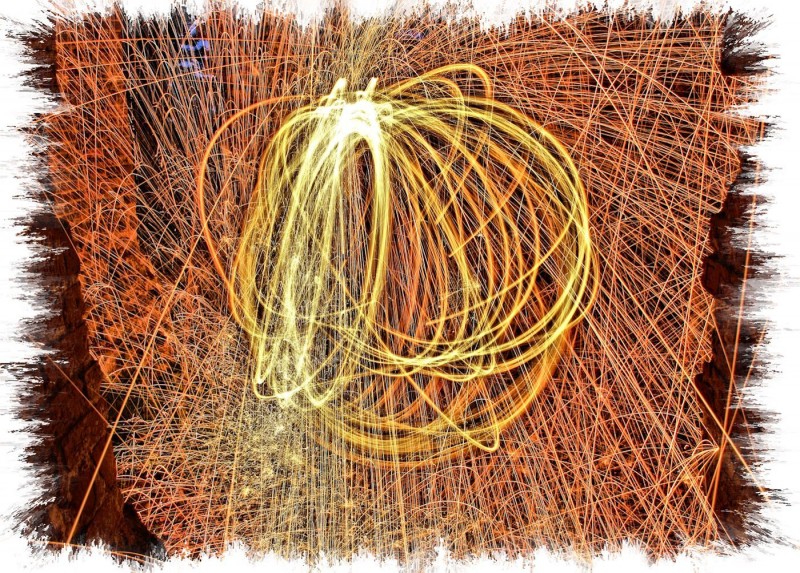
• Whiz That Wire Wool • by Steve Maidwell •
Shutter Speed: 16 Seconds
Aperture: F9.5
ISO: 100
White Balance: Auto
Click image to view large
In order to create the orb shape, spin the cable around in a circle. Then, while spinning, start rotating your body around the pivot point.
Spinning the wool in a circle without rotating around the pivot point will make a two dimensional Circle. It does tend to also light up the person doing the spinning. This creates a ghost image of the spinner. These are just as effective as the three dimensional orbs. Trying out different things is what it is all about!
You will need to test, and change, the settings on the camera to get the exposure right. It may take a few shots to get it the way you want it, but it is worth the effort. Don’t expect to get a correct exposure or final shot with the first try. After the first three or four shots you will get the hang of it.
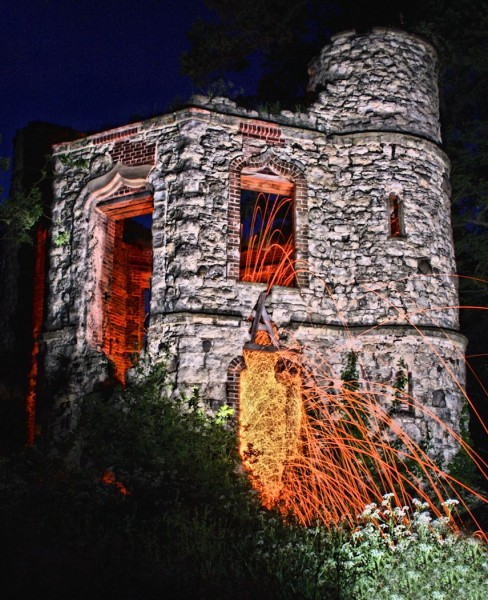
• Sparking Tower • by Steve Maidwell •
Camera settings for this image…
Shutter Speed: 30 Seconds
Aperture: F8
ISO: 100
White Balance: Auto
Click image to view large
Safety
Your safety is very important! For safety, wear a hat or hoodie, long sleeves, long trousers, shoes, gloves and goggles. This prevents your hair or clothes catching alight.
Allow the whisk to cool down before touching it, it will be very hot.
Have a fire extinguisher and a jerry can of water near-by, just in case a spark accidentally lands on a patch of dry grass. It can and WILL catch fire, especially if you are doing this in dry conditions. Very wet conditions are much safer.
Spinning wool in remote places helps because it draws less attention to yourself. You could attract unwanted attention from the authorities in public places.
Happy Spinning!

