Tag Archives: Buying equipment

How Safe Is Your camera sensor from dust?

The camera sensor is incredibly sensitive to dust. Your shots can be ruined!

The camera sensor is incredibly sensitive to dust. Your shots can be ruined!
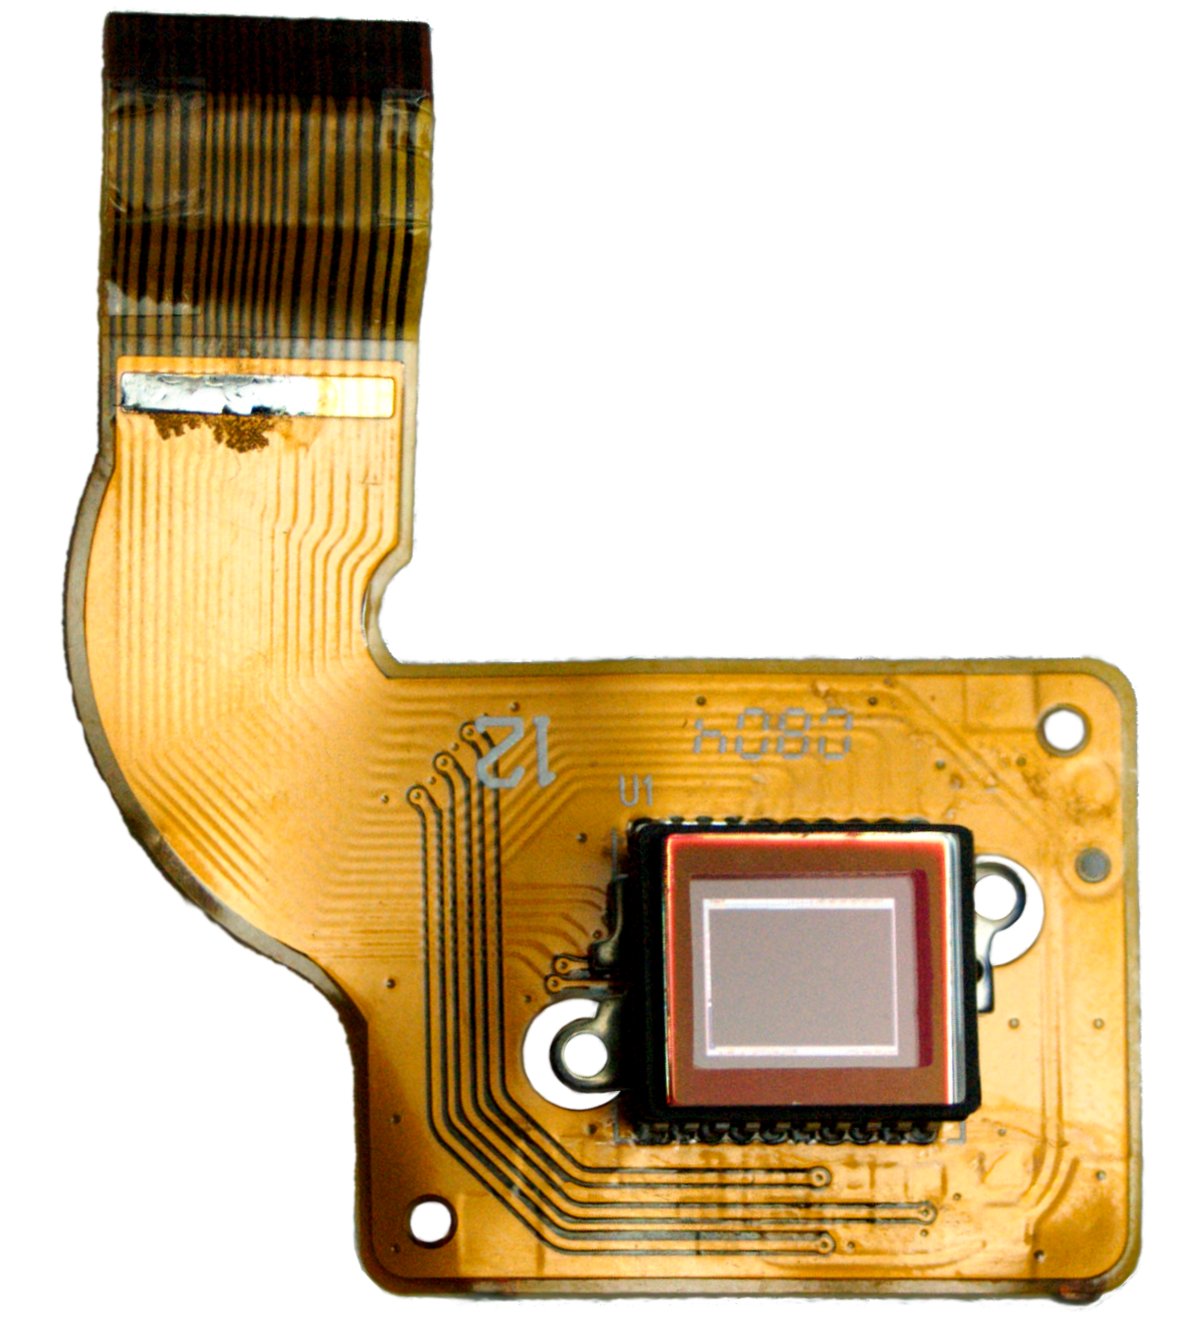
Image Sensor picture curtesy of Wikipedia  External link - opens new tab/page

Your image sensor is your camera!

Without it, you have no means of taking pictures. It makes sense to look after it and to prevent dust from getting onto the working surface. What can you do if it does get dust or other substances on it?

How does dust get onto your sensor?

In a variety of ways… The main entry point is the lens hole. Every time you open your camera, you expose the inside to dust. It is impossible to avoid this. However you can minimise the potential for dust entry…

  • Avoid any opening of your camera unless necessary.
  • Avoid dusty environments. Wipe down your camera with a slightly damp cloth and wipe dry before opening.
  • Avoid windy environments. Get out of the wind before opening.
  • Avoid damp environments: dry before opening. Moisture kills cameras and takes dust inside.
  • Hold your camera with the lens hole pointed toward the ground so that dust/skin/hair cannot fall into it.
  • Avoid having an open lens hole for any longer than necessary.
  • Do not breath or blow directly into the lens hole!
  • Avoid opening the camera in the warm soon after coming in from the cold. The same when entering air conditioned places from hot out-doors. Temperature differences cause air to be sucked in and moisture to condense inside the camera. Allow several hours to equalise temperatures inside and out before opening.

Some cameras leak in other places too… The battery cavity, plugs and jack holes for cables may allow air and dust inside. Every time you put a battery into the camera you are creating a piston to push air (and dust) into your camera. Beware – apply the same rules above for all plugs, batteries and cards movement.

I suspect dust on my sensor – how can I tell?

It’s sometimes difficult to tell if dust is on the lens or on the image sensor, or even if it is on the viewfinder. Here is how it is done.

A dust spot most often shows up on your pictures in the lightest areas. If you are looking for dust, hairs and specks then photographing blue sky does the trick. First, thoroughly clean your lens with lens cleaner and a proper lens cloth. It is best to do the photographs in aperture priority mode. Choose f22 or the smallest aperture. Zoom out to the maximum amount. Then, manually focus to infinity (the camera will probably not be able to auto-focus in a clear sky). Take a few pictures of the sky – the blue areas only.

Download the pictures to your computer. Enlarge them on-screen to the full size. Any dark spots, specks or lines you see on every picture in the same place are dust, other detritus or hairs. Birds, aircraft and UFO’s will be in different positions on the pictures.

What can I do about dust I find?

The simple answer is, clean it. This sounds terrifying. It really is not. It can be done in a few seconds with one simple piece of equipment. You will need to buy a blower. They are simple pump-action nozzles that expel fresh air against the sensor and blow off the dust. Here is the one I recommend… I have used them for years without any problem.


The Rocket Blower

Once you have your blower find out how to lock the mirror up on your DSLR. The mirror lock-up function will be somewhere in your menus. Check in your manual.

The procedure below is best with the camera on a tripod. You can look into the camera with your hands free to use the blower. There will be no danger of moving the camera while doing the blowing.
To blow-clean the sensor with the Rocket Blower:

  1. Mount camera on a fixed position/tripod away from contaminants.
  2. Take off your lens so the lens hole is open.
  3. Turn on your camera.
  4. Set mirror lock-up to enabled in your menu.
  5. Activate mirror lock-up for cleaning (as advised in the camera manual).
  6. There will be a click and you will now be able to see the sensor.
  7. Hold the blower so the nozzle points at the sensor, at about 60mm to 100mm from it.
  8. Squeeze the bulb of the blower about 3 to six times, directing the air at the sensor.
  9. Unlock the mirror lock-up (as advised in the camera manual).
  10. The mirror will click and drop.
  11. Turn off the camera.
  12. Replace the lens.
  13. Retest for dust – re-take sky pictures and view on the computer.
  14. Repeat if dust is still present. (Normally once or twice is enough).

The whole procedure for one test and clean-up should be about five to ten minutes.

Check that the procedure is compatible with instructions in your camera manual before proceeding. Follow any variations suggested.

Common Sense

Be sensible. While you are cleaning your sensor make sure you…

  • Use only air.
  • Use only the type of blower shown above (any similar brand).
  • Do not use compressed air (especially canned). It may damage your camera beyond repair.
  • Do not use other gases (they may contain particulates, corrosives or moisture).
  • Do not use anything to directly touch the sensor.
  • Do not use your mouth to blow into the hole – grease and bodily fluids will be forced onto the sensor surface and will not come off again.
If after three or four attempts you still have dust…

The next level of cleaning involves wiping the sensor with a sensor cleaning fluid and using a cleaning implement. This is a much more delicate operation. It should only be carried out if you are confident dealing with delicate electrical components. I do not cover this operation here. If not confident, take it to a properly accredited service agent for your camera manufacturer.

By Damon Guy (author and Photokonnexion editor)

Damon Guy - Netkonnexion

Damon Guy (Netkonnexion)

Damon is a writer-photog and editor of this site. He has run some major websites, a computing department and a digital image library. He started out as a trained teacher and now runs training for digital photographers.
See also: Editors ‘Bio’.

Five easy ways to learn about the light/shadow relationship

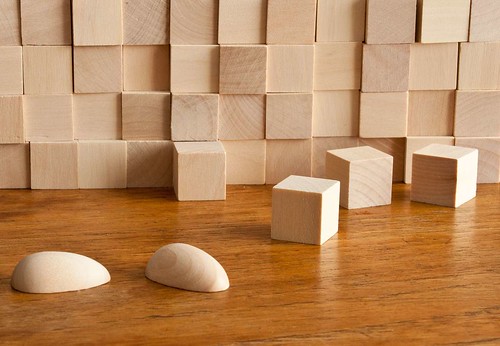
Practice blocks provide a great way to understand light/shadow relationship.

Practice blocks provide a great way to understand light/shadow relationship.
View large About the light/shadow relationship :: External link - opens new tab/page

Our first priority is light – second is shadow.

The relationship between them is one of the great pillars of photography. Learning about them is essential. The key to understanding the use of light is seeing the effect of shadow. In this article I am offering some ways to learn about the light/shadow relationship. If you have not already done so I recommend you read Three little known facts about shadows External link - opens new tab/page first.

The light/shadow relationship – a transition

When looking for a scene the right light and shadows can make or break a shot. We are looking at the light/shadow relationship so we can convey the right message to the viewer. Things with harsh and sharp shadow-lines tend to indicate hard, masculine, tight, dark, angular, tough, solid, artificial, technical. Things with soft shadow-lines showing gradual light-to-dark change are the opposite. They tend to be gentle, mild mannered, lighter, soft, rounded, meek, curved, natural and feminine in appearance. Using the wrong light sends conflicting messages to the viewer. The right light will help your message. The defining aspect of this relationship is the transition from light to dark. The shades between light and shadow are the definition of form. “Form” being the three dimensional shapes we see. The harsh sharp shadows of hard light are great for angular forms. The soft rounded and gradual shadows of a softer light are great for showing rounded three dimensional forms – like faces, eggs and balls.

Creating the right light

Creating light of the right sort is the quickest way to understanding the different types of light and the shadows they create. So, we are looking to bring out the transitional light/shadow relationship through the use of different types of light. This will help us define form in our images and bring out the 3D feel that makes pictures appear to have depth.

You need to be able to create two types of light for these experiments. Hard light – created with an intense beam from a relatively small light source. A torch like this one is excellent for this purpose…

 
The ‘Lenser’ LED Torches

The ‘Lenser’ LED range of torches External link - opens new tab/page is available on Amazon. I personally recommend the excellent LED Lenser 8407 P7 (Black) External link - opens new tab/page torch (advert – left). It is excellent for all types of photography. At night you want a rugged and powerful torch for safety, lighting and to prevent losing equipment. Lenser also sell a coloured filter set for it making this torch great for light painting External link - opens new tab/page too. It’s the top seller (5 star) in the range. Experience has shown it to be an exceptional piece of technology.

You also need soft light – usually generated from a large light source like a window, softbox or photographic umbrella.

Make sure you are using only one light source for your tests. Multiple lights confuse the shadows. The hard and soft lights are best used at the same intensity so you can compare results between them later. If you have one, an off-camera flash with the appropriate modifiers would do the same work. Use a honeycomb or snoot to get the tight beam of a hard light. Use a diffuser or bounce the light off reflectors or walls to create a soft light.

For your first experiments with soft and hard light try out your different light sources. Place a simple object of your choice on a table. For the subject see a small vase, a simple ornament, a small box or something similar. Take a few photographs with both hard and soft light. Then open them on your computer and compare them. What you are looking for is the quality of the shadow. How intense is it – light or dark. How quickly does the light change from light to dark. Is it an abrupt, sharp change? Or, is it a slow, gradual transition? Study your shots to see which you prefer. The light/shadow relationship is best shown in gradual steps. So your shots should show very hard light right through to very soft light.

Experimenting with curves

The use of curved subjects is going to create gradual transitions of light anyway. But curves can also have quite hard shadow-lines if the light is also hard. Using something rounded will show the point. A small ball, an egg or something similar are great for testing the hard or soft light effects. I have several wooden eggs for this purpose. They make test subjects for thinking through individual or group portrait shots. They help in planning shoots and lighting set-ups. They are a very cheap way of making your mistakes before the shoot! Give them a try.

Using a rounded subject, try your hard and soft tests again. This time take shots from at least eight light-positions in a circle round your egg. You must stay in the same position to take each shot. That way you will see all the different angles of the light/shadow relationship as a graduation as you move the light round for each shot.

In your computer ask the same questions about the hard edges and soft graduations of light through shadow. Imagine the eggs are faces. Which will work best on a face – those hard sharp lines or the soft graduations?

Experimenting with lines

For working with more hard-edged objects I have 50 wooden children’s building blocks. I use these in the same way as the eggs. They help me plan lighting and sets/props positions for shoots.

Use one block to start. Repeat the exercise as you did with the eggs. Take eight shots using different light positions around the cube. Keep the camera and cube in the same position from the start. Just move the light to each of the eight positions around the cube. Repeat the exercise for the hard and soft light sources. You will see that the results for a hard edged object is very different to the soft edged eggs in the previous experiment. Concentrate on how the light transitions in the light/shadow relationship shown by each shot.

This time, you are asking the same types of questions… about the quality of the shadow. How intense is it? How quickly does the light/shadow relationship transition, and so on. Again, study your shots to see which you prefer. You will have a different type of result because the edges are much harder than the rounded eggs. The shadow shapes will be very different too.

The wooden blocks are useful. The set I use for this purpose is advertised to the left. It has rounded blocks and a variety of shapes. This gives you the opportunity of trying out a whole range of effects and test lighting set-ups.

Experimenting with specifics

You have experimented with rounded subjects and hard edged ones above. Now it is time to look at the other possibilities.

Try mixing rounded and square edges. Try out a few scenes using the blocks to map out props. If you have other toys around use the blocks to create little still life scenes with the toys or other objects. The idea is to try and creatively use the toys, blocks and egg to make a scene. But you must concentrate on creating sympathetic shadows. Look always for the way you can understand the balance in the light/shadow relationship and make it complement your theme.

Suppose you depict a robot war. Your best light will be hard and very direct. The harsh sharp curves will help create a chaotic and harsh environment. Try depicting a love scene between two figures. You want to use soft, diffused light to carry the romantic mood.

You see my point. You are trying out in miniature what you want to do in the real world to emphasis your message.

I used to use several action figures for testing out scenes with people. But the kids broke them eventually. These days I use cheap wooden artists dummies. They are fun to use and give a very good idea how to set up lighting for poses. The one I use is advertised to the left. It is really great for lighting tests.

The Importance of Eggs

Finally, here is a video which I posted earlier this year. It focuses on the angles of light in the light/shadow relationship. It will show you the point of the eggs exercise. So you can see how it is all done. He shows you the principles. However, you will need to try out for hard and soft light and hard and soft edges – which the video does not show… Enjoy!

The Importance of Eggs (a previous post on Photokonnexion).

Three simple tips to help you buy camera equipment

Three components you should consider above all others...

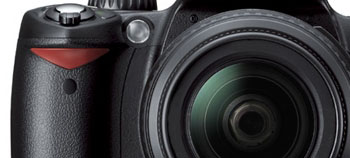
Three components you should consider above all others… the camera body, the lens and you!

When buying new equipment your money is on the line.

And, camera equipment is expensive. To make the best purchase you need to consider three essential things above all else. These are the fundamentals of buying the best kit you can afford.

Seeing is believing…

The camera is NOT the most important purchase. Your lenses are the most important. A camera records light. If the lens is perfect the camera will record it. If the lens suffers from chromatic aberration, optical distortion, internal reflection, inaccurate element alignment or any one of many other defects your record will be affected. The lens is the critical component. The lens forms your picture. Buy a bad lens you will get a bad picture. The camera comes second.

Don’t purchase your equipment mainly around your camera. Think first of what you want to achieve, then consider what lens you need to achieve it. Next, work out what camera you should buy to record the pictures created by that lens. Future additional lenses you buy should be of at least the quality established by your original lens purchase. Lesser lenses would compromise your standards. The lens governs the integrity of your system.

Buy your camera for what you need

Don’t buy a camera body to impress others. Buy a camera body to meet the quality needs of your lens. A body that exceeds the quality of your lens is wasted money unless you know you will be able to afford to trade up your lenses later. You will probably spend more money on lenses than camera bodies for your hobby. So, buy the best possible lens you can afford. Then, with the rest of the money, buy your body to meet the quality standard established by your lens. Don’t buy the camera and get a cheap lens with the rest of the money! Look to the future.

Make sure your camera body is what you need. Modern cameras are pretty sophisticated. They have the ability to out perform the inexperienced user by a long distance. So if you are inexperienced at buying/using a camera, make sure you get the camera you need. If you are buying a camera that has everything then you may not be able to carry it. So consider size weight, functions and image quality – but most important consider what you want to do with it.

There is little point buying a Top-Of-The-Range professional camera, for holiday snaps once a year. There is little point buying a point-and-shoot camera if you want to do high quality macro work. Spend time listing what you are interested in and then look for the camera body to meet that need and match the quality of your lens.

Give yourself time

People often rush into buying a camera. A committed and experienced owner will probably have a pretty good idea from discussions with other photographers and some reading about their needs and aspirations. They will have spent months thinking about it and considering the options. Inexperienced user/buyers don’t have that background. Consider joining a club and talking with members for a while first. Get a range of opinions and try to understand the issues that make the purchase correct for you before buying.

Don’t just walk into a camera shop and hope you will get good advice. You will probably get great advice relating to the person serving you. A sales assistant will think hard about two things… her commission and what she would do in your place. Both those are not about your photography. Spend time looking carefully at your requirements before passing over hard-earned cash. Your judgement will be about your photography.

Take time, learn a few lessons and understand photography before making a big purchase. It has been said many, many times that you can make great photographs on quite cheap equipment. Great photographs are not created on expensive, feature-rich equipment unless you are able to use that equipment properly and have lenses that match its quality.

How to work with reflectors… essential!

Every photographer likes natural light – reflectors give you more.

Using a reflector you can use ambient natural light and modify it to suit your needs. The 5-in-one reflector is probably one of the best buys you can make to extend your lighting.

The five-in-one reflector is a system of reflectors in one package. The system includes a white ring (42inch) with white translucent material filling the ring. The translucent ring is accompanied by reversible covers. The set provide the following properties…

  • Translucent white: creates a strong light diffuser It creates a soft light so it has a vibrant wrap-around quality. Ideal for softening hard light sources, direct sunlight and effectively creating soft shadow edges particularly on the face for portraits.
  • Silver cover: reflects silver-light for increasing specular highlights and high-contrast light reflectance.
  • Gold cover: reflects a warm golden colour for gold colour fill light which is ideal for sunsets, portraits indoors and out, and for special work like fashion highlights, jewellery and back reflection on other surfaces.
  • White cover: produces an even and neutral reflection which will be an effective fill-light for still-life, portraits, product shots and many other situations where light is needed at an angle to the main source of light.
  • Black cover: used to absorb light increasing the shadow on the side used and to dampen the softer lights in the area. Effectively applies definition to glass on the edges of illuminated glass pieces. It will also stop-down sun light and bright hard lights.

In the video the guys from ImprovePhotography go through the different reflectors and how they can be used… more information after the video.
Published on May 23, 2012 by ImprovePhotography External link - opens new tab/page

The use of reflectors is the best way to create a second light-source to produce fill-light for your shots. Reflection or diffusion softens light and reduces its intensity. This is great news because it means that the reflected light looks natural and in proportion to the main light source. It even exhibits similar tonal quality to the main source unless the reflector colours it as gold or silver for example. One side of the shot will be illuminated with ambient light from a natural source or from a flash or other light. The other side is filled by the reflected light. Reflectors are a great way to extend your lighting equipment cheaply and to create great light that is controllably in proportion to the other light in the area. Excellent!

You can buy a five-in-one reflector set on Amazon now…

By Damon Guy (author and Photokonnexion editor)

Damon Guy - Netkonnexion

Damon Guy (Netkonnexion)

Damon is a writer-photog and editor of this site. He has run some major websites, a computing department and a digital image library. He started out as a trained teacher and now runs training for digital photographers.
See also: Editors ‘Bio’.

Can you write? Of course you can!
Write for Photokonnexion...

We would love to have your articles or tips posted on our site.
Find out more…
Write for Photokonnexion.

How do you make a camera lens?

A lens is a high-tech piece of equipment

We don’t see what goes into their production and we also see straight through them. So it is easy to see why lenses are not appreciated as high-tech components. So when I saw these three videos I was suddenly intrigued. They are produced by Canon to show what goes into making lenses. Considering how much work and manufacturing technology is involved we should not be surprised by the cost.

The first video in the series especially fascinated me. I had no idea that creating the glass in lenses was such an involved process. It is not just glass, it is high-quality, high-technology, high production work all in one.

More after the jump…

The grinding of the lenses is also a very precise and time-intensive process. The coatings applied to lenses are high-tech processes too.

In the final video we see how a lens is actually constructed. There is a lot of very detailed and skilled work done by hand. The use use of a whole range of special tools and adhesives makes it inadvisable to take lenes apart!

A personal recommendation…
This little lens cloth is a very handy item. It hangs on any ring or strap right next to your camera. It’s completely out of the way until you need it and then it is right on hand. It is a quality cloth and because if is always near at hand reminds you to keep your lenses clean. Clean lenses have a longer life and your images will be free of dirt smudges.
Lenses are expensive. Protect them for the long-run. Buy now while you remember!


Ideas, Ideas, Ideas… Find Out What Your Kit Can Do.

Google can help you find ideas for trying out with your camera

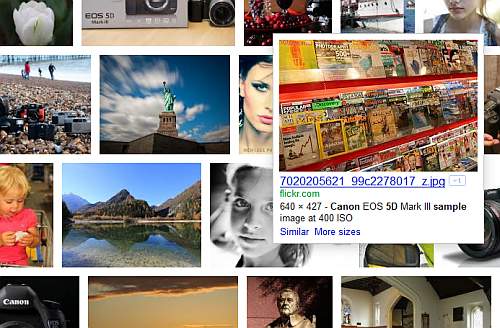
Google can help you find ideas for trying out with your camera. Some results from the Google Images page for "Canon+5d+mkII+sample+images"
Click to see the same search on Google.

Most of the time it’s ideas we need

Sometimes getting new kit is a crusade. Must have this, must have that… buy, buy, buy! When I ask my students and friends why they feel like this the answer is simple. Often photographers feel that the kit they already have is somehow inadequate. Actually, even among my professional photographer friends, I find that most photographers have not fully explored their existing kit. After a little probing it turns out there are a lot of things they have never tried out. It is not kit that is the problem, it is a shortage of ideas. They really need to look for new challenges and to explore ideas.

Here is a quick and simple way to get ideas. Use Google. The search engine has a great ‘image search’ facility. You can put in details of your camera or your lens and see what sort of images other people have taken. I put this search term into the Google images search box… Canon+5d+mkII+sample+images. The + symbol tells Google you want all the words used. What I got back was “About 708,000 results” of images taken by that model. Wow! Now I have some new ideas!

Spend some time looking through those images. I am sure you will have lots of ideas. All of that is possible with your camera or lens or whatever you Googled.

Spend the next year trying to produce images like those on your Google page. If you can improve the quality and extend the ideas you will be developing your skills well. And, you will have a lot of fun.

By Damon Guy (author and Photokonnexion editor)

Damon Guy - Netkonnexion

Damon Guy (Netkonnexion)

Damon is a writer-photog and editor of this site. He has run some major websites, a computing department and a digital image library. He started out as a trained teacher and now runs training for digital photographers.
See also: Editors ‘Bio’.

Filters – Some Reasons To Love Them

Filter making is a craft

Over the years it is possible to collect a lot of filters. They are sometimes a necessary item in the kit bag an sometimes something to be bought out for a particular shot. However, every time I buy one I wonder why they are so expensive. After all they are only a bit of coloured plastic in a frame – aren’t they? Not so! This video shows you how they are made and what goes into making them.

Despite all the modern technology in up to date photography, filters are still hand crafted. Each one may take several days to make, including the ‘cooking’ phase. It is a surprisingly hands-on process involving a number of quite technical steps. When you consider how much goes into making these things it is not surprising there is a heavy price attached. Yet a good quality filter is worth its weight in gold when getting the right shot. Since seeing this video I will not feel so bad about handing over my money next time… and I learned a lot about filters. More on filters after the video. Enjoy!

But… Are they really necessary?

Here are some reasons to love filters…

  • They create great light in-camera saving post processing
  • Some can do things that cannot be done in processing
  • They protect your expensive lens
  • They can create effects that are unique to the scene

The fact that filters can do things in-camera that cannot be done in processing is excellent. For example, a polarising filter gives a blue hue to the sky that is difficult to produce in post-processing. It is also closer to the sky colour we actually see rather than the washed out colour most photos create. Some filters are also great for reducing glare and reflections, making shots through liquid and glass easier. There are a wide range of other effects that they can create too. More on that in another article.

Filters can be expensive but I know they are not a rip-off – they are the result of a time consuming craft process. There are some very good reasons to know more about them. If you would like to know more about filters here are four great books on the subject…

By Damon Guy (author and Photokonnexion editor)

Damon Guy - Netkonnexion

Damon Guy (Netkonnexion)

Damon is a writer-photog and editor of this site. He has run some major websites, a computing department and a digital image library. He started out as a trained teacher and now runs training for digital photographers.
See also: Editors ‘Bio’.