Category Archives: Location

Low light action shots – tips for getting them right

“Low light action shots” is contributed by Melanie Hyde (Bio) of PaintShopPro.com Low light action shots | External link - opens new tab/page.

Low light action shots need care to get them right.

Low light action shots need care to get them right.

Action photography itself can be extremely challenging. Being in the perfect place at just the right time, capturing that incredible moment. Then, hoping to transport anyone who sees your photo across time and space to take them back to the moment the image was taken. It’s a truly a magical experience, whether you’re taking the picture or the viewer.

Given the challenges that come with action photography, removing most of the light only makes it all the more difficult.

There is good news. The same principles of action photography and proper exposure apply. It’s just a little more challenging to get those low light action shots.

Light sources for your low light action shots

When it comes to taking low light action photos, you’ll need to combine the available light sources. This will help to make the most of the situation. First, take a look around and identify whether the lighting is constant or variable.

Constant Light

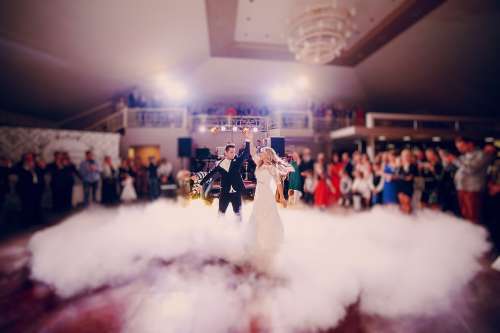
Constant light occurs within your setting when you can isolate out a source for a shot. Framing the shot is important so that the light is consistent for that shot. The next shot may have a different source – you need to isolate the light for that too. For example, if you were shooting a wedding reception, you might capture an image of the bride and groom on the dance floor. Then, you turn around and capture an image of the bride’s parents dancing across the room. Depending on the setting, the lighting may be different between the two subjects but consistent within each shot.

When lighting is consistent, operating your camera becomes much easier. The camera can adjust to meet the needs of the low light action shots. Here are a few points to keep in mind when shooting with constant low light:

  • Shoot in shutter priority mode so the camera can adjust.
  • Use Auto White Balance so the camera can adjust.
  • Manually control your ISO.
Variable light

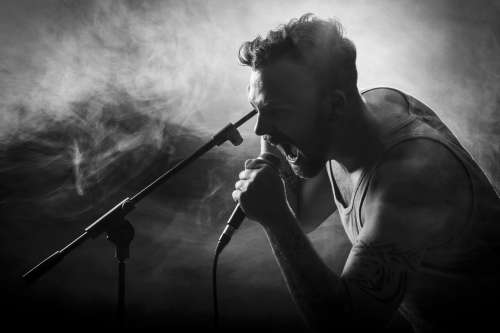
Variable light occurs when light sources are constantly changing and are inconsistent across your field of view. Imagine you’re photographing the lead singer at a rock concert. You may have to deal with strobes, spotlights and pyrotechnics. The constant changes in light sources will cause your camera to struggle to automatically expose the image correctly.

Low light action shots with variable light sources can confuse your camera - go manual.

Low light action shots with variable light sources can confuse your camera – go manual.

When dealing with variable light conditions it’s usually best to go manual. In this situation, remember to:

  • Manually set your aperture and shutter speed.
  • Manually set your White Balance.
  • Manually set your ISO.
Balance aperture, shutter speed, and ISO

You have three ways to control the way your camera exposes an image. Aperture, shutter speed, and ISO. To successfully capture great low light action shots, you must be able to manipulate these elements. Select settings that allow you to capture the highest quality image for the ambient light conditions.

The exposure triangle helps you to keep your shot’s exposure within the capability of the camera and lens. So when going manual your settings should allow these three essentials to balance. Look in your viewfinder to get the needle settled in the centre for a proper exposure. For more detail check out The Exposure Triangle – An aid to thinking about exposure.
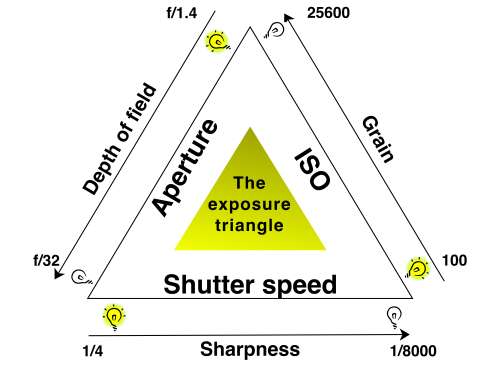
The exposure triangle is an idea that helps you balance aperture, shutter speed and ISO for a good exposure.

The exposure triangle is an idea that helps you balance aperture, shutter speed and ISO for a good exposure.

Start with shutter speed

Low light action shots are by definition going to be in difficult light for your camera. Getting your shutter speed right can be tricky. However, it has a huge impact when shooting movement in low light. The following diagram will help you select the right setting.
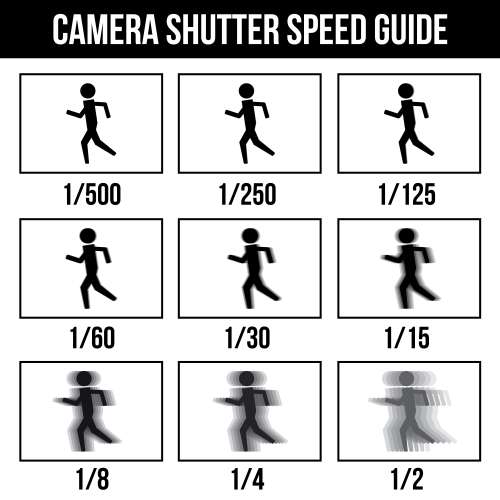
Camera shutter speed guide.

Camera shutter speed guide :: Low light action shots need the right camera speed. If the shutter speed is too low you get blurring.

You have to select a speed that is fast enough to capture the motion clearly and without blur. The speed should still slow enough to deal with the lack of light. For action shots, it’s always best to use the fastest shutter speed that the light allows. It is a balancing act so you will need to practice.

Select the widest aperture for your low light action shots

In action photography, capturing crisp and clean images is usually the priority. When shooting with low light settings, it’s crucial to get as much light to your sensor in the small amount of time that your shutter is open as possible.
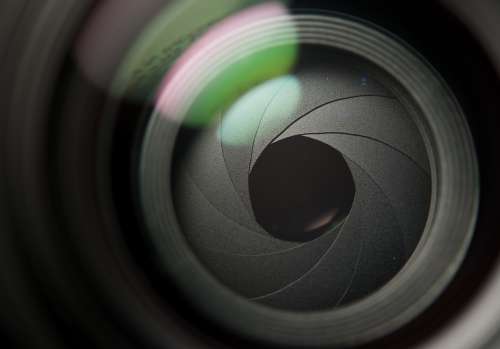
For low light action shots use a wide aperture to increase the incoming light.

The aperture sets the initial amount of light coming into the lens. For low light action shots use a wide aperture to increase the incoming light.

To accomplish this, use the widest aperture that your camera allows. While shooting in shutter priority mode, you allow your camera to do this automatically. Shooting in manual mode however, you’ll need to keep a close eye on your exposure. You need to make sure that your images are not underexposed in the low light.

Using high ISO

Are your images are consistently coming out blurry with your aperture is as wide as can be? Consider stepping up your ISO settings.

Your low light action shots can really win the day if you get your ISO right.

On the dance floor the light is almost always difficult. Your low light action shots can really win the day if you get your ISO right.

By changing your ISO, you alter your camera’s sensitivity to light. The higher the ISO, the more exposed your image will be. Just be cautious: using a higher ISO may introduce more “noise” to your photos. This noise can often be reduced or corrected in a post-processing software like PaintShop Pro Low light action shots | External link - opens new tab/page or Lightroom Low light action shots | External link - opens new tab/page. (Shooting in RAW is especially helpful with noise reduction).

Check your work as you go

Throughout the shoot, use your histogram. (See: Can you use the histogram on your camera?) It will help to make sure you’re exposing your images correctly. The histogram shows the distribution of the type of light in your shot. It aims to help you capture a consistent amount of light across the full spectrum of your image.

The histogram on your camera helps you ensure effective use of light in your exposure.

The histogram on your camera helps you ensure effective use of light in your exposure.

The histogram on your camera helps you ensure effective use of light in your exposure.

You’ll also want to make sure that your white balance looks good and adjust accordingly. In most cases, your camera is going to be able to set white balance automatically, but you may need to tweak it; especially if your lighting is wildly inconsistent.

Increase your odds

Low light action shots are all about being in the right place at the right time with the right equipment.

Use the fastest lens you can find. The wider the aperture, the more light your lens allows to strike your camera sensor. Anything higher than F2.8 will cause you to struggle with exposure.

Set the camera to continuous drive. This equips your camera to capture a burst of images every time you press the shutter release and gives you a better chance of capturing that perfect picture.

Use a fast memory card. Your camera can only capture images as fast as it can write them to the memory card. If you snap too many images in rapid succession, you’ll have to wait for the card to catch up with your camera and you might miss “the shot.”

Be prepared to shoot…a lot. You’re going to have a lot of images that are no good. So remember to keep tinkering with your settings. The key is shooting lots of images at different settings until you get the perfect mix.

Don’t forget to have fun

Low light action photography can be both challenging and fulfilling. As you refine your skills and your eye for lighting, action, and composition, remember to regularly experiment and try new settings.

Comments, additions, amendments or ideas on this article? Contact Us
or why not leave a comment at the bottom of the page…

Like this article? Don’t miss the next — sign up for tips by email.

Looking for the natural detail

Looking for natural detail :: It is all too easy to miss the finer details in nature.

• Looking for the natural detail •
Casual observation often misses the natural detail in a scene. Most of us are guilty of walking past the fascinating detail and seeing only the bigger picture.

Getting closer to the riches.

“I’m sure we’ve all walked along a beach, enjoying the moment. A time to kick off shoes, socks and the shackles of daily life. To relax in one’s own world, exploring new surroundings. But do we soak up all we see around us or do we merely pass by, with little more than a cursory glance? To stop and look closely, could be considered a luxury – but then why not? Enjoy all the riches a beach has to share, it fuels our memories all through the winter time. Is it real, or just a dream?”

These are the opening words to a sequence from the second presentation in my Hebridean Trilogy, entitled “The Island Dream”. And how true they are. I am sure we have all been guilty of overlooking the finer natural detail, spread out as it is, all around us.

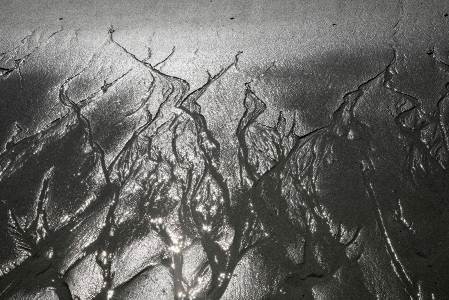
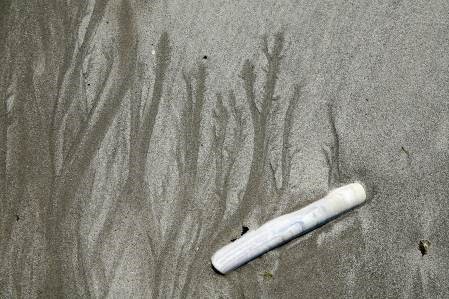
Natural detail :: Patterns left by the falling tide as the sea, sand and peat mingle

• Water patterns in the sand •
Patterns left by the falling tide, as the sea, sand and peat mingle on a Hebridean Island.

Natural detail – the wonders up close

I am often on my knees, on a beach, photographing the wonders to be seen up close. Whether they be patterns left by the falling tide, as the sea and the sand and the peat mingle together, or broken shells who have ended thier life by being smashed in the endless surf.

You don’t need specialist equipment or Macro lenses to capture this natural detail. Most cameras have a close up feature incorporated which adjusts the camera’s settings accordingly. With your feet and legs set firm in the sand, and holding the camera tightly, you can almost replicate a tripod. This ensures images are sharp and in focus where they have to be.

Natural detail :: Shells which ended their life smashed in the endless surf.

• Broken shells •
Shells which ended their life smashed in the endless surf.


You may also need to consider lighting. We photographers often keep the sun behind us. When crouched on the beach your subject could be in deep shade. This is tasking the camera too far. Perhaps a bright but overcast day would be better, avoiding strong directional light which may cause camera sensors to work overtime.

A quiet, wondrous place

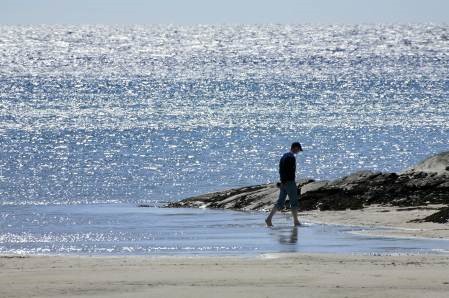
A quiet beach in the right light can be a wondrous place. Try mooching along the sand, being careful not to leave footprints where you may later wish to photograph. No need to rush either, enjoy the rare moment.

Natural detail :: You can almost replicate a tripod

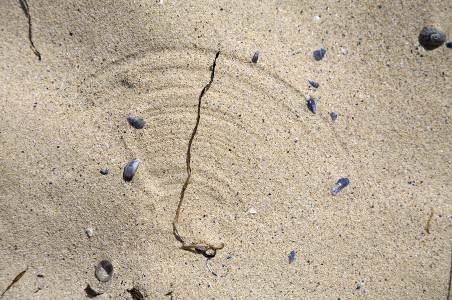
• Detail in the sand •
With feet and legs set firm in the sand you can almost replicate a tripod for your natural detail shot.


I recall a visit to Harris, in the Outer Hebrides. One beach offered me countless opportunities to photograph the finer points of natural detail. I must have spent several hours, in glorious warm sunshine, ambling along the shore line. I can’t recall now how many images I got. It must have been several dozen. With digital, if the shot doesn’t work for you, at least you can delete it later. In the days of colour transparencies, you couldn’t delete them and each shot had a cost attached. Even then you couldn’t see how it had come out!

Work the scene

So my advice is to find a suitable beach and “work it” hard, but in a relaxed fashion. Enjoy both the atmosphere and the images you find.

Natural detail :: On a beach there's fine detail is all around.

• Fine detail everywhere •
Find a suitable beach and “work it” hard. The natural detail is all around.


Photography should be fun and not a chore. I used to be most concerned if, after 3 or 4 weeks shooting in the Hebrides, I came home with very few images. Nowadays it doesn’t bother me so much, as I have revelled in the hidden beauty of the wonderful Hebridean Islands.

Comments, additions, amendments or ideas on this article? Contact Us
or why not leave a comment at the bottom of the page…

Like this article? Don’t miss the next — sign up for tips by email.

Ruari Cumming ARPS (contributing author)

Words and images by: © Ruari Cumming ARPS/Hebridean-Island-Images.com
Ruari has been photographing the Hebridean Islands for many years. He is a distinguished photographer holding the ARPS award. He continues to take stunning pictures of the landscapes, beaches and people of the Islands. He also regularly gives talks on his work. More… Hebridean Island Images Hebridean Island Images | External link - opens new tab/page

What you can learn from candid photography

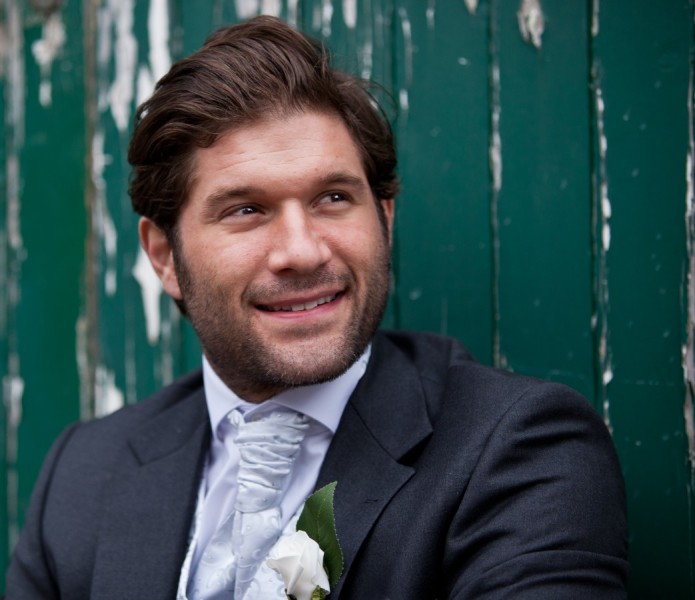
Groom • Candid photography :: getting the shot is a pressure.

• Groom •
Candid photography – getting the shot is a pressure. Weddings are times when you need to work particularly fast and accurately. •

Responding is a skill.

When starting on the path to disciplined photography we’re told to slow down. Take careful, measured and pre-visualised shots. We are told to stop trying to frantically pepper the scene with shots. Take time. Take stock. Think everything through. The aim is to get the shot under control.

A good photographer often needs to respond rapidly. The careful, measured approach still applies. They still have to get the picture. However, the pace of a situation demands swift shots. The practised photog can respond with speed and accuracy. Practice at candid photography is a great way to realise those skills for yourself.

Candid photography and practice

The aim is to make a clean, sharp, well composed image. The nature of a candid shot makes that difficult. While trying to make a success of your candid photography some conditions may apply. Some of those may contradict each other…

  • The subject may not know you are going to take a picture.
  • The subject could know you are going to take a picture.
  • The subject may be unpredictable.
  • You will need to be very quick.
  • You will need to be able to get a sharp image despite speedy working.
  • You may have to take several shots (eg. not dozens).
  • Your subject should be in an interesting position.
  • The subject needs to to be in an interesting context in the scene.
  • You should anticipate the shot (rather than getting lucky).
  • You will have your camera ready and settings correct for the shot.
  • You will have only a microsecond to compose the shot.

You just do not know what you are going to encounter until you have to deal with it.

Dealing with all that may seem a tall order. Especially if you are told not to machine-gun the scene with shots. Haste and frantic bursts rarely lead to good luck. Actually, it is not about doing all that at super speed. Like everything you do in photography, candid photography requires preparation, practice and control.

Equipment – knowing what you can do

NO! Do not go out and buy yourself a micro-weight, super-camera. Up-to-date bells and whistles are not the point. Instead, look for simplicity. Sometimes the best camera is an old and familiar one. What we want for this exercise is knowledge.

The best possible way to get fast with a camera is to know what it can do. The lens too. If you are familiar and well versed in using your equipment you will automatically respond to the scene. Here is an example.

In candid photography control of depth of field is essential

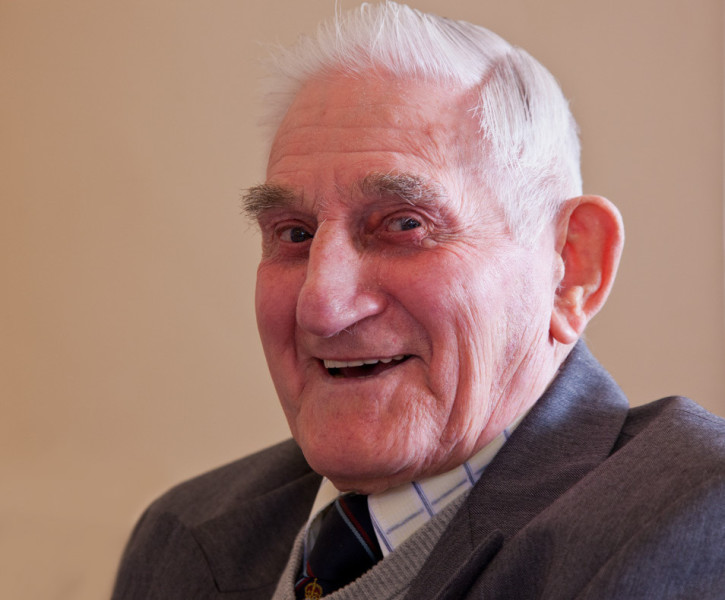
• Impish grin •
Keep the subject in focus but the background is frosted out.
In candid photography control of depth of field is essential
(Click to view large)

This shot was captured as this lovely man turned from a conversation. He was talking to someone on his right. I was ready for his turn toward me. His impish grin as he saw me really made the shot.

I wanted a depth of field that had his head and face sharp. I also wanted the background indistinct. Notice the sharpness is lost just on the far shoulder. My lens was set up to have a depth of field of about 400mm (about 15in to 16in). But there was no measurement involved. This was an estimate. It involved knowing the depth of field at my distance from the man, and using the right aperture. This capture is the result of knowing the lens and camera combo really well. It was a practised shot using very familiar equipment. The successful candid photography came out of the practice and familiarity.

Equally, it is easy to get the shot wrong. Depth of field, especially at close range, is fickle. It is easy to get the tip of the nose out of focus, the eyes and face in focus, and the hair out of focus. It is important to look at the variables involved. The aperture size and distance-from-subject control the depth of field. So, try the exercise below using manual settings.

Take a bright coloured builders tape measure. Place a small object beside a mid-point on the measure. Take a photo of the object down the measures’ length. Use a wide aperture. Check out the depth of field by looking at the measurements that are sharp. Now by varying your distance from the object see how much you change the depth of field. Do this for a wide range of apertures. With experience you will get a feel for controlling the depth of field. With twenty or thirty variations you should get a feel for the depth of field.

Settings

Aperture is one setting. ISO and shutter speed are important too. Getting a feel for your equipment means getting familiar with how these settings work.

Candid photography often involves working in darker lighting. Parties and indoor sessions, weddings in churches and in evening light all require wide apertures. You might use flash. But in a lot of situations that may not be practical or desirable. So using a high ISO setting (more sensitive sensor) will allow you to work effectively in lower light. So, lower the light where you are working with the tape measure. Raise the ISO and repeat the exercises. Get a feel for how you can vary the exposure by changing the ISO.

Needless to say you can vary the shutter speed in similar ways. Try the exercise again. This time keep the aperture and ISO fixed and change the shutter speed up and down through a range of shots. [More on varying shutter speed].

Learning to use your settings manually takes more than one session. That is important. You can gain a lot by training yourself to be sensitive to the settings. Working toward good quality candid photography can really help you gain that sensitivity. Poor photographs of faces and people are immediately obvious! You get great feedback from the experience of poor shots.

Composition – seizing the moment

Candid photography is about seizing the moment. You need to use good settings. You also need some understanding of composition. This means working to get your subject in the right environment. They will have an appropriate pose and possibly the right context or behaviour too. Without all these coming together the moment is lost. Setting it all up takes some thought.

Normally people do candid photography with some idea of what they want to achieve. Random wanderings are normally unproductive. Luck follows more often from preparation and forethought than stumbling upon a notable event.

So, have a good think about your scene composition….

  • Set yourself up in a viable position ahead of the shot.
  • Think about how the light is placed in the scene overall.
  • Place yourself for the right background on the far side of the shot.
  • Fix the camera settings for the composition ahead of the shot.

In other words be prepared. Then, when the right moment comes along, you will have the minimum to do. A little composition, framing the shot, is essential. A tweak of the focus possibly… But essentially – you should be ready.

Now you stand the best possible chance of getting the shot.

Candid photography is successful when it all comes together

All this preparation and practice is about getting you to the moment when you take the shot. Making a success of your candid photography is about three things…

  • Knowing your settings.
  • Practice with and knowing your equipment.
  • Forethought about the scene.

Having everything ready is the key. Then when all the elements of the scene come together all you do is frame it and capture. If you succeed in that, you will also make a swift shot. Because, in fact, you have little to do. Speed and accuracy is about being ready with everything and having the minimum to do when the right events pull the shot together.

Comments, additions, amendments or ideas on this article? Contact Us
or why not leave a comment at the bottom of the page…

Like this article? Don’t miss the next — sign up for tips by email.

Damon Guy - Netkonnexion

Damon Guy (Netkonnexion)

Damon is a writer-photographer and editor of this site. He has run some major websites, a computing department and a digital image library. He started out as a trained teacher and now runs training for digital photogs.
See also: Editors ‘Bio’.
By Damon Guy see his profile on Google+.

Island images – island life… a photographers approach

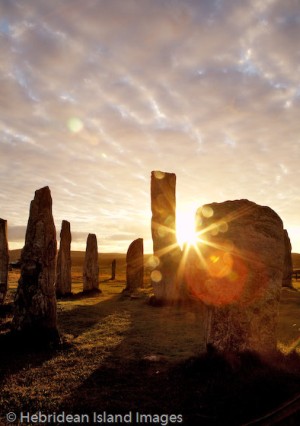
Callanish, Early Dawn - great island images

• Callanish, Early Dawn •
Taken on the Isle of Lewis – Callanhish stone circle.
Image from ‘©Hebridean Island Images’ by Ruari Cumming, ARPS

If tranquillity is what you want…

Many places in the world are still untouched, but few are so close to the bustle of the UK. The Hebrides is a chain of islands off the Scottish coast. What a pearl. I love this wonderful place. Many years ago I spent quite some time there. I fully intend to go back.

Wonderful island images

If you love rugged and interesting coastlines, old ruins and mysterious stone circles, then you will love the Hebrides. There are more than fifty larger islands and hundreds of smaller and uninhabited ones. There’s a lot to see. And, there’s plenty to offer the photographer.

There is a thriving local tourist industry. It does not ruin the isles. It caters well for those looking for the taste of some rugged island air. All levels of accommodation are available. Some of it all year round. It is mostly run by local people. It is low-key, in keeping with the local area. You can find out more about staying there on Visit Hebrides  External link - opens new tab/page.

There is so much to photograph in the Hebrides. Wildlife, people, the sea and the moods of the local weather. And, there are plenty of the latter! However, for me the most attractive thing about the islands is the rugged scenery. There are some fantastic scenes of mountains and coastline. The fact you can photograph them so close together makes it worthwhile visiting just for that. And, if you love a good walk you could not cover all of them if you went back every year!

Renewing a friendship

Last week I was fortunate to listen to a talk by Ruari Cumming ARPS. He has been an enthusiast of the Hebrides all his life. His talk charted his close relationship with the islands, the people who live there and the life they lead. We saw some great island photographs too.

As a photography club member I hear a lot of talks from enthusiastic photographers. Ruari always adds something new. His trade mark audio visual sequences and island images, with accompanying music, keep the audience captivated. This year his insight into life on the islands caught my attention.

The people

Ruari explored the lives of people he met, their work and the places they lived. Particularly interesting was to see them keep alive wonderful traditions. The local Harris Tweed  External link - opens new tab/page industry is known worldwide. It is based on these out-of-the-way islands. However, it is also a global export cottage industry. I asked Ruari if he had any difficulty getting cooperation from the Islanders for his photography. “No” he said, “In the twenty odd years I have photographed the Hebrides, I have never had an islander refuse me taking photos – they were warm and open”. A lesson there for photographers everywhere. Don’t be afraid to ask.

Island images gallery

I really enjoyed the presentation and the island images from all aspects. Ruari gave an interesting and beautifully illustrated talk. He has a website with a gallery of many of his island images  External link - opens new tab/page. The site also provides information about his talks, presentations and island images  External link - opens new tab/page.

 
Best selling book – Hebrides  External link - opens new tab/page

In Hebrides  External link - opens new tab/page, readers follow Peter May on an odyssey in prose and images, through a history of the Vikings’ ‘Long Island’ and his own deep personal connection with the islands that influenced his best selling work.

Travelling as if alongside his protagonist Fin Macleod, he describes the island life – as bewitching as it is treacherous – his encounter with the bird-hunters of Sula Sgeir, the savage seas of Ness and the churches of Eriskay. With extracts from Peter May’s other books and specially commissioned photographs, this book places his writing and characters within the land that gave them form. Hebrides  External link - opens new tab/page

Peter May is the author of the best selling “Lewis Trilogy”…
The Blackhouse: Book One of the Lewis Trilogy  External link - opens new tab/page
The Lewis Man: Book Two of the Lewis Trilogy  External link - opens new tab/page
The Chessmen (Lewis Trilogy 3) External link - opens new tab/page

Comments, additions, amendments or ideas on this article? Contact Us
or why not leave a comment at the bottom of the page…

Like this article? Don’t miss the next — sign up for tips by email.