Category Archives: How to…

How-To articles… how to do specific things, preparation for, planning, shooting, etc.

Artwork images – record or new art?

Artwork images are not as easy to photograph as they seem.

Artwork images are not as easy to photograph as they seem.
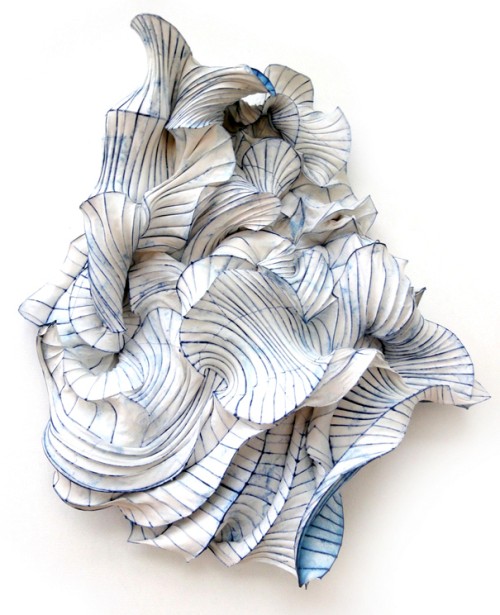
Image of paper art by Peter Gentenaar
More from this artist on: http://www.gentenaar-torley.nl/  Artwork images: Link to Peter Gentenaar | External link - opens new tab/page

Artwork images are sometimes questionable as art

Most photographers look at work by an artist they like and feel compelled to take a picture. Of course it serves to remind them of the art they saw. That is reasonable. The keen photographer thinks differently. They like to see the artwork. They also like to produce photographic art of their own. But more often than not the picture they take is actually a record shot.

It is often said by judges in photographic competition that a sculpture photograph is a record shot. I have said it myself when judging. A pure record is not a piece of art by the photographer. Just exactly what do we mean by that?

Artwork images: Record verses interpretation

An example of a record shot is the photo at the top of this article. This work is by the wonderful paper artist Peter Gentenaar. His work is stimulating and interesting to the eye. Photos of his work bring out the splendour of his art. That is the point. They are less about the photographers interpretation of the art. Instead, they are about repeating the work in its fullness to show the work itself. It is a record. As such, it will show off the skill of the original artist.
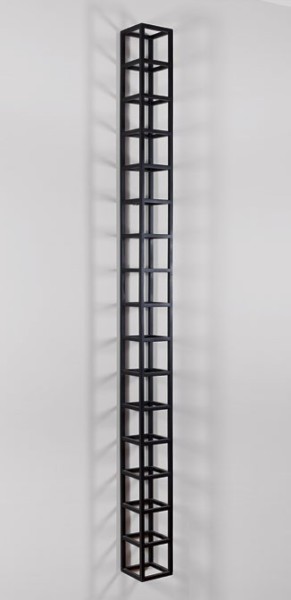
Record shots are a legitimate photographic form. But they are often a record of the exhibit - not new photographic artwork images in their own right.

Record shots are a legitimate photographic form. But they are a record of the exhibit – not new photographic artwork in their own right.

[Seen on www.starr-art.com/ on 30/05/2015
Sol LeWittWall Piece,
1988 Painted wood,
76 x 5 x 5 inches
Published by Edition Schellmann,
Munich and New York.]


Reproduction of artworks in a record style is a proper photographic form. For remembrance, or sales purposes, it is fine. For those seeking to make their own art there is something more needed than simply snapping someone else’s work.

That something extra is a new re-interpretation of the work. The photographer has to invest something of their own into the picture. They have to make more of the original artwork than is presented solely by the work itself. There are a number of ways to do this.

A new interpretation may not be a complete image of the work. It may include the full work, or only be a part of it. The environment of the image, how it is presented, or its framing are all important. Overall there will be something in the new artwork images that the photog makes their own.


How can you make new artwork images from an art piece?
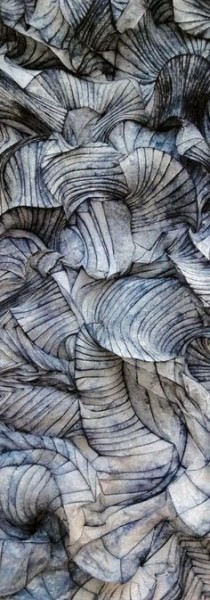
Abstract from a piece of art

In this abstract of another piece by Peter Gentenaar the photographer has not shown the whole piece of work. They have taken a piece of the work that shows the wonderful lines and curves, but as a whole it creates a taste for seeing more.
See: Peter Gentenaar–Paper Magician Artwork images:  | External link - opens new tab/page.

• Abstract artwork images: One way to get something new out of a piece of art is to create an abstract of some sort. Abstract photos can be deeply satisfying to create and provide an interesting image for the viewer to consider. Most of the time abstracts are about making an image of a part of the artwork. An example is shown on the left. There can be a lot more to creating abstract photos than simply framing a bit of the total. The power of abstract is to create the essence of the total.

Abstracts require an eye for what works when the whole is not seen. For more on abstracts see our Abstracts Resources Page.

• Creating an new environment: The environment where sculptures are displayed is often important to the sculpture. Sometimes images are still record shots even if they are not on a simple white background. This link is an example of a Henry Moore sculpture record shot (Author unknown).. The author has displayed the sculpture just as it is with little enhancement. In fact it is almost devoid of its environment. The sky serves only as a backdrop.

The same could be said of this picture of an elephant sculpture (below). The artist has created a superb piece which mimics the body of an elephant defying gravity. The first shot is a pure record shot. But, the second is a superb interpretation of the sculpture in it entirety with an audience, depersonalised by movement blur. Very clever. Both images are taken by the sculptor himself, Daniel Firman. A simple but excellent reinterpretation. Such re-inventions are in themselves artistic. As such they are creating artwork images in their own right.
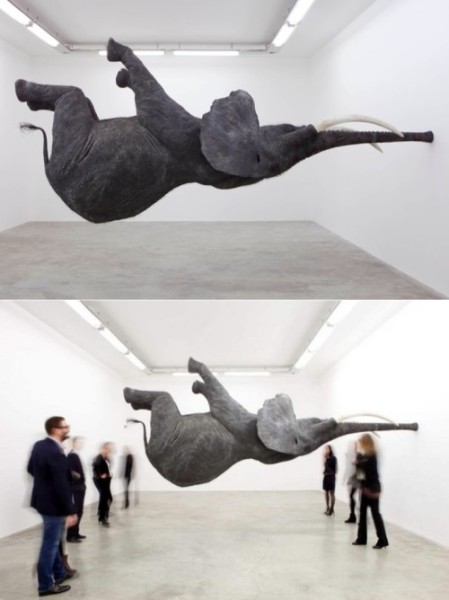
Gravity-Defying Elephant Sculpture

Gravity-Defying Elephant Sculpture by Daniel Firman.
Images by Daniel Firman.

Published in: Gravity-Defying Elephant Sculpture.
(Seen on WordlessTech Artwork Images: Gravity-Defying Elephant Sculpture by Daniel Firman | External link - opens new tab/page 29/05/2015).


Another Henry Moore Sculpture is shown below. This image makes as much of the environment as the sculpture. The artist has created a great panoramic picture using a letter-box crop. The length of the principle subject (the sculpture) is complemented by the almost central position. But, it is highlighted by the mundane, but important line of sheep. The latter gives the eye an excellent weighted contrast to the sculpture in the background. Clever compositional devices like this often create great great artwork images. There is no way this is a record shot.
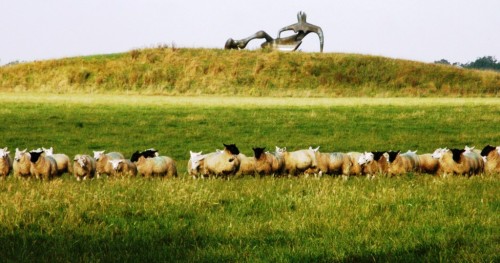
Artwork images: The compositional devices in this image make it an interesting example.

The compositional devices in this image make it an interesting example of artwork images – definitely not a record shot.
(Seen on: Backstrap Weaving Artwork Images: Henry Moore sculpture on Backstrap Images blog. | External link - opens new tab/page.
(Click the image to see full size).

• Adding something: Another way to make something new of a piece of art is to put something new into, or onto, the piece. I leave the artwork images to your imagination here.

I have often heard judges say about record shots, of say a sculpture, “this needs your hat on it”. Alternatively they might say something like, “a cat just here would make the image something different”. What the judge is saying is, the author has created a shot that does not have anything from the photographer in the image. Whereas, with a little thought, or a little prop, or even a person – the picture could be transformed. Instead of the simple (and boring) representation, the author could have added that little extra that makes the image into a reinterpretation – something different. It would be something created uniquely by the photographer.

Works by you are artwork images

The uniqueness of a photograph is something that makes photography interesting. But, make the main subject a simple representation of somebody else’s work, then the uniqueness is lost. A simple record is created. But with simple compositional thoughts, re-frameing, or the addition of some new aspect, you create a new synthesis. One that is unique to you. One that is a real contribution to the body of artwork images. That is what makes photography so special.

The main point to take from this is simple. Think, plan and consider the composition when taking pictures of other peoples art. A subtle treatment of the art piece can transform it into an image only you could make.

Artwork images – further thinking

Which of these are record shots of Henry Moore Sculptures and which are artwork images by the author…
Henry Moore sculpture on Google Images Artwork images - further thinking | External link - opens new tab/page

Comments, additions, amendments or ideas on this article? Contact Us
or why not leave a comment at the bottom of the page…

Like this article? Don’t miss the next — sign up for tips by email.

Damon Guy - Netkonnexion

Damon Guy (Netkonnexion)

Damon is a writer-photographer and editor of this site. He has run some major websites, a computing department and a digital image library. He started out as a trained teacher and now runs training for digital photogs.
See also: Editors ‘Bio’.
By Damon Guy see his profile on Google+.

Backdrops – make them yourself

Create your own backdrops.

Here is a quick and simple way to create a great backdrop. You can produce your own great designs with a little creativity.
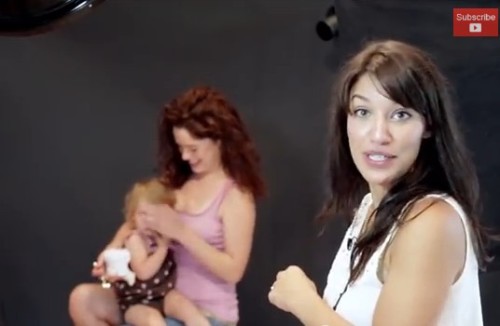
Image from the video below.

The shots and the props can be creative

Great backdrops often make a picture. The simple ones are the best. They do not pull the viewers eye from the subject of the shot. Instead they focus your viewer on your subject. A backdrop should create an environment for the shot that both completes the scene and brings out the best in the subject.

Photography is creative and the backdrops should be too

There are a million creative things you can do with your pictures. Making backdrops can be equally as creative. In addition they add a new spin and level of creativity to your shots.

You can make backdrops out of wood, canvas, sheets, paper, metal… well millions of things. Be careful they are not too heavy. If they fall and hit someone they might be injured. Don’t make backdrops too flimsy. They might fall apart during the shoot. Apart from that the sky is the limit!

Here are some ideas I have seen used to good effect.

  • Autumnal leaves densely stuck to an old sheet.
  • Spaghetti stuck to an old sheet.
  • Chinese lettering enlarged in a copier and stuck on white wall paper liner.
  • Wallpaper of many designs.
  • Hundreds of pieces of string hanging down.
  • Dozens of electric lights hanging down.
  • Hundreds of Wooden scraps nailed to five planks in a random fashion.
  • White back drop paper with lightly pencilled circles drawn all over it.
  • A white sheet “tie and dyed” with various patterns.

I am sure you can think of many more creative ways to enhance your shoot with DIY backdrops. Just take a little time to think over what you need for your shoot.

Here is a Google search for “Creative backdrops images“. Plenty of ideas there to stimulate your thinking!

Some simple principles for good backdrops

Some backdrops are simply not right for the shot. Of course there are those artists who seem to make anything work. For those of us who need a little guidance, here are some principles to help you design your backdrop:

  • Do not make the backdrop stronger or brighter than the subject.
  • Choose colours that bring out the colours in your subject.
  • Use colours and designs that almost fade into obscurity allowing the subject to blossom.
  • Allow your backdrops to complement the subject – not clash with it.
  • Use texture, tonality and hue to vary the background so it appears to be slightly 3D.
  • Be careful that patterns do not emerge unless they are deliberate.

These are not rules. They are guidelines to get you started. Of course as your skill as a photographer and backdrop-maker develop you can make or break these principles. Have fun. Make great shots!

How to make your own studio photography backdrop – video

In the video below there is a quick and simple method of setting up a canvas backdrop. It can be done in a few hours. If you don’t have much space you can make it out of doors. Enjoy this video short and let it help your mind be creative.

Comments, additions, amendments or ideas on this article? Contact Us
or why not leave a comment at the bottom of the page…

Like this article? Don’t miss the next — sign up for tips by email.

Damon Guy - Netkonnexion

Damon Guy (Netkonnexion)

Damon is a writer-photographer and editor of this site. He has run some major websites, a computing department and a digital image library. He started out as a trained teacher and now runs training for digital photogs.
See also: Editors ‘Bio’.
By Damon Guy see his profile on Google+.
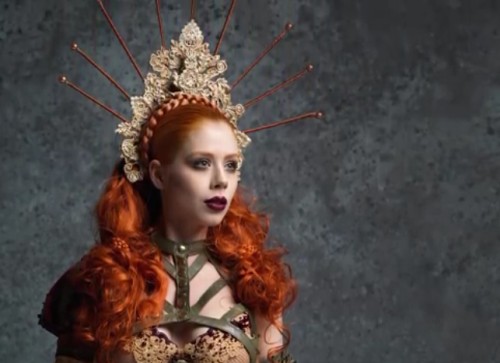
Buying Lenses – a quick guide…

Buying lenses

Buying lenses is not as straight forward as it seems. There is a lot to consider.

Critical features to consider when buying lenses

The key to buying lenses is knowing what you want to achieve with your purchase. It is also important to have a clear idea of your budget. However, there are a whole range of other things that have an impact too.

There are a wide range of photographic lenses to buy for most cameras. Each has their own characteristics. A lens can easily cost more than your camera. Take care with your choice. The wrong decision can leave you with a lens that is not suitable to your interest.

Getting started on buying lenses

First of all sit down and write down all the reasons you want a lens. Also, write down all the possible things against buying lenses (of any sort) at this time. Try to convince yourself you really don’t need to buy. In most cases of purchase-fever the buyer gets things they don’t want. So, when spending lots of money you should be careful. Buying lenses is a big investment. If you make the right choice then your purchase may last you through a number of camera bodies. So think carefully and make the right decision up front. That way your money will not be wasted.

I have purchased about thirty lenses over the years. Of those, five were bad purchases. Four were impulse buys – not suited to my needs. In another case, a hasty decision meant I bought a poor quality lens. From this experience I have compiled the list below to help you when buying lenses in future.

Some of the basics for buying lenses

1. Focal Length:

  • a. Measured in millimeters.
  • b. Smaller Focal lengths provide wider angles of view.
  • c. Longer focal lengths show less of the scene and tend to magnify the view.
  • d. Distortion may be found at the extremes of focal length.

2. Aperture:

  • a. Measured in f stops (eg.f2.8 [wide open] f5.6 [medium], f16 [small aperture]).
  • b. Wide aperture lets in most light – faster shutter speeds possible (eg. F2.8).
  • c. Small aperture lets in less light – requires longer shutter opening (eg. F22).
  • d. Wide aperture provides short depth of field.
  • e. Smaller apertures gives sharpness throughout the depth of the picture.
  • f. Zooms – Aperture size gets smaller with increase in focal length.

3. Stabilisation:

  • a. Slow shutter speeds mean more chance of camera movement, which makes blur.
  • b. Stabilised lenses typically give one or two f stops smaller aperture without more blur; the stabilisation compensates for movement.
  • c. Cost is higher if the lens is stabilised.
  • d. Canon = IS (image stabilisation); Nikon = VR (vibration reduction); Sigma = OS (optical
    stabilisation); etc…
  • e. Stabilisation may be in the camera rather than the lens.
General considerations when buying lenses

1. Optical characteristics

  • a. Glass optical quality varies with the production process and ingredients.
  • b. More lens elements/groups reduces light able to pass through the lens.
  • c. High quality optical glass does not reduce light as much as cheap glass.
  • d. Each manufacturer has a specific type of glass for higher quality lenses.
  • e. Optical aberrations come from low quality optical glass.
  • f. Lens optical coatings reduce aberrations and flare.
  • g. Distortions are caused by specific groupings of lenses.

2. Motors/drives:

  • a. Used to drive the aperture control; stabilisation and auto-focus.
  • b. Sometimes noisy – not desirable for wildlife shots.
  • c. Adds a lot of weight to the lens.
  • d. Not necessary on manual-focus prime lenses.
  • e. Some cameras have them only for auto-focus.
  • f. Older lens models have slower, sometimes heavier, often noisier motors.

3. Weight:

  • a. Often forgotten attribute. If you can’t carry it, then it’s no good for you!
  • b. Weight often increases with wider apertures – fast lenses may be too heavy for you.
  • c. Weight will tend to increase the amount of hand-shake movement.
  • d. Stabilisation motors put a lot of weight on the lens too.

4. Sensor optimisation

  • a. Lens focal lengths are usually stated for full-frame cameras (quoted for 35mm sensors).
    But…
  • b. A cropped sensor will still have the same focal length lenses as a full-frame, but image size will multiply it by the crop factor. (See: crop factor).
    So,
  • c. Cropped sensors increase the lenses’ magnification. Eg. Canon APS-C lenses are optimised for the Canon cropped sensor. The crop factor is 1.6. So a 100mm lens on a Canon 450D is actually equivalent to a 160mm focal length on a canon full frame camera like the 5D.
  • d. Different crop factors apply to different manufacturers and cameras.
  • e. Some optimised lenses will not fit different sensor sized cameras – APS-C – check the fit and crop size in the specification for the lens.
More specific issues affecting you when buying lenses

1. Zoom vs. Prime

  • a. Zoom lenses give you a variable focal length; you control magnification.
  • b. Prime lenses have fixed focal length. Move nearer/further to change the angle of view.
  • c. Zooms give you focal control over the framed view.
  • d. Primes tend to be higher quality lenses, sharper, faster (wider apertures).
  • e. Primes more compositionally challenging.
  • f. Primes – colours and exposure control more realistic.

2. Why you want this lens…
Make sure you know why you are buying lenses. Consider these points below:

Fisheye lenses (8 – 18mm on cropped sensor; 14 – 18 mm on full frame)

  • Introduces central focus with peripheral distortion.
  • Highly creative focus provides extreme visual views drawing the eye to the centre.
  • Used primarily for highlighting specific subjects or attributes of the scene.
  • Ideal (according to some) for full-frame sensor work for portraits.

Zoom lenses (long focal lengths 50 to 600mm)

  • Sometimes dubious quality in some parts of the zoom.
  • Flexible for many purposes, but especially wildlife photography at longer focal lengths.
  • Ideal for getting ‘into’ the shot.
  • Creativity related to the placement of the subject in the frame; angle of view variable.
  • Extreme zooms (350 – 800mm zoom ranges)(Very long range lenses greater than 800mm available).
  • Extreme expense – (expect cost around £5,000 for the 800mm sort of focal length).
  • Excellent for specialist wildlife and long range work.
  • Angle of view very limited at extreme end.
  • Very heavy – absolutely requires tripod for longest ranges.
  • Really only supportable for specialist work (professional wildlife photographer).
  • Cheaper to hire for the odd trip.
  • Macro (from around 35mm to 200 mm) (sometimes achieved using extension tubes).
  • Used to get close-up shots of very small subjects.
  • Focal length is artificially extended to magnify for close-up work – aim to get 1:1 or larger result.
  • Can be used for longer views; tends to be at restricted apertures for non-macro work.
  • Great for magnification shots.
  • Great creativity scope.
  • Tilt and Shift.
  • Specialist – for control of where to place sharpness in the depth of field OR how to deal with
    converging parallels (lines in the road or converging verticals in buildings).

Wide angle lenses (16 – 24 mm on cropped sensor) (24 – 35 mm on full frame sensor)

  • Used for getting wide views of the subject; sweeping view across a scene.
  • Some optical distortion at the very wide end accentuates central subjects.
  • Tend to be used by landscapers; often capable of very small apertures (f22 – f36).
  • Standard zoom lenses (35mm to 200mm of varying focal lengths).
  • Provide great flexibility because can change from wide angle to magnification.
  • Quality often highly price dependent.
  • Optical quality variable with change in focal length.
  • Very long focal lengths often have high f-stops (eg. F5.6).

Standard prime lens (50mm)

  • Sees approximately what the human eye sees (full-frame sensor cameras).
  • Slightly wide angle for cropped sensors.
  • Usually good low light performance because of aperture size is usually wide.
  • Approx.. 80mm for cropped sensors – good for portraits.
  • Creativity allows for the same flexibility that the eye sees.
  • Controlled angle of view is determined by photographers position (no zoom control).
  • Standard prime lens (80mm).
Ultimately it is about image quality

When you are buying lenses consider what you are going to get. If you buy a cheap lens you will get a poor picture.

Most modern camera bodies are going to produce pretty good pictures. But if you stick a poor quality, budget lens on a camera it will give you a poor result. A top quality lens will serve you for many years. It will swap between bodies of the same manufacturer. It will produce quality pictures from your body.

On the other hand a poor quality cheap lens will degrade the ability of the camera body. Which will devalue your overall investment. It is pointless upgrading a body to a higher specifications if your lenses are not up to the same performance standard. Buying lenses is about setting your aspirations. Buying lenses of poor quality is about limiting your potential, for now and for years to come.

Buying lenses – checking the various options

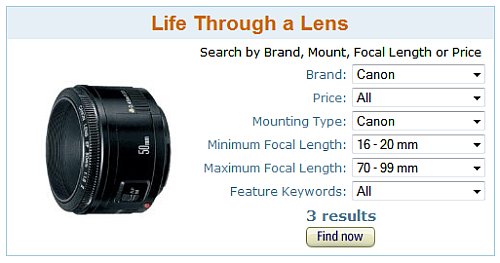
The sheer number of lenses available is daunting. Try starting with a lens finder. This great Lens finder on Amazon.co.uk makes buying easier.
Note:
USA users may not be able to get the above “Lens finder on Amazon.co.uk” link. See below…
Link version for USA users: Amazon.com Lens Finder
Please report problems with these links.


If you are buying lenses enter the important factors for your lens choice. It returns a list of the lenses to suit that purpose. I find this an invaluable tool for helping to me to find a range of lenses from which to make my ideal purchase.

Comments, additions, amendments or ideas on this article? Contact Us
or why not leave a comment at the bottom of the page…

Like this article about Buying Lenses? Don’t miss the next article — sign up for tips by email.

Damon Guy (Netkonnexion) - Author of Buying Lenses

Damon Guy (Netkonnexion)

Damon is a writer-photographer and editor of this site. He has run some major websites, a computing department and a digital image library. He started out as a trained teacher and now runs training for digital photogs.
See also: Editors ‘Bio’.
By Damon Guy see his profile on Google+.
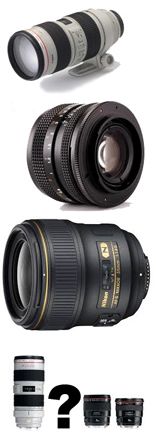
Photography hacks – adapting your equipment

Seven photography hacks :: adapting your equipment

Seven photography hacks

Photography hacks- making something work differently

In most shots our standard equipment does what is required. Yet, the standard shot is not always what we want. Sometimes we want to make some special effort to provide a different effect, a new view. There are many thousands of photography hacks. Each one can give us something different. Some are more radical than others. But what it really comes down to is making our equipment fit our need to get a specific type of outcome.

Regular readers will know that creative work often involves visualisation. Seeing a hoped-for image outcome in your head helps you to have ideas. Such pre-thinking can help you plan how to use or adapt your equipment. To get the desired result you may have to do all sorts of small adaptions. Walk into any working studio and you will see, card, boards, gaffer tape, clamps, flags. They are all there to help jury-rig things into a new way of creating an effect for the shoot.

These photography hacks are the mainstay of studio work and important on location too. You can do lots of simple things to change the light, the colours, the shadows, the effects of light on your lens, and so on. All that is required is to try and think ahead about what you want to achieve. Then, find ways to change your equipment to get the effect. Familiarity with your equipment helps. As you get creative, then other ideas will come to mind. Look around for ways to change things, or to get new effects.

Photography hacks video

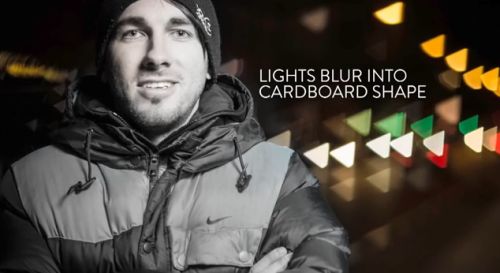
In the video, “7 Simple Photography Hacks” you can get an insight into some of the basic ideas. These are a good start for some examples you can develop yourself. Spend a little time thinking about things you have around you. See if some of them could be used in your own photography hacks.
Provided by COOPH Photography hacks video | External link - opens new tab/page

Messy

The “Vaseline” photography hack in the video can be a bit messy. Only do it on a filter, not the lens. And, try to keep any of the “Vaseline” off the rest of the camera. It is difficult to clean up too. So use an old filter.

Another photography hack for you to try

Here is another idea you can use. It is less messy and gives some satisfying results too…

  • Cut a section out of a fine quality pair of ladies tights (psst… make sure they are surplus first!).
  • Pull the piece tight across the end of your lens.
  • Fix it in place by securing it with elastic bands tight enough over the end of the lens to hold it taught.
  • Take your photo through the material of the tights.
  • To vary the effect, you can make a central hole in the material.
  • Try different colours, try different types of tights knit.

This one is a very old photography hack. It used to be used a lot in wedding shoots years ago. It is just as effective today. Have a go. It is fun.

Let us have some of your shots. We would love to put up a few for others to see.

Comments, additions, amendments or ideas on this article? Contact Us
or why not leave a comment at the bottom of the page…

Like this article? Don’t miss the next — sign up for tips by email.

Damon Guy - Netkonnexion

Damon Guy (Netkonnexion)

Damon is a writer-photographer and editor of this site. He has run some major websites, a computing department and a digital image library. He started out as a trained teacher and now runs training for digital photogs.
See also: Editors ‘Bio’.
By Damon Guy see his profile on Google+.
Settings for overcoming hand-shake blur

Balance your settings to avoid hand-shake blur in low light.

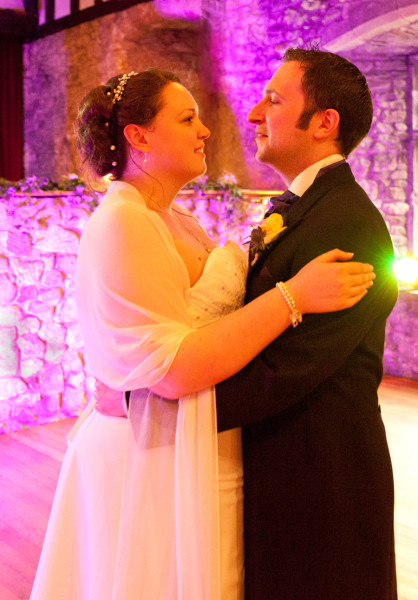
First dance
Low light photography needs a careful balance of settings to ensure a sharp shot and avoid hand-shake blur.

Hand-shake blur and sharp results.

Hand held shots often return blurred results. While using auto-settings the problem does not seem to arise. What is going on and how do you overcome hand-shake blur?

Manual settings and auto

Your digital camera is a sophisticated computer. It has access to a range of powerful programs that make decisions about each shot. When you use auto settings you are handing the camera over to the control of its programming. The auto setting is selected with the green square on the program dial. It makes all the decisions and you just point and shoot. This ‘auto’ strategy is limited. It leaves you unable to make creative decisions about your shot. Depth of field, movement blur and the light or dark emphasis in a scene is beyond your control.

With any of the manual settings on the program dial things are different. Shutter speed (S or Tv), Aperture (A or Av) and ISO settings allow you to get control of the exposure. Once you control these settings you are able to make creative decisions about your shot. But if you get it wrong you might allow hand-shake blur to creep in. Equally, with the right strategy, you can also set up to prevent the effects of hand-shake blur.

What causes hand-shake blur

Low light, long shutter opening or low ISO can all contribute. Hand shake-blur is caused by hand movement while the shutter is open. To prevent it you shorten the time the shutter is open. With a shorter shutter opening any hand movement is not given time to impact on the shot. Very fast shutter opening, say 1000th of a second, freezes the shot. The hand has almost no time to move in that short period. So, no hand-shake blur.

However, short shutter opening time means less light reaches the sensor. A good exposure requires sufficient light. A shutter speed of 1000th of a second would leave the picture under exposed in low light conditions. On the other hand, if you select a 15th of a second, the shutter is open for a long time. Hey presto! Enough light. But, (boo!) hand-shake blur. The shutter is open too long. Your hands have plenty of time to move.

Over coming hand-shake blur is about balance

If you raise the ISO setting, the sensor becomes more sensitive to light. So, raise the ISO until you can set the shutter to around 200th of a second. At that speed it is easier to hold the camera steady.

Of course, if you have to raise the ISO a lot to allow 200ths sec. you will get a grainy picture. Raising the ISO reduces the quality of the shot. Ideally an ISO setting of 100 will give you the best quality photographic result. On an average day you may have to set your ISO at around 200 or 400 to get a 200ths of a second shutter speed. Up to about ISO 800 the quality from most good DSLRs will be fine. After that, the quality of the image will be affected more and more by grain or “Digital Noise”.

Pictures taken in a dark church, or at an evening dance will have very low light. So, as an example, an ISO of 1600 would possibly give you enough sensitivity to work with a shutter speed of, say, 160th of a second. That would allow you to get a hand-held shot without hand-shake blur, if you have a steady hand. But you might also get a little digital noise in the final image.

Getting the right settings between the ISO and shutter speed is a fine balance. You need to raise the ISO the right amount to give you the shutter speed you need. Too much ISO and you get bad quality in the picture. Too little ISO and you will be forced to use a shutter speed that’s too low. Hand holding under these low light conditions may cause hand-shake blur.

Hand-shake blur and aperture

With ‘auto’ shots the camera program takes account of the light conditions. The program sets the ISO, aperture and shutter speed to values that allow shorter shutter opening. So far we have only discussed shutter speed and ISO. But aperture has a part to play too.

If you open the aperture wider it lets in more light. So, you don’t need to raise your ISO so high if you also open your aperture. In our church example above, an ISO of 800 (not 1600), shutter speed of 200th sec. and an aperture of f4 (wide) could create a good exposure.

If your aperture is set at say f11 (small) less light will get through. So, again you are going to need to have higher ISO or long shutter opening (or both), depending on your light conditions. A small aperture, like f11, will give you a sharp picture to infinity. But, you may have to sacrifice picture quality (high ISO) or suffer hand-shake blur (from longer shutter opening).

The wide aperture does have a penalty too. As the aperture gets wider the depth of field gets shallower. So once again we are back to a balance. To hand-hold a camera we must make decisions about all three basic settings – Shutter speed, aperture and ISO.

Other strategies for avoiding hand-shake blur

Camera movement or hand-shake blur can be avoided in a lot of different ways. Sometimes you must work in situations where hand-shake blur is inevitable without more radical solutions. Then there are other things you can do to reduce hand-shake blur. Here are some of them…

  • Lens anti-vibration: Many quality lenses have anti-vibration systems. These sophisticated systems detect hand-shake blur as it happens and counteract it. This might extend your safe shutter speed down to quite slow shutter speeds (say a 60th of a second). While this many not solve all your problems it can help in less extreme light conditions.
  • Tripod: A steady platform will prevent camera movement. If you need a long shutter opening then work from a tripod to eliminate hand-shake blur.
  • Flash: If you are working in a low light situation you may need to raise light levels. A flash unit, on or off the camera, is one answer. An intense flash of light can raise the light high enough for you to work with settings that prevent hand-shake blur.
  • Studio lights: More controllable, but more expensive, these lights can accurately raise light levels to enable you to reliably avoid hand-shake blur and get a good exposure.
  • Reflectors: You can use these to bring more light to where you are working by, say, reflecting from another artificial light or natural light source. Reflectors are particularly useful in reducing the darker areas of a shot. You can reflect the light to just raise light levels in some areas bringing the over all light level up. As the light level across the shot is raised the hand-shake blur can be reduced since shutter speed can be faster.
  • Improve your stance: A better stance is a great way to improve your steadiness.
  • Go to the gym: “What? This is about photography not fitness”, I hear you say. Well, here is a revelation. If your arms are stronger you can hold the camera steadier. A DSLR is a heavy object. Especially after a long session your arms will not hold the camera steady. If your camera is too heavy for you – well, strengthen up. Actually, more strength gives you much better motor control of your hands in any case. You will be able to hold even a point and shoot camera or phone with a steadier hand after regular exercise. Photography, like all other pursuits benefits from a fit body. Improved fitness will reduce hand-shake blur.
The answer to avoiding hand-shake blur

The auto program in your camera may give good results and reduce hand-shake blur. However, it will only do so in average conditions. In more extreme conditions, or where you want to exert some creative control over your shot you need to go manual.

The use of manual settings gives you control. You can control depth of field, subject movement-blur and light vs. dark emphasis in your shots. But, to get the best out of your camera you will need to set it up to avoid hand-shake blur. In this article I have tried to help you understand that the settings you pick can help you control hand-shake blur. Overall, the answer lies in creating a balance between the basic settings of aperture, shutter speed and ISO so that your hand held shutter speed is around 200ths of a second or higher. Lower than 200ths of a second and hand-shake blur is liable to creep into your shots.

Of course there are other things you can do to help raise your shutter speed. I have mentioned some of them. But they all have the same effect. They either stabilise the camera (tripod) or allow you to get the shutter speed high enough so you can steady the camera. So, now you know. Get out there and try to get your settings so you have around a 200th of a second when you take the shot.

Comments, additions, amendments or ideas on this article? Contact Us
or why not leave a comment at the bottom of the page…

Like this article? Don’t miss the next — sign up for tips by email.

Damon Guy - Netkonnexion

Damon Guy (Netkonnexion)

Damon is a writer-photographer and editor of this site. He has run some major websites, a computing department and a digital image library. He started out as a trained teacher and now runs training for digital photogs.
See also: Editors ‘Bio’.
By Damon Guy see his profile on Google+.
Headshot poses – make your portrait right

Headshot poses :: Keep it simple.

• Headshot poses •
Keep the shots simple and try to reduce any distracting elements in the shot.
(Image from the video)

Your portraits need to be suitable for your subject…

When you want to do a portrait your subject will often not know what to do. Headshot poses are usually pretty simple. But the subject will look to you for direction. You will need to help them pick the right pose.

What inexperienced photogs forget is that male and female poses are different. So they tell their subject to pose how they do when feeling good. That may not be right for someone of the opposite sex to you.

Think about the gender of the subject in headshot poses

If you are a female, think carefully about your headshot poses for a male. Maleness tends to be angular, more aggressive in stance. Males are often better seen head on where their size seems a little more imposing. A hard, upright position indicates maleness. So does harder shadow lines on the face and angular light direction.

If you are a male photographer, you may think in male terms. Female headshot poses are better as more rounded poses than male shots. Inclined heads and slightly turned bodies are best – not looking directly at the camera. Find ways to pose your women subjects in a smaller more understated pose. Remember, shadows on a female face are more flattering when they are soft and give a more rounded appearance.

Circumstances may effect the headshot poses too

There are a lot of different reasons to take a headshot portrait. They may have particular poses attached to those circumstances. For example business poses still have a masculine and feminine aspect. However, they would tend to be more understated than a free posing session. The same might be said of guests at a wedding – and so on. So you need to consider why the headshot poses are being taken.

Clothing is important too. Headshot poses tend to include only the upper body. So if the clothing is distracting it can draw the eye away from your subjects face. Don’t try to get your subject to do a heavy make-up or high-quality hair do if you are trying for a natural shot. Let the inner person come out. Headshot poses are best done in as simple way as possible. There is going to be a high proportion of face in the shot. Overdoing other things will detract from that.

Setting the mood for your headshot poses

Here are a few extras for you…

  • Relax. Sometimes you can get very uptight when shooting portraits. This will get your subject uptight too. So before you start shooting, take a deep breath, breath out slowly. Then spend a few moments talking to your subject to put them at ease.
  • Jokes help to relax an uptight subject. If you tell a light-weight joke it will help set a light mood.
  • Subjects often have a very uptight face to start with. Sometimes all the expression goes of their face. It is fun and will lighten things up if you tell them to pull a few faces – do it with them. That will help get a few giggles and they will have more expression after doing it.
  • When doing the poses make sure you complement your subject. Headshot poses are best done with natural facial expressions. Reward those with a complement. “Lovely smile”, “Nice eyes”, “love that expression”, and so on. This builds a rapport with your subject. It helps them feel comfortable as they pose too.
How to Pose someone for Headshots

In this five minute “headshot poses” tutorial you are lead through a range of things to consider…
Tony Northrup

Comments, additions, amendments or ideas on this article? Contact Us
or why not leave a comment at the bottom of the page…

Like this article? Don’t miss the next — sign up for tips by email.

Damon Guy - Netkonnexion

Damon Guy (Netkonnexion)

Damon is a writer-photographer and editor of this site. He has run some major websites, a computing department and a digital image library. He started out as a trained teacher and now runs training for digital photogs.
See also: Editors ‘Bio’.
By Damon Guy see his profile on Google+.
Get down to eye level with animals

Work at the eye level of the animal - get into their world

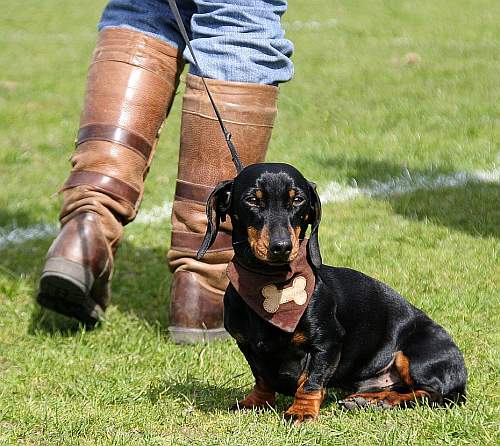
Work at the eye level of the animal – get into their world.

The world at eye level…

Photography can be wonderful because of the alternative views we can get. Often the best photographs are the ones that show us new views, or ones we don’t see from our normal standing position. The world of animals is a particular case in point. Use the eyes as a guide. Work at eye level.

Photographing animals

There is a whole range of animals involved in our lives. Domestic animals and others make great photo-subjects and there is a huge number of different ways to photograph them. Inexperienced photogs often make the mistake of taking the shot from the normal upright standing position. This does two things. It renders the subject “normal” in the eyes of the viewer – because this is the angle they see it normally. This upright position also tends to make the animal seem small and subservient. Both these viewpoints can make your shot look mundane or worse, flat. It will probably be uninteresting to the viewer.

Get down to the eye level of the animal. All of a sudden you are in the animals own world. By engaging directly with the animal at its eye level you create a correspondence with it. Eye-to-eye communication is an excellent way to get to the story of the animal. You see it at its own height. You can also see its world the way the animal does.

The point about this is that you are telling the viewer a new story. It is one they normally stand above. The viewer will have a much better insight from the animal you have pictured. More to the point you will be developing the eye level contact between the pictured animal and the viewer themselves. That contact brings the viewer into the picture. Eye to eye pictures are very powerful.

Eye level contact

Getting eye level contact with an animal is very powerful. The line of sight view the animal has, and the impact of the stare, can all be used to good advantage. If your animal has particularly amazing eyes you are also going to gain from the directness of the shot.

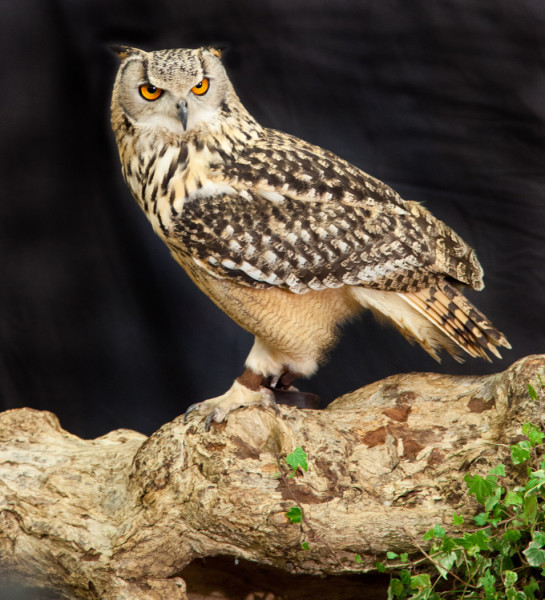
Eye level contact with animals and birds is a very powerful way to draw viewers into your picture.

Eye level contact with animals and birds is a very powerful way to draw viewers into your picture.
(Click image to view large)


Of course you can do the same for animals, in many situations. I enjoy doing photography in zoos. When you try to picture animals there, try to get them at eye level too. To do that you may need to get up a little higher. For example monkeys may be above your head height. I have often found a light ladder or folding step useful when photographing this way. It gets you up to their level.

Getting down low is important too. So be ready to lie down or at least bend for some shots. Try to get your shot right into the eyes of the animal subject you are imaging.

Bring the eyes alive

Eyes tend to look dead if they don’t reflect light. So when possible arrange the light or take the shot to see these reflections. They are called catchlights. If the eyes look alive the dynamic feel of the catchlights will add to the drama of the shot. Catchlights are more easily captured at eye level. So taking a picture on a direct line of sight will help to capture the feel of a penetrating eye.

Eye to eye level

All living subjects have eyes. You will always find that they are most important in the power of your shot. If you get your shot with an eye to eye level correspondence you will connect with that power. Animal or human subject, that power will be there. Your photography will benefit from emphasising it when ever you can.

Comments, additions, amendments or ideas on this article? Contact Us
or why not leave a comment at the bottom of the page…

Like this article? Don’t miss the next — sign up for tips by email.

Damon Guy - Netkonnexion

Damon Guy (Netkonnexion)

Damon is a writer-photographer and editor of this site. He has run some major websites, a computing department and a digital image library. He started out as a trained teacher and now runs training for digital photogs.
See also: Editors ‘Bio’.
By Damon Guy see his profile on Google+.