Tag Archives: Dog

Don’t Photograph in Black and White

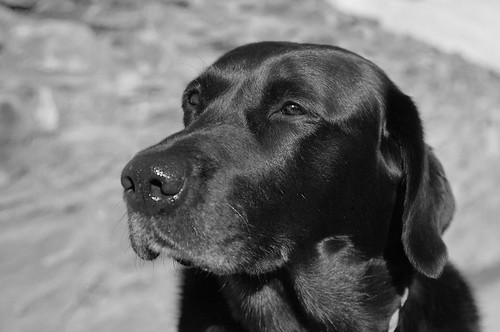
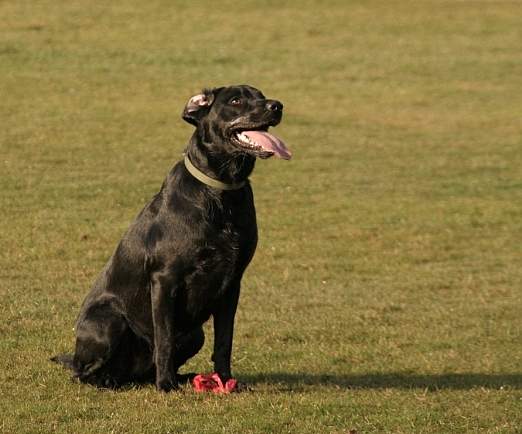
A much loved dog in our family. Is this portrait better in black & white or full colour?

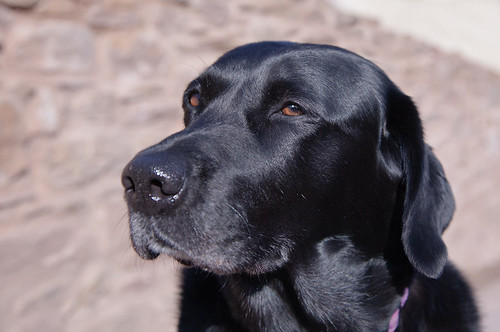
A much loved dog in our family. Is this portrait better in black & white or full colour?

You should be making the decisions – not your camera

I love photographing dogs. They have such a lovely texture in their fur. A friendly dog loves the attention too so you can have fun together with a camera. However, it struck me that this shot might not be that good in black and white. I ‘quite’ like it. But, I am very glad I did not take it in black and white because I prefer the full colour shot. Lets look at the reasoning…

Most cameras these days can directly take black and white photographs. From the push of the shutter button you get a black and white (or greyscale) picture. However, the process that takes place is quite interesting. The digital sensor is just hardware. It takes a full colour shot every shot. Next, the on-board computer does some processing. This processing is controlled by a computer program. The camera manufacturer has worked out what they think is a good black and white picture. The program tells the computer to process the file according to their ideas. It also tells the computer to dump all data from the shot not used in the final picture. The result is an interpretation by a computer program written by someone who was not there when the shot was taken. And, to add insult to injury, the rest of the data is thrown away. The colour can never be retrieved.

It’s possible that the shot is good. However, a lot of personal choice goes into a black and white photograph. The depth of contrasts, the blending of the colours, the tonal variations and the intensity of the blacks and whites are all contributing factors to how my photograph comes out. My black and white preferences are not something that can be accurately reproduced by computer program. And, they certainly cannot be reproduced on every shot.

On the other hand you can take a full colour picture and process it yourself. This gives you the ability to control the factors that make a black and white photograph so potent. And, at the same time, you have also got a copy of the full colour version in case the black and white photo did not work out as you hoped.

In the case of the picture above, I preferred the full colour shot. I would have been very disappointed if I had taken a black and white and it did not work out. Because I would have had nothing of value. Now, I have a full colour shot I like. I also have had some fun doing the conversion to black and white. Nothing lost, lots gained.

One important thing to remember. If you are going to do full colour to black and white conversion it is best to shoot in RAW. This gives you much better colour depth to do the conversion and more control over your tones. If you are shooting in *.jpg files then you will have little control as the camera has already dumped a lot of the data from the picture.

Don’t let your camera make the decisions. Do the conversion yourself and also have the luxury of the full colour version as well.

Doing colour to black and white conversions is fun. So there will be a follow up to this article on doing the processing yourself. In the meantime, here is the full colour version of the picture above.

The same picture as above in full colour. I have the luxury of choosing which I like best as well as full control over the final conversion.

The same picture as above in full colour. I have the luxury of choosing which I like best as well as full control over the final conversion.

The Eyes Have It… nine ways to emphasize eyes

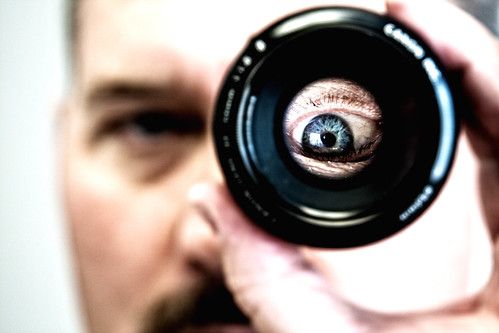
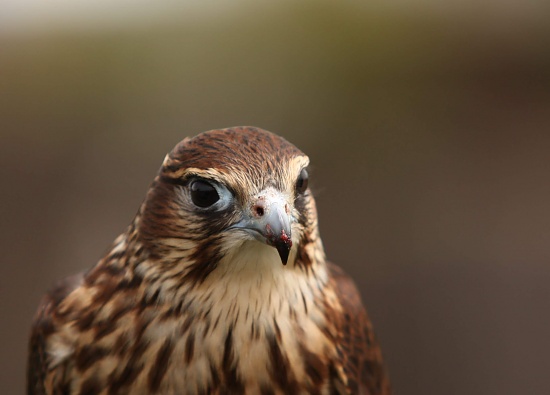
The eyes are often the most important element in a photograph.

"Bison" - The eyes are often the most important element in a photograph. Make them central to your shot if you can. Your viewer will almost always start there.

The most important element of a photograph

The power in the eyes of a person or an animal draws your viewer into your photograph. The stronger and more prominent you make the eyes the more you will capture the attention of your viewer.

There are many ways you can help emphasize the eyes…

Focus:
Nearly always the eyes should have the most sharpness. If the eyes are sharp then you will be able to get the attention of the viewer. You can of course vary your depth of field and your softness for other parts of the picture, as long as the eyes are sharp.

Thirds:
As with any composition the eyes are a significant element. You can really highlight them well if they are on one of the ‘Rule of Thirds‘ grid points. If it is not easy to fit them to a grid point then try to put them on one of the lines of thirds. Both these positions will make them have a more dynamic position in the picture.

Lines:
Often when composing a picture it is possible to use the eyes to join up with other compositional elements. The eyes have two points which implies a line between them. If you are able to put them on a line with something else in the picture the implied line will draw the eyes of your viewer. That implied line is a powerful way to get your viewer involved.

Line of sight:
A very strong compositional tool is to use the eyes of a subject in the picture to point out something else in the picture. This is done by photographing the subject with their eyes looking toward another significant object in the picture. This correspondence helps the viewer to understand the prominence of both the subjects. Lots of expression on the face of the ‘looker’ helps with this one too. Often this is a great ploy for a ‘different’ photograph at a tourist site. Photograph a tourists eyes drinking in the view and you will provide a great interplay between the tourist spot and the other person. You will be showing not only the human element but also the famous place.

On the diagonal:
The eyes are normally seen evenly placed on the horizontal. As that is how we normally see them they are, well, normal. If you ask your subject to incline their head a little so the eyes are slightly on the diagonal they have a new dynamic… er, not normal! Do it, you will see how effective it can be. Not for every picture, situation or face, but a great ploy in a set of photos. The inclined head is often the image that gets picked out. (See: Nadia by Enigma Photos – below).

Rapport:
Often, when taking a portrait, the eyes look alive and dynamic when they appear to make contact with the photographer. Remember your viewer is looking at you when you take the shot, but they are looking directly at the viewer of you shot too. That has a great impact on the viewer. So if you can build a rapport with your subject the eyes really seek out the viewer and have a greater impact as a result.

Catchlights:
The eyes often look dead and lifeless if there are no ‘catchlights’. That is the photographers term for that little flicker of light that you see in the eye… a reflection from a near light source. The catchlights give life, shape and direction to the eye. In fact portrait photographers are obsessive about getting these little compositional elements right in the eyes because they eyes just die without them. Really study catchlights and find opportunities to put them into your shots. Your photos will come alive.

Emotion:
The eyes often convey great emotion. Just look at the eyes of a winner in a sports competition. Wow! They say it all. Now capture the eyes of the loser. Wham! Real impact. Get those eyes in focus right at the moment of the fully expressed emotion and you will have a winner.

Not there…
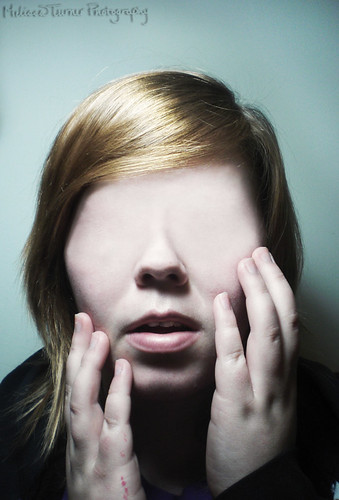
Sometimes it is what you can’t see in a picture that provides the impact. Eyes, or at least where they should be, can be very impactful if they are not where you expect them.

Here are a few pictures that really show the impact of eyes. I hope that some of them inspire and inform your own shots. Why not leave a link in the comments so we can see your eye shots too.

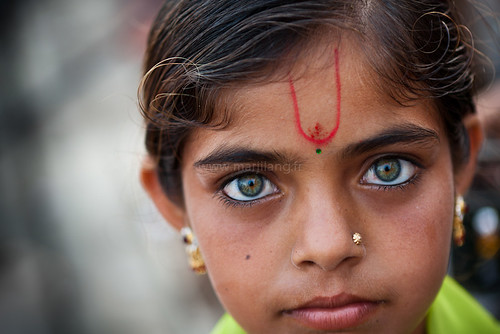
Eyes, Dwarka  Green eyed little girl, Dwarka, Gujarat, India.

Eyes, Dwarka Green eyed little girl, Dwarka, Gujarat, India.

On this link you can see a really captivating pair of dogs eyes. Wonderful focus and excellent perspective… Beagle eyes External link - opens new tab/page

Here are a really dynamic pair of childs eyes. Wonderful capture! Behind these hazel eyes… External link - opens new tab/page

The eyes have it! Papu in Pushkar, India

The eyes have it! Papu in Pushkar, India


Eye Contact

Eye Contact


Eyes wide shot

Eyes wide shot


After Feeding

After Feeding


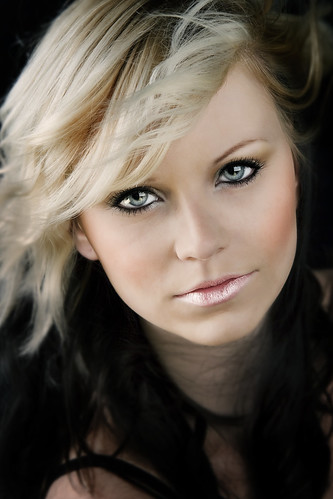
Nadia by Enigma Photos

Nadia by Enigma Photos


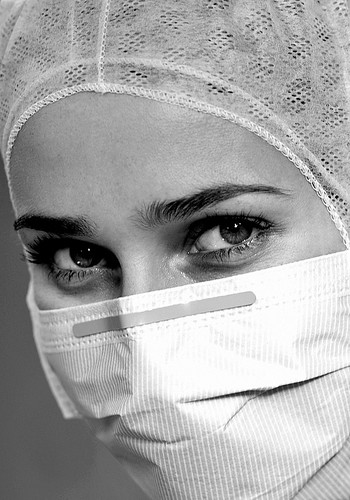
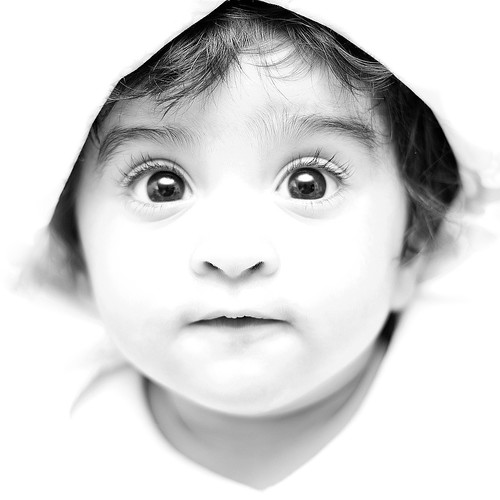
Eyes wide open by umar.s, on Flickr

Eyes wide open by umar.s, on Flickr

This link takes you to a photograph that is exciting because of what you cannot see… Look External link - opens new tab/page

I've lost sight of the things that matter by Melissa Turner., on Flickr

I've lost sight of the things that matter by Melissa Turner., on Flickr


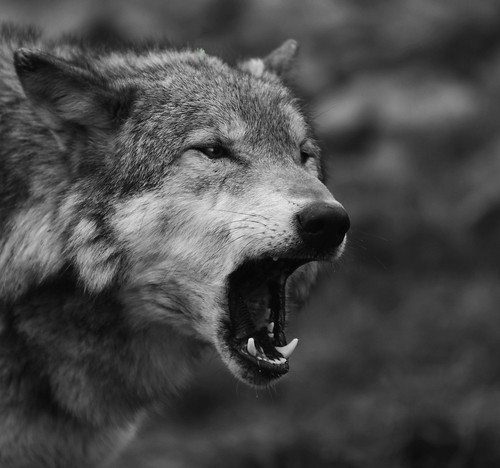
Wolf by Netkonnexion On flickr

Wolf by Netkonnexion On flickr

By Damon Guy (author and Photokonnexion editor)

Damon Guy - Netkonnexion

Damon Guy (Netkonnexion)

Damon is a writer-photog and editor of this site. He has run some major websites, a computing department and a digital image library. He started out as a trained teacher and now runs training for digital photographers.
See also: Editors ‘Bio’.

Photographing Dogs – Part 4 – Practical Issues

A happy subject is a good subject

A happy subject is a good subject

Practical considerations
How many shots should you take? It varies with the dog and your situation. Have no expectations and you will not be disappointed. If the dog is getting bored or spooked stop immediately. They will get irritated if you keep shooting and they are not enjoying it or are uncomfortable. Little and often is the key. Expect to get little co-operation from the dog unless you wait for it to quieten down or it is well trained. You have no option but to do a portrait with the dogs’ consent. Investing a little time to get it comfortable may reduce the shots you take. However, they will be more relaxed and natural.

Taking lots of shots does not guarantee success. A few carefully planned and appropriate shots are better. Your success rate will depend mostly on patience and preparation. As with any photography the ones you think will be great shots may not be so… There will also be surprise results.

Health and safety
It is important to think about health and safety when working with animals. If you are working with your own dog it is easier to keep yourself safe. With luck, you’ll know your dogs reactions to the things you do. A strange dog is different. They can be wild and unpredictable to you. Asking the owner a few questions about what the dog likes and dislikes could prevent harm or injury. While the dog is a photo-subject, look after its safety too. Make sure you have not forgotten dangerous roads nearby, or the dangerous ice, other people and children, other dogs… Always have the welfare of you, other people and animals in your care in mind when taking photos.

Consider these points for better shots

  • If you have a DSLR multiple shots mode is very useful for dog photographers. It captures the animal multiple times and you might get a great shot in less controlled situations, say while its running.
  • Avoid full-on flash. Dogs are easily spooked by it. If you use it reduce the intensity of the flash but make sure the dog is comfortable with it first. Try firing the flash when not holding the camera to your face and make and look completely calm and un-phased. It is best to use always-on lights if you need fill-in light. You can also use a torch or LED light to create catchlights in the eyes, but don’t startle the animal. Get them used to lights first even if only for a minute or two.
  • With flash be aware of eye-shine. I have seen various colours from dogs eyes under different lights. The flash-back can be quite bright if it is silver and it can ruin your shot. Off-set the line of the flash from the direct line of the shot.
  • I love shots of dogs with a fish-eye lens. In close to the centre of the lens the dog’s long nose and depth to the eyes is emphasised. It really seems to accentuate the character of dogs. Keep the background simple.
  • A wide angle lens (not a fish-eye) is best off-set to the side a bit. This really brings the character of the dog forward and the emphasis is on the length of the body and its sleekness.
  • If you are working outside, especially on walks, use a longer lens. This gives you scope for catching the dog at all distances.
  • Light coloured or white fur are easily blown-out under daytime bright sky, brightly lit rooms or studios. If all the details lost in a mass of white your picture loses impact. Measure your light off the animals’ fur and tone down the exposure to ensure the fur is distinct and detailed.
  • Tripods are great if your dog is static. With action shots the tripod is less useful and prevents you following the dog.
  • Props are useful with dogs. They love a toy or two. A range of them helps to absorb their attention. New is best. A badly chewed toy is a distraction for the picture viewer.
  • Dogs are little individuals. Emphasise this by photographing them without a collar. However, be careful where, make sure you can get them back. Don’t endanger them or others without a way to catch or control them.

A happy subject is a good subject
Relax and enjoy your dog photography. If it is happy the dog will enjoy it too. Stress the dog, or expect too much and you will lose the co-operation of your little friend.

By Damon Guy (author and Photokonnexion editor)

Damon Guy - Netkonnexion

Damon Guy (Netkonnexion)

Damon is a writer-photog and editor of this site. He has run some major websites, a computing department and a digital image library. He started out as a trained teacher and now runs training for digital photographers.
See also: Editors ‘Bio’.

Can you write? Of course you can!
Write for Photokonnexion...

We would love to have your articles or tips posted on our site.
Find out more…
Write for Photokonnexion.

Photographing Dogs – Part 3 – Getting the shots

Bright sunlight on a sleek coat creates a nice image

Bright sunlight on a sleek coat creates a nice image

If the surrounding light is good and there is sun to warm the whole scene you will get great dog shots. Early morning or late afternoon walks when the shadows are long is an especially good photography time. Dogs are fun to photograph on the long walk – especially among trees. The sunny glade is suits dogs of all one colour. The dappled or variable light under trees helps relieve the single fur colour. Dogs of spotted or patchy appearance are best in open light. Dappled sunlight through the trees clashes with different fur colours.

The tree filled environment provides great ‘snuffle’ shots. Dog owners will recognise what I mean immediately. Dogs love to get their noses stuck into a pile of leaves or around trees and other forest objects. Snuffle, snuffle… Nose down and actively being dog-like makes a great shot. Your capture of these moments gives away the essential characteristics of the animal and it portrays well in that type of environment. Where possible make sure that nice soft shadows emphasise the body shape. Shadows also bring out the position of the dog in its environment – so work them in where you can. In any good photography the shadow is the shape defining feature that makes the photo have depth and texture.

As with most good modern photography “less is more” is a truism for dogs. If they are snuffling in the forest then try to capture them with an uncluttered background. Try to see them as part of the environment, but don’t make it too complicated. If with children then see if you can capture the animal with them and against say a grassy background. More clutter than that and you lose the focus of the dog to the background or other incidental subjects. With action shots, dog at full pelt or jumping, try to make sure you have worked them into a position where there is a plain background. Then the sleekness of the lines or the position of the animal in the air is captured without distractions round-about.

If you are taking action shots the animal will be busy with the action and less involved in the photography so you can take more shots. Use burst mode (multiple frames per second) to ensure that some come out. When the dog is quiet they may be cooperative. If not then get someone else to distract the dog from your activity as the photographer. That way you will get more shots.

When you are out for a walk with your dog try not to use treats to encourage photographic situations. They will totally distract the dog from doing natural things when they are in a condition of heightened alertness for a hand-feed. It is better to wait and try to capture that type of alertness when they are doing something natural like ‘hunting’ for something in the woods. Wait for them to lie down or to ‘investigate’ or whatever. They will eventually do it. Reserve the treats for more ‘artificial’ situations like the studio or at home when doing photography.

You can excite the “alert” pose or response by fooling the dog that something of doggy-interest is happening. Be ready with your camera, then, when the dog is not looking, throw something into bushes or nearby where it will make a slight noise. This will cause that wonderful pose that dogs do with the pricked up ears and intense stare. This ‘virtual hunt’ expression is a great shot for dogs. You have to be quick to catch it. After the initial pose the dog may rush to investigate. The resulting quick and elevated bounding movement is also worth capturing.

Walking with dogs, especially when in an open or wooded type environment, is as near to natural as you are likely to see them behave. So you can mimic natural noises to get them excited. Try making little noises, squeaks or breaking twig sounds. They love the ‘hunt’ and giving them some stimulus will get them into the mood. As they rush about you have an opportunity to catch this natural behaviour. Stimulating noises can be used anywhere, not just the park, to get the dog interested. So think about the sorts of noises your dog likes and use them in the next photo-session.

Photographing Dogs series links…
Photographing Dogs – Part 1 – Getting Started
Photographing Dogs – Part 2 – What to focus on.
Photographing Dogs – Part 3 – Getting the shots
Next article: Photographing Dogs – Part 4 – Practical Issues

By Damon Guy (author and Photokonnexion editor)

Damon Guy - Netkonnexion

Damon Guy (Netkonnexion)

Damon is a writer-photog and editor of this site. He has run some major websites, a computing department and a digital image library. He started out as a trained teacher and now runs training for digital photographers.
See also: Editors ‘Bio’.

Can you write? Of course you can!
Write for Photokonnexion...

We would love to have your articles or tips posted on our site.
Find out more…
Write for Photokonnexion.

Photographing Dogs – Part 2 – What to focus on

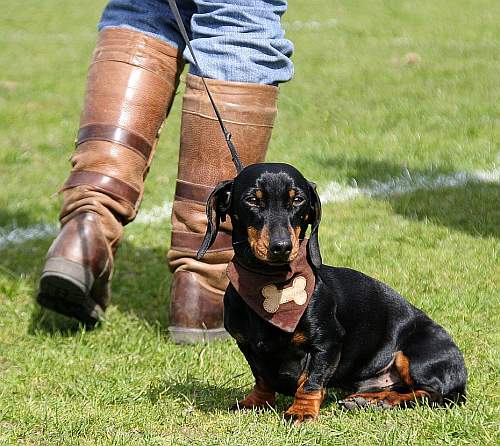
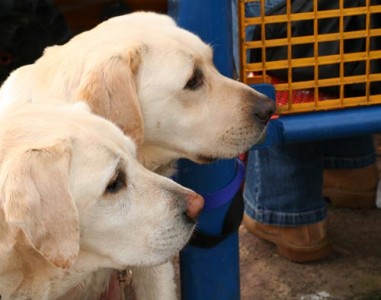
Loyalty - Waiting For Master - It is best to see the dogs eyes Side shots tend to look more like a record than an engaging picture.

• Loyalty - Waiting For Master •

Capturing attention with the dogs eyes

When we see a human our immediate focus is the face. Especially the eyes. It is just the same with a dog. Focus on the eyes and you invite the viewer into the shot. A catchlight in the eyes help too. They emphasises the dog’s expression and helps define its line of sight. Catchlights are the pin-points of bright light that reflect the eye. They bring the eye alive and help to animate the picture.

Pin-sharp focus on the dogs eyes and catchlight is a great way to draw in the viewer to your picture. If the catchlight is pointing at you the shot is even more engaging. Try to find ways to position yourself to capture these reflections.

Dogs eyes are appealing, along with other things

Your favourite pooch is more appealing if you are looking into its eyes. Eye contact with you while photographing will establish a rapport with your viewer in the picture. I think dogs have expressive faces. If you recognise a dogs mood in the face the dogs eyes will help you capture it.

A waggy tail is appealing too. Some of the best dog pictures are taken with an obvious waggy tail. You can often get a dog to show waggy tail enthusiasm by rewarding its participation. A little petting that the dog likes will get the response you want. It will also put some life into the dogs eyes.

The appeal of ‘doggyness’ often comes from the unbound joy-in-life shown by dogs. They love sharing fun with you. Try to capture them enjoying themselves. A favourite toy will help give a focus their behaviour for the shot. Try to make sure the toy is presentable. A photo can be ruined by a horribly chewed toy. It is distracting. Again, with toys get the dogs eyes in the shot.

The best moments to capture a dog are when it is showing affection. Dogs and children make especially cute compositions. Dogs who love kids really put over the feeling of a loving and loyal dog. If you can get the child’s and dogs eyes to meet that is especially appealing. The eye connection is emotive in a photo.

Record shot

The more the dog is taken from the side or looking slightly away the more the shot looks like a record shot. Dogs don’t seem to photograph well from the side unless lit to show off the body form. The side view tends to flatten the picture and makes the shot less appealing. Of course if you are taking a shot of a show dog then it is perhaps exactly what you want. If you do want this, you should arrange the lighting to come from the side of the shot – down the length of the body. That will help sculpt the body shape by creating shadows. Do not use on-camera flash. That will tend to flatten the body shape.

What is the point?

It’s worth thinking about what you are trying to achieve. If you want to see more of the body shape it is better to focus your shot from the face down the body. Make sure your camera is set up to have a deep focus (say, f11 to get a deep depth of field). Try to make the background simple, uncluttered. This will help keep the viewers attention on the dog, especially the dogs eyes.

Loyalty

Dogs love to lie at the foot of their most loved. If you can, make a picture of a dog at the foot of a relaxed family member. The dogs eyes are often soulful in this “loyalty” position. You could get a great photo. There is nothing more appealing to us than seeing protective love and affection.

Wild and free

Dogs love the wild and free moments in life. If you want to emphasis the wildness of a dog capture for the depth of blackness in the dogs eyes. Catchlights, when reduced to tiny spots, emphasise wildness. Pick up on other ‘wildness’ actions too. Tail down and low head and shoulders emphasise menace. A crouch in walking emphasises the hunting poise. One paw off the ground, frozen, alert, is another classic hunt/menace pose. Don’t forget the ‘ready-to-spring’ position – it is a great hunting pounce shot. It is often possible to capture that moment just before someone throwing a stick. Try to remember the dogs eyes when you capture that moment. Look for its line of sight to get the shot right.

Always leave room in front of your dog so they look like they have space to run into. If you bunch their head too close to the side of the picture it is not flattering. It also makes the dog look like it is about to crash into the side of the picture. And, this golden rule applies to the dogs eyes too. If they are looking away from you you must allow space in front of the face for them to look into. Otherwise the benefit of the line of sight will be lost.

Sleep and cuteness

Sleeping shots make great portraits. Concentrate on the lines of the dog. Show its relationship to the surroundings. Sleep often shows vulnerability. So try to find a background that brings it out. Dogs are pretty cute when asleep. However, try to take the shot from the same level as them. If you stand up for a sleep shot all the cuteness is lost and the flatness of the floor makes the dog look flat too.

Portrait work

For dog portraits, the way it is standing, sitting or moving is important. The simplest thing is to just stand there and snap away. But it is a bit hit and miss. When doing a portrait of a dog remember that the most effective shots are taken at its level. Get down to it and really get into its world. Try shooting nose to nose, catch it eating – work with it on its favourite toy. Try to find as many things that you can that complement its way of life down at its own level. Down on the floor with a dog you will capture the dogs eyes more intimately. You will also invite its approach to you. Dogs love you to share their world with them.

Incentives

Use toys, or props, that the dog will enjoy. It’s a good way to get the dog involved. It will also provide a secondary focus to the shot. Remember secondary items can be distracting. So don’t make them too big in the shot. Instead, use props to motivate your dog to play. Minimise the impact of the toy on the photo. Concentrate on the dogs behaviour.

The dog will want to be involved with your shoot. But, there is no use trying to “make” it do things. It must “want” to do them. Try giving treats at appropriate times when photographing them. This will encourage and reward them for the behaviour you want. It will help them be involved in your photography too. You will also get a better line-of-sight for the dogs eyes if you involve them. They will be more likely to look in your direction.

Much of your dog photography will be captures of the dog ‘doing its thing’. Be ready for the behaviour you want. Plan for it. The happy accident is when you have prepared for the shot by watching the dog. Then it does what you hope and you are all ready to click. Working with different dogs will get you different results. So be prepared to change your approach in different situations or with different moods of the animal. The very character of the dog will define the way it is pictured.

Photographing Dogs series links…
Photographing Dogs – Part 1 – Getting Started
Photographing Dogs – Part 2 – What to focus on.
Next article: Photographing Dogs – Part 3 – Getting the shots
Photographing Dogs – Part 4 – Practical Issues

Netkonnexion

Damon Guy (Netkonnexion)

Damon is editor of Photokonnexion. He has professional experience in photography, writing, image libraries, and computing. He is an experienced, webmaster and a trained teacher. Damon runs regular training for digital photographers.
See also: Editors ‘Bio’
By Damon Guy :: Profile on Google+.