
• How to learn photography in 20 hours •
To learn anything you only need to be good enough that you can become self improving.
Learning all photography is a lifetime commitment.
However, Learning enough to self correct and self improve takes just twenty hours. That is just 45mins a day for less than a month.
The most crucial skill in photography is to gain camera control. I am going to show you how to learn photography by gaining control of the manual settings. And, you can do it in just twenty hours from this post.
Going manual involves learning to use the three basic controls. These are ISO, Aperture and Shutter speed. Gain control of these. Then you’ll be able to self improve and correct for the future.
Learn photography – How the 20 hour process works
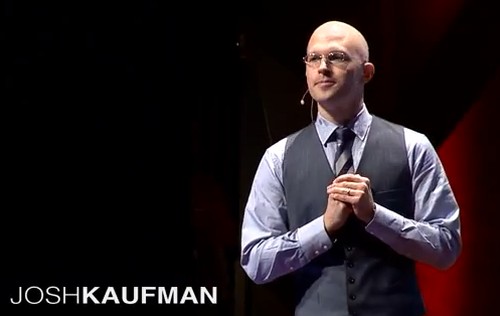
In this video Josh Kaufman shows us how the twenty-hour-learning idea works. It really is simple. It works with any skill – you can learn photography too. First the video, then the plan…
TEDx Talks ![]()
Four steps to learn photography
To invest the 20 hours in the best way, Josh picks out four starter points.
- De-construct – break the skill down into smaller skills.
- Learn enough to self correct – get better, notice your mistakes, self correct.
- Remove the barriers to practice – remove the distractions.
- Practice for 20 hours.
This easy cocktail for learning seems simple, and it really is simple…
Learn photography – The skills broken down
As with any skill there are a very small number of important things to know. To start you on manual control of your camera I have broken down the skills you need. Learn photography with these simple steps…
- Simple skill one:
Learn where the controls are on your camera:
ISO :: Aperture :: Shutter speed
(Use your camera manual to find and work the controls). - Simple skill two:
Learn how to balance these controls. Read:
The Exposure Triangle - Simple skill three:
Try your camera in ‘M’ mode (manual) and discover the needle over the scale you see in the viewfinder. This is described in the above post. - Simple skill four:
Try these settings in broad daylight…- ISO control to 100,
- Aperture to f8,
- Shutter speed to 200th second
These are good settings for a bright day. If you cannot see the needle over the scale with these settings in broad daylight try ISO200. If the needle is still not visible then try ISO400. By tweaking either side of the f8 setting (aperture) in each of the ISO settings you should be able to find the needle. Tweak the settings – experiment.
- Simple skill five:
Once you have the needle centred, you have found the optimum exposure for that light level. For any light conditions you simply start by centring the needle. Then to get the effect you want, vary the settings from these.
This is where you start to practice!
In The Exposure Triangle mentioned above there is an alternative method to finding your starter setting. Either method will work. With experience you should find it easy to get the needle centred. You will have an idea of which settings to choose for a start. Then, you can make adjustments.
You want to learn photography? Play!
Once you know how to find and centre the needle you have control of your camera. Change the settings to get the picture you want…
- Is it darker than a bright day? Try a higher ISO.
- Lighter than a bright day? Try a lower ISO.
- Want a deeper depth of field? Try higher ‘f’ numbers.
- Want a shallower depth of field? Try lower ‘f’ numbers.
- More movement blur? Try lower shutter speed (less than 200th sec).
- Want to freeze movement? Try higher shutter speed (over 200ths sec.).
- (See also… Shutter speeds – An easy guide)
The key to success with these tweaks is balance. Each time you change one setting, you need to change one or both of the others to bring the needle back to the centre. This is where the ‘exposure triangle’ fits in to guide you.
Now you have 20 hours to play with these controls. Each of these tweaks give you a slightly different result for the same picture. As the video describes, the trick is to work through these in a logical way. Vary one at a time. Take a picture. See the effect. Tweak, try another picture. Tweak, try another. And so on.
When I was going through this I was using film. I made a note of all the setting tweaks I made. With a digital camera it’s easier. In each photograph there is something called EXIF data. It tells you each of the settings from your shot. Read this to find out about EXIF data.
These settings and tweaks are just a guide. When you learn photography you find that each light situation is different. Each picture is different. The simple plan is this. First learn to quickly get the needle centred. Then you should start to think how you want your picture to look. So, second, learn to tweak your settings.
As said in the video, start simple. Then develop. Once you have mastered the settings in bright daylight, try darker conditions. Master those. Slowly, slowly allows you to understand the next simple step.
You are ready to learn photography in 20 hours
The route down your ‘learn photography’ path starts with control of your camera. First learn to centre the needle in your light meter. We learned this in The Exposure Triangle.
Next you should learn to tweak the settings. This helps you gain experience in little steps.
Use the rest of your 20 hours to practice and improve.
As you “learn photography” you will begin to see where you make mistakes. By trying slight changes to settings you can correct it. After 20 hours practice your skills will good enough to take you onward to higher levels of expertise.
Comments, additions, amendments or ideas on this article? Contact Us
or why not leave a comment at the bottom of the page…
Like this article? Don’t miss the next — sign up for tips by email.
Photokonnexion Photographic Glossary – Definitions and articles.
Definition: Exposure
Definition: Exposure Triangle
Definition: Aperture
Definition: f number
Definition: Depth of Field:
Definition: ISO
Definition: Digital Noise
Definition: Shutter Speed
Definition: Bulb Mode; Bulb Setting
Definition: DSLR; Digital Single Lens Reflex Camera

Damon Guy (Netkonnexion)
See also: Editors ‘Bio’
By Damon Guy :: Profile on Google+
2 responses to “Learn photography in 20 hours – manually control your camera”