
• Clip •
Click image to view large
• Clip • By Netkonnexion on Flickr ![]()
Experiment with table top photography…
A regular reader asked about table-top lighting. It inspired me to think about table-top studios. A subject I really enjoy. I am going to post on various aspects of the subject, including lighting. To start us off here are some ideas.
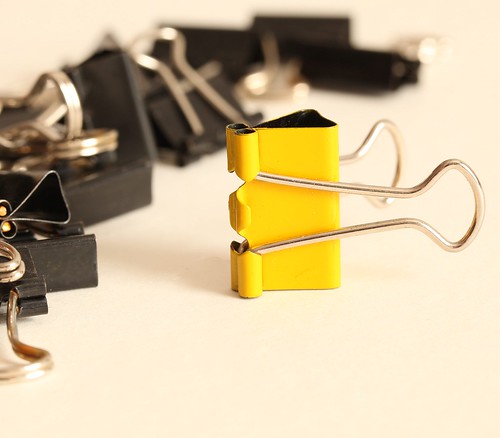
Clips – essential
In the UK we call the clips in the picture “Bulldog clips”. I am not sure why. Elsewhere they are often called binder clips. They have a very strong spring steel body and “handbag” handles that can be folded back or down flat. They are pretty useful for clipping paper together. No table-top photographer should be without them either. I have three different sizes which I use to hold reflectors. They are clipped onto the edges of white-board. Then they can hold the board in an upright position creating the table top reflector or white back-screen.
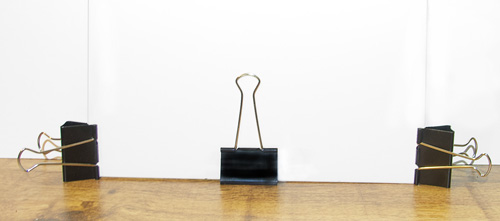
• Binder clip set up for reflectors •
The clips act as stands for small desktop reflectors to spread the light around.
In the picture I show three clips holding up a white card. For a small board like this one you can get away with only the two side clips. Then you can remove the middle clip allowing the board to be used as a white screen (as I did with the torch shot below). With a bigger board you can add more clips. Alternately, for bigger boards you can use the clips to hold the board to other more substantial supports.
I have used binder clips for positioning many different things for table-top studies. They are easy to use and inexpensive. You can buy them in most stationery stores. I have about 10 of each size. In the shot above I used the large size for demonstration purposes. The smaller ones would have been fine for this particular board and would have been less obtrusive in the photograph.
Flashlights (Torches)
Photographic lights on a table-top can be over-kill. On-camera flash is very bright and harsh too. I tend to use window light or flashlights for supplementary light. Older flashlights with bulbs give off a very yellow colour cast light. Modern LED lights are better, they tend to have a whiter light. Unfortunately single-LED flashlights tend to give off a very hard light. It is harsh and often has rings of light from the shape of the internal reflector.
There are two ways to even out the light from a flashlight. Point it at the card reflector instead of the subject and use the reflected light. The other way is to use a piece of white toilet tissue as a diffuser. Make the tissue into a dome over the light – make it loose and wide so the light is spread. You can fix it in place to the flashlight with sticky tape or an elastic band.
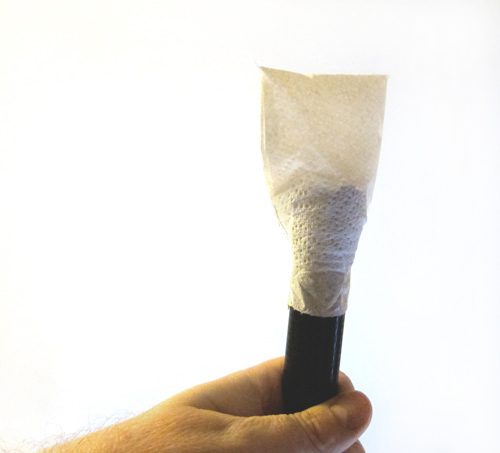
• Tissue diffuser on a flashlight •
The sides of the tissue have been sealed with a little slip of sticky tape. The tissue is held in place with a tight wrap of sticky tape around the flashlight.
There are a wide variety of different flashlights you can use. The one shown is the ULTRAFIRE WF-501B NOW WITH CREE XM-L U2 LED UPGRADE FROM CREE T6 LED -1000 LUMEN FLASHLIGHT/TORCH
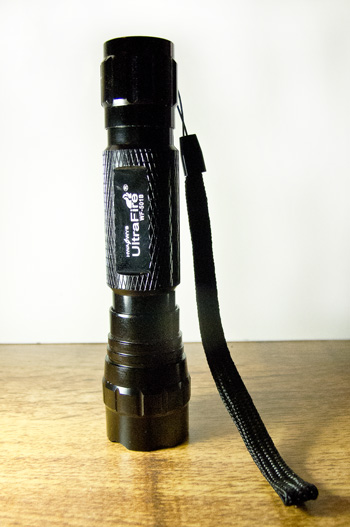
• Powerful hand held flashlight
ULTRAFIRE WF-501B NOW WITH CREE XM-L U2 LED UPGRADE FROM CREE T6 LED -1000 LUMEN FLASHLIGHT/TORCH ![]()
You will also need to buy the charger & battery ![]()
set too.
These flashlights are very powerful. I definitely recommend them. I have three of them for table-top lighting. They are also excellent for light painting at night – but that is another story.
For an even more diffused source I use a multi-LED flashlight. The Rolson 61770 72 LED Camping Light
![]() can be purchased at a great price too.
can be purchased at a great price too.

- 72 super bright LED’s giving a high level of lighting
- Complete with hanging hook
- Three magnets on the base for securing on metal objects
- Soft feel plastic housing
- Ideal for camping,workshop,emergency and general lighting applications
The Rolson 61770 72 LED Camping Light
![]() provides a wider more diffuse light. As with the torches, you can diffuse the light even more using the tissue trick if you want. These are also highly recommended for table-top photography. The light is great for all sorts of photography and it can also be reflected.
provides a wider more diffuse light. As with the torches, you can diffuse the light even more using the tissue trick if you want. These are also highly recommended for table-top photography. The light is great for all sorts of photography and it can also be reflected.
Throwing light on the matter…
Table-top lighting is a pretty simple business and inexpensive too. Using white card reflectors helps to spread light around. It is best to work with window light if you can. However, you can also work with low intensity artificial lights. I use hand-held flashlights. They are really flexible and the light is easily manipulated using white card reflectors.
 Photokonnexion tips by email
If you enjoyed this article please sign up for our
Tips by email service.
Find out more…
Start Photokonnexion email subscription now!
Photokonnexion Photographic Glossary – Definitions and articles.
Light and Lighting – Resource pages on Photokonnexion
CD Play – Fun with Light and Reflections
hard light
By Damon Guy (author and Photokonnexion editor)

Damon Guy (Netkonnexion)
See also: Editors ‘Bio’.
2 responses to “Two simple but essential elements of a table-top studio”