Tag Archives: Technology

Size Does Matter…

Understand your sensor – hidden insights into your shots

It sounds technical, but the size of the image sensor in your camera can effect your shot. If you are thinking of buying lenses or a new DSLR you should know what you are buying. The sensor size in a digital camera can affect how you frame a picture, its relative size compared to other cameras, its noise levels and the depth of field capabilities.

Lenses are usually measured in terms of focal length. Actually, a 50mm focal length lens on one camera may not be able to take the same picture on another camera. The focal lengths of lenses are measured against a standard 35mm sensor – that is a legacy from the days of 35mm film. Today, different companies have various technologies and have created varying sizes of sensors. The impact of this is that your sensor may not see the same as a camera with a different sensor – even though the same lens is used.

Below is a video that explains in simple terms all about sensor sizes. It also looks at other ways the shot is affected by sensor size. The video is 7.5 minutes and aimed at non-technical photographers.

I have inserted a chart overlay below of the various sensor sizes. You can check the sensor size of your camera in the technical specification of your camera manual.

Diagram showing the comparitive sensor sizes of various cameras. (Source: Wikipedia)

Diagram showing the comparitive sensor sizes of various cameras. (Source: Wikipedia)

Are you in control of your shots?

DSLR camera controls are simple to master

DSLR camera controls are simple to master. Learn to use them and you will have full control of your camera.

Part 1 of a series on going manual with your camera…

Today we are starting a short series on getting full control of your camera. “Going Manual” is about learning the essentials about how to control the settings you need to get a great exposure. This article examines why you should consider kicking the ‘auto’ habit and introduces the three controls you will be learning about.

Why you should consider going manual

“Auto settings” in modern digital SLR cameras are ‘averaged’ shots. In a full ‘auto’ shot the camera looks at the conditions in which it is taking the shot. After taking sensor readings it calculates an optimum exposure. Then the camera sets itself up to take the shot. Snap! The shot it takes is the result of its programming. What you get is an ‘averaged’ shot based on its optimisation. The only choice you get is to focus the shot on a subject. If you are using auto-focus, even the fine detail of the focus will be left up to the camera. So, the question is, did you take the photo? Or, was it the lab boffin who worked out the programming?

Modern digital SLRs also offer you a range of pre-set modes. These provide you with a ‘mode-choice’. You choose what type of ‘averaged’ shot you want. Taking a picture using a pre-set mode is telling the camera to set up the shot for you. You are asking the camera to create an exposure based on a few simple pre-set conditions. Programming boffins have looked at classic shots in particular situations. They have programmed the camera to reproduce those ‘types’ of shots in the pre-set modes. When you choose portrait mode you get an exposure that is frequently used in a classic portrait shot. If you choose landscape mode you get an exposure which is frequently used in classic landscape shots.

While these pre-sets create reasonable pictures, the camera controls the outcome. Creating the photograph you want is taken away from you. You are getting the exposure that is ‘frequently’ used by other people. It may not be ideal for the shot you want to make. It is simply how lots of people do portraits. To make your own, unique, picture you will need to take control.

An ‘exposure’ is the light-data recorded by the image sensor when it’s exposed to light. Controlling the light determines what the sensor records. The way the light is controlled gives you some unique artistic effects and results. When a camera takes an ‘auto’ or ‘mode’ picture the camera controls the exposure. Modes and auto are ‘averaged’ programmed shots based on a boffin’s view of common or classic exposures.

Taking control

Spend time learning to work with ‘modes’ and you will only get ‘averaged’ shots. Alternatively, you can go straight to the heart of the matter. You can learn to directly control the exposure. Learn the simple camera controls and you will be able to take unique pictures that reflect your idea of the shot. Your control will reflect your choice and match the way you want the shot to come out. It will be your creative choice.

Do you like the idea of controlling your camera? OK…

The trick is to set the controls to manage the light entering the camera. The aim is to create a balance of light the camera sensor can capture to produce a pleasing result.

You have three elements of control. You can control how sensitive the sensor is to the light. You can also control the amount of light entering the camera. And, you can control how much light the sensor sees. The three elements of control are:

  • ISO – the light-sensitivity of the camera sensor;
  • Aperture – the amount of light coming through the lens;
  • Shutter speed – how long the sensor is exposed to the light.

Over the next few posts we will be looking at how you can use these settings to control your exposure.

Going Off-Camera with the Latest Flash…

The new innovative Canon flash - new dimensions...

The new innovative Canon flash - new dimensions in flash technology. Click to see the article on the Canon website.


Off-camera flash is one of the most liberating aspects of flash technology. The idea is to get your camera to capture light that is controlled by you. You set up the flash so you can design how viewer sees your shot. In recent years flash units attached to DSLRs have become very sophisticated. This latest release from Canon has a range of high quality control features and in-built radio technology.

Syl Arena is a well known author in the field of flash technologies. In this article he reviews the latest offering from Canon. It is a rounded and informed view.

Contribute A Definition?

Send us a definition of a photographic word or phrase...

Send us a definition for our list of photographic words and phrases. Simply write a clear definition and send it in. Include an original picture if you wish. Give us your name and a link to your website and we will credit your work.

20 Ways to Protect Files on Memory Cards (Part 1)

The flash memory card in your camera is not a safe environment for files.

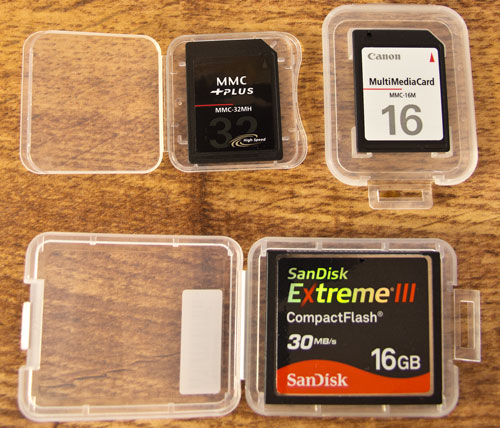
The flash memory card in your camera is not a safe environment for files.

The Danger

Memory cards are NOT safe media. The shocking truth is they are insecure, vulnerable, damageable and corruptible! I have seen a grown man cry after losing a whole day of shots! I am going to go cover ways to prevent losing files.

Problems and Solutions

1. Do not use ‘dirty’ memory cards! Corrupt files, old data, errors and old data can cause problems, errors or corruptions – especially if the card has been in another camera or mobile device.
Solution: Every time you put a card into your camera…
– Check you have already downloaded any files on it.
If it is OK…
– Format the card using the on-camera format system.
Regular formats ensure that the card database is refreshed, errors are corrected and old data is deleted. Only format the card in the camera. Other formats may be different to the camera system. If you do not normally remove the card (recommended) then format it at the start of every shoot.

2. Inserting and removing memory cards can damage them or the camera. Compact flash cards are particularly vulnerable. Tiny wires (40) are pushed into it when inserting the card. Put it in too hard or the wrong way round and you can cause serious damage. Small format cards can be bent on inserting which can literally break the chip. The contacts on all memory cards are vulnerable to grease, dirt and damage. Most cards will exceed over a million read/write cycles. However, they will not survive near that number of inserts/removals – even under perfect conditions.
Solution: Push the card in slowly and gently. Do not force it. Ensure it is in the right way around. Ensure it is the right type for the slot. Don’t touch contacts. Minimise the number of times you handle your card. If you have time download your files from the camera. It’s slower but saves handling the card.

3. If your camera reports an error your files could be overwritten if you carry on shooting.
Solution: Stop shooting immediately. Remove the card and use another to continue shooting. Corrupt files and errors can be recovered with rescue software and there are data services that can recover lost files. Nothing can be done if files are overwritten.

4. Don’t put all your eggs in one basket. One card and a failure will put you out of action.
Solution: Carry at least three cards. If one fails you have one to replace it and still have space on the third. If you were on the second card when it failed you still have the third. Less than three there should never be!

5. High capacity cards = high losses! If your files are precious (wedding shots for example) you are at high risk if you have a large card and put all the files on it.
Solution: It is better to have small batches of files on many disks than lose them all on one disk. If you only have a few files on a disc then others on other discs are safe. Professionals download or change cards frequently.
More after the jump…

6. Do not delete files while on the camera. The deletion process is error-prone. Advice from many sources, including manufacturers, indicates that deleting in the camera can cause corruptions. This may prevent access to the rest of the card, damage many files or prevent file removal. (Note: deleting and formatting are different processes).
Solution: It is better to delete your files once they have been downloaded and onto your computer where you can manage them properly and back them up.

7. Do not fill up the memory card. There is a chance that filling the card will prevent further access to it or may corrupt the software on the card. Card problems often occur on filling a card.
Solution: Finish shooting before filling the card. Download the files safely and then format the card before re-using. Change the card if you do not have a way to download immediately.

8. Do Not remove a full card from the camera. Some corruptions occur when you try to access a full card using a different system to the camera. Do not attempt to delete files to make space as this can also cause corruptions or files to be overwritten.
Solution: Download files from a full card using the camera. This may take longer than usual. If you have to remove the card to carry on shooting, put it back in the camera when downloading later at your computer.

9. Do not individually delete files to clean a card. The on-camera delete leaves file residues. The file remainders can cause problems later.
Solution: The recommended way to ‘clean’ all cards is to format the card in camera. The format process reduces the accesses, deletes all file data and cleans up the database the camera uses to manage files on the card. This will minimise the risk of corruption and errors.

10. Do not turn off your camera immediately after a shot. It can destroy your files. Your battery running out has the same effect. If the camera is deprived of power while processing a shot it may corrupt its record in the database of file information. Worse, it may damage the database, possibly damaging other picture files.
Solution: Wait at least fifteen seconds after your last shot before turning off your camera. Never let the battery get low. Have a spare battery on hand.

By Damon Guy (author and Photokonnexion editor)

Damon Guy - Netkonnexion

Damon Guy (Netkonnexion)

Damon is a writer-photog and editor of this site. He has run some major websites, a computing department and a digital image library. He started out as a trained teacher and now runs training for digital photographers.
See also: Editors ‘Bio’.

Can you write? Of course you can!
Write for Photokonnexion...

We would love to have your articles or tips posted on our site.
Find out more…
Write for Photokonnexion.

Does Pop-Up Flash Ruin Your Shots?

Pop-up flash needs careful use...

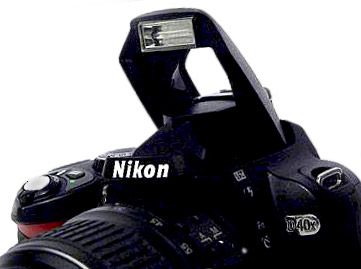
Pop-up flash needs careful use... it can be harsh and unforgiving.


Camera manufacturers will try to convince you that pop-up flash units are great. The truth is that they are pretty difficult to use. Here is what goes wrong and two solutions that will help…

Problems – Harsh Highlights, Washed-Out Colours and cut-throat shadows

Highlights are those bright spots that are complete white spots. Flash, pop-up flash in particular, is prone to create these highlights. The very small and direct light source creates harsh or hard light. Particularly on faces, highlights are ugly. The appearance of bright white areas on a face spoils shots and distorts the looks. Flash also tends to give faces a slightly blue/white tinge, making the flesh look washed out. People with faces affected by this flash effect look as if they need several good nights’ sleep. In addition, Pop-up flash is direct onto the face and in-line with the lens. This often causes a harsh under-chin shadow that slices across the neck.

Bouncing the Light

So what can you do about it? One solution is to ‘bounce’ the light from the flash. Bouncing light from your pop-up flash is easy! You need to find a way to deflect the light coming out of the flash lens. With pop-up flash it is easiest to deflect the light to the ceiling. This takes the direct light off your subject. When it hits the ceiling the deflected light bounces, which spreads it all around. This raises the light in the area you are shooting. Your shot will be brighter, but without harsh highlights. There are lots of ways to deflect the pop-up flash. However, the simplest is to buy an economical deflector. There are a number available here are two…
Professor Kobre’s Lightscoop, Standard Version Bounce Flash Device, Universal Model, fits over the Pop-up Flash of most SLR Cameras

Cateye reflector for SLRs (not Canon) Cateye LETS Flash Reflector/Diffuser Hybrid, for use with DSLR pop-up flashes

Cateye reflector for Canon: Cateye LETS Flash Reflector/Diffuser Hybrid, for use with DSLR pop-up flashes. Canon specific version

There is another, less expensive way. It is often more effective too…

Diffusing the Light

The second way to improve your image is to use a diffuser on your pop-up flash. A simple device, the diffuser is a way to spread the light out so it fills the area with light. This causes the light to bounce off a lot of nearby surfaces. The soft light that results from using a diffuser is particularly flattering. It softens shadows allowing gradual shading of the face without harsh lines or ugly highlights. The soft light from diffusers also overcomes a problem from reflectors – colour casts. With a reflector light bouncing from a coloured ceiling may pick up the colour. This can sometimes affect your picture. Diffusers are less likely to create colour casts. Nevertheless, it is important to check your LCD carefully to ensure a good colour result. Again, diffusers come in many forms. However, they are quite cheap and very easy to fit. Here are two different types – they perform equally as well and fit on most pop-up flash units. Here are two that I have been impressed with – they fit any camera…
Three Colour Diffuser: Pop-up Flash Diffuser for Nikon, Canon, Olympus, Pentax, Panasoic Lumix, Fuji FinePix, Sony Alpha, Sigma and general DSLR Cameras (with white, blue, orange)

White General Diffuser: Pop-up Flash Diffuser for Nikon, Canon, Olympus, Pentax, Panasoic Lumix, Fuji FinePix, Sony Alpha, Sigma and general DSLR Cameras

Off Camera Flash Units

An alternative is to consider buying an off-camera flash unit. These are much more controllable than pop-up flash units. They also give you a great deal of flexibility in what you can shoot and how you do it. Find out more about off-camera flash.

By Damon Guy (author and Photokonnexion editor)

Damon Guy - Netkonnexion

Damon Guy (Netkonnexion)

Damon is a writer-photog and editor of this site. He has run some major websites, a computing department and a digital image library. He started out as a trained teacher and now runs training for digital photographers.
See also: Editors ‘Bio’.

Can you write? Of course you can!
Write for Photokonnexion...

We would love to have your articles or tips posted on our site.
Find out more…
Write for Photokonnexion.


Focus on Imaging 2012

Focus on Imaging 2012 - The UKs largest photography show.

Focus on Imaging 2012
The UKs largest photography show.

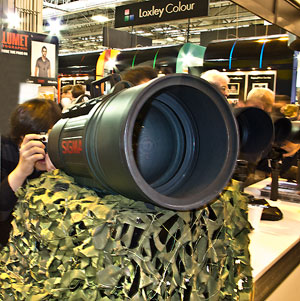
This week the largest photography show in the UK was revisited upon the NEC in Birmingham. It was a good show this year! Amid the hype of new cameras, lenses and other electronic goodies was a great range of seminars, and of course, retail interests of all types.

This year Canon had a major stand back on the main concourse. They have released a number of great new products recently. This week marked the release of the new Canon 5D MkIII. I was firmly informed that this is a ‘new breed’. Apparently it is NOT to replace the Canon 5D MkII, which will continue in production. As impressed as I was with the 5D MkIII the differentiation between the two models was only one of a technological generation. Of course, its a great step forward – the new Digic 5+ chip looks like a powerful system. Nevertheless the new MkIII model was not a ‘hybrid re-invention’ – the representative failed to convince on that one. A big improvement is the contrast recognition. This allows auto-focus functions to work better in low light. Also, the much needed focus point improvements in the focus system looked great. Significant improvements in processing speed allow a number of software enhancements. These include HDR processing in-camera and faster frame capture at six frames per second. The remodelled body felt great, and the quieter shutter/mirror system was welcome. Even so, it is difficult to see how Canon can justify keeping the two models running side by side. For 5D first time buyers the big price lift is probably not justified unless the new features are right where you want your business to be focussed. With prices falling for the 5D MkII the differentiation into a new ‘5D range’ is questionable. Canon are no strangers to quirky strategy – it may prove an interesting route. The scheme worked with the flagship 1D range. A number of stands at the show were selling MkII bodies for around £1400! That represents a big price drop. Will the differentiation stand up between these two? Only the market will realise that story.

Elsewhere in the show were some great stands. As always the Sigma stand impressed. A great range of lenses for the major mounts – beautifully marketed and supporting some superb features. The somewhat odd Sigma SD1 flagship camera was on show, but did not seem to be a centre piece. It seems a great camera. A little under-designed in its looks, it boasts a 46 mega-pixel sensor. I was at the busy stand for about 20 minutes and it did not come out once. It was hidden in a side-counter under a pile of brochures all day. Perhaps Sigma do not believe in this product? I would like someone to prove otherwise to me. Something needs looking at there Sigma.

The Lowepro stand showed an astonishing range of bags and accessories. The great range of sling bags is in my opinion unbeatable. Sling bags can be carried over one shoulder but worn like a rucksack until wanted. Then it simply slides down into a side opening bag. A great idea and a comfortable way to carry equipment and be ready for the quick shot. Worth a look at this range for bags to suit almost every type of photographic equipment.
More after the jump…

As usual there were, aside from the main players, a wide range of side stands. They were showing all sorts of innovations, additions to ranges, specialist operations, services and discounted goods. Too numerous to mention these stands make the trip worth while. Every photographer loves a nifty piece of equipment or the quirky accessory. Several happy hours in these stands provided some interesting finds.

If you love photography, technology and accessories then this is the place to go. It was a great show with many new releases as icing on the cake for the technology buff. I was absorbed the whole day. I am already looking forward to next year.

By Damon Guy (author and Photokonnexion editor)

Damon Guy - Netkonnexion

Damon Guy (Netkonnexion)

Damon is a writer-photog and editor of this site. He has run some major websites, a computing department and a digital image library. He started out as a trained teacher and now runs training for digital photographers.
See also: Editors ‘Bio’.

Can you write? Of course you can!
Write for Photokonnexion...

We would love to have your articles or tips posted on our site.
Find out more…
Write for Photokonnexion.

Buying a Best Selling Digital SLR for the First time

Looking for an affordable top quality DSLR? Modern DSLRs meet the highest standards.

Looking for an affordable top quality DSLR? Look no further...

Affordable DSLRs today offer unprecedented quality of images and wide flexibility in functions and control.

Affordable DSLRs today offer unprecedented quality of images and wide flexibility in functions and control.

The Digital SLR market is a competitive place. Without getting too specialist the main-stream manufacturers that generate the most sales for first time DSLRs are Canon and Nikon. They have managed to edge ahead of other manufacturers because they recognise that the key to a good photographic system is actually the lenses – not the camera. Both these companies have a broad range of excellent lenses. Good quality lenses will last you a lifetime. They are also interchangeable with other cameras in the same brand range. More important, quality lenses will determine the quality of your pictures much more than the camera bodies. So if you think you will want to move on in photography, invest in a mid-range camera and quality lenses. The lenses will stay with you. The camera bodies can be upgraded when you are ready.

There is little to choose between Canon and Nikon. They have both mastered the major features that modern camera users demand. They also cater in full for the more exacting demands of the discerning professional and advanced hobbyist. Both these manufacturers can provide you with lens ranges and camera bodies that will provide for you from starter to advanced career professional – and for life! So any investment in either company is likely to be a long and secure one with plenty of variation and development.

Nikon and Canon both provide the camera features and functions every beginner needs and many more than they will probably use. The camera and lenses will probably perform well beyond the demands of the starter or even the experienced amateur. The picture quality is excellent too. The difference between any of the equivalent cameras in their ranges lies in personal choice only. Your guide is therefore what you feel you need. Buying your first SLR is about fulfilment of your photographic dream. All the SLRs will be more than sufficient to meet your needs.

So, which camera? Here are some ideas to help you make up your mind and two recommendations.

Price

The first guide is how much you can afford. The first DSLR is a big decision. It a lot of money and you are probably not very confident in your knowledge. Secondly, your first purchase will commit you to a brand. Spending a lot of money on one brand, then investing in other accessories adds up to a lot of expense. It costs a lot to drop that investment and start again with another brand. So your decision is a commitment.

Set a budget. Most first time buyers have a budget in mind. However, do not just set a budget for a camera. You will actually need to buy more than just a camera. Consider some of the first-time package deals. They usually include a camera body, a battery, small memory card and a kit lens. Sometimes packages include some ancillary equipment too which might be persuasive – a camera bag or an extra lens for example. However, before you buy these consider what you will need over and above these. Do you need extra lenses? Are you going to need an off camera flash? Tripods are one of the three most essential pieces of equipment. So don’t leave them out.

If you are going to buy lenses spend as much money as you can to buy good quality lenses. A cheap, poor quality lens ruins your experience. A great lens will live with you for years, through several camera bodies if you treat it right. Buy a duff one and you will always regret it. So budget accordingly.

Functionality

Almost every camera in a range has similar features as the equivalent in another brand – with minor variations. First time DSLR buyers often don’t appreciate this simple fact. They spend hours pouring over the slightest variations in ‘essential’ elements of the competing cameras. Actually when they buy their first DSLR, they are not able to use it to its full extent – after all they are not experts. So the camera is pretty likely to be able to perform well beyond their competence and comfort zone. The minor variations in performance for specific functions are rarely important to the new DSLR user. So you should be doing two things. Buying a camera that enables you to grow into it, but which stretches your ability.

Buy your camera to be excited and challenged by it. Searching for just the right type of functionality and features is probably misguided. Your first DSLR should enable you to try out some of the things you want to do – but be flexible enough to extend you in areas you have not explored yet. Mid-range DSLRs are pretty amazing in what they can do. They are more capable in a wide range of uses and conditions than any cameras of the past. So buy something that will provide for the future, give you scope to buy quality glass (lenses) and enable you to meet your aspirations. The features and functions of a modern camera are likely to be less important than practice and practical experience. So here is a list of things you should think of which have a real impact on your shots…

  • Weight… Buy a camera you can hold up for long periods
  • weight… go lighter for family and general recreational photography
  • Size… Smaller people are more comfortable with smaller cameras
  • Size… Some activities suit small cameras (street photogs go smaller, landscapers > bigger)
  • Speed… High speed sports shots? Look for high shot repeats
  • Shape… Be sure you can hold it comfortably
  • Shape… be sure the buttons are suitably placed
  • Family… make sure the flash is easily controlled for portraits
  • Serious? Make sure you have full manual control available
  • Recreational? Consider fully implemented modes (portrait, macro etc)
  • Lens mounts… make sure you can use professional quality lenses
  • Lens mounts… ensure the manufacturer produces professional quality lenses
  • File format… discerning photogs use RAW. Ensure it is available.

Note… RAW, is the file format that keeps all the data the camera captures. Only RAW allows you to exploit the full potential of your shots. If you are serious about your photography, you will eventually want to use the RAW format. Secondly, if a camera manufacturer does not produce professional quality lenses it is questionable whether they have aspirations for top quality images. That may not be important for you now, but it will be if you take your photography beyond your first DSLR to more challenging photography.

OK… so what should you buy?

Here are two hot selling, mid-range cameras. They both meet the needs of first-time DSLR buyers. They are feature rich and capable of providing a challenge for at least the first few years of the enthusiasts photography. The prices are pretty keen. If you have scope in your budget, go for quality lenses too.

I have chosen the Canon 650D and the Nikon D5100. Both are reasonably priced. They have much the same specifications with equivalent kit lenses included in the package. The features and functions will handle a wide range of uses and the image quality on both these cameras is excellent. They are not too big, and will be usable by most people. They support mounts that have superb quality lenses available. They will both perform reliably in difficult photographic conditions and far beyond the starting ability of most first-time DSLR owners. They are both fun cameras to use!

Updated to most recent models 18/Oct/2012

Canon EOS 650D Digital SLR Camera with 18-55mm IS II Lens


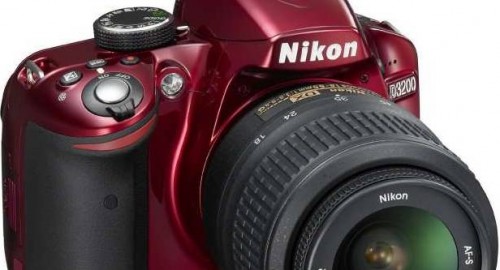
Nikon D3200 Black Digital SLR with 18-55mm VR Lens


By Damon Guy (author and Photokonnexion editor)

Damon Guy - Netkonnexion

Damon Guy (Netkonnexion)

Damon is a writer-photog and editor of this site. He has run some major websites, a computing department and a digital image library. He started out as a trained teacher and now runs training for digital photographers.
See also: Editors ‘Bio’.