Tag Archives: Stance

Focus – great tips for better understanding

Learning to focus is about understanding the shot.

With every shot, you must know what your subject is going to be. Your focus on it is about directing the viewers attention to the ‘point of interest‘. Learn to control your focus and you will control the viewers eye on the shot.

The important thing about understanding focus is that it gives you control of the way that you are approaching your subject. The shot is complete only when you have pressed the release button fully and the focus is captured in the final exposure. It is that point of commitment that is important. The click of the button. For it is in that moment the subject you have capture is immortalised. The focus you have provided on that scene is the way it is immortalised. In so doing you have given the viewer your view of your subject.

Knowing how to control that moment, the focus, is perhaps the most committing act of composition. It is also the moment of truth about your skill. So be careful with your focus. It is the ultimate moment of your capture.

In the video below Phil Steele shows you how to get sharp photos with your DSLR. he gives five five focus tips which will help you get the right focus and make the commitment to your exposure correctly.

Finally, a point not made in the video. If your stance is bad your focus will almost always be off. You will probably miss it at the last moment because you moved or did not hold the shot properly for the capture. So make sure that you work to improve your stance at the same time as your focus. Try reading this post… Simple tips for a good stance.

Some great tips here. Enjoy!

Published on Aug 16, 2012 by steeletraining; http://www.steeletraining.com

By Damon Guy (author and Photokonnexion editor)

Damon Guy - Netkonnexion

Damon Guy (Netkonnexion)

Damon is a writer-photog and editor of this site. He has run some major websites, a computing department and a digital image library. He started out as a trained teacher and now runs training for digital photographers.
See also: Editors ‘Bio’.

Five tips you must know to start photography

Essentials are simple…

The simple things make the biggest improvements. Concentrate on taking some simple steps and your photography will quickly improve. These tips will get you ahead when you start photography.

Tip 1. Solid base: The best ways to hold a camera for a sharp shot…

You can use the hand-held method for a lot of things. Using auto settings most simple shots come out right. There are many things you cannot do that way. A tripod helps. Most beginners disregard the tripod as an annoyance. They cannot be bothered with it. Actually, if you take time and get the shot right you will get the best results. The tripod is the best friend of results. No self respecting professional photog would be without one. If you are not using one then you are ignoring the simplest method to get sharp shots.

Tip 2. Daily use: In any sport, skill or hobby, improvement comes with practice, practice, practice. So, do some photography every day. Take at least one photograph every day. Sometimes many more. There is no better way to start photography. It helps to have somewhere to show off the results. Especially if you can get supportive and helpful comments back. There are some great places to post your shots on the web. Many of these places you can get helpful comments from other users too. Get your relatives to comment, even your kids. Do some photography every day and you will soon find friends, online or offline.

Tip 3. Always have your camera with you: I have a number of cameras. I always go out with at least one. If you have your camera with you, there is no excuse for ignoring it. If you use it you are practising. Simple!. Start photography the way you mean to go on… do a lot of it.

Art and interest in everything

Tip 4. There is art and interest in everything: Go for a walk, search your house, see a friend… these and more are scene creating events. I have friends who only ever take photographs in their home and local neighbourhood. They take great shots and have great fun. Look for interest in everything near where you are now. You will find something, probably lots of things. Have your camera with you and your eyes will be opened to a new world. If you see something you don’t have time to shoot, make a note of it. That’s one for another day!

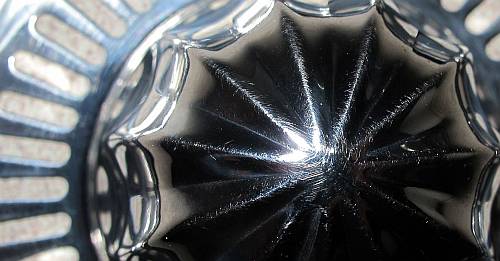
• Lemon Juicer! • There is art and interest in everything. Even your everyday house-hold equipment. Start photography the way you mean to go on.

• Lemon Juicer! •
There is art and interest in everything. Even your everyday house-hold equipment.
Start photography as you mean to go on – do a lot of it.


Tip 5. Camera settings. Getting to know your camera will put you ahead of many other photographers. You might be surprised to learn that most DSLR owners never use anything but the ‘auto-mode’. If this is you too, then by learning more about your camera you can quickly learn to take pro-shots. Study the manual. Be objective. Try out one setting many times in many situations. Then, move on to another setting. Mastering your camera is the first step to becoming a master of the art of photography. It costs nothing to take a shot but learning the settings will repay your effort many times over. Experiment, have fun!

OK… 6 tips to start photography!

Tip 6. Ha! I slipped in an extra tip for free… In number 1. above I mentioned a proper stance. Well, if you practice every day with the proper stance (Simple tips for a good stance), you will find your shots get sharper. The act of repetitively holding the camera in the same position a few times every day when you start photography will build up muscles. You will quickly learn to get precise control using that position. Practice gives you body control, as well as improving your skill. The muscle memory you develop will help you react quickly and precisely in situations where you want to take shots. Particularly with disabled people or people with weak muscles, some really big improvements can be made by using the camera a few times every day. Your body responds well to all forms of exercise. Some of today’s cameras are not a trivial weight. If you expect to hold it properly and steady you must practice with your camera from the moment you start photography.

Damon Guy - Netkonnexion

Damon Guy (Netkonnexion)

Damon is a writer-photographer and editor of this site. He has run some major websites, a computing department and a digital image library. He started out as a trained teacher and now runs training courses to help you start photography.
See also: Editors ‘Bio’.
By Damon Guy see his profile on Google+.

Simple tips for a good photography stance

Poor photography stance could ruin your shot

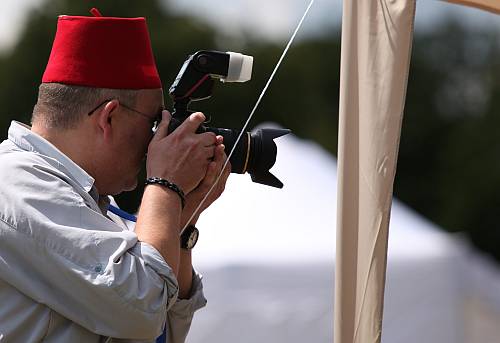
Poor photography stance could ruin your shot! Rehearse a smooth performance...

Click and go? No.

OK, it sounds simple. To take a shot in bright daylight just focus, point and click. Easy. No, not so easy. You need to think about your photography stance. Why?

Breath, shift, close, stab and roll – that’s why. These are some of the things people do when they take a photograph. Here is the full sequence. They line up the shot – everything just so… Then, they take a breath and shift their weight. Suddenly, they close their eye and stab the button followed by something I call ‘the roll’. The roll is where the camera is whisked away from the face to see the subject of the shot. This sequence causes movement through the shot.

Being aware of these problems helps you to adjust your stance and breathing. Then you can take the shot in a fluid way. Building up a steady, controlled set of actions will train your body and mind. This training helps to prevent the movements that cause loss of sharpness.

The sequence of a controlled shot should be deliberate and rehearsed. Through the shot your photography stance should aim to avoid the uncontrolled movement of the ambush. Hunt your shot with deliberate, stealthy moves. Here are some tips to help you get a sharper shot.

The photography stance you should work on

A good photography stance needs a stable position…

  • The basic foot/leg position is critical. Stand still, with your feet apart. Slightly more than one length of your own foot should fit between them. One foot slightly forward helps. Make sure you are comfortable.
  • Your back should be straight and neck upright.
  • Tuck your elbows in to your body to create a triangle-of-support for your camera.
  • Your right hand should hold the camera hand-grip.
  • The right index finger should be poised lightly on the shutter button.

  • Your left hand should be palm-up under the lens supporting its weight. Your left-hand fingers should be free to focus without shifting support from the lens in your palm.
  • The camera eye piece (viewfinder) should be gently but firmly held to the ridge above your eye. It will act as another stable point but allow you to see comfortably though the eye piece.
Composing the shot – involve your photography stance

Once the camera is comfortably held to your eye, you can compose the shot. Hold your stance. Breathe smoothly during this composition.

A good photographer has a ‘way’ of breathing. People often take a sharp in-breath before shooting and hold it. That causes movement and an unbalanced position. And, your heart-rate quickly goes up too. More movement! Think about your breath.

Once you are aware of your pattern of breath you can control it. Keep your breathing smooth and under control. Find the top or bottom of the breath – your choice. At that point in the breath there is a brief moment when the body is still. Shoot then! You may slightly delay the next phase of your breath until the shutter has shut. (OK, that could be interpreted as holding your breath). Try it until you are happy with the result.

How to push the shutter button

When ready to shoot, DO NOT stab the button. The smoothest method I have found is to have my button finger poised at the edge of the button and turned out slightly at the outset. To shoot, I roll the finger onto the button. It’s only a tiny movement. Then the contact is composed and relaxed. Work on a smooth motion like rolling pastry. All the time keep your hands firm but relaxed – not strained or white knuckled. Finger poised ready to roll onto the button.

Some people roll the index finger down onto the button from the side. This will work too as long as the movement is under control and smooth. Your photography stance will hold you in a stable position while you press the button. So make sure you are holding your position.

Roll your finger onto the shutter release button - maintain your photography stance.

Roll your finger onto the shutter release button - maintain your photography stance.

While pressing the shutter button don’t close your working eye. Many people blink in anticipation of the shot. Look through the lens for as long as possible. This helps control the hand movement and steadies the camera. The action of the mirror/shutter will block your view during the shot. If you are prepared you will not flinch or change your photography stance.

The “anti-roll bar”

Now you use the “anti-roll bar”. ‘Bar’ yourself from rolling the camera away from your face the instant you press the button. Before I found out about this I ruined many shots rushing the camera from my face after the shot. You will often find, in your enthusiasm, the removal is premature. Movement is introduced while the shutter is still open. To overcome this tendency slowly say “one thousand” to yourself after the shot (takes one second). Next, gently remove the camera. Practice it and soon you will not do ‘the roll’ any more.

Practice makes your photography stance perfect

Put these tips together and you will return controlled shots. It will help break the cycle of frenetic composition and hasty captures. With practice your shots will get sharper and more considered. You will be making the shot, not snapping it. With proper use of the photography stance you will have sharper images and better control.

Comments, additions, amendments or ideas on this article? Contact Us
or why not leave a comment at the bottom of the page…

Like this article? Don’t miss the next — sign up for tips by email.

By Damon Guy (author and Photokonnexion editor)

Damon Guy - Netkonnexion

Damon Guy (Netkonnexion)

Damon is a writer-photog and editor of this site. He has run some major websites, a computing department and a digital image library. He started out as a trained teacher and now runs training for digital photographers.
See also: Editors ‘Bio’.