Tag Archives: How to Shoot

Ten reasons not to take pictures for free

You and your camera go beyond your hobby

• You and your camera •
Don’t let your hobby take over your life or put you under undue pressure.

Don’t feel guilty saying no to “photography-for-free”.

Keen photogs will probably be asked to take photos for friends. OK. Don’t be shy. The odd shot is fun. It’s about being friendly. What about when that ‘ask’ is really a ‘job’? Here are the ten reasons you need to think carefully before committing to a job without pay…

1. What is a job?

There’s no clear definition. The line between amateur and professional is blurred. Making good or great images is not the only factor involved. Being a professional photographer involves a whole lot more. A keen amateur can produce great images. But can they do it under the same pressure that professionals work under? This is the key to the issue. When you agree to do a “pictures-for-free-gig” you are doing what a professional will do – and not getting paid for it. Can you perform to professional requirements and provide the goods despite the pressure and no pay?

2. When it does not come out right who is at fault?

You! The person who agreed to do this is you. And, the responsibility is yours to deliver. Can you – deliver? You had better be clear about that; and happy to provide a comeback when it fails. Professionals carry professional indemnity to cover serious disasters and legal proceedings. Do you have cover? Have you thought about the consequences for something priceless – your friendship? A possible law suite and loss of friendship can both be devastating.

3. Unforeseen problems

Your friends have asked you to do a job. Do you know what problems are likely to crop up? They probably do not… and they rely on your expertise. You might be happy to produce the shots but do you really know what else is needed? Jumping in blind can be a minefield. What are the expected shots for this type of shoot? Do you even know to ask that question? Do you know what you will need to do to get that information? If you have not worked out what is needed to cover eventualities when problems arise you are in a difficult situation. If you do not see the problems it will be your fault. Are you sure you have covered everything? Think again. And again. For you it’s about photos. For your friends it is about their memories. You really need to be sure you know it all and what will happen.

4. Your time will not be respected…

Your “friends” will expect you to be on call. You may be happy with that. But you have your life to live too, right? Nevertheless, you are doing the job and you will need to be the one who covers the time. Some events have a lot of meeting time and provision for professional input. Do you have that time? Rehearsals, shoot lists, requirements and principle characters are all important and as the photographer you may have to meet them all. You may be required to meet people both during working hours and at evenings and weekends. You may be involved in planning for months ahead of the event. You will need to be ready to fall in line. If you are not being called to these meetings then you are potentially building up a legacy of problems for the day. When you don’t know the details of the event minute by minute but are required to get all the shots, who is at fault? Your time is important to the event. Or at least that is the way it will be seen by the event organisers. Can you really provide that resource? For free?

5. Professional standards

Sure, you will be told, “We don’t expect professional standards”. Your friends have seen your images. They know you are good. Will they feel so forgiving when you do not produce one hundred top quality images with all the expected and formal variations for their wedding, party, engagement, event etc.? One or two good ones from a shoot is great. For your personal interest it may be what you want. When you are working for someone else their expectations are more exacting. Professional standards are expected for all the shots, not just a few. Be ready to provide for that.

6. Things do go wrong!

You are the ONE! The person for the job. Do you have the eventualities covered? Here are some of the sort of things photographers might encounter…

  • You drop and break your camera on the day;
  • Your memory card is defective;
  • You get sick;
  • On the day you discover you are not allowed to use flash in church;
  • You break a lens;
  • Your daughter breaks an arm the day before the event;
  • You’re asked on the spot for shots you’ve not agreed or were not prepared to do;
  • A passing pedestrian steals your camera bag  External link - opens new tab/page;
  • A drunk guest wants to take “up front pictures” while you are doing the formal shots;
  • Extreme sunlight outside the church will blow out the white on the brides dress;

A professional photographer will have contingencies, strategies and cover for things like these. Things always go wrong in some respect. You need to cover for all these and be prepared for more. And, you need to do it for free.

7. People don’t value things that come free

It is almost a cliché – “the best things in life are the most expensive”. It may not be true. But it is a public perception. If you are doing this “job” for free there can be consequences. Your advice will be devalued because you are free. You will be on the same advice level as Aunt Mavis, the brides father and others. Worse, the chap down the road who is a retired photographer and family friend (who has never used a digital camera) will also be advising out of your earshot. Working in those conditions adds a pressure that is a new dimension beyond friendship (and professionalism). Be aware that doing the job – even if you get it right – may still damage your friendship.

8. Post production

A professional photographer provides an after-shoot service. Within a week the processed images are provided as contact-sheet choices for final prints. There may be a need for a book; a cd; other types of mounted images. Be prepared for about four or five days processing work. Then you will need to provide for the future requirements. You will need to be ready to send out images, keep copies available for updates and reprints for several months. You will also need to retain the images on file indefinitely (securely). You will need to make solid editorial decisions about which images you allow to be seen and which you do not. You may have a thousand images… common for amateur digital photographers. Post production is a big part of a professional shoot. Can you resource it? Can you make the grade in post production? Can you resist when your friends says she wants all the images, not just the ones you chose? Feel good about that?

9. One for free… many more to go

Once people know you do professional work – without the cost – you will be in the front line. All sorts of pressures and unreasonable requests will be made. You will be taken for granted. And, it will be up to you to resource it. Travel, printing, expenses, processing, insurance, time, new equipment – there is more to shooting regularly than simply turning up with your camera. You have to provide resources too. Remember, you will not have the benefit of income for it either. How do you say no to other friends and family when you have done a professional job once already?

10. Photography is fun – right?

Doing the free stuff is fun when you are doing it for you. There is a completely different spin on it when you are doing something under pressure for someone else and not getting anything but hassle in return. Professionals enjoy their job. They are prepared and resourced for the problems and pressures. You need to have the same resources and cope with those pressures too – free. Where is the fun in that? Taking a photography “job” for free takes the fun out of your work. And, it is no fun being taken for granted.

The overview

Despite the opinion of many people, photography is a job. There are professional standards, costs, requirements and pressures. You may want to take up professional photography. That’s fine. However, be prepared. I have pointed out the professional dimensions.

The key point is simple. There are additional pressures on you and your friendships when you let yourself be taken for granted by doing free work. Sometimes they go beyond professional pressure.

Feel free to do family shots, fun activities and enjoyable photography. Even a little charity work and some contributions to local groups are fine – on your terms. Be prepared for something that looks like a “job”. A polite withdrawal will be looked on with respect and friendship once you explain the pressures involved. Failing to make the grade will not be looked on with simple forgiveness.

Comments, additions, amendments or ideas on this article? Contact Us
or why not leave a comment at the bottom of the page…

Like this article? Don’t miss the next — sign up for tips by email.

By Damon Guy (author and Photokonnexion editor)

Damon Guy - Netkonnexion

Damon Guy (Netkonnexion)

Damon is a writer-photog and editor of this site. He has run some major websites, a computing department and a digital image library. He started out as a trained teacher and now runs training for digital photographers.
See also: Editors ‘Bio’.

Can you write? Of course you can!
Write for Photokonnexion...

We would love to have your articles or tips posted on our site.
Find out more…
Write for Photokonnexion.

Getting close with your camera

Get Closer

• Get Closer •
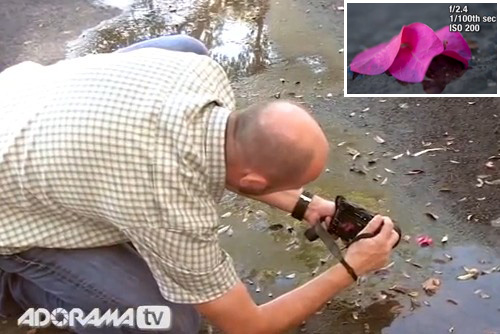
Images from the video.

There are few better ways to show your subject…

If getting close to your subject was easy then more photography learners would do it! Strangely very few do get close in to the shot. It is a great way to invigorate your shots and you can find some amazing subjects in the most obscure environments.

Get Closer! Exploring Photography with Mark Wallace

In this simple, explanatory, video Mark Wallace shows us how to get up close and personal with some seemingly bland subjects. When you get down to small-size photography you quickly find a new world that is both unexpected and exciting. Some really ugly subjects come out with some surprisingly beautiful shots. You just need to cultivate the right way of seeing. That is what getting close and thinking about your composition is all about.
Adorama Photography TV  External link - opens new tab/page

Comments, additions, amendments or ideas on this article? Contact Us
or why not leave a comment at the bottom of the page…

Like this article? Don’t miss the next — sign up for tips by email.

By Damon Guy (author and Photokonnexion editor)

Damon Guy - Netkonnexion

Damon Guy (Netkonnexion)

Damon is a writer-photog and editor of this site. He has run some major websites, a computing department and a digital image library. He started out as a trained teacher and now runs training for digital photographers.
See also: Editors ‘Bio’.

Visual toolbox for photographers

Sharpen up your creative photography…

It’s easy when starting photography to over emphasis the importance of gear. In fact it’s ‘photographers eye’ that really makes the difference. Your vision and insight into a scene are critical to producing a wonderful image.

Sage advice from a world master

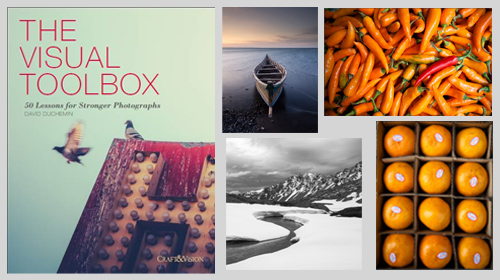
The Visual Tool Box by David duChemin is all about the skills of composition. He goes into depth around the background ideas which help you look at a scene. The ultimate success in photography is to make your image a pleasure to view. Aesthetics rule – it’s as simple as that. This book is dedicated to teaching you the tools you need to develop the ‘eye’.

David duChemin says,

These are the lessons I wish I’d learned when I was starting out.
The Visual Tool Box by David duChemin

This is my kind of book. He writes superbly, in simple, readable form. His examples are excellent and the pictures are just amazing. But most of all the book is organised for learners to extend their knowledge in easy, well structured steps. This book is all about putting new tools in your photographic tool box and it achieves that with an ease that any beginner will find a joy.

Composition

The book is packed with examples of the sort of compositional ideas that really work – for anyone. Just look at some of the topics covered…

  • Manual
  • Optimize Your Exposures
  • Master the Triangle
  • Slower Shutter Speed
  • Learn to Pan
  • Use Intentional Camera Movement
  • Use Wide Lenses to Create a Sense of Inclusion
  • Learn to Isolate
  • Use Tighter Apertures to Deepen Focus
  • Use Bokeh to Abstract
  • Consider Your Colour Palette
  • Lines: Use Diagonals to Create Energy
  • Lines: Patterns, Lead my Eye, Horizons
  • See the Direction of Light
  • Light: Front Light, Side Light, and Back Light
  • Quality of Light: Further Consideration
  • White Balance for Mood
  • Light: Reflections, Shadow, Silhouettes, Lens Flare
  • People
  • Experiment with Balance and Tension
  • Use Your Negative Space
  • Juxtapositions: Find Conceptual Contrasts
  • Orientation of Frame
  • Choose Your Aspect Ratio
  • Use Scale
  • Simplify
  • Shoot from the Heart
  • Listen to Other Voices (Very Carefully)

And there is plenty more content to complement and extends these ideas. What’s not shown in a list is the excellent and sage advice throughout the book. I will let David duChemin have the last word…

Pace your-self. Anyone can master a camera; that just comes with time. It’s the other stuff — learning to think like a photographer — that takes so much work and allows this craft to become the means by which you create art.
The Visual Tool Box by David duChemin

And it is thinking like a photographer that you will quickly learn from reading this book.

How to buy this great book

This book was originally published as an ebook. However, it is no longer available in that form. The book has moved into the real world. It will be available on Amazon as a Paperback From 31 Mar 2015.
The Visual Toolbox: 60 Lessons for Stronger Photographs (Voices That Matter)You can per-order the book from Amazon.

Comments, additions, amendments or ideas on this article? Contact Us
or why not leave a comment at the bottom of the page…

Like this article? Don’t miss the next — sign up for tips by email.

Damon Guy - Netkonnexion

Damon Guy (Netkonnexion)

Damon is a writer-photographer and editor of this site. He has run some major websites, a computing department and a digital image library. He started out as a trained teacher and now runs training for digital photogs.
See also: Editors ‘Bio’.
By Damon Guy see his profile on Google+.

10 quick hacks that photographers need to know…

Photogs life hacks

• Photogs life hacks •
There are some things which seem so simple once you have been shown how to do them… here are some free hacks for photographers.
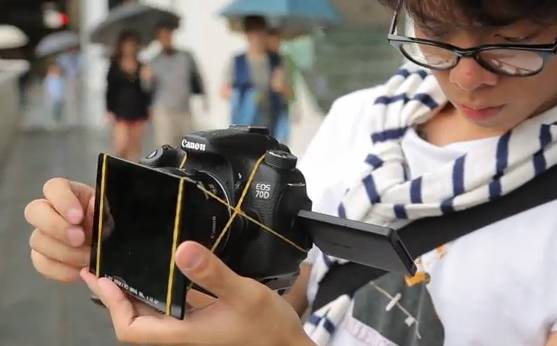
Image taken from the video.

Simple and cheap ways to do things in photography…

In every situation there are lots of ways you can cut corners without affecting the outcome. Here are ten “life hacks” that give you something extra in your photography.

10 Photography Life Hacks You Need To Know

Uploaded by DigitalRevTV  External link - opens new tab/page

Of course there are lots of other life hacks that photogs need to know… Do you have a favourite hack? Let us know what it is in the comments so we can all gain something from your idea.

Comments, additions, amendments or ideas on this article? Contact Us
or why not leave a comment at the bottom of the page…

Like this article? Don’t miss the next — sign up for tips by email.

find out more...Photokonnexion tips by email
If you enjoyed this article please sign up for our
Tips by email service.
                                                 Find out more

By Damon Guy (author and Photokonnexion editor)

Damon Guy - Netkonnexion

Damon Guy (Netkonnexion)

Damon is a writer-photog and editor of this site. He has run some major websites, a computing department and a digital image library. He started out as a trained teacher and now runs training for digital photographers.
See also: Editors ‘Bio’.

Documentary… Ansel Adams

Ansel Adams

• Ansel Adams •
One of the all time greats in photography. This video is about his life, thoughts and work.
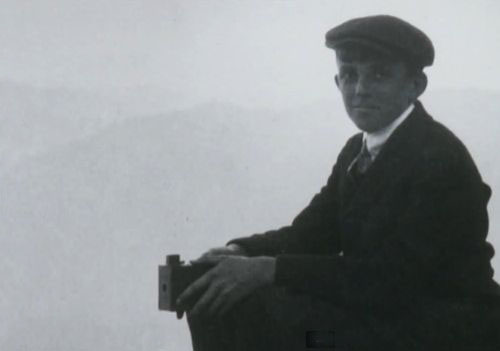
Image taken from the video.

The thinker-photographer…

There is a great deal to be said about Ansel Adams. He was a great photographer, thinker and artist. He was also an accomplished musician.

This post was about Ansel Adams.

Unfortunately the video was taken down from YouTube.

We have other Ansel Adams Resources on Photokonnexion.

At the time the video was removed it did not appear available online in another place. However, the subtext for the video as it was published is below. You may find it useful to use the text in case this video becomes available again at a later date.

Subtext for the video

Published on 29 May 2013
“The American Experience” Sierra Club Productions – Steeplechase Films
Ansel Adams is the intimate portrait of a great artist and ardent environmentalist — for whom life and art, photography and wilderness, creativity and communication, love and expression, were inextricably connected. ANSEL ADAMS, a ninety-minute documentary film written and directed by Ric Burns, and broadcast on national public television in April 2002, provides an elegant, moving and lyrical portrait of this most eloquent and quintessentially American of photographers. Written by Joshua Mueller
Category: Education
Licence: Standard YouTube Licence

Comments, additions, amendments or ideas on this article? Contact Us
or why not leave a comment at the bottom of the page…

Like this article? Don’t miss the next — sign up for tips by email.

By Damon Guy (author and Photokonnexion editor)

Damon Guy - Netkonnexion

Damon Guy (Netkonnexion)

Damon is a writer-photog and editor of this site. He has run some major websites, a computing department and a digital image library. He started out as a trained teacher and now runs training for digital photographers.
See also: Editors ‘Bio’.

Circular Polarising filters

Polarising filter range

• Polarising filter Range •
The polarising filter is one of the more useful filters in the kit bag.

The polarising filter – one of the more useful filters

Strong Sun, low in the sky, can cause problems. Direct rays of light into the camera, specular highlights and washed out colours create photographic distractions in the image. Here is how to reduce the problem.

Watch for highlights – gain some benefits

Bright spots, difficult reflections and big highlights are a very strong draw for the eye in an image. Try to check around the frame when composing. Find ways to reduce these strong areas in the shot.

If you cannot reduce the reflections, highlights or washed out colours from bright light you should consider using a polarising filter. They are relatively inexpensive and have an incredible impact on the shot. If you use them right polarising filters can…

  • Reduce strong reflections: this gives a deeper, richer appearance to water, allows you to see into water and through glass and brings out strong images reflected in shiny surfaces like mountains etc.
  • Reduces the “washed out” effect of bright light: Colours that are whitened or lose their intensity in bright light can be made richer and more saturated. Skies and water in particular will get more depth of colour.
  • Reduces the intensity of bright light: Polarising filters reduce the total light entering the camera because they reflect/absorb some of the light. This helps bring down the overall levels of light.
Fitting polarising filters

Most polarisers are bought as circular screw tread attachments that screw into the front of your photographic lens. The filter part is mounted in a ring that freely rotates on top of the screw thread. It can turn without tightening or loosening the mount when it rotates. Screw the filter directly to the front filter-screw thread on the lens.

A polarising filter come in multi-filter kits. These can be fitted to the front of your lens. A frame is fitted onto the lens filter screw. Various filters can be slotted into the frame, including polarising filters.

Gentle rotation

To gain a benefit from your polarising filter you need to adjust it to suit the light. You can twist the filter part in the mounting in either direction The rotation of 90° is enough to see the full effect. Twist it gently until the full or desired impact is seen in your viewfinder. You should see slight darkening, increase in colour saturation and reduced highlights, particularly from shiny surfaces.

With a little practice you can easily see the full benefit of the filter. However, some highlights are still strong enough to create white spots and distractions. So still be careful when composing.

As a guide, if your sunglasses are polarised you can look at a scene quickly and see an immediate effect. If they help you to see more colours and reduce reflection and highlight impact then get your polarising filter out and screw it on the lens. Sunglasses help you to make the decision to get out the filter, but obviously they do not have a photographic impact. They will be of a different strength to your filter too. So you will still need to compose and adjust the filter.

How they work

Polarising filters act to filter the incoming light. They allow some specifically aligned light waves to pass through and not others. In so doing the filter effect does two things. First, they reflect or absorb some of the light where the waves are not aligned. Secondly, they allow the aligned light through. This light reduction and alignment is enough to ensure the glare, brightness and strong highlights are weakened.

For a more informed look at the detail of polarisation filters you can get more information here.

Buy now!

If you don’t have a polarising filter for your favourite lens then buy one now. You’ll see an amazing difference.

Buy the correct filter size. Check the thread size of your lens – normally found at the front edge of your lens. A mid-range size would be 58mm. My small lens is 52mm and my largest 88mm. Look for that size on the filter you order.

Have a look at the what’s available…
Circular polarising filters – buy one now!  External link - opens new tab/page.

Recommendation!
Hoya 58mm Circular Polarizing Filter
These are great value polarising filters. Check out the one seen here then search for one the size of your lens.


Comments, additions, amendments or ideas on this article? Contact Us
or why not leave a comment at the bottom of the page…

Like this article? Don’t miss the next — sign up for tips by email.

By Damon Guy (author and Photokonnexion editor)

Damon Guy - Netkonnexion

Damon Guy (Netkonnexion)

Damon is a writer-photog and editor of this site. He has run some major websites, a computing department and a digital image library. He started out as a trained teacher and now runs training for digital photographers.
See also: Editors ‘Bio’.

Can you write? Of course you can!
Write for Photokonnexion...

We would love to have your articles or tips posted on our site.
Find out more…
Write for Photokonnexion.

Shooting waterfalls and moving water… great for Autumn

Moving water shots

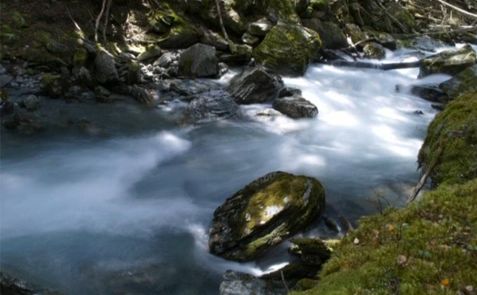
Moving water shots are some of the most romantic landscape shots. They are really easy and fun to do. (Image from the video).

Wow! September already…

With Autumn around the corner I am thinking about great projects for the when the leaves start to turn. Here’s a great idea for you to follow up to make the best of the Autumn colours.

Why Autumn

The summer is great for doing wide open landscapes. Especially around the Golden Hour or at dawn when the light has those wonderful reds, golden or yellow colours.

Autumn is better for doing great shots under the forest canopy and those great shadowy dell shots. The Sun’s lower in the sky and there is reduced contrast with fewer distracting bright spots peeping through the trees from the sky. The light is great and the lower aspect is better for creating contrasts in moving and falling water. On top of that the autumnal colours are exciting. More to the point the range of Autumnal colours create depth and contrast. That is something that uniform green of the summer months tends to reduce.

So think about doing your waterfall and forest shots in the next two months or for your local Autumn. You will really benefit from greater contrasts, colours and light angles.

How to blur water for a dreamy effect

To get you started on great water shots here is an introductory video on the way to slightly blur water in your shots. It helps to make the water take on a more motion-filled ethereal dreaminess.
Uploaded by: Gordon Laing (28 Dec 2007)

A couple of extra tips

Sometimes, especially when working under trees with those hidden waterfalls you will get large contrasts with the surrounding environment. Such contrasts often cause highlights that are distracting. Here are a couple of extra tips to help get past this distraction…

  • If you find you are doing a shadowy moving water shot in the trees but the brightness is still too high try using a polariser filter. This will help to increase the contrasts and overall reduce the incoming light. Polarisers reduce the light by up to about two stops which really helps when working with water. It will also reduce sharp reflections which can be confusing in moving water – especially under trees.
  • If you need to reduce the light even more you can try a Neutral Density filter (ND filter) This type of filter is like sunglasses for your camera. You can find out more here… and here is a range of resources on filters.

Comments, additions, amendments or ideas on this article? Contact Us
or why not leave a comment at the bottom of the page…

Like this article? Don’t miss the next — sign up for tips by email.

By Damon Guy (author and Photokonnexion editor)

Damon Guy - Netkonnexion

Damon Guy (Netkonnexion)

Damon is a writer-photog and editor of this site. He has run some major websites, a computing department and a digital image library. He started out as a trained teacher and now runs training for digital photographers.
See also: Editors ‘Bio’.

Can you write? Of course you can!
Write for Photokonnexion...

We would love to have your articles or tips posted on our site.
Find out more…
Write for Photokonnexion.