Tag Archives: Flash

The top twenty phototips that you should know

20 spots - twenty tips

• 20 spots – twenty tips •
Click image to view large

Learning photography is about…

Doing the simple things really well. Although there are a lot of things to learn, the important ones are a few things you do over and over again. If you improve them you will automatically improve your photography.

Work on these to make the biggest improvement
  1. A proper stance will provide a proper, steady hand-held camera position.
  2. Go everywhere with your camera. Use it every day – improve every day.
  3. Learn with what you’ve got, better equipment will not improve your skill.
  4. Three essentials – camera, lens, tripod. Learn to use them all equally well.
  5. Get close, fill the frame, your shots will probably be better.
  6. Think about every shot before you push the shutter button.
  7. Count to two before taking your camera away from your face.
  8. Never just look at others’ photos – do a critique every time.
  9. Work on your composition skills at least as hard as your technical skills.
  10. Be inspired by other photographers, but develop your own style.
  11. Discuss photography as much as possible with other photographers.
  12. Look for contrasts in colour, light, shape and other variables.
  13. Declutter your shots, show it as simply as possible.
  14. Use natural light as much as possible – get to know its properties.
  15. The rule of thirds works more than 95% of the time.
  16. Try different perspectives, points of view and heights at each scene.
  17. Vary shutter speeds, ISO and aperture settings to experiment with exposure.
  18. Make people, and especially faces, a central study in your photography.
  19. Great photos can be found everywhere – you just need to look out for them.
  20. Be completely obsessed with the study of light and the language of light.

If you pay attention to these important tips you will find your photography will develop.

Photography becomes a way of life, but don’t make it the only thing in your life. You need other interests to bring new perspectives into your photography.

Most of all enjoy what you are doing. Photography should be fun… don’t take it too seriously. Laugh a lot.

find out more...Photokonnexion tips by email
If you enjoyed this article please sign up for our
Tips by email service.
                                                 Find out more

By Damon Guy (author and Photokonnexion editor)

Damon Guy - Netkonnexion

Damon Guy (Netkonnexion)

Damon is a writer-photog and editor of this site. He has run some major websites, a computing department and a digital image library. He started out as a trained teacher and now runs training for digital photographers.
See also: Editors ‘Bio’.

Ten simple ideas to improve your photography (and a fun quiz)

Ten Tips

Ten Tips and 12 fun quiz questions.

Simple things help you…

We should all take a step back and think about the basics sometimes. It helps us remember essential techniques and keeps us on our toes. Here are the basics with some fun quiz questions too.

The simplest techniques in photography are often the most important ones. In this post we make sure we don’t forget them…

10 essential things to know; 12 fun quiz questions
  1. Not knowing your camera: This is really bad news. If you are hoping to improve your photography make sure you learn what every lump, bump, dial, screen, lens and twiddly bit does. Read your manual regularly. Practice with each function until you have got it right. Then practice it in the dark so you can do a night shoot.
    Quiz Question 1: How many lenses are there on a camera? Answers at the end!
  2. Poor stance: Most people when starting photography don’t realise that the way they stand and hold the camera creates all sorts of problems and poor performance. If you are a keen photographer a good stance can contribute to improved sharpness (hand-held shots), better focus, more steady hand and better shot timing. Learn to stand properly right at the start and you will save yourself lots of re-training time later.
    Quiz Question 2: At what point in the breath cycle is it best to take your shot?
  3. Not using a tripod: classic mistake. Tripods save you lots of time and give you pin sharp photographs. They give you an opportunity to set your camera up properly and ensures that your are ready for your shot.
    Quiz Question 3: A monopod has one leg, a tripod has three legs. What is, and how might you use, a bipod?
  4. Not giving the camera time to focus: When you press the shutter button halfway down it causes the auto-focus to cut in which focuses the camera. But if you punch straight through that to the shot the focus has not had time to do the full focus. This normally happens on the first focus attempt when the focus is right off. After that the lens in nearly focused and will adjust more quickly. So don’t make your first focus attempt too close to the shot or it will be blurred.
    Quiz Question 4: Why do you have two rings on a modern auto-focus/zooming photographic lens? What do you call each of them?
  5. Taking pictures against a bright light? Cameras don’t like very bright lights. Especially if there are also very dark spots nearby. Shooting indoors while looking at a window out to a bright sky will cause a strong white spot. This is very distracting and draws the eye away from the subject. Not good. There are Light and Lighting resource pages on Photokonnexion for you to learn more.
    Quiz Question 5: How many stops of light can healthy human eyes see (20:20 vision)? How many can the camera (rough generalisation) cope with?
  6. Relying on flash (especially pop-up flash): Pop up light has a very small concentrated source. It discolours faces, washes out colours, creates harsh, sharp-lined shadows and is badly placed (too close to the optical axis) creating nasty highlights on faces. Try to use natural light more. It is much more forgiving and does not produce such harsh shadows most of the time.
    Quiz Question 6: What is often the result of using pop-up flash with respect to two parts of the face?
  7. Dead centre subject: If you put the subject of your picture in the centre it will usually be boring. If you off-set your subject the eye will be looking to see why the symmetry is broken. That keeps the eye hunting around the screen. Learn about the “Rule of thirds” and other Composition principles. That will help you make the shot more compelling to the eye.
    Quiz Question 7: What type of compositional perspective would you be working with if you want to promote a three dimensional feel to your picture composition?
  8. Horizon control: Make sure your horizon is level, especially if it is a seascape. If you leave it on an angle the picture will be ruined because it will look like the sea is sliding off the page! Horizons also induce mid-picture viewer-stupor. Make a decision. Either shoot for the sky in which case place the horizon in the bottom third of the picture. Or, shoot for the ground in which case the horizon goes in the top third of the picture. An off-set horizon is more dynamic and keeps the viewers eye moving.
    Quiz Question 8: If your main choice is to shoot for the sky, where would you take your exposure from? (Where would you point your viewfinder focus point?) a. The sky? b. The ground?
    Quiz Question 9: Describe autofocus hunting and why it happens?
  9. Simplify, simplify, simplify: The most effective way to show a subject to your viewer is to de-clutter the picture. Take out of your composition everything that is nothing to do with the subject. The more you make the viewers eye go to the subject the more effective your shot will be.
    Did I mention that you should simplify your shot?
    Quiz Question 10: What is it called when you paint out something from your picture in post processing to simplify a shot?
    By the way, did I mention that you should work really hard to simplify your shots?
  10. Go manual: Auto-modes on your camera are really best guesses about what the manufacturer thinks will be suitable for the average shots most snappers will take. Buy you are a keen photographer. To get the camera to do exactly what you want, and to make discerning choices about your images you should work on improving your manual control. Your understanding of photographic principles will improve, your skill at exposure will improve and you will find yourself making informed choices about how you want your picture to come out. You will turn from a snapper into a photographer.
    Quiz Question 11: What does the ISO control do? a. Adjust the sensitivity of the digital image sensor or b. Change the aperture size?
    Quiz Question 12: Does ‘shutter speed’ or ‘aperture’ control movement blur?
Answers to quiz questions
  • Quiz Question Answer 1: I am talking about any camera that has a lens, not just DSLRs. the number of lenses is a matter of variation. If you are discussing photographic lenses then only that one will count (but read on). Some people think of each glass element in the photographic lens as an independent lens. Technically that is not true. They are optical lenses or glass elements, not photographic lenses. However, if the photographic lens (and elements if you included those) were all you counted you would be wrong. Here is a short list of Possible lenses on a camera of any sort…

    There may be others.

  • Quiz Question Answer 2: You should take a shot at the full inhale point or full exhale point before inhaling or exhaling in the next part of the cycle. You can choose which is best for you. All you do is delay the next part of the cycle while you take a shot. This is the point in the breath cycle when there is least movement of the shoulders/chest. Read more about it in Simple tips for a good stance
  • Quiz Question Answer 3: A bipod is photographically uncommon. Understandably, it has two legs. Find out more here… Definition: Bipod
  • Quiz Question Answer 4: The two rings on an auto-focussing photographic lens allow one ring to focus the image – the focus ring. The other ring is for zooming the lens. The latter changes the focal length and is called the focal length ring.
  • Quiz Question Answer 5: Human eyes can see about 18 to 20 stops of light when healthy. However, by contrast the best commercially available cameras have to operate with a dynamic range of 8 to 12 stops of light. Research is pushing the boundaries but there is still a big gap to meet the dynamic range of the human eye (in 2013).
  • Quiz Question Answer 6: Pop-up flash is very likely to cause red-eye.
  • Quiz Question Answer 7: To make things look three dimensional in your image you should be working with three point perspective. Look for lines in your image that promote cube-like structures. For example buildings, walls and other objects with lines and shapes that have a solid feel in real life. This will trick the eye into believing that there is a solid object in the picture. Read: Simple ideas about perspective in photography and: Definition: Perspective
  • Quiz Question Answer 8: If you shoot for the sky you will need to be taking your exposure from the sky as that is the brightest point. This will leave the ground darker in your exposure than you would see it with your eye. You can use one of a number of techniques to correct that later.
  • Quiz Question 9: Auto-focus hunting is when the auto-focus in the lens cannot focus and will keep going up and down the focus range trying to get a focus. This is a common problem at night, in darker conditions, low contrast conditions and clear or totally grey skies. You can read more about it in: Auto-focus ‘Hunting’ Definition: Hunting, Auto-focus

  • Quiz Question 10: when you paint out something from your picture in post processing to simplify a shot? You normally use a cloning tool. You can find out more in: Definition: Cloning; To Clone; Cloned; Clone Tool.
  • Quiz Question 11: What does the ISO control do? It adjusts the sensitivity of the digital image sensor allowing you to work in bright light (low ISO setting) or low light (high ISO setting). There is an article on ISO here: ISO.

  • Quiz Question 12: Shutter speed controls movement blur. Aperture controls blur (bokeh) created by the loss of sharpness outside the zone of acceptable sharpness. This is traditionally known as the depth of field. More reading on: Definition: Exposure and related to aperture: Definition: f number.

find out more...Photokonnexion tips by email
If you enjoyed this article please sign up for our
Tips by email service.
                                                 Find out more
#11030#

By Damon Guy (author and Photokonnexion editor)

Damon Guy - Netkonnexion

Damon Guy (Netkonnexion)

Damon is a writer-photog and editor of this site. He has run some major websites, a computing department and a digital image library. He started out as a trained teacher and now runs training for digital photographers.
See also: Editors ‘Bio’.

A simple lighting technique with lovely light

The mobile phone light... soft and effective.

The mobile phone light… soft and effective.

Table-top photography works with soft light.

When you are doing still life shots you want soft, gentle light. Exposures can be longer so you can create lovely gentle shadow graduations. Your mobile phone provides an excellent light source for this. Here is how it is done.

White source image

The basic technique is to put a bright white image onto your mobile screen. When you display it on the mobile screen the illumination produces a white light. This is a wonderful, quite localised soft light for your shot. The steps in detail are…

  • Open your favourite image editor
  • Create a new image (approx size 800 pixels by 600 pixels)
  • Paint it brilliant (pure) white
  • If you are on your computer save the image then upload it to your phone
  • If you are on your mobile phone save the image to a known folder
  • When you want to use the light, display the image on screen

The white image on screen produces enough illumination to create the light you want for your table top image.

Other ways to use your mobile as a light source

Of course many mobiles are also capable cameras in their own right. So here are two other ways to use them:

Photographic light: Lots of mobiles have a “flashlight” app. This will allow you to use the camera flash as a photographic light onto your still life scene. Many on-camera (pop-up flash) flash units are very strong and have a harsh light. The flash on a mobile is often much softer and sometimes is coloured to be a similar colour to daylight (approx 5500 Kelvin). This ‘daylight balance’ is a great light and worth using if you have it. Prop your phone up with the flashlight app activated and start shooting.

Coloured light source: Traditionally coloured light is produced using colour gels. However, some apps on mobile phones can create both a white light or a range of other coloured lights. One such app for example is: Tiny flashlight + LED. This is an app. for Android phones, but there are other apps. for different operating systems. If you cannot find a suitable app. you can produce a colour image like the white one above. Store that on your phone and open the image when you want that colour light.

Versatile

While the light from the screen of your phone might not be very strong, for a long exposure that is not too important. The light is wonderful and soft. As it comes from a wide source it creates lovely wrap-around shadows. These are just great for still life. Other features of phones can help with the lighting for your photography too. So, have a look at your mobile in a new light – see what you think.

By Damon Guy (author and Photokonnexion editor)

Damon Guy - Netkonnexion

Damon Guy (Netkonnexion)

Damon is a writer-photog and editor of this site. He has run some major websites, a computing department and a digital image library. He started out as a trained teacher and now runs training for digital photographers.
See also: Editors ‘Bio’.

How to buy a new camera…

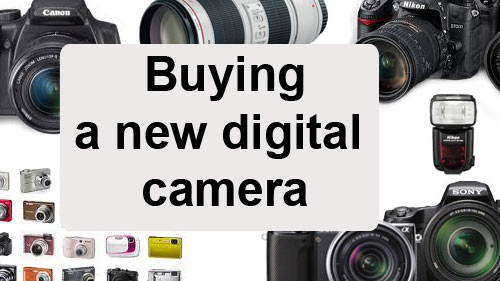
Buying a new digital camera

Buying a new digital camera

Buying is a big decision.

Photographers should be wary of the simple answer. Buying a camera is a deeply personal matter and a big investment. You live with the consequences for a long time. Look carefully at considerations that really matter to you and your performance as a photographer. Impulsive buys may spoil your photography. If you’re comfortable with your buy you will be more likely to get to know it, use it and have fun with it.

1. Work out what you need

Impulsive buying means something will not match your need, then you won’t get the use you want. The points below will help refine your thoughts. Write down your ideas to ease your research later.

Budget: Fix a budget – it may define the type of camera you can buy. So write down what you want to spend before starting. Change your mind later, but start with an idea to guide initial research.

Usage: What type of photography will you do? There are broadly two types of photographer…
The ‘point-and-shooter’:

  • Interested in recording fun, family, events and memories.
  • Love things they do when they have a camera around.
  • Take pictures as reminders. (Holidays, family, fun, action, friendship).
  • The camera is an accessory to the activity.
  • The camera is easy to use, probably in auto mode.
  • Simple controls – lighter, lifestyle-type design.
  • Less interested in the art of photography, more the style of life.

The ‘photographer’:

  • Take pride in every shot.
  • Indulges other passions through photography.
  • Wants more equipment.
  • Interested in “functions” and “controls” – technical cameras/DSLRs.
  • Camera is an essential part of the activity. (Landscapes, macro, action, nature, still-life, fine art…).
  • Loves photography for its art, technology, skills and techniques.
  • Documents passions and communicates interests through photography.
  • Take pride in camera control.
  • Enjoys the technical aspects of the capture as much as the images.

Each has an associated type of camera. A heavy DSLR is not well suited to the carefree life of the point-and-shooter. A compact, colourful, wrist-strap camera is not suited to landscape shots and large prints. Preferences and lifestyle should be shorted out early on. Are you are a point-and-shooter or a committed photographer (DSLR style)?

Conditions: Indoors/outdoors, weather, underwater, holiday, abroad, air travel? The situations in which you use the camera affects what you buy. Consider protection, travel, camera size and special equipment needs.

Experience: Skill level affects purchase – your aspirations for your future photography will too. If you’re just starting out, buying a camera with a bewildering range of functions is daunting. Take simple steps. Entry level DSLRs provide for years of growth into your hobby and produce great images. This allows you to develop skills without confusion.

Features/flexibility: Spending more on a camera means more features and flexibility. However, while this gives more control it increases cost for relatively little increase in picture quality for starters. Don’t waste your money. Focus on what you need, not “feature bloat”.

Physique/fitness: When buying you don’t get a feel for using a camera. Little, disabled, or not very fit people may find big cameras unusable. Fit, but not shooting daily? You might struggle to hold up a big camera for long periods. Buy a camera you can hold steady and use all day (if necessary). I know people who bought great cameras and had to sell them again to buy another great, but lighter, camera. Also ensure you can grip it properly and comfortably. Can you reach all the buttons easily?

Size of prints: More megapixels is NOT a better camera today. Good quality cameras have sensors to produce great images. High megapixels are only necessary for high resolution pictures – mostly for large prints. You pay a lot of money for top-megapixel cameras. Only buy them if you frequently do big prints in high definition. Don’t worry about megapixels in the market mid-range.

Lenses: To a committed photographer lenses are key. Buying the right lenses is more important than a camera body. Lens investment pays you back for a lifetime, or many camera bodies. Spend less on the body than you intended and save money for better quality lenses (not more lenses). Consider retaining at least half your budget for lenses.

Other equipment and accessories: New cameras require other items affecting your budget. Consider…

  • Lenses (Wide angle, Zoom, macro etc)
  • Camera/equipment bag
  • Tripod
  • Spare batteries (two)
  • Light modifiers (diffusers), filters, reflectors
  • Specialist equipment for specific interests
  • Memory cards (at least two – eg. 2×16 Gb not 1×32 Gb – cheaper and more secure)
  • Off-camera flash (pop-up flash is rarely useful)
  • Remote trigger to fire the flash/camera

There may be other things too.

Compatibility: Is your existing equipment compatible? Buying a camera could mean buying those extras again, straining your budget. Consider the camera brand you want to buy. That may affect the other equipment you buy later. Lenses are a particular consideration. Top brands make good lenses, but other brands may not. That could be important for your buying strategy.

Picture quality: Quality digital cameras produce great picture quality. However, large, high resolution images (especially for printing) may need larger digital-sensor size (cropped or full frame?) and type of lens and lens quality. Buy up-market lenses as far as you can. For a point-and-shoot camera consider the quality of zoom. ‘Optical zoom’ is best, the lens does the enlarging. The quality will be better with a good optical zoom. With a large digital zoom component expect lower quality prints. Digital zooms crop the picture in-camera to make the picture appear bigger. You will see more detail, but the picture may be a lower definition/resolution.

More after this…

find out more...Photokonnexion tips by email
Enjoying this article? Please sign up for our
daily email service.
                                                Find out more
#11030#

2. Research

Now look at what is available. examine a range of reviews on different websites. Check out what’s popular around the web and get a “best fit” camera to your specification from above. Talk to experienced photographers. Join a club. Leave questions on Internet forums. Ask in shops.

Be prepared for this stage to take quite a long time. You may be committing to a brand for a quite a few years, or your career. Take it slowly so you can understand all implications. Keep notes and be prepared to check definitions and learn about features.

3. Try it out

Once you have identified your dream machine, see if you can try one out. Beg, borrow or hire. You will be unlikely to try everything but spend a weekend or week with it to really get a feel for it. That will help you to feel confident about your ideas or start new research. Ensure you are on the right track.

4. The purchase

From a shop: Local camera shops often have deals and committed staff. They will have knowledge and experience too. Remember they are on commission and a different focus to you. So go to a shop with a really good knowledge from the above before you buy.

Online: There are some great deals but also a lot of scam artists. Consider…

  • Who you are buying from.
  • Does the site cover losses?
  • Is delivery and packaging good?
  • Delivery times?
  • Are there proper cancellation and returns procedures?
  • Transit/purchase insurance (the company or your credit card)
  • Is the online store reputable and well known?
  • Do not click from email ads to the site – insecure.
  • Check with friends to see which online stores they used.

If it sounds too good to be true, it probably is. A reputable company will have protections built into the purchase and made clear on the site.

When you are ready consider negotiations. Lots of websites will do deals. Shops will too. Make sure you get the right deal, but don’t compromise security or safety.

5. After purchasing

Check your purchase properly – has everything arrived? Retain all paperwork and orders for future reference, returns and insurance. Test to see that it works properly. Get signed receipts and correct paper work for returns, delivery shortages or damage.

Satisfied you have the correct equipment and it works? Put it through its paces in a logical way. In Getting started with a new lens I show how to work through testing and getting to know new lenses. Many of the principles apply to the purchase of a camera and help you get to know your camera properly.

Other ideas?

Please share your other ideas, tips or experiences on buying a camera with us below in the comments…

By Damon Guy (author and Photokonnexion editor)

Damon Guy - Netkonnexion

Damon Guy (Netkonnexion)

Damon is a writer-photog and editor of this site. He has run some major websites, a computing department and a digital image library. He started out as a trained teacher and now runs training for digital photographers.
See also: Editors ‘Bio’.

Twelve Simple tips for atmospheric candlelight shots

Candles put out a wonderful light…

Everyone feels the atmospheric impact of candlelight. The colour and the low light seems to draw you in. Capturing that light is easy with a few simple hints. Lets look at what is needed…

Tripod…

There is nearly always low light associated with candle photography. That means working with longer exposures. A tripod is excellent for that. Indoors, beware of a wooden floor, any move you make can be transferred to the tripod. Floor vibrations can ruin a shot or make it soft. For sharpness remember to use the camera timer for the shot or a remote shutter release.

Lighting…

The best way to view candles is by their own light. Because they don’t use a tripod many people are tempted to use flash. Unfortunately flash will over-power the candlelight. It will take out the colour from the light and tend to create hard, sharp shadows. It will ruin the atmosphere of the candlelight. Make sure you switch off your flash. If you need more light the you can use as many candles as you need to raise light levels. They don’t need to be in the shot, but they will keep the light the same throughout the shot.

Composition…

First decide if your candle or candles are the subject or are props. This decision will affect your focus and how you lay out your scene. Candles can create a strong bright spot in the scene. If it is too bright the flame will form a burnt out white spot. Once you have arranged your scene, ensure that the candle will only draw the eye a small amount unless it is the subject. You should consider the placement of the candle in a way that might minimise the impact of the bright flame spot.

Positioning…

If all your candles are close together the light will tend to act as one light source. This will tend to act as a hard light creating more defined shadows. If you want the light to be softer and the shadows with less well defined edges set your candles further apart. If the light is to be cast on a face then soft light will be more flattering.

Movement…

One of the peculiarities of working with candles is that the flames are subject to the slightest air movement. Unfortunately candle flicker is attractive to the eye in real-time; but looks like a loss of sharpness in a still image. It is quite useful in close focus shots with a candle to use an air break of some kind nearby to stop air movement. In a table-top study use a large sheet of card to one side out of shot. That will help prevent air movements. If not, keep an eye on the flames when shooting. Try to capture the flame upright or, if using more than one flame, make sure they are all going the same way. They look more natural that way.

Since candle light is low intensity, make sure you also prevent other sources of movement in the shot. They will inevitably be blurred as the shot will be using a long exposure. This will look like a distraction against still flames.

Can you write? Of course you can!
Write for Photokonnexion...

We would love to have your articles or tips posted on our site.
Find out more…
Write for Photokonnexion.

Light intensity…

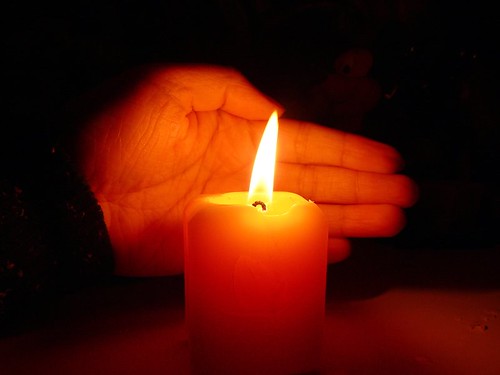
The light from a candle can be made much more intense if you use something to catch the light from the candle. A face, hand or other objects bring alive the picture and complements the candle. The presence of the object acts to reflect the candlelight. Light flesh tones are particularly good in this respect since the flesh colour is tonally close to the candlelight hues and they act as a reflector to bring out the light.

From

From “Candle Series” by Spicedfish
From “Candle Series” by Spicedfish on Flickr External link - opens new tab/page

Using reflectors in a candle scene is a great way to raise the light intensity. You can find other types of surface than the one in this picture in most scenes. Walls, ceilings and even off-shot reflectors are all good. Be careful to use neutral colours. Colour reflectors will affect the colour of the scene. If you are using a big card out-of-shot make it white. This will reflect the same colour light back into the scene, filling in the light.

Shadows…

The other side of light intensity is the shadows. The darker tones and strong contrasts of candle shots create most of the atmosphere. Spend time studying the shadows created in your scene. Strong contrasts are great subjects. If you create shadows that fall badly across your scene it will impact on the overall effect. The best use of shadows is often to the edges of the shot. If the light fades out to edges this holds the scene into the shot – naturally focusing the eye. Work with shadows to ensure the mood is harmonious.

Additional lights…

If you want to use fill light in the scene try to match the quality of light from your candles. Use soft light sources and natural light with hues matching the candles. Natural light will fill the scene well but tend to neutralise the colour of the candle light. The warm glow of candles is a great mix with evening, low-intensity light.

Some people use light with gels to give a warm glow. Warming gels can also be used with a flash. However, beware the power of flash. The candles will lose their soothing effect if all the shadows are taken away around the base of the candle and harsh shadows are introduced from one side. Typically use a diffused flash on the lowest setting – it also helps to be a distance away from the candles as well.

Multiple candles…

When working with one candle as subject the main focus of the shot is clear. However, there is a lot of scope for creativity. Consider two main issues. How to layout your candles and how to use the overall light with the layout. Using candles for making patterns is great fun and can produce excellent shots.

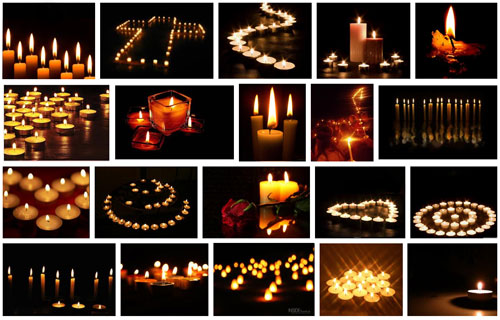
Patterns with candles

Making patterns with candles
Click to view Google Images “Candle Light” search

Try to keep the scene simple. Overlapping candles or indistinct objects in the pattern are confusing. Work with the sharp contrasts and keep your pattern well defined.

Exposure…

How long should you make your exposure? This depends, like any scene, on your light levels. To get more light in the exposure a long shutter speed is suitable for most candle shots. A range of 1/15 second down to 2 seconds is a good starting range with an ISO of 100. Camera settings vary significantly with reflectors, multiple candles or fill lights. Experiment to get it right. Aim to make the shot moody or atmospheric while providing detail for the eye to look at around the candle flame(s).

The main exposure concern with dark or shadowy shots is digital noise. If ISO is too high you will get more noise. It is better to use a low ISO, say 100 and have longer shutter opening. This reduces noise and means more detail is visible.

Lenses…

A fast lens allows a wider aperture. Faster lenses will allow a quicker exposure than a smaller aperture. Nevertheless, when experimenting check the depth of field. With big candle patterns, or larger subjects, a very wide aperture will give a very shallow depth of field. Too shallow and you will lose a lot of detail. On the other hand, lots of candles in the background with a shallow depth of field will produce pleasing bokeh. For choosing your lens, more than other aspects of your set-up, you need to have a clear vision of what you want your final shot to look like. Then do some “Chimping” to check results.

Prime lenses, especially the 50mm, will give an approximation to the human eyes. To capture the mood of a scene a 50mm will help. A wide angle lens close-up can provide great exaggerations of candle tallness or broadness – depending on lens orientation. There is great scope for artistic interpretation. Also remember that zoom lenses tend to foreshorten, reducing the apparent depth of the shot. With a zoom lens place your candles to give an impression of depth.

White balance…

The warm glow of candles is attractive. If you change the white balance you will change the characteristics of the warm glow. Candlelight shots are about moodiness and atmosphere. It is worth playing with the white balance to influence the shot and increase moodiness, but be careful you don’t remove it. You only need to adjust white balance when shooting in *.jpg as it will be fixed once the shot is taken. If you are shooting in RAW you have more flexibility with settings in post processing to control colours and the final exposure. If you cannot shoot in RAW then, again, make sure you do some “chimping” to get the colours right.

Being safe…

Although fun, candles are naked flames. It is all too easy in low light to leave something close to the candle. Fires start quickly and spread fast too. Feel free to experiment but make sure you don’t accidentally knock over candles, touch wall paper with one or do something else to set off a fire. Never leave candles alight and unattended. Always blow them out and wait for the smoke stop raising before leaving.

find out more...Photokonnexion tips by email
If you enjoyed this article please sign up for our
daily email service.
                                                 Find out more
#11030#

By Damon Guy (author and Photokonnexion editor)

Damon Guy - Netkonnexion

Damon Guy (Netkonnexion)

Damon is a writer-photog and editor of this site. He has run some major websites, a computing department and a digital image library. He started out as a trained teacher and now runs training for digital photographers.
See also: Editors ‘Bio’.

Easy ideas for controlling your flash unit

Specular highlights

Bath toy
Specular highlights are distracting and draw the eye which spoils the shot.

Flash is a great benefit and a problem all at once!

Most people don’t realise two things about flash. First, the standard setting is nearly always too powerful. Second, the highlights resulting from flash are very distracting.

Working with flash power

Like all things in photography you need to think carefully about using flash. It is not simply click and move on. Most improving photographers are just beginning to make shots rather than snaps when they begin to see the quality and colour of light. So it is easy to miss some of the impacts that flash has on a subject. Here are a few consequences of a flash shot…

  • An over-bright subject.
  • Strong highlights with a tendency to wash out colours.
  • Specular highlights that create sharp, bright spots that distract the eye.
  • Bright foreground, dark background.
  • Flesh tones strongly whitened giving a sick look to the face.

Each of these is almost always down to using too much power in the flash. So, the way to over come these issues is to do two things. Turn down the power of the flash and diffuse the flash so it scatters the light.

Turning down the flash is simple. You must find the setting that adjusts the flash power level. This is easy if you are using an off camera flash because the unit usually has a display and a dial or buttons to change the settings. On-camera (pop-up) flash is usually adjusted by finding a menu setting that turns the power up or down. You may need to consult your camera manual to find where that setting is found.

The key to getting the right setting for your flash is to understand how to change it. Most off-camera flash units are marked up so there is two stops of light on the flash. Normally if the flash is marked 1:1 then that is full power, and more often than not this is the default setting. You can usually turn this down by one third of a stop of light at a time. Each time you stop down the setting one stop you are halving the light it emits.

Pop-up flash units may not be marked so clearly. Some are marked [low – medium – high], others, particularly point and shoot cameras, may just have “full | half”. More sophisticated pop-up units may also be marked in the same way that off-camera flash units are marked. Which ever your flash is, you should practice with it so you have an idea of how powerful it is and how much the settings can change the impact of the flash.

Flash diffusion

The best way to get used to using flash and controlling the power is experimenting. However, the issue of nasty highlights is the other problem the inexperienced user often does not spot at first. Strong highlights raise the light levels so you can see the tonal changes in the colour of the surface the light hits. This helps to define the shape of an object. So, for example, a brighter top on a ball and dark shadows under it help to define the spherical shape.

If the light intensity is too high, particularly on reflective surfaces, the reflected light level will exceed the level the camera can cope with. The highlight then becomes blown out. The light is so bright in that area that it becomes a bright spot where all the detail is lost to pure white. Unfortunately such strong, blown out areas, are severe distractions. In the picture above, the small reflective points, called specular highlights, are also strongly distracting. So what can you do to avoid these nasty effects?

If your power adjustments are not working and you still have blown out spots or highlights then you should consider diffusing the flash. This makes a difference in two ways. The diffused light will scatter the light from the flash over a wider area. This effectively lowers the light intensity even further in the area of the highlight since the light is not hitting it from a direct focused hard light from the flash.

Secondly, diffused light spreads the effect of the light. This makes it more likely to bounce off other surfaces nearby. These surfaces then become multiple mini-light sources. All these sources hitting your subject create a soft light which is much less likely to create specular highlights or very strong colour-destroying highlights.

So how do you do this diffusing? I just love this great flash diffuser. Designed to fit your off-camera flash unit it is an ingenious design and easily adaptable to any flash unit. Check out the Rogue FlashBender 2 – off camera flash. If you have an off-camera flash this is the best. It is the most adaptable diffuser I have ever used. You attach it to the flash with a wrap around grip. The big diffuser stands up above the lens of the flash. It is tough, flexible and creates a lovely daylight-white light. It is superb for portraits and still life work. Coupled with adjustments to the power settings on your flash it gives you excellent control and helps reduces highlights and the effects of hard light direct onto the subject.

For off camera flash there are a range of diffusers available. They are based on various different mounting or reflector principles too. So, you need to look around to see if you can find a diffuser that suits you.

For pop-up flash the options are not as easy. However, I recommend one of two options. I have successfully used ordinary white tissue paper sticky taped over the pop-up flash to both reduce and diffuse flash. However, while this works well, reducing the light by about a full stop, it is a temporary solution. Also, if you use the flash a lot the extra insulation may cause the flash to over heat. So, not for regular use.

My favoured options for pop-up flash diffusion are one of these three methods…

Professor Kobre’s Lightscoop, Standard Version Bounce Flash Device, Universal Model, fits over the Pop-up Flash of most SLR Cameras This diffuser produces a very effective ceiling bounce for the diffusion. However, make sure that in rooms where you use it there is no strong colours on the ceiling or it will cause colour casts.


Gary Fong Puffer – Pop-Up Flash Diffuser for Canon / Nikon / Pentax / Olympus / Panasonic- Lumix pop-up flashes A well reviewed unit, and has the advantage of an easy fit. The other advantage is that it diffuses the light moving forwards. The other two units here bounce the light which puts you slightly at a disadvantage in controlling the flash light direction.


Cateye LETS Flash Reflector/Diffuser Hybrid, for use with DSLR pop-up flashes Although I have not used this one personally, I know some people who have. I have had some very good feedback on this unit and it seems to work effectively in a wide range of situations.


Great shots with flash…

Yes, like everything else in photography, to get good with it, you have to practice use of flash. However, first you need to make sure you can spot the highlights, specular highlights and over-powered flash. Once you know what you are looking for you can adjust your flash power.

The best way to gain control of your flash is reducing the power, or at least adjusting it. Also, the more you soften the harsh, hard flash light the less distracting and natural the highlights will be.

Whatever you decide to do to make your flash manageable do plenty of experimenting to gain control of the light. Don’t forget to Examine Shots Before Shooting Again – “Chimping” to check for highlights. The practice will pay you back in great, well lit shots many times over.

find out more...Photokonnexion tips by email
If you enjoyed this article please sign up for our
daily email service.
                                                 Find out more
#11030#

By Damon Guy (author and Photokonnexion editor)

Damon Guy - Netkonnexion

Damon Guy (Netkonnexion)

Damon is a writer-photog and editor of this site. He has run some major websites, a computing department and a digital image library. He started out as a trained teacher and now runs training for digital photographers.
See also: Editors ‘Bio’.

Simple explanations of camera exposure modes

Choose your settings from a range of modes.

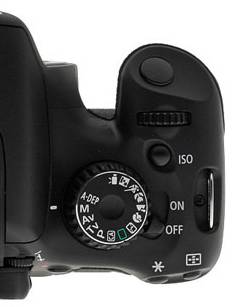
Canon550DModeDial

Camera Mode Dial
Choose the most suitable setting for your shot.


The DSLR contains a sophisticated computer providing a wide range of exposure options. They may seem bewildering. In this post we will provide simple explanations for the most common exposure modes to help you choose the best method for your next shot.

Exposure…

The modern Digital Single Lens Reflex (DSLR) can accommodate so many options that it is often difficult to know how to get started. So it is helpful if you have some idea of what exposure is about.

As photographers we are concerned with the use and manipulation of light. Everything else is secondary. We need to understand the concepts relation to how the camera detects light and the impact that has. Basically there are three controls which affect way the camera uses light. These controls are:

  • ISO – controls how sensitive the camera is to light. However, at high ISO levels there is an increase in digital noise.
  • Shutter speed – controls how long the camera sensor is exposed to light. The shutter speed also affects the amount of movement blur in the shot. The slower the shutter speed the more blur.
  • Aperture – controls how much light is allowed into the camera. Aperture also controls the depth of field. The wider the aperture the shallower the sharp zone in the picture.

(The links above take you to a full explanation of each control).

Between them these three provide control over your exposure. Co-ordinating them requires a little practice. Nothing too difficult. It is about balance. For the camera to create an exposure it has to collect a fixed amount of light. Too much light and the picture will be over-exposed. Too little light and the pictures will be underexposed. Getting it right requires a little knowledge of your camera light meter and how to change the controls to create the balance that makes the exposure.

In addition to the direct controls listed above there are the others called “modes” found on most cameras. These have been developed by the camera manufacturers to try and assist beginners who don’t understand the exposure process. The modes are intended to provide easy pre-selections for certain situations.

The different modes range from fully controlled by the camera (fully automatic mode) through to fully controlled by you (full manual mode). That is a range of controls from where the camera does everything for you through to where you make all the decisions. These modes differ from camera to camera but in general terms they are described below. The names may be different with each manufacturer too…

Full Auto: Basically this puts your camera into “point-and-shoot” mode. The camera uses its sensors to make an exposure. It responds to its programming and creates a picture which is of good quality but which you have no creative control over at all. It will even activate the flash if the camera detects insufficient light to create a balanced exposure.

Auto with No Flash: This is the same as the full auto setting, but the flash will not work under any circumstances. This leaves the camera to make the exposure without the additional light from the flash.

Program: The camera responds to its programming and makes an exposure by controlling the settings on your behalf. However, you have the option to make changes to that pre-programmed exposure – small adjustments that allow you to have a small amount of creative control.

Scene settings:
The scene settings on your camera includes a number of scene variations. These are likely to vary widely between the manufacturers and various models they make. Here are some of the more popular options:
• Portrait (for taking portraits)
• Landscape (landscapes shots and long distance shots)
• Night-time (night and dark shots)
• Sports and/or Action
• Macro
The above are standard modes. In most recent cameras these may be extended to include other additional modes to cover children, pets, specialised filters for colours and vintage settings for example. All sorts of other modes may be included depending on the target market for the camera.

These automatic modes above are pretty much camera controlled. Aside from tweaks, the camera has all the control. The problems with all of these is that the manufacturer is calling the shots. You can compose the shot, but have little control over what it looks like in the exposure. The discerning photographer wants to take creative control and use the main three controls mentioned above. Then they will be able to use the depth of field, movement blur and sensitivity to light to create the exposure that expresses their interpretation of the scene they are shooting. As a result there are three modes to deal with this. The first two are “semi-automatic” and the third gives you full manual control of the camera.

Aperture Priority:
The aperture semi-automatic mode relates to the manual control of aperture and the automatic control of the shutter speed and ISO. When you are in ‘A’ or ‘Av’ (aperture value) mode you are able to change the size of the aperture. The different sizes of the aperture are measured in “f-stops”. You can find out more about f-stops in this Definition: f number; f stop; Stop. The term aperture relates to the size of the hole which allows light into the camera. As the aperture varies the depth of field changes. Controlling the depth of field gives you discretion over the sharp area of the picture. The sharp parts of the picture attract the eye. Controlling where the sharpness is in the picture therefore affects where the viewer looks. This makes aperture control a valuable aspect of your composition.

Aperture also determines how much light is allowed through to the digital imaging sensor. A wide aperture allows more light in (say, F2.8) and has a shallow depth of field. A narrow aperture allows less light through (say, F22) but has a deep depth of field – at F22 sharpness will be more or less right through the picture.

Aperture priority allows you true control over the creative aspects of the light levels in the exposure. However, the camera balances your exposure control to make a good quality exposure because it sets appropriate ISO and shutter speed. You have creative control, it provides the quality exposure you need to make a great image.

Shutter Priority: This too is a semi-automatic mode. However, using this mode you have access to the shutter speed. Nominated as S, T, or Tv (time value) mode allows you creative control over the length of the exposure. Using this mode you can set yourself up for longer or shorter shutter opening. If the shutter is open for longer anything moving in the field of view will tend to blur. If the shutter is open longer the movement will be more blurred.

Shutter speed allows for control over the creative aspects of the total amount of light allowed to influence the exposure. While using the shutter speed the aperture setting and the ISO are under the control of the camera so it can balance the overall exposure while you control the creative part.

Manual or Full manual setting: The manual setting or “M” setting on the modes dial of your camera is used to give you full control. If you do it right your exposure will allow for depth of field control as well as creative use of movement blur. This mode gives you full control of all three aspects of the exposure.

So which mode do you choose?
In essence the automatic modes and scene modes are manufacturers programming – they do all the work for you. They represent an attempt to create classic ways of doing certain shots without you needing to take part in the exposure control. However, as a result these modes respond to make a picture that is not of your vision. Instead it is the suggested settings that manufacturers have researched about what the average shot of that type. These modes are in effect telling you how to take the shot.

On the other hand, the semi-automatic modes allow you to take control of major aspects of the control of the camera. As you have control of only one of the controls it allows you to concentrate on working on the creative part of the shot. That leaves the camera the make a balanced exposure to support your creativity. As this mode gives you an important aspect of the control without upsetting the outcome of the exposure it is an excellent mode to learn control of the camera.

Likewise, when using the shutter speed as a way of controlling the camera. You have the creative control over the length of exposure and any movement blur. This too is a great mode to learn control of the camera.

Both Av and Tv modes are affected by the other controls when in use. So, it stands to reason that you do not have the total control needed to get an exact overall exposure. However, for you to make full use of such a full manual control you should also have quite a sophisticated vision of what you want to achieve in your final exposure. While that is quite a normal requirement for a picture it does require some practice. The semi-automatic modes allow you to learn about the use of these controls and to develop the vision you need to start using the full manual mode. Learn to use these semi-automatic modes and you are not only on the way to full manual control, but also learning about how to envision your final exposure.

find out more...Photokonnexion tips by email
If you enjoyed this article please sign up for our
daily email service.
                                                 Find out more
#11030#