Tag Archives: Flash

Buying a tripod – the essentials

Buying Tripods

• Buying Tripods •
Buying a tripod? There are a lot to choose from. So what should you look for?
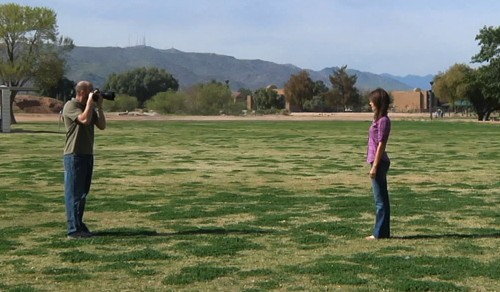
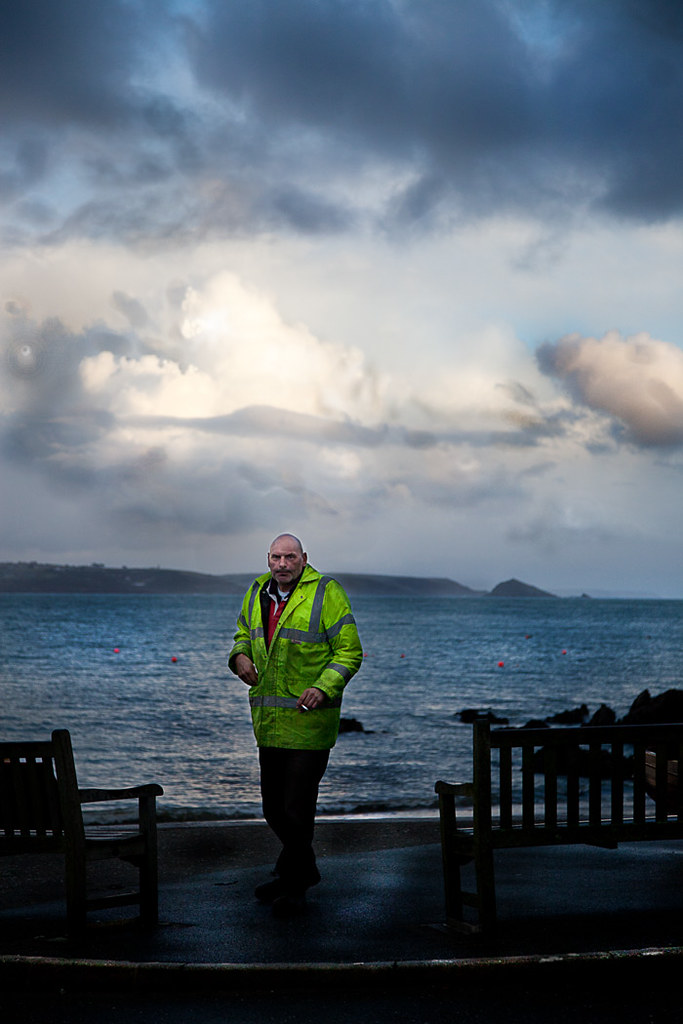
Image from the video.

Why would you buy a tripod?

Because a tripod is of the central pillar of your sharpness strategy. Without a tripod you are denying yourself the opportunity to use a large proportion of the settings on you camera. Let’s look more closely at what this means…

Settings

Your camera has three primary controls…

  1. ISO – Controls how sensitive your camera image sensor is to light.
  2. Shutter speed – Controls how long your sensor is exposed to light.
  3. Aperture – controls how much light is allowed to reach the sensor.

These are inter-related. As we want a high quality result (with low digital noise) we set the ISO to around 100. Therefore, for our purposes here we are particularly interested in two of those settings.

  1. Shutter speed – movement blur created with long exposure; movement frozen at short shutter speeds.
  2. Aperture – Wide aperture, shallow depth of field; small aperture gives a deep depth of field.

Looking at these you need to consider how you do photography where only low levels of light enter your camera. Here are some examples:

  • Landscape – Use aperture f11 or higher. Small aperture gives Depth of Field, but lowers the light influx. Therefore you need to have a longer shutter speed especially during the Golden Hour. Hand-holding is not an option.
  • Portraiture – In bright sunlight a shallow depth of field (wide open aperture – blurred background) would overexpose the shot the shot.Use a Neutral Density Filter. This reduces light influx but means a ling exposure. A tripod stops handshake.
  • Still life: You are doing a still life requiring low light for the mood shadows. To get the exposure you need a longish exposure. You do some test shots. Your best exposure is with a shutter speed of one second. Tripod needed!
  • Fireworks: You need to hold the camera steady for about 1/20th of a second to get the full spread of the explosion. Tripod – essential.
  • A disco dance floor – If you want to capture movement you will need to work at around 1/60ths of a second. But you also need sharpness right through. You will need an aperture of f8 or f10. A Tripod is essential if you want the movement blurred and the rest of the room sharp.
  • Photographing a baby. Flash changes the mood and invites crying. It’s also harsh light. Baby skin loves natural light. Use a fast shutter and tripod. Make the composition right then watch the baby. Pick your moments and take several shots. A tripod helps you can concentrate on the right moment while baby is still and happy. You don’t have to recompose for every button push.
  • Family photo – Set the timer, join the group! A tripod is essential.

I could go on… there are dozens of everyday scenarios requiring a tripod. These are just the obvious ones. For sharp, quality shots I need to use a tripod around 75% of the time. My tripod is essential to my business.

If you are an amateur you probably cover more varied situations than me. You need a tripod for a high quality result. It is not uncommon for me to hear students say, “I never use a tripod, I don’t need one”. Then in almost the same breath, “Why are my pictures always blurred or dull?” The answer to the question is – to get a proper exposure you need a tripod.

Lots of people say, “A tripod just slows me up!” My response is simple. Most amateurs take ten shots to get one – and are not necessarily successful. A tripod actually saves you time. You can rely on one shot being sharp. In post production you review one shot for each composition, not dozens.

What to look for…

In general the main considerations are:

  • Well designed: smooth operation, strong leg clips so you can set the tripod at various leg heights.
  • Centre column: Solid, little movement, clamps solid.
  • Legs – variable wideness: You can spread the legs out wider and at different angles to each other.
  • Tripod provides a platform for different heads: Do not buy a tripod with one type of head pre-fitted. It may not be suitable for your camera and there are different heads for different types of photography.
  • Weight or lightness: Solid and heavy tripods mean a good platform. Lighter carbon fibre tripods are more expensive, but the carbon fibre has the ability to reduce vibration (especially when stressed by a weight bag hanging on it to steady it).

For general work I use this tripod…

Of course you need a good head on a good tripod. This head is my mainstay for most work…

A good tripod will last you years. It will be stable and steady even in wind. It will not wear out easily. A worthwhile investment. Don’t be tempted to go cheap. Look for quality brands with after sales parts and good design. Spend more and you will have a flexible friend that helps you in all aspects of your photography.

Have a look at these ranges of tripods. I use a Manfrotto for most situations, but there are other quality ranges. My Benro tripod is very rugged and nothing beats it on a beach or mountainside. Check out these links for a range of ideas…

Manfrotto tripods  External link - opens new tab/page

Gitzo Tripods  External link - opens new tab/page

Giottos Tripods  External link - opens new tab/page

Benro Tripods  External link - opens new tab/page

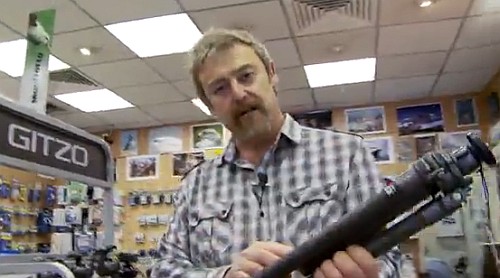
Which Tripod Should I Buy?

Mike Browne introduces this video with the basics of how to think about what you want in a tripod. What he says is good thinking. At the end two other photographers add their advice. I was impressed with the comments of both. There is a lot of great advice in this video.

Mike Browne  External link - opens new tab/page

Comments, additions, amendments or ideas on this article? Contact Us
or why not leave a comment at the bottom of the page…

Like this article? Don’t miss the next — sign up for tips by email.

By Damon Guy (author and Photokonnexion editor)

Damon Guy - Netkonnexion

Damon Guy (Netkonnexion)

Damon is a writer-photog and editor of this site. He has run some major websites, a computing department and a digital image library. He started out as a trained teacher and now runs training for digital photographers.
See also: Editors ‘Bio’.

Learn to shoot while controlling the depth of field…

Depth of Field

• Depth of Field •
Work with Depth of Field in mind. It will help you to control the blur that provides soft and un-distracting backgrounds.
(Image taken from the video.)

Shooting with Depth of Field

The controlled use of Depth of Field (DoF), when done skilfully, is a central pillar of artistic success in photography. To learn how to properly control its use will help you to master many challenging situations.

Getting the measure of Depth of Field

Following the great response from “Understanding depth of field” yesterday, here is another video. In this one Mark Wallace shows how the three basic controls of DoF actually affect the clarity and blur in fields where depth of field is visible. It is important to watch the settings as he takes the pictures. Follow how the blur changes as the settings change.

SnapFactory  External link - opens new tab/page

Comments, additions, amendments or ideas on this article? Contact Us
or why not leave a comment at the bottom of the page…

Like this article? Don’t miss the next — sign up for tips by email.

By Damon Guy (author and Photokonnexion editor)

Damon Guy - Netkonnexion

Damon Guy (Netkonnexion)

Damon is a writer-photog and editor of this site. He has run some major websites, a computing department and a digital image library. He started out as a trained teacher and now runs training for digital photographers.
See also: Editors ‘Bio’.

Know how to use a gobo? You have probably used them…

A gobo can be used to fit on off-camera flash units

• A gobo can be used to fit on off-camera flash units •

A simple idea – but so useful!

A gobo is used to block or shape light – normally using black screens of some sort. They’re commonly used in the movie industry, and more recently photography. Find out all about them here…

Of light and shadow

It sounds like a grand and mysterious name. In fact the term gobo is a rather straight forward. Here is what the Oxford English Dictionary (OED) Gobo - Oxford English Dictionary | External link - opens new tab/page says…

gobo, (noun); gobos (plural)
Etymology: Unknown. Originally from the U.S.
1930 – Gobo, portable wall covered with sound-absorbing material.
1936 – A ‘gobo’ is a small black screen used to deflect light.
1970 – A gobo is anything that goes between, e.g., the light and the set.
OED (online) Seen 08/08/2013  External link - opens new tab/page

So, this wonderful little word seems to have been a compound word from “go between”. Hmmm! I would like to see some proof of that. The side entry in the OED says in red “This entry has not yet been fully updated (first published 1972)”. Seems a long time without full qualification.

What is the Gobo really about? Manipulation of light and shadow. Our more technical definition in the Photographic Glossary (gobo) goes into more depth about how it is used in five broad ways in modern photography…

  • To block light or create shapes or patterns of light and shadow together.
  • A mask with a shape cut out of it fixed to the light and used to project a light shape (eg. a logo).
  • Cards/screens to create shaped shadow or deeper shadow in a scene.
  • A jury rigged light modifier on a light to shape or direct the light.
  • A mask placed in the light beam which shapes the light/shadow in the scene.
  • A light modifier allowing some light through and casts a specific shadow or diffusion shape

It is interesting that both the Hollywood studios and the OED use the term to manipulate and absorb sound. Of course in photography sound is less important. You can see however, that gobos are used to shape light and shadow in various ways.

How do gobos affect you?

If you have ever held your hand, a hat or a piece of card up to shade your lens to prevent flare or lens reflection you have used a ‘flag‘. Originally a gobo was the term used for protective devices to keep a lens out of incidental light. Now days the more specialist term, flag, is used for shield or blocking of light especially when it relates to the protection against lens flare. Understandable the two terms are easily mixed up. A flag seems to be used mainly for blocking light out. A gobo more for manipulating light, especially where that involves creating shadows.

Today I was photographing a white van in very bright overhead light. I keep a black blanket in my equipment for this type of situation. My assistant held up the blanket behind me to create a broad shadow across the corner of the van I was photographing to cut out the strong sun light. This is one form of gobo. It was not cutting out the light completely. I was reducing the very bright sunshine to an area of pure white so I could more easily pick out the details.

In a studio you might use a a black screen to intensify the darks in one area of a scene. It is a mood enhancer in this situation.

On another day I was working on business portraits. The office was a bright, but grey colour. We used plants on a trellis with a light behind it to create a shadow-pattern of leaves and diamond shapes onto the wall giving added interest to the background, breaking up the grey. This is a gobo too – being used to enhance the light/shadow ambiance.

More after this…

A solid light of the same colour and intensity across a still life is boring. Use cards or diffusion surfaces to vary the light and create slight shadows or graduate the light. One side of the still life use a black card to darken and block light. On the other side use white card to intensify and diffuse it.

A gobo is often used to shield the camera from light too, but it is not a flag. In A quick shoot using water? Tips to get you started… from yesterdays post a gobo could have been placed in front of a flash unit on the table. This would prevent the light getting directly back to the camera lens, but still project the light onto the back wall. A two in one gobo.

There is one further really fun use of gobos that is growing in photography. The recent growth of interest in light painting has renewed the interest in projecting shapes onto surfaces to be photographed. A black card with a logo or shape cut out of it can be placed directly in front of a light source. The light shining through the shape projects it onto a far surface. Then, in the dark, light painters can photograph the projection. Light painting is the intrepid art of photographing deliberately manipulated bright lights in the dark. It’s great fun!

What have we learned

A gobo is a term that describes the manipulation of the light shadow relationship. We use a range of blocking and masking techniques to manipulate the light and the gobos are the instruments of that manipulation. A flag on the other hand is a pure blocker of light.

Have fun thinking this one over. It is a useful concept and one that has infinite uses for mood, variation of shadow and creating settings.

Comments, additions, amendments or ideas on this article? Contact Us
or why not leave a comment at the bottom of the page…

Like this article? Don’t miss the next — sign up for tips by email.

A quick shoot making water splashes? Tips to get started…

Water splashes :: Have a go at water from a bottle

• Have a go at water from a bottle •
Water splashes :: Great fun, easy to do at home.
Picture taken from the video.

Photographing water splashes is great fun!

Every photographer has to have a go at water splashes some time. It is fun, can be done at home, and produces some creative. exciting and visually interesting shots. To get started you need very little kit. Here’s how you can have a go…

Water splashes :: Fine art water droplets

Everyone wants to do water droplets splashing up. Typical fine-art water droplets shots produce brilliant shapes and forms that we don’t see every day. I am sure you have seen them… if not here is a page of examples ::
Fine art water droplet images on Google  External link - opens new tab/page

Water splashes :: Working with water to get started

Fine art water splash shots need quite a bit of practice and precise measurements. It is better to get some practice working with water first. Then you will learn about the equipment and working with water. You will also get some great shots.

Start off with an easy exercise. The video is going to show you how you can do photos of water tumbling out of a bottle. You get some great results and there is a twist to add a little pizazz. You can show the bottle with the water splashes going upwards!

The video will show you how to set up the water splashes shot with a bottle. Here are a few things you need to do for this exercise. In the video Gavin Hoey has some expensive equipment. We can do it using only household items.

What you need…
  • A water tray – to collect the water splashes coming out. Use a baking tray or large bowl.
  • Use a broom stick or pole to hang the bottle. Put two chairs on a table with the the pole between them Use the backs to hang the bottle. This gives you enough height for the shot at a comfortable level.
  • Use a smallish, thin-necked bottle. Large bottle necks let the water out too quickly. Start looking for the right bottle now. You will have found what you want by the weekend!
  • To suspend a bottle without a studio clamp, tie the bottle around with a length of string long enough to hang it from your pole. Then use some packing tape, or electrical tape to stick down the string tied around the bottle. This stops the bottle from slipping out of the string. This method actually does a better job than shown in the video because the bottle hangs slightly to one side – a pleasing composition. Tape the string onto the bottle near the end of the bottle so your shot captures the top part of the bottle without seeing the tape.
  • If your bottle swings too much while the water is coming out, tie it up using two strings affixed to the bottle. Tie them to the pole wider apart than the width of the bottle and this will stop the swing.
  • In the video Gavin suggests using an off-camera flash. OK, lots of you do not have these. Use the pop-up flash flash on your camera. The problem is that the on-board flash may create a bottle shadow on your background. This is because the flash is in-line with the shot. Notice how the flash is below the bottle in the video. Pull your working table away from the background. Then, well away from the water, point one or two bright domestic lamps at the wall. These will stop shadows and make sure that you have a perfect white background. I usually stand them on the floor behind the table and point them at the wall from there.

Apart from these tips the rest of the equipment is much as shown in the video.

One trick not in the video…

Cleaning! Don’t we all hate it? Yes, but it can really make a difference to your shots. Make sure you clean your bottle really carefully. Did I mention carefully? One thumb mark, dirty trace or blotch and the beautiful clarity of your shot will be ruined. Wash it in detergent and make sure it is dry (free of drips) before you start. It really makes a difference.

Please remember safety…

This is a safe exercise if you remember a few tips…

  • Make sure any electrical appliances are well away from any water splashes.
  • Ensure there are no trailing electrical wires near any water or equipment.
  • Have a towel on hand. Mop and dry wet patches on the table and floor as soon as they spill to prevent slipping.
  • Keep your camera and especially any flash equipment away from the water splashes. You don’t want to break your camera or get it wet.
  • Flash guns, even ones with batteries, release very high power jolts of electricity and can be dangerous if wet.
  • With chairs on the table make sure they are safe from falling.
  • This may seem a fun environment for kids… it’s not. Keep them clear. Have fun with the pictures later.
  • Remember, food dye can mark certain clothes, table tops and carpet materials. Keep it clear from these things, wear old clothes.
How to create amazing photos with water and a bottle


PhotoGavin  External link - opens new tab/page

A fun extension activity…

I have found that this bottle exercise can be huge fun. However, it’s also fun to experiment. I have on occasion placed various items under the falling water. Place them within the range of your shot frame. It takes a little lining up. Fun things like brightly coloured objects work well. Try grapefruit, lemon, bright colour balloons a bath duck and so on… Make sure you have something large enough to catch the water splashes. This makes way-more mess over a larger area!

If you want to make it really fun you can do the water splashes falling on someone’s head. Yeeha!

Have fun with your water splashes. With only a few tries you can get some great results and have some excellent shots to show your friends.

Comments, additions, amendments or ideas on this article? Contact Us
or why not leave a comment at the bottom of the page…

Like this article? Don’t miss the next — sign up for tips by email.

find out more...Photokonnexion tips by email
If you enjoyed this article please sign up for our
Tips by email service.
                                                 Find out more

A quiz about lenses… what do you know?

• Lenses • Lens quiz

• Lenses •

Lenses are a wide ranging subject…

and there is a lot to know. It is very easy to make mistakes. So finding out the basics is important. In this lens quiz I will give you the links to resources so can find the simple answers which is also essential information… have fun!

Lens Quiz Questions…
  • Q1. Why do you use a lens hood?
  • Q2. Name the phenomenon that causes light to bend when it hits a lens surface?
  • Q3. How does the optical path differ from the optical axis?
  • Q4. What is another name for an individual glass lens inside a photographic lens?
  • Q5. Is the focal length of an optical lens the same as the focal length of a photographic lens?
  • Q6. How many lenses in a lens group?
  • Q7. Describe what “chromatic aberration” looks like in a picture.
  • Q8. What is projected onto the sensor plane from the lens?
  • Q9. What is the diaphragm in a photographic lens?
  • Q10. Can the focal length be greater than the measured length of the lens body?
  • Q11. What would you normally use a macro lens to do?
  • Q12. Does a wide aperture have a low ‘f’ number or a high ‘f’ number?
  • Q13. Is the shutter in the lens or the camera?
  • Q14. Which is the fastest lens an f1.2, f5.6 or f4.0?
  • Q15. What controls the depth of field?
Where to find the answers…
Answer sheet

You can download a copy of an answer sheet so you can write the answers while looking at web pages.

Our answers…

We will give you our answers on Monday 05th August 2013. In the meantime, have fun!

Comments, additions, amendments or ideas on this article? Contact Us
or why not leave a comment at the bottom of the page…

Like this article? Don’t miss the next one — sign up here.

Damon Guy - Netkonnexion

Damon Guy (Netkonnexion)

Damon is a writer-photographer and editor of this site. He has run some major websites, a computing department and a digital image library. He started out as a trained teacher and now runs training for digital photogs.
See also: Editors ‘Bio’.
By Damon Guy see his profile on Google+.

find out more...Photokonnexion tips by email
If you enjoyed this article please sign up for our
Tips by email service.
                                                 Find out more

A simple way to bring out your subject in environmental portraits

• Early morning worker • Bring out your subject in environmental portraits.

• Early morning worker •
Click image to view large
• Early morning worker • By Netkonnexion on Flickr External link - opens new tab/page :: Environmental portraits
A great way to show off your subject is to find a way to make them brighter than the background. This projects them right out into the viewers eye. Environmental portraits are particularly good subjects for this technique.

Subjects should come first.

Every photograph should have a subject, but sometimes they get lost in the overall picture. If that happens you lose the viewers eye. Make the subject stand right out. In environmental portraits, one of the best ways to do that is to bring out your subject. Find a way of making them brighter than the background.

Environmental portraits

Most people shots, whether street photography, simple portraits, or even an event shot benefit from emphasis. There are lots of forms of emphasis. Here are a few examples…

  • High contrast
  • Big colour variations
  • Placement in the frame
  • Perspective…

Probably one of the most effective forms of emphasis in environmental portraits is subject highlighting. Environmental portraits are where a person is captured in the context of their environment. You can see them as they are in that environment. This helps you see into the person and their character.

If you can use highlighting your emphasis has two impacts. First, it provides an immediate draw for the eye. This is because the eye is drawn to the brightest spots in a picture. Secondly, the scene takes on more depth because of the impact. The very fact that the background is more subdued helps the eye to perceive the depth. The highlight creates a wider contrast between the darkest and lightest parts of the picture. In environmental portraits this has a profound effect on the eye.

How?

During the middle of the day the ambient light is very bright. You have to take care when highlighting to prevent blown out areas or over-exposure. There is one way to do it. Pick out your subject as the focus. Then turn down your exposure to slightly underexpose your background. Then use a manually set flash to illuminate the foreground subject. You will see the background as darker from the slight under-exposure. The subject will be properly exposed by the flash. Be careful not to have your flash too powerful. It will over expose the foreground and leave the background too dark. You might need to practice your technique.

In the photograph above I was lucky enough to capture the subject in bright clothes. The incidental light that did most of the work for me. A little brightening in my post-processing helped bring out the details. The emphasis of the light made the foreground object (the man) stand out. Often, what makes environmental portraits powerful is the understated background lighting.

In environmental portraits, bringing out the subject with highlighting is about taking advantage of natural lighting. Nearly every situation has local lighting variations. So if you take the time to look around your location and find light/shadow situations you are sure to find some place where the natural highlighting will give you an advantage. Most of the time it is down to becoming aware of the light and shade relationships.

Two lessons

What we should be doing when the light is right is highlighting the subject. It gives the picture impact and depth. When doing environmental portraits you will always have local light variations. Take advantage of them where you can. If you need to, use a little flash to emphasis the subject and make them stand out.

Comments, additions, amendments or ideas on this article? Contact Us
or why not leave a comment at the bottom of the page…

find out more...Photokonnexion tips by email
If you enjoyed this article please sign up for our
Tips by email service.
                                                 Find out more

Damon Guy - Netkonnexion

Damon Guy (Netkonnexion)

Damon is a writer-photographer and editor of this site. He has run some major websites, a computing department and a digital image library. He started out as a trained teacher and now runs training for digital photogs.
See also: Editors ‘Bio’.
By Damon Guy see his profile on Google+.

Seven easy tips to improve your group photography

• Boys Group •

• Boys Group •
The humble group photograph can be much improved by a few simple steps.

Simple steps lead to great shots…

With groups you must go a little further than with straight portraits. Getting people coordinated, a range of different settings, beating the dreaded ‘blinks’, great sharpness… Check these out, go the extra mile.

Planning

When doing group shots a few ideas up front helps. Some simple ideas about cohesion, commonality and framing can make your shots more compelling. Clear ideas about how you want this particular group arranged will enable you to get them quickly into place. Groups, by their nature become impatient quickly. Preparation moves things along keeps people on the ball. Have your location scouted and know where you are going to place your group. Have a good, simple background ready. Make sure you have adequate light to work with. Location is everything.

Settings

Remember, groups require a wide view and you need some depth too. Set your aperture too large and you risk the back row being out of the zone of sharpness. Most groups are best photographed at f8 or even better f11. To get the sharpness work with your shutter speed up reasonably high. 1/125th minimum – better 200ths of a second. Go higher if you don’t need flash.

Bigger groups always have a certain amount of movement. Higher shutter speeds help to freeze the action. The problem is, high shutter speed and small aperture leave you needing flash or extra lighting. There is always a trade-off. To compensate you may need to raise your ISO.

Sharp shooting

Shooting at high speed will help freeze the action. It will not steady your hand. If shooting a big group, especially for formal shots, it’s best to use other sharpening techniques. Consider these sharpness…

  • Using a tripod
  • Use mirror lock-up function
  • Image stabilisation off (not needed on tripods – it creates vibration)
  • Auto-focus off on a tripod after the group is focused (it creates vibration)
  • Operate with a remote shutter button or use the on-camera timer

A tripod saves time. You can arrange the group and smooth the shot through. If you have more than one group, your camera is always set up when it is on a tripod. It helps smooth the flow.

Light and shade

Overall light in the scene is important, so is the shade. When taking pictures of groups you are taking a wide angle view. The group is often spread out. It’s easy to miss that one or two of the group are in the shade. Or, with a camera mounted flash, the shadows from the flash fall harshly onto the people behind. Trees, buildings, other people, towers, street lights – any number of objects can cast unexpected shadows which are difficult to notice. Flash casts shadows you don’t see until you open the picture on a computer later. Look carefully at your group. Arrange them to be in clear, consistent light. Make sure any lights or flash you are using treats all the members of the group evenly and fairly.

Clothing

So often with groups you have no control over clothing. If the event is formal the clothes often have a stiff and upright feel. People don’t relax so well in this situation so you will have to set the scene and pose them accordingly. It is not easy, especially with family conventions or a preset plan. Where possible let them arrange themselves with your help. People will be most comfortable next to the people they like and know.

When a group is coming together informally the clothes may be wildly variable in character. What matters when working with a candid group is the fun arrangement of the group. Try to get the group to look dynamic and together. This will offset a strong clothing variation.

The prize giving

• The prize giving •
If the group feels comfortable and you work with them they’ll help make a great picture.

Organisation

Groups, especially close up, look odd if the faces are at different distances from the camera. They are close enough to us to look fine. However, the lens plays tricks on our eyes. If they are out of line – at different distances, but close together – they will appear to have different head sizes. Try to make people in each line of a group stand evenly down the line.

Sometimes the classic, short in front taller to the back works fine. Other times it is better to actually mix up short and tall – especially with different generations. It is much more natural for grandchildren to be arranged with grandparents than stuck on the end of the line because they are small. Putting children between adults also provides an opportunity to have a shorter person behind so as to break up a line up – to make it less formally arranged.

Close family groups, and friends, often look good leaning together, or heads together. It is very intimate to touch heads.

The dreaded ‘blinkies’ strike every group shot if you are not careful. The bigger the group the more likely that someone will blink. Overcome it with a little group control. Ready to shoot? Tell them you are going to help stop them blinking in the shot. Tell every one to shut their eyes. Count to two, tell everyone to open. Count to two. Press the shutter. Everyone will have open eyes. Explain it first so they know what is coming. It will make sure they all have eyes open long enough for you to get the shot.

So, with all these different ways of organising the group make sure that what you have is comfortable, natural – never forced.

Posing

Organising the group is about positioning and location. Posing is about personal stance and comfort. You, as the photographer, need to direct the group. But on the other hand you have to work with the people you have before you. Try to make it fun. Get them to relate to one another. If you have time, especially with candids or informal group, get them to experiment. Handshakes, greetings, hugs, arms around each other, standing in groups – the idea is to make ‘that’ group look good. Another group might not look good with the same poses. You should work with them, discuss ideas with them, respect their thoughts. They probably know each other better than you know them and will make the best suggestions. It is your job as a director to pick up on the most effective shots from their ideas. Consider what you know about them, consider their ideas for their poses – then work together to make the shot just right.

Getting the right feeling…

Working with groups is more than just lining them up. You have to consider the time, place, light, shade, the settings and the technique. But the best shots still come from the group itself. If the members of the group are comfortable, having fun and feel natural about their poses they will make sure you get a good shot. Work with them, help them make your picture work.

Comments, additions, amendments or ideas on this article? Contact Us

find out more...Photokonnexion tips by email
If you enjoyed this article please sign up for our
Tips by email service.
                                                 Find out more

By Damon Guy (author and Photokonnexion editor)

Damon Guy - Netkonnexion

Damon Guy (Netkonnexion)

Damon is a writer-photog and editor of this site. He has run some major websites, a computing department and a digital image library. He started out as a trained teacher and now runs training for digital photographers.
See also: Editors ‘Bio’.