Tag Archives: Depth of Field

The power of light and shadow

Facial shadows

• Facial shadows •
Image taken from the video.

Great portraits rely on shadows

Shadows define a portrait. So it is no surprise that good lighting to get the shadows right is a wonderful idea. But what most people don’t realise is that, almost every time, more lights make things more complicated. One light is almost all you will ever need to get a face right. The rest can be done with a reflector.

Shadow work

In the video Mark Wallace shows us how the face can be properly illuminated, how to do it and more important how to make it look beautiful. He looks at ugly shadows and hard light and explains how to remove them and subdue them using soft light. In all, this is one of the best best portrait lighting tutorials I have seen on video. Enjoy it. There is some really useful stuff presented in a simple and understandable way.

Adorama TV  External link - opens new tab/page

Comments, additions, amendments or ideas on this article? Contact Us
or why not leave a comment at the bottom of the page…

Like this article? Don’t miss the next — sign up for tips by email.

By Damon Guy (author and Photokonnexion editor)

Damon Guy - Netkonnexion

Damon Guy (Netkonnexion)

Damon is a writer-photog and editor of this site. He has run some major websites, a computing department and a digital image library. He started out as a trained teacher and now runs training for digital photographers.
See also: Editors ‘Bio’.

Three minutes of peace and tranquility and endless fun later!

Ink Drops

• Ink Drops •
The feeling of peace and tranquillity can come with many aspects of photography. This is something you can think about and possibly do yourself.
Image from the video.

Seeing and capturing

Every interest has its peaceful side. Photography is no different. For a change here is a video which delivers three minutes of peace and tranquillity. It is possibly something you can have a go at yourself…

Whats going on – can I do it?

What you see in the video is very simply drops of ink into water. The water is sometimes still and sometimes moving very gently. It is simple to do but infinitely complex in the outcomes. Anyone can do it.

There are literally hundreds of different inks on the market. Have a look at this…

Drawing Inks Assortment Set of 12  External link - opens new tab/page
A great set of varied colours. Can be used to create coloured water and for droplet mixes. Great for experimentation.

Here are a few other types of ink you can choose.  External link - opens new tab/page

I have a range of colours I use for water work. You can also use food colourings. Basically the technique is like this…

  • Set up a glass jug, vase or small tank (flat sided is best).
  • Make sure it is very, very clean.
  • Have a dry cloth available to wipe the glass dry if you spill.
  • Use a remote flash or domestic lamp set to the side.
  • Place a black or white card behind your glass vase.
  • Mount your camera on something solid. A tripod is best.
  • Set your camera to auto-white balance.
  • Set the ISO to 100.
  • Use Shutter Value [Sv, Tv etc.] as your shooting mode
  • Use f11 as your setting to shoot right through the water.

You will need to have the light on from the side of the shot. An on-board flash will cause the ink to appear very flat with the light coming from the front. This will ruin the effect.

If you want added brightness from behind you can add a light shining onto the background card. This will lift the internal colours.

Then, as with everything in photography you will need to experiment with the light and conditions you are working with to get the best shots.

The technique

Your water should ideally be about six inches deep. Drop the ink into the water and start clicking your shutter button. You can do it quite a few times as the ink forms up the shots. Once you are satisfied there is no more shots to be had then replace the water and start again.

People spend literally years working with this sort of effect. It is not only great fun for everyone from beginners onward, it is also great art. There are many fine art photographers who work on this sort of image for a living. There is also endless amusement, beauty and some wonderful images. The technique works for both still photography and videography.

INK DROPS

And now for your three minutes of peace and tranquility – enjoy!

Jacob + Katie Schwarz  External link - opens new tab/page

Comments, additions, amendments or ideas on this article? Contact Us
or why not leave a comment at the bottom of the page…

Like this article? Don’t miss the next — sign up for tips by email.

By Damon Guy (author and Photokonnexion editor)

Damon Guy - Netkonnexion

Damon Guy (Netkonnexion)

Damon is a writer-photog and editor of this site. He has run some major websites, a computing department and a digital image library. He started out as a trained teacher and now runs training for digital photographers.
See also: Editors ‘Bio’.

Review your own photographs

Low flying aircraft

• Low flying aircraft •
Click image to view large
• Low flying aircraft • By Netkonnexion on Flickr External link - opens new tab/page
Every picture has its merits. However is there enough in the picture to interest and invigorate the attention of your viewers? Sometimes, like this picture, if you don’t have a point worth making then you should not really bother with it.

A picture is a wonderful communication.

But like speech if there’s no point there is no impact. To help you see if you have made a great picture here are some guiding points.

We are going to consider…
• What you are communicating:
• Presentation:
• Camera technique:
• Technical Quality:
• Visual Awareness, Visualisation, Seeing and aesthetics:

Looking critically at your own picture

When you make a picture your previsualisation of what you want to achieve is critical to the outcome. If you don’t know what you are trying to make how can you make it convincing? So try to have a mental image of what your picture it going to look like when you make it. If you can see the image before you make it you should have a good point in mind – a reason for making it. All too often snappers see something and just ‘snap’. That being the case, few of the images will have real meaning or impact.

When looking at your own picture you must see if there is really something there. Are you really saying anything? Are you really communicating with the viewer of your picture? Or, is what you have just made only a simple picture? To have real impact is to create in the viewers mind an image. An image that means something to them. So look at your picture and honestly ask yourself what is the viewer going to get from it? What will it mean to them? If you find that you have really said something in the picture then the first criteria for success has been passed.

To this end you should consider how successfully each of these things has contributed to the success of the image…

  • Personal input: have you understood and connected with the subject
  • Appropriate communication the message, mood, ideas, and information you want to pass to your viewer
  • Complementary use of the photographic media (mounting, projection, printing, texture of print etc.)
  • Appropriate imagination and creativity / suitable timing for the shot
What about the other things?

• Presentation: It is important to have a good presentation for your picture. Have you edited out distractions and sensor/lens spots, removed the errant sweet rapper littering the foreground etc. In other words, have you done the little tidying up tasks that make the image stand up as clean representation of your original vision for it? If it is a print, is it well mounted in a non-distracting way. Is the printing immaculate or are there streaks and spots; over-run and smear.

• Camera technique: Is the sharpness the way you want it – deliberate softness is fine as long as that is making an artistic point in a way you intended. Is the depth of field right for the composition? Have you emphasised the point or simply missed the point. Is the digital noise too high, or the contrast too low. What you are looking for here is to see if your prowess with the camera has come through. Did your technique work or were there any errors or mistakes that detract from the delivery of your point? Some of the other things to consider are…

  • Viewpoint to the subject – exciting, interesting, different, right?
  • Choice of lighting – does it complement or complete the subject or is it at odds with your point?
  • Accurate focusing – accurate choice of focus for the subject.
  • Appropriate quality and choice of exposure.
  • Suitable use of depth of field (aperture).
  • Appropriate shutter speed for the subject (and shot timing).
  • Highlights and shadows (ensuring detail is retained)
  • Appropriate quality and choice of exposure – does the balance of light and dark complement or detract from the subject?
  • Is the quality of the light effective or bland; does is make a statement or is it of little consequence?

• Technical Quality:
In this category you should consider exposure, colour and tonal control…

  • Absence of processing faults (dust, spots, hairs, processing artefacts, image damage by sharpening etc.)
  • Appropriate adjustments of colour temperature; hue, saturation, colour balance etc.
  • Appropriate tonal use and control of the range of tones.
  • Good image finishing: removal of distractions, removal of abrupt or discordant features.
  • Appropriate use of levels, curves, colour management, filters, overlays etc (post processing)

In this category you are looking to make sure that the image is digitally developed properly. Is the exposure even or has it been obviously enhanced and changed. Is the light effective to make the point or has the exposure not been fine tuned. It is easy to take a picture, but all these thing go into making an image. Think about what you are trying to achieve and does this picture achieve it with its colour and technical delivery/

• Visual Awareness, Visualisation, Seeing and aesthetics:
Do you think that your shot, the one you have in front of you sees anything different? Are you reporting what you saw or expressing a point, message, communication, feeling… does this picture have IMPACT?

  • Is the composition, design and cropping of the image an effective aesthetic construction?
  • Appropriate simplification (minimising complexity and clutter)
  • Distractions / intrusions should not divert the viewers eye
  • Good use of light, mood, texture and colour
  • Good use of masking/manipulation where appropriate
What you are doing…

Each time you want others to look at your picture you want to impress them, to lift them, to… well, get out your message or point for the picture. The type of questions I have asked above are aimed at getting you looking at your images with a critical eye. If you are honest, you will find that none of your pictures will be satisfactory in all of the above. But if you find you are gradually improving your standard of delivery you will see that the above get closer to ideal with every new picture. Critically reviewing each picture before you publish print or show it to other people helps make sure you are producing something worth showing.

You won’t be right every time. But you will see as you develop, your comments will begin matching those of other people. You will than have a benchmark that tells you if your work is measuring up to peoples view of it. Or, more importantly to see if your picture is measuring up to your original vision of how you wanted the shot.

Comments, additions, amendments or ideas on this article? Contact Us
or why not leave a comment at the bottom of the page…

Like this article? Don’t miss the next — sign up for tips by email.

By Damon Guy (author and Photokonnexion editor)

Damon Guy - Netkonnexion

Damon Guy (Netkonnexion)

Damon is a writer-photog and editor of this site. He has run some major websites, a computing department and a digital image library. He started out as a trained teacher and now runs training for digital photographers.
See also: Editors ‘Bio’.

Buying a tripod – the essentials

Buying Tripods

• Buying Tripods •
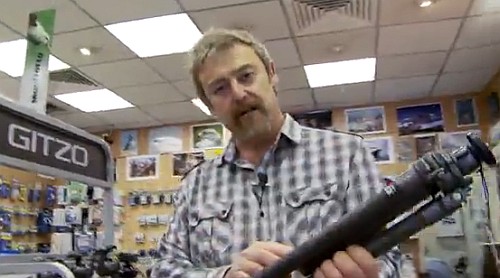
Buying a tripod? There are a lot to choose from. So what should you look for?
Image from the video.

Why would you buy a tripod?

Because a tripod is of the central pillar of your sharpness strategy. Without a tripod you are denying yourself the opportunity to use a large proportion of the settings on you camera. Let’s look more closely at what this means…

Settings

Your camera has three primary controls…

  1. ISO – Controls how sensitive your camera image sensor is to light.
  2. Shutter speed – Controls how long your sensor is exposed to light.
  3. Aperture – controls how much light is allowed to reach the sensor.

These are inter-related. As we want a high quality result (with low digital noise) we set the ISO to around 100. Therefore, for our purposes here we are particularly interested in two of those settings.

  1. Shutter speed – movement blur created with long exposure; movement frozen at short shutter speeds.
  2. Aperture – Wide aperture, shallow depth of field; small aperture gives a deep depth of field.

Looking at these you need to consider how you do photography where only low levels of light enter your camera. Here are some examples:

  • Landscape – Use aperture f11 or higher. Small aperture gives Depth of Field, but lowers the light influx. Therefore you need to have a longer shutter speed especially during the Golden Hour. Hand-holding is not an option.
  • Portraiture – In bright sunlight a shallow depth of field (wide open aperture – blurred background) would overexpose the shot the shot.Use a Neutral Density Filter. This reduces light influx but means a ling exposure. A tripod stops handshake.
  • Still life: You are doing a still life requiring low light for the mood shadows. To get the exposure you need a longish exposure. You do some test shots. Your best exposure is with a shutter speed of one second. Tripod needed!
  • Fireworks: You need to hold the camera steady for about 1/20th of a second to get the full spread of the explosion. Tripod – essential.
  • A disco dance floor – If you want to capture movement you will need to work at around 1/60ths of a second. But you also need sharpness right through. You will need an aperture of f8 or f10. A Tripod is essential if you want the movement blurred and the rest of the room sharp.
  • Photographing a baby. Flash changes the mood and invites crying. It’s also harsh light. Baby skin loves natural light. Use a fast shutter and tripod. Make the composition right then watch the baby. Pick your moments and take several shots. A tripod helps you can concentrate on the right moment while baby is still and happy. You don’t have to recompose for every button push.
  • Family photo – Set the timer, join the group! A tripod is essential.

I could go on… there are dozens of everyday scenarios requiring a tripod. These are just the obvious ones. For sharp, quality shots I need to use a tripod around 75% of the time. My tripod is essential to my business.

If you are an amateur you probably cover more varied situations than me. You need a tripod for a high quality result. It is not uncommon for me to hear students say, “I never use a tripod, I don’t need one”. Then in almost the same breath, “Why are my pictures always blurred or dull?” The answer to the question is – to get a proper exposure you need a tripod.

Lots of people say, “A tripod just slows me up!” My response is simple. Most amateurs take ten shots to get one – and are not necessarily successful. A tripod actually saves you time. You can rely on one shot being sharp. In post production you review one shot for each composition, not dozens.

What to look for…

In general the main considerations are:

  • Well designed: smooth operation, strong leg clips so you can set the tripod at various leg heights.
  • Centre column: Solid, little movement, clamps solid.
  • Legs – variable wideness: You can spread the legs out wider and at different angles to each other.
  • Tripod provides a platform for different heads: Do not buy a tripod with one type of head pre-fitted. It may not be suitable for your camera and there are different heads for different types of photography.
  • Weight or lightness: Solid and heavy tripods mean a good platform. Lighter carbon fibre tripods are more expensive, but the carbon fibre has the ability to reduce vibration (especially when stressed by a weight bag hanging on it to steady it).

For general work I use this tripod…

Of course you need a good head on a good tripod. This head is my mainstay for most work…

A good tripod will last you years. It will be stable and steady even in wind. It will not wear out easily. A worthwhile investment. Don’t be tempted to go cheap. Look for quality brands with after sales parts and good design. Spend more and you will have a flexible friend that helps you in all aspects of your photography.

Have a look at these ranges of tripods. I use a Manfrotto for most situations, but there are other quality ranges. My Benro tripod is very rugged and nothing beats it on a beach or mountainside. Check out these links for a range of ideas…

Manfrotto tripods  External link - opens new tab/page

Gitzo Tripods  External link - opens new tab/page

Giottos Tripods  External link - opens new tab/page

Benro Tripods  External link - opens new tab/page

Which Tripod Should I Buy?

Mike Browne introduces this video with the basics of how to think about what you want in a tripod. What he says is good thinking. At the end two other photographers add their advice. I was impressed with the comments of both. There is a lot of great advice in this video.

Mike Browne  External link - opens new tab/page

Comments, additions, amendments or ideas on this article? Contact Us
or why not leave a comment at the bottom of the page…

Like this article? Don’t miss the next — sign up for tips by email.

By Damon Guy (author and Photokonnexion editor)

Damon Guy - Netkonnexion

Damon Guy (Netkonnexion)

Damon is a writer-photog and editor of this site. He has run some major websites, a computing department and a digital image library. He started out as a trained teacher and now runs training for digital photographers.
See also: Editors ‘Bio’.

Fifty tips to set photography starters on their feet

There are some great things to learn.

When you are starting out and need to learn some things fast, it helps to have some guidance. Here are a few things photographers need to know to get started. And some things I wish I had known when starting photography…

Roller coasters ‘R’ us – Photo-learning list…
  1. If you want to learn fast take lots of pictures.
  2. If your pictures aren’t good enough, you’re not close enough.
  3. Spend more time reviewing your pictures than it took to make them.
  4. There are billions of types of light. Learn to see 10 types to start.
  5. Get obsessed with the quality of light and its properties.
  6. Work on image composition at least as hard as your technical skills.
  7. Use natural light as much as possible. Learn its variations.
  8. Don’t use on-board flash. It will ruin your shots.
  9. Make people a central study of your photography.
  10. Count 1000, 2000 slowly then take your camera from your face.
  11. Think carefully about how to do it well. Then follow a process.
  12. Clean your kit before you go out and when you’re back. Cameras hate dust.
  13. “Learners don’t need a tripod”. My biggest learning mistake.
  14. Sharpness is a habit – work hard to get it right from the start.
  15. Think “Why am I taking this picture?” for every shot you take.
  16. Add another lens to your “kit lens” as soon as you can.
  17. Great lenses are more use than an expensive camera. Spend more on them.
  18. Don’t cheap out on a tripod. Cheap ones will not do the job.
  19. Use your tripod.
  20. Own more than one memory card AND more than one battery.
  21. Learn the meaning of RAW and then shoot with it.
  22. “Your first 10,000 photographs are your worst.” ― H. Cartier-Bresson
  23. A keen digital photog can clear 10,000 shots in 14 days – shoot more.
  24. Make some photography gear. You’ll understand your needs.
  25. Gear lust replaces your photographic vision with a hole in your pocket.

More after this…

find out more...Photokonnexion tips by email
Enjoying this article? Please sign up for our
Tips by email service.
                                                Find out more


  1. Carry your camera with you everywhere.
  2. Look at 50 pictures by other people every day.
  3. Take a clichéd shot – satisfy your curiosity. Store it in a secret place!
  4. The “Rule of thirds” works nearly all the time. Learn it early.
  5. Simplicity is the ultimate sophistication.” Leonardo da Vinci
  6. Read your camera manual. Try something. Read that bit again. Repeat.
  7. Have a go at every setting on your camera lots of times.
  8. A proper stance will provide a steady hand-held camera position.
  9. Amateurs often do better pictures than professionals.
  10. And, Professionals do more good pictures, more often.
  11. If your photos look tired and drab – go manual – learn control.
  12. For every shot you do, look at 50 similar ones. How does yours look?
  13. Don’t panic. Usually there is no problem.
  14. No photo, however good, replicates reality. Cameras distort – get over it.
  15. If you see it one way, most people will see it a different way.
  16. Check all gear before you go. Have a list of what you need.
  17. Know why you are going to a location and plan shots in advance.
  18. Back up your files. If your hard drive crashes you will lose the lot.
  19. Wear the right clothes. You cannot do good photography if you are cold.
  20. Help someone else to learn. You will learn too, and make a friend.
  21. Learn the meaning of “exposure” – practice using manual settings.
  22. Learn “Depth of Field” and practice it with each of your lenses.
  23. Post processing is an art and part of photography. Learn it.
  24. Join a club or class – you learn fast with other photogs.
  25. Use Google Images to research every shot you take.
And one for luck!

Photography is fun. Make sure you go with that!

Comments, additions, amendments or ideas on this article? Contact Us
or why not leave a comment at the bottom of the page…

Like this article? Don’t miss the next — sign up for tips by email.

By Damon Guy (author and Photokonnexion editor)

Damon Guy - Netkonnexion

Damon Guy (Netkonnexion)

Damon is a writer-photog and editor of this site. He has run some major websites, a computing department and a digital image library. He started out as a trained teacher and now runs training for digital photographers.
See also: Editors ‘Bio’.

Learn to shoot while controlling the depth of field…

Depth of Field

• Depth of Field •
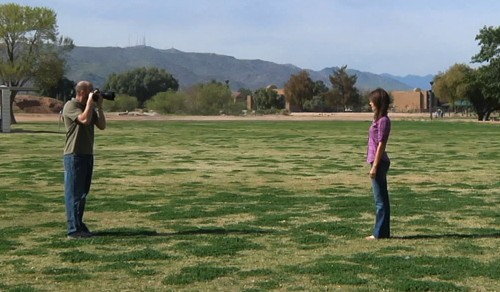
Work with Depth of Field in mind. It will help you to control the blur that provides soft and un-distracting backgrounds.
(Image taken from the video.)

Shooting with Depth of Field

The controlled use of Depth of Field (DoF), when done skilfully, is a central pillar of artistic success in photography. To learn how to properly control its use will help you to master many challenging situations.

Getting the measure of Depth of Field

Following the great response from “Understanding depth of field” yesterday, here is another video. In this one Mark Wallace shows how the three basic controls of DoF actually affect the clarity and blur in fields where depth of field is visible. It is important to watch the settings as he takes the pictures. Follow how the blur changes as the settings change.

SnapFactory  External link - opens new tab/page

Comments, additions, amendments or ideas on this article? Contact Us
or why not leave a comment at the bottom of the page…

Like this article? Don’t miss the next — sign up for tips by email.

By Damon Guy (author and Photokonnexion editor)

Damon Guy - Netkonnexion

Damon Guy (Netkonnexion)

Damon is a writer-photog and editor of this site. He has run some major websites, a computing department and a digital image library. He started out as a trained teacher and now runs training for digital photographers.
See also: Editors ‘Bio’.

Understanding depth of field

Pebbles

• Pebbles •
Depth of field helps the background lose distinguishing features which makes the subject stand out.

It is an important artistic tool.

Depth of field (DoF) provides a way to isolate the subject from the background. Sharpness inside the DoF is of critical importance to our image. The blur outside the DOF helps divert the eye to the sharp subject. So how does DoF work?

Depth of field defined…

The depth of field (DoF) is an easy concept to remember. The DoF is the sharp part of a picture. It is defined by the out of focus parts of the picture on either side of it. A lens can only focus at one point. It is at that point that the image is sharpest. However, on either side of the sharp point is a zone where, to the naked eye, the sharpness is still good enough to be convincing.

The eye can distinguish sharp detail inside the DoF and we want to ensure our subject is in that zone. However, we also want to compose our picture so the unimportant parts of the picture are out of focus. To achieve these things we need to know how to control the DoF. In fact there are three ways to control it…

  • Change the size of the Aperture.
  • Change the focal length
  • the distance of the subject from the lens

As the aperture changes size so does the zone of sharpness we call the DoF. As we open up the aperture wide the DoF gets shallow. As we make our aperture smaller the DoF gets wider and eventually we get sharpness all through to the horizon. Similarly changes to the distance from the subject affects DoF. If I walk away from a subject (and do not change the aperture) the depth of field gets wider (and visa versa). Focal length changes affect the DoF in a similar way.

A Simple Guide to Depth of Field

In this video Dylan Bennett provides the best explanation I have seen on why the DoF changes with the three factors I mentioned above. He uses a simple explanation and some great diagrams to show what is involved.

Dylan Bennett  External link - opens new tab/page

Just to clear up a point…

The analogy that Dylan Bennett uses, “toothpaste squeezed in a tube”, works well for most people learning the idea of DoF. What really causes the DoF to elongate is related to something called the Circle of Confusion (CoC). For more detail you can see information in: “Definition: Circle of Confusion”.

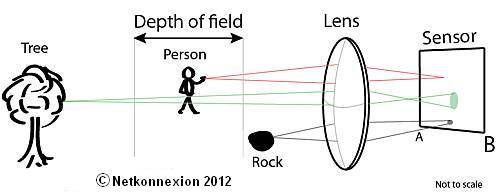
The CoC projected onto the sensor is (notionally) a tiny point of light representing one point of light from the subject. When that part of the subject is in focus the CoC is very small and individually indistinguishable from those around it. Like this it’s a sharp representation of the subject point of light. However, at a point outside the DoF an individual point of light can no longer be represented by a sharp point on the sensor and begins to blend with points around it. It has lost its sharpness. This is because the lens focuses points outside the DoF slightly before the sensor or slightly after it.

Diagram showing various sizes of Circles of Confusion (CoC).

Diagram showing various sizes of Circles of Confusion (CoC) on the sensor sized according to the focus (not to scale). Only CoCs projected from within the Depth of Field are sharp. Our eyes cannot perceive them well as they form sharp points. Ones projected from outside the depth of field are unsharp to our eyes.

Here is the reason why the DoF widens as the aperture gets smaller. When the aperture is small the angle of light that can pass through it from the subject is also small. As a result the CoC for each point of light is relatively small. This is because it can only originate from a small angle of light.

A very small aperture means that the circles of confusion are never big enough for our eye to see. This allows the lens to focus at infinity (say f11 and smaller). When the aperture is wide open the reverse is true. The circles of confusion can be much bigger. Only those rays that the lens will naturally focus will be sharp (a shallow depth of field).

Comments, additions, amendments or ideas on this article? Contact Us
or why not leave a comment at the bottom of the page…

Like this article? Don’t miss the next — sign up for tips by email.

By Damon Guy (author and Photokonnexion editor)

Damon Guy - Netkonnexion

Damon Guy (Netkonnexion)

Damon is a writer-photog and editor of this site. He has run some major websites, a computing department and a digital image library. He started out as a trained teacher and now runs training for digital photographers.
See also: Editors ‘Bio’.