Tag Archives: Aperture

Understanding depth of field

Pebbles

• Pebbles •
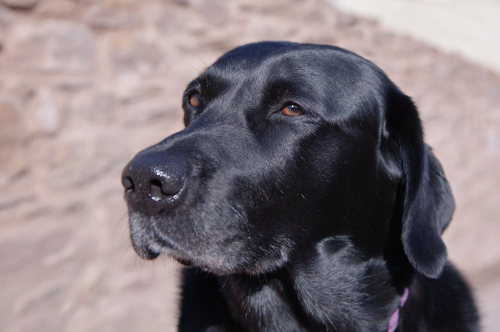
Depth of field helps the background lose distinguishing features which makes the subject stand out.

It is an important artistic tool.

Depth of field (DoF) provides a way to isolate the subject from the background. Sharpness inside the DoF is of critical importance to our image. The blur outside the DOF helps divert the eye to the sharp subject. So how does DoF work?

Depth of field defined…

The depth of field (DoF) is an easy concept to remember. The DoF is the sharp part of a picture. It is defined by the out of focus parts of the picture on either side of it. A lens can only focus at one point. It is at that point that the image is sharpest. However, on either side of the sharp point is a zone where, to the naked eye, the sharpness is still good enough to be convincing.

The eye can distinguish sharp detail inside the DoF and we want to ensure our subject is in that zone. However, we also want to compose our picture so the unimportant parts of the picture are out of focus. To achieve these things we need to know how to control the DoF. In fact there are three ways to control it…

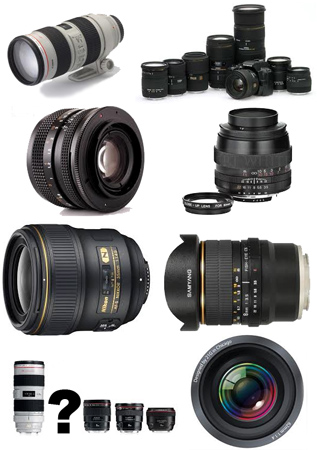
  • Change the size of the Aperture.
  • Change the focal length
  • the distance of the subject from the lens

As the aperture changes size so does the zone of sharpness we call the DoF. As we open up the aperture wide the DoF gets shallow. As we make our aperture smaller the DoF gets wider and eventually we get sharpness all through to the horizon. Similarly changes to the distance from the subject affects DoF. If I walk away from a subject (and do not change the aperture) the depth of field gets wider (and visa versa). Focal length changes affect the DoF in a similar way.

A Simple Guide to Depth of Field

In this video Dylan Bennett provides the best explanation I have seen on why the DoF changes with the three factors I mentioned above. He uses a simple explanation and some great diagrams to show what is involved.

Dylan Bennett  External link - opens new tab/page

Just to clear up a point…

The analogy that Dylan Bennett uses, “toothpaste squeezed in a tube”, works well for most people learning the idea of DoF. What really causes the DoF to elongate is related to something called the Circle of Confusion (CoC). For more detail you can see information in: “Definition: Circle of Confusion”.

The CoC projected onto the sensor is (notionally) a tiny point of light representing one point of light from the subject. When that part of the subject is in focus the CoC is very small and individually indistinguishable from those around it. Like this it’s a sharp representation of the subject point of light. However, at a point outside the DoF an individual point of light can no longer be represented by a sharp point on the sensor and begins to blend with points around it. It has lost its sharpness. This is because the lens focuses points outside the DoF slightly before the sensor or slightly after it.

Diagram showing various sizes of Circles of Confusion (CoC).

Diagram showing various sizes of Circles of Confusion (CoC) on the sensor sized according to the focus (not to scale). Only CoCs projected from within the Depth of Field are sharp. Our eyes cannot perceive them well as they form sharp points. Ones projected from outside the depth of field are unsharp to our eyes.

Here is the reason why the DoF widens as the aperture gets smaller. When the aperture is small the angle of light that can pass through it from the subject is also small. As a result the CoC for each point of light is relatively small. This is because it can only originate from a small angle of light.

A very small aperture means that the circles of confusion are never big enough for our eye to see. This allows the lens to focus at infinity (say f11 and smaller). When the aperture is wide open the reverse is true. The circles of confusion can be much bigger. Only those rays that the lens will naturally focus will be sharp (a shallow depth of field).

Comments, additions, amendments or ideas on this article? Contact Us
or why not leave a comment at the bottom of the page…

Like this article? Don’t miss the next — sign up for tips by email.

By Damon Guy (author and Photokonnexion editor)

Damon Guy - Netkonnexion

Damon Guy (Netkonnexion)

Damon is a writer-photog and editor of this site. He has run some major websites, a computing department and a digital image library. He started out as a trained teacher and now runs training for digital photographers.
See also: Editors ‘Bio’.

Broaden your lens and focal length knowledge

Mixed lens types

Mixed lens types – What do they all do?

There is a range of lens types…

If you know about the lens types you have, that’s good. But talking and thinking about buying others takes a wider knowledge. Here are two videos to give some insights on lens types. There are some interesting facts too.

Think about your lens types

Before you buy lenses, think about what you want. If you are just learning photography this is important. It keeps you in touch with what’s possible with each of the lens types. Also, it helps you to know what you can do with the skills you have. With each video, try to relate your experience with the lens types they are talking about. Then you will be able to extend your skills with kit you own now.

Another point worth thinking about is what you want to photograph. Long lens types, for example, get you closer to objects in the distance. They make things large in the frame, even when it’s far away. But some subjects are more environmental. So you might benefit more from showing a distant subject in its wider environment. Landscapes are a classic example, but there are others. So, think about what other creative views you can achieve with each of the lens types too.

Introduction to Camera Lenses PT1


Mike Browne  External link - opens new tab/page

Introduction to Camera Lenses Part 2


Mike Browne  External link - opens new tab/page

Comments, additions, amendments or ideas on this article? Contact Us
or why not leave a comment at the bottom of the page…

Like this article? Don’t miss the next one — sign up for tips by email.

By Damon Guy (author and Photokonnexion editor)

Damon Guy - Netkonnexion

Damon Guy (Netkonnexion)

Damon is a writer-photog and editor of this site. He has run some major websites, a computing department and a digital image library. He started out as a trained teacher and now runs training for digital photographers.
See also: Editors ‘Bio’.

Get Photokonnexion tips by email!
We send you tips daily – find out more…

Start email subscription now!

A quiz about lenses… what do you know?

• Lenses • Lens quiz

• Lenses •

Lenses are a wide ranging subject…

and there is a lot to know. It is very easy to make mistakes. So finding out the basics is important. In this lens quiz I will give you the links to resources so can find the simple answers which is also essential information… have fun!

Lens Quiz Questions…
  • Q1. Why do you use a lens hood?
  • Q2. Name the phenomenon that causes light to bend when it hits a lens surface?
  • Q3. How does the optical path differ from the optical axis?
  • Q4. What is another name for an individual glass lens inside a photographic lens?
  • Q5. Is the focal length of an optical lens the same as the focal length of a photographic lens?
  • Q6. How many lenses in a lens group?
  • Q7. Describe what “chromatic aberration” looks like in a picture.
  • Q8. What is projected onto the sensor plane from the lens?
  • Q9. What is the diaphragm in a photographic lens?
  • Q10. Can the focal length be greater than the measured length of the lens body?
  • Q11. What would you normally use a macro lens to do?
  • Q12. Does a wide aperture have a low ‘f’ number or a high ‘f’ number?
  • Q13. Is the shutter in the lens or the camera?
  • Q14. Which is the fastest lens an f1.2, f5.6 or f4.0?
  • Q15. What controls the depth of field?
Where to find the answers…
Answer sheet

You can download a copy of an answer sheet so you can write the answers while looking at web pages.

Our answers…

We will give you our answers on Monday 05th August 2013. In the meantime, have fun!

Comments, additions, amendments or ideas on this article? Contact Us
or why not leave a comment at the bottom of the page…

Like this article? Don’t miss the next one — sign up here.

Damon Guy - Netkonnexion

Damon Guy (Netkonnexion)

Damon is a writer-photographer and editor of this site. He has run some major websites, a computing department and a digital image library. He started out as a trained teacher and now runs training for digital photogs.
See also: Editors ‘Bio’.
By Damon Guy see his profile on Google+.

find out more...Photokonnexion tips by email
If you enjoyed this article please sign up for our
Tips by email service.
                                                 Find out more

A fast and simple introduction to portrait photography

How to make a digital camera

A rapid but full introduction to portraiture


When I introduce a new idea or a concept in these pages I often provide a video to help put the point across. Well, here is a video that stands up on its own. It is a light and simple introduction to portraiture. It bombs along at a great rate and has plenty to say about good principles in portrait photography. So, without further ado here it is. It’s 4mins 15secs long.

How to take great portrait photos


VideoJug  External link - opens new tab/page
Portraiture – Resources on Photokonnexion.com

Comments, additions, amendments or ideas on this article?
Contact Us
or why not leave a comment at the bottom of the page…

Seven easy tips to improve your group photography

• Boys Group •

• Boys Group •
The humble group photograph can be much improved by a few simple steps.

Simple steps lead to great shots…

With groups you must go a little further than with straight portraits. Getting people coordinated, a range of different settings, beating the dreaded ‘blinks’, great sharpness… Check these out, go the extra mile.

Planning

When doing group shots a few ideas up front helps. Some simple ideas about cohesion, commonality and framing can make your shots more compelling. Clear ideas about how you want this particular group arranged will enable you to get them quickly into place. Groups, by their nature become impatient quickly. Preparation moves things along keeps people on the ball. Have your location scouted and know where you are going to place your group. Have a good, simple background ready. Make sure you have adequate light to work with. Location is everything.

Settings

Remember, groups require a wide view and you need some depth too. Set your aperture too large and you risk the back row being out of the zone of sharpness. Most groups are best photographed at f8 or even better f11. To get the sharpness work with your shutter speed up reasonably high. 1/125th minimum – better 200ths of a second. Go higher if you don’t need flash.

Bigger groups always have a certain amount of movement. Higher shutter speeds help to freeze the action. The problem is, high shutter speed and small aperture leave you needing flash or extra lighting. There is always a trade-off. To compensate you may need to raise your ISO.

Sharp shooting

Shooting at high speed will help freeze the action. It will not steady your hand. If shooting a big group, especially for formal shots, it’s best to use other sharpening techniques. Consider these sharpness…

  • Using a tripod
  • Use mirror lock-up function
  • Image stabilisation off (not needed on tripods – it creates vibration)
  • Auto-focus off on a tripod after the group is focused (it creates vibration)
  • Operate with a remote shutter button or use the on-camera timer

A tripod saves time. You can arrange the group and smooth the shot through. If you have more than one group, your camera is always set up when it is on a tripod. It helps smooth the flow.

Light and shade

Overall light in the scene is important, so is the shade. When taking pictures of groups you are taking a wide angle view. The group is often spread out. It’s easy to miss that one or two of the group are in the shade. Or, with a camera mounted flash, the shadows from the flash fall harshly onto the people behind. Trees, buildings, other people, towers, street lights – any number of objects can cast unexpected shadows which are difficult to notice. Flash casts shadows you don’t see until you open the picture on a computer later. Look carefully at your group. Arrange them to be in clear, consistent light. Make sure any lights or flash you are using treats all the members of the group evenly and fairly.

Clothing

So often with groups you have no control over clothing. If the event is formal the clothes often have a stiff and upright feel. People don’t relax so well in this situation so you will have to set the scene and pose them accordingly. It is not easy, especially with family conventions or a preset plan. Where possible let them arrange themselves with your help. People will be most comfortable next to the people they like and know.

When a group is coming together informally the clothes may be wildly variable in character. What matters when working with a candid group is the fun arrangement of the group. Try to get the group to look dynamic and together. This will offset a strong clothing variation.

The prize giving

• The prize giving •
If the group feels comfortable and you work with them they’ll help make a great picture.

Organisation

Groups, especially close up, look odd if the faces are at different distances from the camera. They are close enough to us to look fine. However, the lens plays tricks on our eyes. If they are out of line – at different distances, but close together – they will appear to have different head sizes. Try to make people in each line of a group stand evenly down the line.

Sometimes the classic, short in front taller to the back works fine. Other times it is better to actually mix up short and tall – especially with different generations. It is much more natural for grandchildren to be arranged with grandparents than stuck on the end of the line because they are small. Putting children between adults also provides an opportunity to have a shorter person behind so as to break up a line up – to make it less formally arranged.

Close family groups, and friends, often look good leaning together, or heads together. It is very intimate to touch heads.

The dreaded ‘blinkies’ strike every group shot if you are not careful. The bigger the group the more likely that someone will blink. Overcome it with a little group control. Ready to shoot? Tell them you are going to help stop them blinking in the shot. Tell every one to shut their eyes. Count to two, tell everyone to open. Count to two. Press the shutter. Everyone will have open eyes. Explain it first so they know what is coming. It will make sure they all have eyes open long enough for you to get the shot.

So, with all these different ways of organising the group make sure that what you have is comfortable, natural – never forced.

Posing

Organising the group is about positioning and location. Posing is about personal stance and comfort. You, as the photographer, need to direct the group. But on the other hand you have to work with the people you have before you. Try to make it fun. Get them to relate to one another. If you have time, especially with candids or informal group, get them to experiment. Handshakes, greetings, hugs, arms around each other, standing in groups – the idea is to make ‘that’ group look good. Another group might not look good with the same poses. You should work with them, discuss ideas with them, respect their thoughts. They probably know each other better than you know them and will make the best suggestions. It is your job as a director to pick up on the most effective shots from their ideas. Consider what you know about them, consider their ideas for their poses – then work together to make the shot just right.

Getting the right feeling…

Working with groups is more than just lining them up. You have to consider the time, place, light, shade, the settings and the technique. But the best shots still come from the group itself. If the members of the group are comfortable, having fun and feel natural about their poses they will make sure you get a good shot. Work with them, help them make your picture work.

Comments, additions, amendments or ideas on this article? Contact Us

find out more...Photokonnexion tips by email
If you enjoyed this article please sign up for our
Tips by email service.
                                                 Find out more

By Damon Guy (author and Photokonnexion editor)

Damon Guy - Netkonnexion

Damon Guy (Netkonnexion)

Damon is a writer-photog and editor of this site. He has run some major websites, a computing department and a digital image library. He started out as a trained teacher and now runs training for digital photographers.
See also: Editors ‘Bio’.

The top twenty phototips that you should know

20 spots - twenty tips

• 20 spots – twenty tips •
Click image to view large

Learning photography is about…

Doing the simple things really well. Although there are a lot of things to learn, the important ones are a few things you do over and over again. If you improve them you will automatically improve your photography.

Work on these to make the biggest improvement
  1. A proper stance will provide a proper, steady hand-held camera position.
  2. Go everywhere with your camera. Use it every day – improve every day.
  3. Learn with what you’ve got, better equipment will not improve your skill.
  4. Three essentials – camera, lens, tripod. Learn to use them all equally well.
  5. Get close, fill the frame, your shots will probably be better.
  6. Think about every shot before you push the shutter button.
  7. Count to two before taking your camera away from your face.
  8. Never just look at others’ photos – do a critique every time.
  9. Work on your composition skills at least as hard as your technical skills.
  10. Be inspired by other photographers, but develop your own style.
  11. Discuss photography as much as possible with other photographers.
  12. Look for contrasts in colour, light, shape and other variables.
  13. Declutter your shots, show it as simply as possible.
  14. Use natural light as much as possible – get to know its properties.
  15. The rule of thirds works more than 95% of the time.
  16. Try different perspectives, points of view and heights at each scene.
  17. Vary shutter speeds, ISO and aperture settings to experiment with exposure.
  18. Make people, and especially faces, a central study in your photography.
  19. Great photos can be found everywhere – you just need to look out for them.
  20. Be completely obsessed with the study of light and the language of light.

If you pay attention to these important tips you will find your photography will develop.

Photography becomes a way of life, but don’t make it the only thing in your life. You need other interests to bring new perspectives into your photography.

Most of all enjoy what you are doing. Photography should be fun… don’t take it too seriously. Laugh a lot.

find out more...Photokonnexion tips by email
If you enjoyed this article please sign up for our
Tips by email service.
                                                 Find out more

By Damon Guy (author and Photokonnexion editor)

Damon Guy - Netkonnexion

Damon Guy (Netkonnexion)

Damon is a writer-photog and editor of this site. He has run some major websites, a computing department and a digital image library. He started out as a trained teacher and now runs training for digital photographers.
See also: Editors ‘Bio’.

Ten simple ideas to improve your photography (and a fun quiz)

Ten Tips

Ten Tips and 12 fun quiz questions.

Simple things help you…

We should all take a step back and think about the basics sometimes. It helps us remember essential techniques and keeps us on our toes. Here are the basics with some fun quiz questions too.

The simplest techniques in photography are often the most important ones. In this post we make sure we don’t forget them…

10 essential things to know; 12 fun quiz questions
  1. Not knowing your camera: This is really bad news. If you are hoping to improve your photography make sure you learn what every lump, bump, dial, screen, lens and twiddly bit does. Read your manual regularly. Practice with each function until you have got it right. Then practice it in the dark so you can do a night shoot.
    Quiz Question 1: How many lenses are there on a camera? Answers at the end!
  2. Poor stance: Most people when starting photography don’t realise that the way they stand and hold the camera creates all sorts of problems and poor performance. If you are a keen photographer a good stance can contribute to improved sharpness (hand-held shots), better focus, more steady hand and better shot timing. Learn to stand properly right at the start and you will save yourself lots of re-training time later.
    Quiz Question 2: At what point in the breath cycle is it best to take your shot?
  3. Not using a tripod: classic mistake. Tripods save you lots of time and give you pin sharp photographs. They give you an opportunity to set your camera up properly and ensures that your are ready for your shot.
    Quiz Question 3: A monopod has one leg, a tripod has three legs. What is, and how might you use, a bipod?
  4. Not giving the camera time to focus: When you press the shutter button halfway down it causes the auto-focus to cut in which focuses the camera. But if you punch straight through that to the shot the focus has not had time to do the full focus. This normally happens on the first focus attempt when the focus is right off. After that the lens in nearly focused and will adjust more quickly. So don’t make your first focus attempt too close to the shot or it will be blurred.
    Quiz Question 4: Why do you have two rings on a modern auto-focus/zooming photographic lens? What do you call each of them?
  5. Taking pictures against a bright light? Cameras don’t like very bright lights. Especially if there are also very dark spots nearby. Shooting indoors while looking at a window out to a bright sky will cause a strong white spot. This is very distracting and draws the eye away from the subject. Not good. There are Light and Lighting resource pages on Photokonnexion for you to learn more.
    Quiz Question 5: How many stops of light can healthy human eyes see (20:20 vision)? How many can the camera (rough generalisation) cope with?
  6. Relying on flash (especially pop-up flash): Pop up light has a very small concentrated source. It discolours faces, washes out colours, creates harsh, sharp-lined shadows and is badly placed (too close to the optical axis) creating nasty highlights on faces. Try to use natural light more. It is much more forgiving and does not produce such harsh shadows most of the time.
    Quiz Question 6: What is often the result of using pop-up flash with respect to two parts of the face?
  7. Dead centre subject: If you put the subject of your picture in the centre it will usually be boring. If you off-set your subject the eye will be looking to see why the symmetry is broken. That keeps the eye hunting around the screen. Learn about the “Rule of thirds” and other Composition principles. That will help you make the shot more compelling to the eye.
    Quiz Question 7: What type of compositional perspective would you be working with if you want to promote a three dimensional feel to your picture composition?
  8. Horizon control: Make sure your horizon is level, especially if it is a seascape. If you leave it on an angle the picture will be ruined because it will look like the sea is sliding off the page! Horizons also induce mid-picture viewer-stupor. Make a decision. Either shoot for the sky in which case place the horizon in the bottom third of the picture. Or, shoot for the ground in which case the horizon goes in the top third of the picture. An off-set horizon is more dynamic and keeps the viewers eye moving.
    Quiz Question 8: If your main choice is to shoot for the sky, where would you take your exposure from? (Where would you point your viewfinder focus point?) a. The sky? b. The ground?
    Quiz Question 9: Describe autofocus hunting and why it happens?
  9. Simplify, simplify, simplify: The most effective way to show a subject to your viewer is to de-clutter the picture. Take out of your composition everything that is nothing to do with the subject. The more you make the viewers eye go to the subject the more effective your shot will be.
    Did I mention that you should simplify your shot?
    Quiz Question 10: What is it called when you paint out something from your picture in post processing to simplify a shot?
    By the way, did I mention that you should work really hard to simplify your shots?
  10. Go manual: Auto-modes on your camera are really best guesses about what the manufacturer thinks will be suitable for the average shots most snappers will take. Buy you are a keen photographer. To get the camera to do exactly what you want, and to make discerning choices about your images you should work on improving your manual control. Your understanding of photographic principles will improve, your skill at exposure will improve and you will find yourself making informed choices about how you want your picture to come out. You will turn from a snapper into a photographer.
    Quiz Question 11: What does the ISO control do? a. Adjust the sensitivity of the digital image sensor or b. Change the aperture size?
    Quiz Question 12: Does ‘shutter speed’ or ‘aperture’ control movement blur?
Answers to quiz questions
  • Quiz Question Answer 1: I am talking about any camera that has a lens, not just DSLRs. the number of lenses is a matter of variation. If you are discussing photographic lenses then only that one will count (but read on). Some people think of each glass element in the photographic lens as an independent lens. Technically that is not true. They are optical lenses or glass elements, not photographic lenses. However, if the photographic lens (and elements if you included those) were all you counted you would be wrong. Here is a short list of Possible lenses on a camera of any sort…

    There may be others.

  • Quiz Question Answer 2: You should take a shot at the full inhale point or full exhale point before inhaling or exhaling in the next part of the cycle. You can choose which is best for you. All you do is delay the next part of the cycle while you take a shot. This is the point in the breath cycle when there is least movement of the shoulders/chest. Read more about it in Simple tips for a good stance
  • Quiz Question Answer 3: A bipod is photographically uncommon. Understandably, it has two legs. Find out more here… Definition: Bipod
  • Quiz Question Answer 4: The two rings on an auto-focussing photographic lens allow one ring to focus the image – the focus ring. The other ring is for zooming the lens. The latter changes the focal length and is called the focal length ring.
  • Quiz Question Answer 5: Human eyes can see about 18 to 20 stops of light when healthy. However, by contrast the best commercially available cameras have to operate with a dynamic range of 8 to 12 stops of light. Research is pushing the boundaries but there is still a big gap to meet the dynamic range of the human eye (in 2013).
  • Quiz Question Answer 6: Pop-up flash is very likely to cause red-eye.
  • Quiz Question Answer 7: To make things look three dimensional in your image you should be working with three point perspective. Look for lines in your image that promote cube-like structures. For example buildings, walls and other objects with lines and shapes that have a solid feel in real life. This will trick the eye into believing that there is a solid object in the picture. Read: Simple ideas about perspective in photography and: Definition: Perspective
  • Quiz Question Answer 8: If you shoot for the sky you will need to be taking your exposure from the sky as that is the brightest point. This will leave the ground darker in your exposure than you would see it with your eye. You can use one of a number of techniques to correct that later.
  • Quiz Question 9: Auto-focus hunting is when the auto-focus in the lens cannot focus and will keep going up and down the focus range trying to get a focus. This is a common problem at night, in darker conditions, low contrast conditions and clear or totally grey skies. You can read more about it in: Auto-focus ‘Hunting’ Definition: Hunting, Auto-focus

  • Quiz Question 10: when you paint out something from your picture in post processing to simplify a shot? You normally use a cloning tool. You can find out more in: Definition: Cloning; To Clone; Cloned; Clone Tool.
  • Quiz Question 11: What does the ISO control do? It adjusts the sensitivity of the digital image sensor allowing you to work in bright light (low ISO setting) or low light (high ISO setting). There is an article on ISO here: ISO.

  • Quiz Question 12: Shutter speed controls movement blur. Aperture controls blur (bokeh) created by the loss of sharpness outside the zone of acceptable sharpness. This is traditionally known as the depth of field. More reading on: Definition: Exposure and related to aperture: Definition: f number.

find out more...Photokonnexion tips by email
If you enjoyed this article please sign up for our
Tips by email service.
                                                 Find out more
#11030#

By Damon Guy (author and Photokonnexion editor)

Damon Guy - Netkonnexion

Damon Guy (Netkonnexion)

Damon is a writer-photog and editor of this site. He has run some major websites, a computing department and a digital image library. He started out as a trained teacher and now runs training for digital photographers.
See also: Editors ‘Bio’.