Category Archives: Things to try

Things that photographers can try out and enjoy.

How digital cameras work – With James May

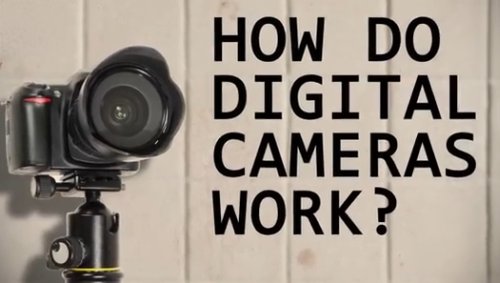
How Digital Cameras Work?

• How Do Digital Cameras Work •
You don’t have to know how your digital camera works to enjoy it. But knowing a little helps you to enjoy it better.
[Image taken from the video].

Understanding your camera better…

You don’t need an in-depth know how. Just enough to make it easy to learn more. Knowing a bit about how digital cameras work is really useful. Here is a quick and easy intro…

A few words from me

Those who know the world famous TV show, Top Gear How do digital cameras work: link to Top gear on Wikipedia - External link - opens new tab/page know James May External link - opens new tab/page. He has a zany sense of humour. Recently he’s been doing simple science videos. In the video he shows how digital cameras work. Off-hand jokes and jibes at Richard Hammond How do digital cameras work: Richard Hammond - Jibes - External link - opens new tab/page make the fast-paced video fun. Watch and learn how your camera works.

How digital cameras work. With James May.

Head Squeeze  How digital cameras work - from Head Squeeze :: External link - opens new tab/page

Some things to think about…

The history in the video is a bit misleading. How digital cameras work was worked out in the 1970s. By the 1980s sensors were quite advanced. But, it was not until the 1990s that digital image sensors became consumer items. Then camera makers made them small and cheap. To find out more see: A History of Photography (pt.6). The Digital Age.

Mr. May gets the idea of a pixel wrong too. He talks about pixels being on the sensor. Many people have this idea. Pixels are in images on screen. Data for digital images is collected on a digital image sensor. Each point where the data for each pixel is collected is called a photosite. Just remember, photosites collect data on the sensor. Pixels display the data in the image on the screen.

For more information about pixels check these links…
Definition: Pixel; Pixels
Definition: Photosite; Photosites
Definition: Sensor; Image Sensor; Digital Image Sensor

For some more context on pixels in your images check this: Getting down to pixel level.

Comments, additions, amendments or ideas on this article? Contact Us
or why not leave a comment at the bottom of the page…

Like this article? Don’t miss the next — sign up for tips by email.

Damon Guy - Netkonnexion

Damon Guy (Netkonnexion)

Damon is a writer-photographer and editor of this site. He has run some major websites, a computing department and a digital image library. He started out as a trained teacher and now runs training for digital photogs.
See also: Editors ‘Bio’.
By Damon Guy see his profile on Google+.

Snowflakes – a source of mystery and wonder

Snowflakes are intricate and beautiful.

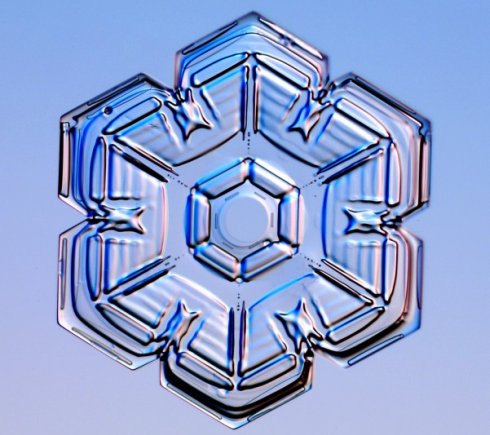
• Snowflake crystal •
Snowflakes are intricate and beautiful. They are a source of interest to scientist – but photographers can make amazing pictures with them.
Image taken from SnowCrystals.com External link - opens new tab/page

Snowflakes are amazing!

Close up pictures of snowflakes show how intricate and beautiful they can be. And there are an infinite variety of them too. Here are a few ideas…

Some history about snowflakes

The perfect six-sided snowflake exists, but is not the only sort. Early snowflake pictures were taken by farmers’ son, Wilson “snowflake” Bentley  External link - opens new tab/page (February 9, 1865 – December 23, 1931) from Vermont. Aged 15 he was captivated by snowflakes. It started with looking down a microscope. But in 1885 he began experiments with a camera too. After struggling with the early camera technology he began to make some progress. During his life he made thousands of photos of snowflakes. His work still dominate our ideas today. In particular he was the first to claim snowflakes are unique and six sided. His pictures are also some of the best too.

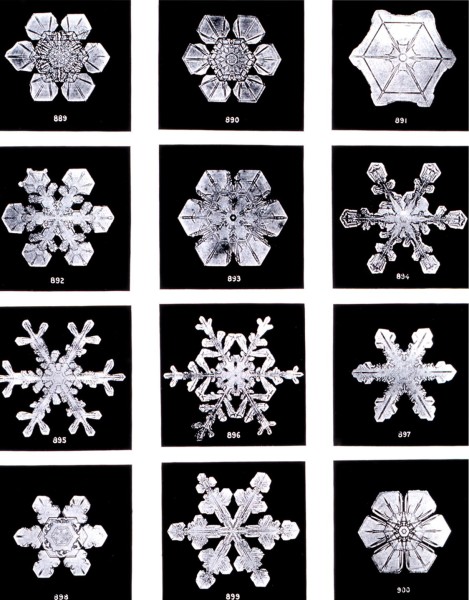
Snowflake photographs by Wilson "snowflake" Bentley

• Snowflake Photographs by Wilson “Snowflake” Bentley •
Wilson “Snowflake” Bentley was famous for his snowflake photographs. Nearly a century after his death we are still using the images.

Research has shown how diverse snowflakes can be. They are not all perfect, regular shapes either. In fact according to “New Scientist  External link - opens new tab/page” (a weekly publication, UK) there are many types. The various forms are created under different conditions…

  • -2°C = Simple hexagons and star shapes
  • -5°C to -10°C columns
  • -15°C Six sided crystals (dendrites) form again
  • -22°C onward… complex plates and columns form again

Here is detailed morphology diagram for snowflakes Morphology Diagram for snowflakes - External link - opens new tab/page. It shows the relationship between the snowflakes’ type and temperature/humidity.

Snowflakes go through a range of temperature, humidity and other changes while falling. They have a unique and sometimes violent history. They clash together. They may ball-up with other flakes. It’s common for them to have multiple crystals joined in one flake. They may circulate in the clouds for long periods. They may also melt and refreeze before descending to the ground. It is not a surprise they are all so different. There is a great infographic on SnowCrystals.com External link - opens new tab/page showing snow crystal growth and the no-two-alike idea.

Capturing snowflakes on camera

You can’t easily photograph snowflakes on the ground. The overall white in a snow mass makes it difficult to distinguish individual flakes. The small size makes them a challenge too. The best approach to snowflakes is two-fold.

  • Use a macro lens or macro extension tubes.
  • Use a clean (new) long hair artists paint brush. Sable hair is best. Use a small black velvet cloth (about 500mm x 500mm) to see the snowflakes.

The aim with these is simple. Tease out individual snowflakes onto a black background. Then get in close with the lens. If you are working with a macro lens help yourself out and use a tripod.

The snowflakes themselves are easily destroyed. The trick is to use the artists brush to lift snowflakes onto the velvet. The brush and velvet have hairs that support the snowflake without damage. Be as gentle as you can to preserve its delicate nature of the crystal.

Sadly tiny ice crystals tend to go grey when on a black background surface. When shot on a dark background they are best converted to monochrome. This helps to increase the contrast and definition of the crystal.

To show the beauty of the refracted light use a well-lit background. If you can, place the snowflake onto a glass slide delicately lifting it off the velvet. You can buy Blank Slides – Microscope accessories External link - opens new tab/pageBuy microscope slides for your snowflake photos. from various places. Make sure you have left the slides to cool down to the snow temperature or the snow will melt on it.

Be sure to keep your cloth, brush and slides cold and dry. Make sure your breath is not directed at the snowflake. Even slightly raised temperature or humidity will affect the snowflake while you are trying to photograph it. More than once I have had them dissolve in front of my eyes.

If you are using an actual microscope, or if you are using a glass slide try to get some backlighting. To get the best refractive results try light at different angles on the snowflake. The best results are not necessarily when the light is directly from below. The angled light tends to create contrasts on the snowflakes. This brings out light and dark as well as some aesthetic colourations from refraction through the crystal.

For your interest here is an amazing camera-microscope…

Celestron Dual Purpose Amoeba Digital Microscope – Blue External link - opens new tab/page
This an affordable and well reviewed digital microscope. It will do detailed images direct from your computer. It’s a photography tool which provides an opportunity to develop your macro skills. Hours of fun too!

Masterful shots

One of the acknowledged masters of the art of shooting snowflakes is Kenneth G. Libbrecht External link - opens new tab/page. He’s a professor of physics who researches crystal growth. He also runs the SnowCrystals.com External link - opens new tab/page website. There are wonderful resources on the site including a “how to guide” External link - opens new tab/page and many hints about photography and equipment. There are some wonderful galleries of images External link - opens new tab/page. There is also a section on how to grow your own snowflakes. Although, the latter was a bit more complex than I think I would go… but who knows. People in this field seem to get obsessive about it. Snowflakes are extraordinarily beautiful.

Other sources of snowflake inspiration…

For a huge range of inspiring snowflakes images check out this search page on Google: Snowflakes photography  External link - opens new tab/page

Comments, additions, amendments or ideas on this article? Contact Us
or why not leave a comment at the bottom of the page…

Like this article? Don’t miss the next — sign up for tips by email.

Damon Guy - Netkonnexion

Damon Guy (Netkonnexion)

Damon is a writer-photographer and editor of this site. He has run some major websites, a computing department and a digital image library. He started out as a trained teacher and now runs training for digital photogs.
See also: Editors ‘Bio’.
By Damon Guy see his profile on Google+.

Camera grip – hold your camera correctly

Improving your camera grip.

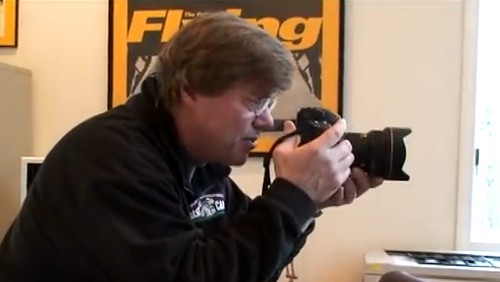
Improving your camera grip is an important part of developing your skills.
[Image taken from the Joe McNally video below].

Your camera grip is a critical skill.

Do it wrong and you’ll have problems getting a sharp image in many situations. You may even give yourself bad posture and back pain. Learning to have a good camera grip will help develop your skills in many ways.

Camera grip and overall stance

The way you grip your camera works as part of your overall stance. You can get the grip perfect, but with a poor stance it will ruin the impact of a good camera grip. In Simple tips for a good photography stance I set out a detailed plan for a good stance. It will be worth reading that before you see the videos below.

Joe McNally – Da Grip

In this video Joe shows us how to properly hold the camera. He apologises for how this best suits a left-eyed shooter. However, the technique can apply to both left and right eye shots. So don’t be put off. Watch to the end. Joe makes many of the points I do in Simple tips for a good photography stance and this article. He shows you how to properly grip your camera. He also demonstrates how to control it from this grip too.

JoeMcNallyPhoto External link - opens new tab/page.

Sharpness and camera grip are close friends

When teaching I have often found that poor stance and grip go together. They result in soft shots and poor quality images. I try to help people to be more deliberate and use relaxed but firm control. Then, if they hold a good stance and a good grip the sharpness and image framing seem to come together.

In the next short video Gavin Hoey goes through his method for a camera grip. It is very similar to Joes grip and my camera grip too. Everyone has quirks and slightly different ways to do it. The important thing is to follow the basic plan and practice until your shots are sharp and controlled. Then you will see the benefit of good stance and camera grip.

Gavin spends time on some other aspects of sharpness too. This nicely shows how all these methods come together. Great stance, camera grip and control of your camera will develop your skills in leaps and bounds. For more on improving your sharpness check out this article :: The Zen of sharpness – 12 easy ways to improve.

No more blurred photo’s… Ever!

Gavin Hoey External link - opens new tab/page.

Comments, additions, amendments or ideas on this article? Contact Us
or why not leave a comment at the bottom of the page…

Like this article? Don’t miss the next — sign up for tips by email.

Damon Guy - Netkonnexion

Damon Guy (Netkonnexion)

Damon is a writer-photographer and editor of this site. He has run some major websites, a computing department and a digital image library. He started out as a trained teacher and now runs training for digital photogs.
See also: Editors ‘Bio’.
By Damon Guy see his profile on Google+.

Get some new ideas for your photography – a quick tip!

Get some new ideas for developing your photography

Here is a great book External link - opens new tab/page you can learn some new ideas about photography without paying…

New ideas to develop your photography…

Here is an interesting and easy way to find some new ideas. At the same time you can do some reading at no cost. A great way to grow your knowledge and find out more about photography.

How to get new ideas

I am sure you know Amazon, that great book-shop on the web. It is not all about book sales (and more). It is also a source of actual reading too. There are ways to use the website for new ideas and information. More to the point it’s free.

Let’s take an example to see how you can get these new ideas. The Collins Complete Photography Course External link - opens new tab/page is an excellent book. Well produced and researched. It’s a top seller and well reviewed. When you go to the Amazon page for it the book also has a readable section. That’s right. While on Amazon you can read several chapters. If the book has a “click to read” tag, like the picture above, you can read some of the text. The chapters you can read in this book are…

  • The story of photography
  • Camera types
  • Getting to grips with your DSLR camera
  • About various exposure modes

…and at the back of the book you can read a great little glossary of terms used in the book.

OK, so maybe you are not going to learn the whole of photography with this method. But, it is one way to pick up some new ideas and information. Other books are of interest too. This extends to books about art and composition ideas as well as other information. You could find yourself in a world of new ideas, facts and know-how.

One more new idea

If you are looking for projects or new ideas for a photograph try this. Go to the index at the back, or sometimes the contents at the front. Both of these areas of a book are packed with concepts. If you are in a book about art or composition in photography, these can start you thinking. Inspiration is all about the idea right? Use this resource just to get the new ideas flowing. Then follow your thoughts…

Comments, additions, amendments or ideas on this article? Contact Us
or why not leave a comment at the bottom of the page…

Like this article? Don’t miss the next — sign up for tips by email.

Damon Guy - Netkonnexion

Damon Guy (Netkonnexion)

Damon is a writer-photographer and editor of this site. He has run some major websites, a computing department and a digital image library. He started out as a trained teacher and now runs training for digital photogs.
See also: Editors ‘Bio’.
By Damon Guy see his profile on Google+.

Using the sun to create shafts of light

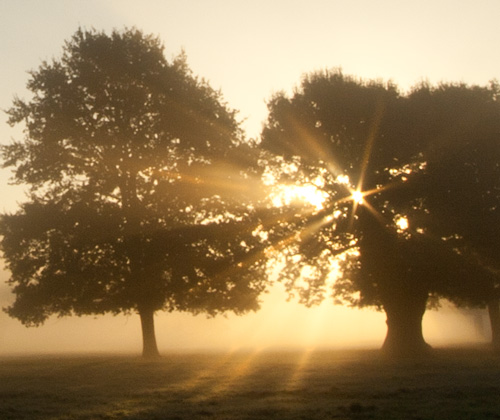
Golden Morning - Light shafts pierce the mist

Golden Morning – Light shafts pierce the mist

Atmospheric shots – look for light shafts

Look out for the early morning or evening mist that creeps across the landscape. If the mist is with a clear sky, you are in for a photographic treat. This is one of the most atmospheric shots you can take.

What are light shafts?

We are talking about those lovely rays that pass through the air highlighted by the mist. They often pick up the golden colours of morning or the wonderful oranges/reds of dusk.

Misty conditions can arise in lots of ways. Early morning or evening chill after a warm day often creates mist. It’s best as a ground mist. Up above the rising or falling sun is bright, golden and low. Under these conditions you have the perfect situation for light shafts. It is the shafts of light falling through the mist that create the effect. Although often there does not need to be much more than a hint of mist. Sometimes only a moist air is enough. This is especially so if you are in a dark forest with bright light penetrating deep between the dense canopy. The strong contrasts will often pick out the light shafts.

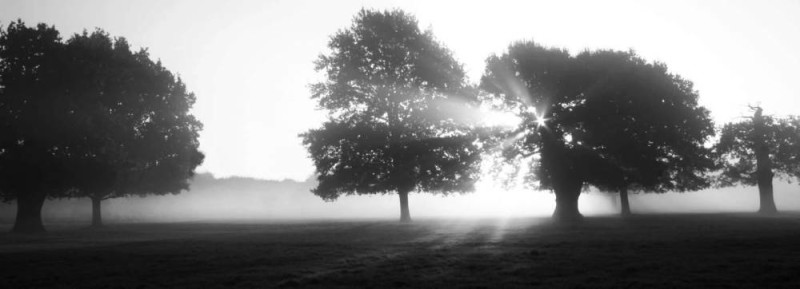
Misty Morning • Look for light shafts

• Misty Morning •
Look for the way the shafts of light cut through the mist

How do you capture light shafts

Actually, very easily. Be careful however, because you can damage your eyes or camera. Here is what you do…

Look for the shafts of light you can see with your eyes. If you can see them then you can often bring them out in-camera by slightly over exposing the light shafts. Set your camera focus to measure light using only the centre point of the viewfinder. Check your manual to find out how. Then, make sure you point it at a dark spot – like the trunk of a tree. The camera will measure for the darker areas of scene. This will brighten the scene and light shafts will stand out strongly. You will need to use one of the manual modes to do this.

You can also look for very bright spots coming through tree cover. This is often only the case if your camera is pointing directly at the sun. This can be dangerous so only do it if tiny points of light are coming through. NEVER look directly at the sun with your eyes or through your lens. If you can, use live view. Then you will not be looking directly at a bright light. If you are able to see a place where most of the light is blocked you could capture a few rays. Powerful as they are, they will cause strong lens flare. Often this will emphasis light shafts coming through the mist.

Light shafts – examples

You can check on this search on Google Images to see a whole page of light shafts. There are so many around the web that you cannot fail to be inspired…
Google Images :: Light shafts  External link - opens new tab/page about light shafts

Getting there on time

This is one of those techniques that work best with the Golden Hours of morning or evening. So you might need to get up early. Looking out for the right conditions is crucial. So is making sure you are in the right light/dark conditions. Forests and woodland are best. Most of all, be at one with nature. These shots make exciting images to look at. They are wonderful to experience too.

Comments, additions, amendments or ideas on this article? Contact Us
or why not leave a comment at the bottom of the page…

Like this article? Don’t miss the next — sign up for tips by email.

Damon Guy - Netkonnexion

Damon Guy (Netkonnexion)

Damon is a writer-photographer and editor of this site. He has run some major websites, a computing department and a digital image library. He started out as a trained teacher and now runs training for digital photogs.
See also: Editors ‘Bio’.
By Damon Guy see his profile on Google+.

Light intensity – estimating the light you need

Light intensity is about finding the natural look

• Computer user •
Get familiar with light intensity. Look for the right light intensity in every shot. It is not always easy – here’s how.

Aim for a light intensity that suites the subject.

When using artificial lights think about how light best suits the subject. Learners often use lights set too bright. We will explore the use of distance to reduce the light intensity.

What is light intensity

You might describe light intensity as the power that light has at a given place. A light is most powerful at its source. As it radiates away from the source it becomes less intense. Actually the light radiated still has the same total energy. As it gets further from the light source it is just spread out more.

At each point where you measure light travelling away from the source there will be less and less light. This is because the total light is more and more spread out. This relationship is called the Inverse Square Law. It is a bit of math which describes how light behaves. For our purposes we just need to know that as the distance from a light increases, the illuminated area also gets larger. The same amount of energy is spread out over a larger area. We can say this in a simple way…

As you move away from a light, the light intensity reduces by “distance squared”.

A camera only samples a small area of light. If the light is spreading out the amount of light it can gather is getting less. The light intensity it can capture reduces with distance. Less light is going to get into the camera.

So the light intensity gets less with distance?

At one meter from the light you can say light intensity is one unit. At two meters the light is spread out over four square meters (1 divided by four). If you take a photo you will get one quarter of the light entering your camera. Here is a table that shows how this goes…

1 M from source :: Light intensity per square meter = 1
2 M from source :: Light intensity per square meter = 1/4
3 M from source :: Light intensity per square meter = 1/9
4 M from source :: Light intensity per square meter = 1/16
and so on…
[M = Meter]

Here is a diagram showing how light intensity falls off according to the inverse square law.

How does this help?

When using artificial light of any kind you should remember light intensity. Good light should match the scene for a good image. It should look natural and the right sort of light (colour, intensity, etc). You also need to have enough illumination for the shot. Too little and the picture will be under exposed. Too much? The picture will be washed out, over exposed. All simple enough.

You need to know that light intensity falls off with the square of the distance for one reason. If you take a picture close to a light (1m) that may be bright enough to achieve what you need. If you move to three meters the light intensity will be reduced to one ninth of its previous amount. That is very different light to use. It changes your light levels in the scene. It will also affect your cameras ability to make an exposure. It may affect the colour of the light or other properties.

For someone using a flash on a camera it works the other way around. If you move to three meters from your subject the flash will light them at one ninth of the light intensity of a shot taken from one meter. They will appear much less bright.

Moving close to or away from a light source

The point is simple. Light intensity determines both the illumination and the brightness of a subject. You don’t need to move a lamp or flash very far for a significant loss (or gain) of light intensity. So guessing where to take your next shot is made easier. You can predict that fall-off now you know how the lighting behaves.

Now you can control your flash two ways. You can turn it down using the menus on your camera (check your manual). Alternatively you can move back. Even a short distance back will reduce the brightness of the shot by a lot.

Next time you are using a flash…

Why not test the theory. Put your camera in manual mode. Take a picture at one meter. Without changing the settings, move back. Try two meters, then three, and so on. Each picture will get dimmer. Quicker than you expect you will not be able to make an exposure. This is probably one of the most important lessons about the behaviour of light.

Comments, additions, amendments or ideas on this article? Contact Us
or why not leave a comment at the bottom of the page…

Like this article? Don’t miss the next — sign up for tips by email.

Lag time – don’t miss the shot

Lag time - test one

• Lag time – test one •
There is a gap between pushing the button and the making the photo.
(image by Netkonnexion)

Every time you push the button…

There’s a period when not much happens. Lag time is the total time taken for the camera to complete the exposure process from the button push. In that process is a lot of detail. Here we look at lag time. With a simple test you can get a feel for the lag time in your camera.

Why is lag time important?

If you buy a camera for action shots you want minimal lag time. Otherwise you look and press, but the action has gone. Of course you can anticipate the action. This is how we all deal with lag time. But to know what time to anticipate you need a feel for the camera. A long lag time is likely to make your guess about when to press the shutter button less accurate. So it’s in your interest to know the lag time and practice with it. If you know the lag it makes it easer to guess the delay for shots.

Shutter lag – don’t misuse the term

Some people use the term shutter lag in a confusing way. They mean it to be the same as lag time. In the past this may have been the case. In early cameras most of the exposure process was completed by the shutter. Today we have a lot of other steps involved. The list of various time related things in the exposure process is quite long today…

  1. LCD activation of the picture (LCD display and electronic [mirrorless] viewfinders only).
  2. Thinking time between seeing a subject on the display and the finger push on the button.
  3. Time taken to get a focus.
  4. Aperture – time to calculate & set aperture size.
  5. Meter – time from light reading to exposure set up.
  6. Digital sensor start up to be ready.
  7. Shutter motor/mechanism actuation.
  8. Shutter opening.
  9. Digital capture of light data.
  10. Shutter closing.
  11. Data emptied from sensor ready for next exposure.

These items may overlap, run simultaneously or be in sequence. Some may not apply to some cameras. It depends on the camera model, design, efficiency and the components involved.

This list adds up to the total lag time. The first five items are not shutter related. They delay the firing of the shutter. They are shutter delay times. The other items are shutter lag items. They are responsible for the shutter and sensor capture of the exposure. They determine the shutter process from start to finish. These are the shutter lag items.

To be clear, lag time is the sum of all the lag items. Shutter lag is only those items related to the shutter-sensor system.

For a more detailed look at various components of lag times check out: Definition: Shutter lag; Shutter delay; Lag time; Processing lag;

Getting the shot – lag time explored

In order to know your camera better you can actually measure your lag time. So here is a method you can use at home. I have tested it using two different pieces of equipment and on two cameras with good results.

A word of warning. The on-board flash crosses all the other lag/delay times and may extend your total lag quite a lot. This is because it takes time to charge up ready for the flash. It will affect the results. Before testing turn off your flash. Check your manual if you are not sure how. Both these methods have back-lighting. You will get enough light without it.

Explanation/method: to measure the lag time we need to identify all the processes involved. I have done this for you above. This allows you to know what parts of the process are holding things up. You will see later that can help you save time.

Next we need to find a way to mark the start and end of the process. Fortunately the camera helps us. When the shutter button is pushed we know the exposure process is started. The clever part is that if we photograph a timer we know when the exposure process is finished because the clock will show the finish time.

To find out our lag time is easy. We activate a clock at the same time as we push the shutter button. We do this while photographing the clock. When the shot is taken the end of the the lag time is shown on the photograph.

Two methods to try out

In the photo “Test one” above I have used this method with my smart phone. I set up the stop-watch app on my phone. Then I pushed “start” with my left hand. I simultaneously held the camera and pushed the shutter button. The key is to make sure you set off both the timer and shutter button at once. If you do, the the photograph will show the lag time. In the photo above it shows 69/100ths of a second. This is my lag time for a photo taken on my little Canon G12. Use a tripod or stand if holding your camera and pushing the button at once is not steady enough.

If you do not have a smart phone (or a stop watch) to photograph, try this web page…
This page will allow you to test your Digital Camera’s shutter lag… External link - opens new tab/page.
(Note: this page is about your total lag time even though it refers to the shutter lag).

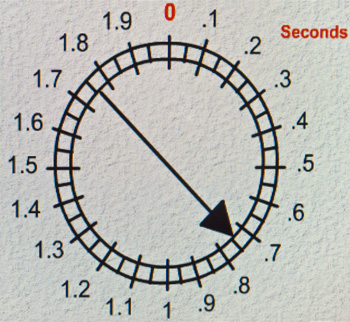
Shutter Lag Test two

• Shutter Lag Test two •
Test your Digital Camera’s lag time External link - opens new tab/page.

Follow the instructions on that page. You will see a very slight retard on the clock at the ‘zero’ point. That gives you time to notice the top point and press the shutter button. The resulting photo will tell you the lag time on your camera.

I have run tests on my camera using both the web page and the stop-watch app method. They give consistent results. I feel confident you will find either test will work for you.

Pre-focus to get the shot

Notice on the second test page there are two tests. The second one shows you how you can shorten your lag time. If you pre-focus the camera that saves some pre-shutter time. Focus takes quite a bit of time. So if it is already focused when you take the shot your lag is reduced.

To reduce the delay with pre-focus press the button half way down while looking at the clock. The camera will focus and take meter reading. Then you can hold the half way position – this is called focus-lock. Hold your half-down position until, at zero. Then push the shutter button the rest of the way down. You will normally find your camera lag time is greatly reduced. Possibly by as much as a half. Something to bear in mind for future shots.

Accuracy

Of course you might take a totally bad reading for your fist shot. After playing I found that for both methods you need to practice a little to get consistent readings.

To ensure you get a good overall result I suggest taking ten readings after some practice. Here are readings from my run of ten… 0.53 + 0.53 + 0.69 + 0.98 + 0.89 + 0.66 + 0.74 + 0.65 + 0.66 + 0.74 = 7.07
If we divide the total by ten we will get an average reading. It will iron out any anomalous readings.
Thus: 7.07÷10 = 0.71 (rounded to two places). The lag time on this camera is therefore 71/100ths of a second.

This ‘average’ method provides us with a consistent standard over our readings. This is a more accurate method of gauging the lag time.

What have we done?

The things a modern camera does to take a picture has created a long lag. The lag time is the sum of all the different things that impact the exposure process. From button-press to complete capture-of-data is the lag time.

We have looked at two ways of testing the lag time: a stop watch app; and a web page timer. I have also suggested using an average reading to iron out anomalies.

If you go through this process you will know your camera much better. But more to the point you will have a new confidence. You will know how long it takes to complete an exposure. And, you will know how much time to delay for a shot.

Comments, additions, amendments or ideas on this article? Contact Us
or why not leave a comment at the bottom of the page…

Like this article? Don’t miss the next — sign up for tips by email.

Damon Guy - Netkonnexion

Damon Guy (Netkonnexion)

Damon is a writer-photographer and editor of this site. He has also run some major websites, a computing department and a digital image library. He started out as a trained teacher and now runs training for digital photogs.
See also: Editors ‘Bio’.
By Damon Guy see his profile on Google+.